
Creating your own setting spray at home is a fantastic way to customize your makeup routine while knowing exactly what’s going onto your skin. Many store-bought sprays include added chemicals and fragrances that may not suit everyone, so making your own offers a skin-friendly and cost-effective alternative. Whether you’re aiming for a dewy glow, a matte finish, or simply want your makeup to last longer, this guide will help you every step of the way.
In this comprehensive tutorial on how to make a setting spray for makeup, you’ll learn about the tools and ingredients you’ll need, detailed steps to craft your perfect spray, additional tips to get the most out of your DIY product, and answers to common questions. With some simple kitchen and beauty supplies, you’ll have a fresh, personalized makeup setting spray in no time.
What is a Setting Spray?
A setting spray is a lightweight, mist-like product designed to keep your makeup in place throughout the day. It works by creating a thin, protective layer over your makeup, helping to reduce smudging, creasing, or fading. Setting sprays are particularly beneficial for those with oily skin or who live in hot, humid climates, as they help lock in your look and control shine.
They come in various formulations—some providing a matte finish, others offering hydration or a radiant glow—allowing you to choose one that best suits your skin type and desired makeup effect.
Why Use a Setting Spray?
A setting spray is an essential tool for ensuring your makeup stays flawless throughout the day. It locks in your look, preventing smudging, fading, or excessive shine, regardless of weather conditions or long hours. Whether you’re combating humidity, want to avoid a patchy foundation, or need your makeup to endure a special occasion, setting spray helps maintain a polished finish.
Additionally, it can smooth out your makeup application, giving you a seamless, professional look. By using a setting spray, you can enhance the longevity and vibrancy of your makeup, making it an indispensable part of your beauty routine.
Tools and Materials You’ll Need
- Spray Bottle (Preferably New or Thoroughly Cleaned)
- Distilled Water
- Witch Hazel or Rose Water
- Glycerin (for Moisturizing Effect)
- Aloe Vera Gel
- Measuring Spoons or Small Cups
- Small Funnel
- Spoon or Stirrer
- Essential Oils (Optional, for Fragrance)
- Labels and Markers for Identification
10 Step-By-Step Guidelines on How to Make a Setting Spray for Makeup
Step 1: Prepare Your Work Area
Start by cleaning the surface where you’ll be working. Lay out all the tools and materials you’ll need, ensuring everything is within reach. This step prevents contamination and helps you stay organized as you move through each part of the process.
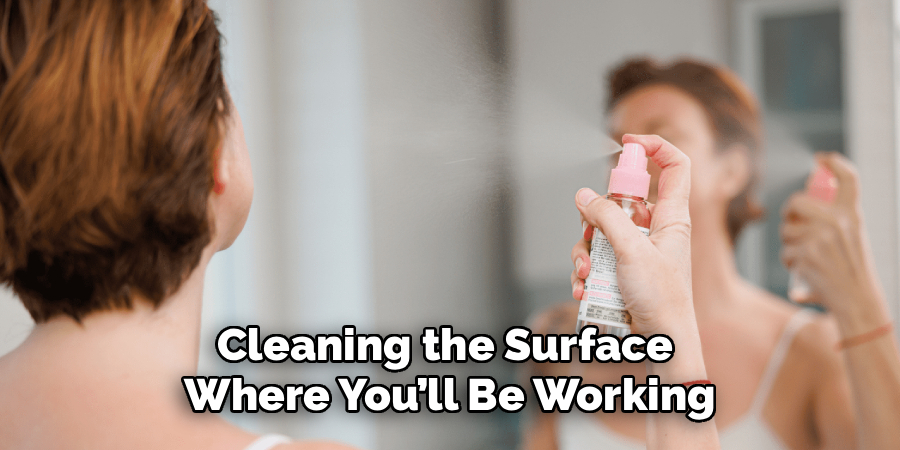
Wipe down your work area with a clean cloth and, if necessary, sanitize the spray bottle—either by washing with soap and hot water or wiping it with isopropyl alcohol. Good preparation sets the stage for a smooth DIY experience.
Step 2: Sterilize the Spray Bottle
A clean spray bottle is crucial for ensuring your setting spray remains free of bacteria. If using a previously owned bottle, rinse it with boiling water and let it dry upside down. For brand-new bottles, a hot water rinse is still beneficial.
Sterilizing your bottle may seem like a small step, but it can significantly prolong your spray’s freshness. Let the bottle air dry completely before you add any ingredients.
Step 3: Measure Out the Distilled Water
Pour about 3 tablespoons of distilled water into your measuring cup. Distilled water is preferable because it lacks contaminants and minerals that could affect your spray.
Using the funnel, transfer the water into the spray bottle. This forms the base of your setting spray and also ensures proper mixing of the other ingredients.
Step 4: Add Witch Hazel or Rose Water
Add 1 to 2 tablespoons of witch hazel or rose water to the bottle. Witch hazel acts as a gentle astringent, helping to set your makeup, while rose water soothes and hydrates the skin.
Choose the one that best suits your skin type and desired finish. Pour it into the bottle and give it a gentle shake to mix with the distilled water.
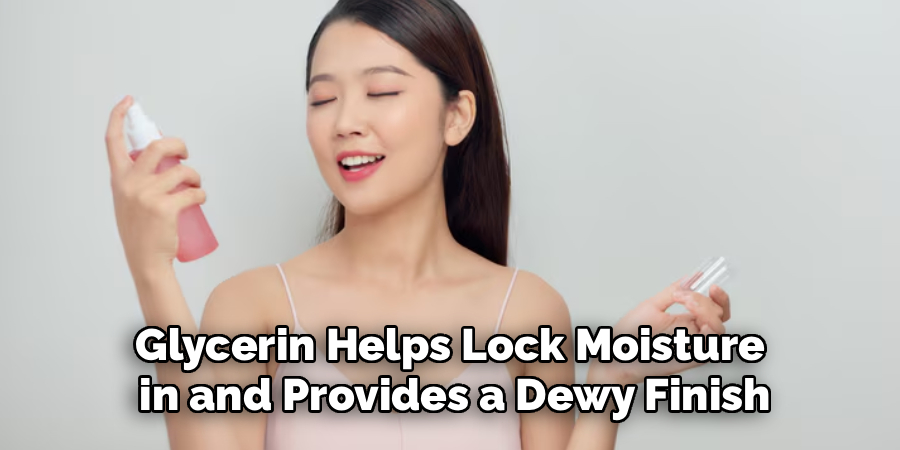
Step 5: Incorporate Glycerin for Moisture
Measure ½ to 1 teaspoon of glycerin and add it to your mixture. Glycerin helps lock moisture in and provides a dewy finish, making your makeup look fresh for longer.
Too much glycerin can make your skin feel sticky, so be sure to measure carefully. Swirl the contents of the bottle gently to combine all the liquids thoroughly.
Step 6: Add Aloe Vera Gel
Spoon in ½ teaspoon of aloe vera gel. Aloe vera is known for its soothing and hydrating qualities, making it perfect for a setting spray.
Mix well to dissolve the gel fully. Aloe vera also helps keep your skin calm, especially if you have sensitivity to makeup products.
Step 7: Mix in Optional Essential Oils
If you want a light fragrance, add 1–2 drops of essential oil, such as lavender or tea tree oil. Essential oils can offer added skin benefits, but use them sparingly to avoid irritation.
After adding the oils, secure the spray bottle’s lid and shake gently to blend everything. Essential oils are optional, especially for sensitive skin types.
Step 8: Shake and Test Spray
Close the spray bottle securely and shake vigorously for at least 30 seconds. This ensures the ingredients are evenly mixed.
Before applying to your face, spray a little onto your wrist or the back of your hand. This test helps confirm that the spray disperses evenly and that you enjoy the scent and texture.
Step 9: Label and Storage
Use your label and marker to write the contents and the date you made the spray. Adhere the label to the bottle for easy identification.
Store your setting spray in a cool, dry place or, for added freshness, keep it in the refrigerator. Proper labeling and storage help ensure longevity and safe use.
Step 10: Application and Longevity Tips
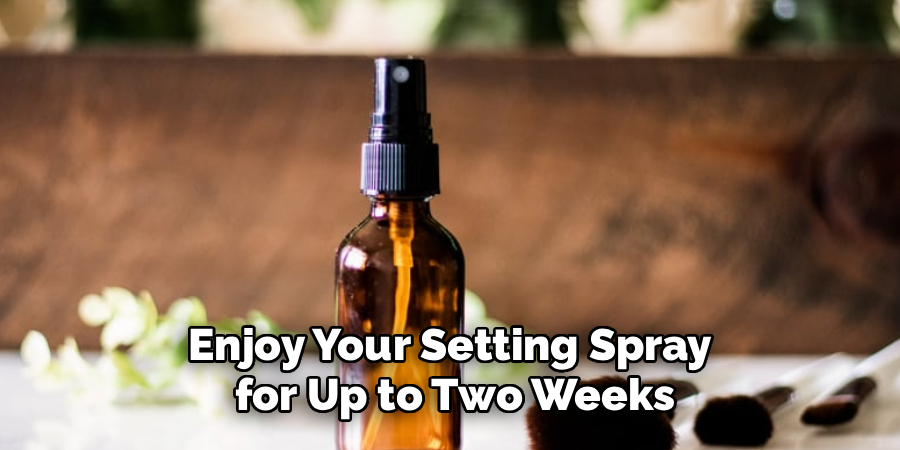
To use your DIY setting spray, hold the bottle 8–10 inches from your face and mist lightly after finishing your makeup. Allow it to air dry and repeat as needed for additional freshness.
Shake well before each use, as natural ingredients can settle. Enjoy your setting spray for up to two weeks, then make a fresh batch for optimal results.
Following these steps on how to make a setting spray for makeup can help you achieve a flawless look with lasting hold. However, there are also some additional tips for application and longevity that you can incorporate into your routine.
Additional Tips
- Always use distilled water to reduce the risk of bacteria and extend shelf life.
- Adjust the amount of glycerin according to your desired finish; more for a dewy look, less for matte.
- Patch test any new ingredient on your wrist before using it on your face to avoid allergies.
- Keep your spray bottle clean and remake the spray frequently for maximum freshness.
- For a cooling effect, store your spray in the fridge and enjoy a refreshing mist anytime.
Frequently Asked Questions
Q1: How Long Does Homemade Setting Spray Last?
Homemade setting sprays typically last about one to two weeks because they lack preservatives. Always store it in a cool place or the refrigerator, and watch for any changes in smell or texture. If you notice any, make a new batch to maintain skin safety.
Q2: Can I Use Regular Tap Water Instead Of Distilled Water?
It’s best to avoid tap water, as it can introduce bacteria and minerals into your spray. Distilled water is cleaner, safer, and helps your spray last longer. If distilled water isn’t available, boiled and cooled water can be used as a last resort.
Q3: Is Glycerin Necessary For Setting Sprays?
Glycerin helps set makeup and keeps skin hydrated, but it’s not absolutely essential. You can leave it out if you prefer a lighter feel, but your makeup might not last as long or look as dewy. Substitute with more aloe vera gel for a touch of moisture.
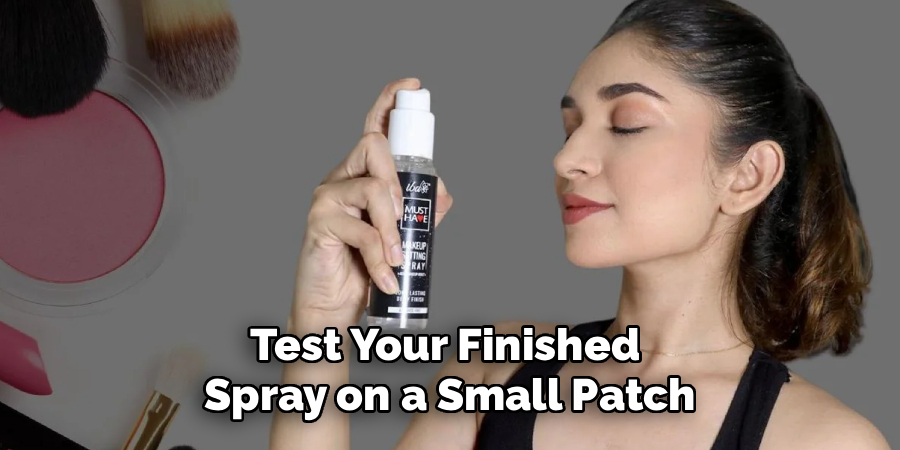
Q4: What If I Have Sensitive Skin?
If your skin is sensitive, use fewer ingredients and stick to gentle options like rose water and aloe vera. Test your finished spray on a small patch of skin before using it on your face. Also, avoid adding essential oils, as these can sometimes cause irritation.
Conclusion
Making your own setting spray for makeup is simple, fun, and allows you to tailor your beauty routine to your exact preferences. With just a few natural ingredients and basic tools, you can create a spray that keeps your makeup in place and cares for your skin at the same time. Give it a try and discover how satisfying it feels to use a product you made by hand!
Thanks for reading this guide on how to make a setting spray for makeup! Keep experimenting and have fun with your new DIY setting spray. Happy beautifying!
About the Author
Jane Hubbard is a passionate beauty expert with a wealth of experience in makeup, hair, and overall beauty techniques. After years of working as a hairdresser specialist, she followed her entrepreneurial spirit and started her own consultancy business.
Jane has always been driven by her desire to help others feel confident in their own skin, and she does this by sharing her knowledge, experiences, and practical beauty tips. Through her consultancy, she empowers individuals to embrace their unique beauty, offering tailored guidance that boosts both self-esteem and personal style.
Professional Focus
- Specializes in makeup, hairstyling, and beauty consulting.
- Provides personalized beauty advice, tips, and techniques to help individuals feel confident in their appearance.
- Dedicated to staying up-to-date with the latest industry trends and developments.
- Passionate about creating a comfortable and empowering experience for every client.
Education History
- University of Craft and Design – Bachelor of Fine Arts (BFA) in Woodworking and Furniture Design
- Woodworking Apprenticeships – Extensive hands-on training with skilled craftsmen to refine carpentry and furniture making techniques
- Online Courses & Masterclasses – Continued education in advanced woodworking techniques, design principles, and specialized tools
Expertise:
- Makeup artistry, hairstyling, and beauty consulting.
- Personalized beauty techniques to enhance confidence and self-expression.
- Educating clients on how to maintain their beauty routines at home.