
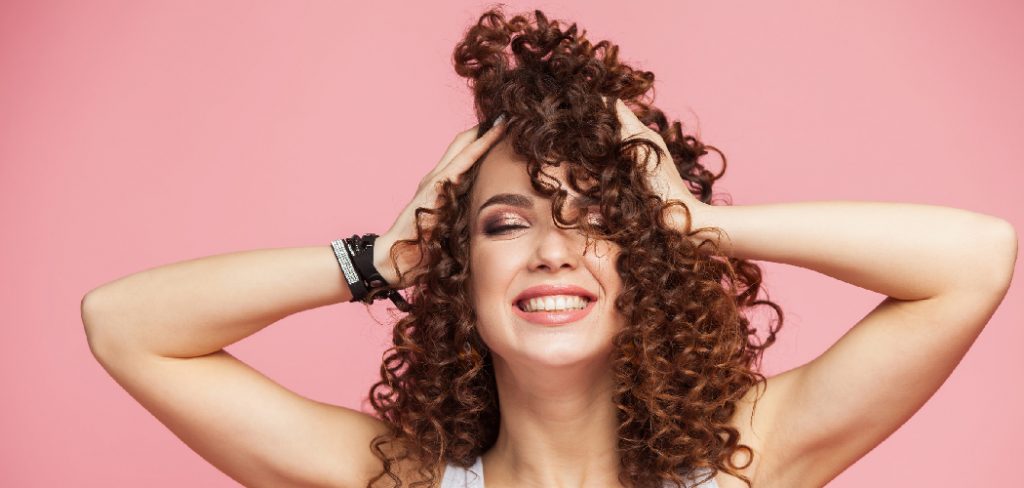
If you have naturally curly hair, you know how beautiful and unique it is. But sometimes, you might crave a different look, like soft, beachy waves. The common approach often involves heat styling tools like flat irons, which can cause significant damage, dryness, and breakage over time. Protecting your delicate curl pattern is paramount. The great news is that you can achieve a looser, wavy texture without a single hot tool. This guide is designed for beginners and will provide clear, damage-free instructions on how to make curly hair wavy without heat, helping you switch up your style while keeping your locks healthy and strong.
Creating waves without heat requires a bit of patience and the right techniques, but the results are worth the effort. This method embraces the natural texture of your hair while avoiding the risk of heat damage. Whether you’re preparing for a casual day out or a special occasion, these approaches will ensure your curls transform into soft, beautiful waves in a way that’s gentle and effective.
Why Choose Heatless Methods for Creating Waves?
The primary reason is to maintain the health and integrity of your hair. Frequent use of hot tools like curling irons or straighteners can weaken the hair cuticle, leading to breakage, split ends, and dryness over time. By opting for heatless techniques, you allow your hair to retain its natural moisture and strength. Additionally, using these methods can save time and energy while being equally effective in achieving gorgeous, natural-looking waves. It’s a win-win for both style and hair health.
The Benefits of Heatless Hairstyling
Heatless hairstyling has gained popularity in recent years for its numerous benefits. Apart from maintaining the health and integrity of your hair, there are other advantages to opting for heatless techniques:
- Cost-effective: Hot tools can be expensive, especially if you invest in high-quality ones to minimize damage to your hair. By using heatless methods, you save money on purchasing hot tools as well as electricity costs.
- Time-saving: Using hot tools often requires prepping your hair with heat protectant products, waiting for the tool to heat up, and then carefully styling your hair. With heatless techniques, you can achieve beautiful hairstyles without any prep time or waiting for tools to heat up.
- Healthier hair: Constant heat styling can damage your hair and cause it to become dry, brittle and prone to breakage. Heatless methods allow your hair to retain its natural moisture and avoid any potential heat damage.
- Versatility: Unlike hot tools that often have a specific use, such as straightening irons or curling wands, heatless techniques offer a variety of styles that can be achieved with just one method. This allows for more creativity and versatility in hairstyling.
- Travel-friendly: Hot tools can be bulky and difficult to travel with, especially if you are limited on space or flying with carry-on luggage only.
Step-by-Step Guide on How to Make Curly Hair Wavy Without Heat
Step 1: Start with Thoroughly Wet Hair
The foundation of reshaping your curls is to start with completely saturated, clean hair. After washing and conditioning, do not towel-dry your hair aggressively. Instead, gently squeeze out the excess water, leaving your hair very damp, almost dripping. This is because hair is most malleable and receptive to new shapes when it is wet. Attempting to restyle hair that is already partially dry and has begun to form its natural curl pattern will only lead to frizz and an uneven texture. Working with soaking wet hair gives you a blank canvas for creating your desired waves.
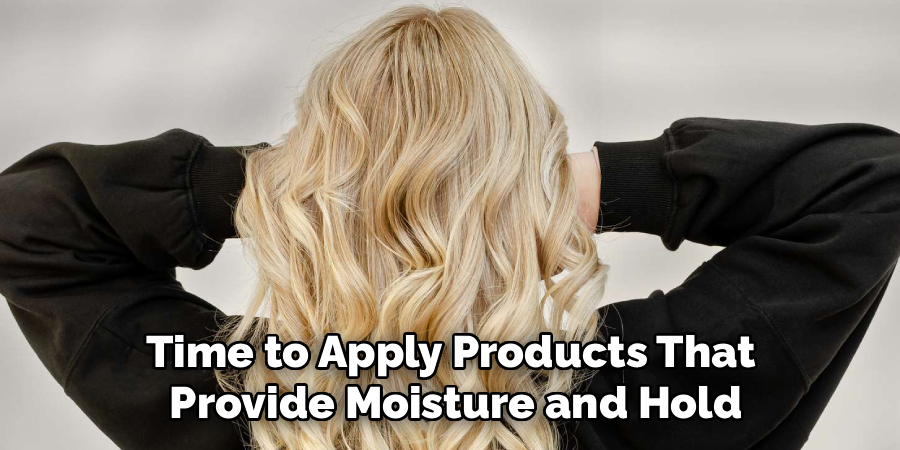
Step 2: Apply the Right Products
With your hair still wet, it’s time to apply products that provide moisture and hold. A good leave-in conditioner is non-negotiable for curly hair; it provides a base layer of hydration and helps detangle. Next, apply a curl cream or a light-hold gel. Avoid heavy products that define curls too strongly. Instead, opt for something that offers flexible hold and frizz control. Rake the products through your hair with your fingers or a wide-tooth comb to ensure even distribution from root to tip. This product cocktail will help elongate your curls and encourage them to set into a wavier pattern as they dry.
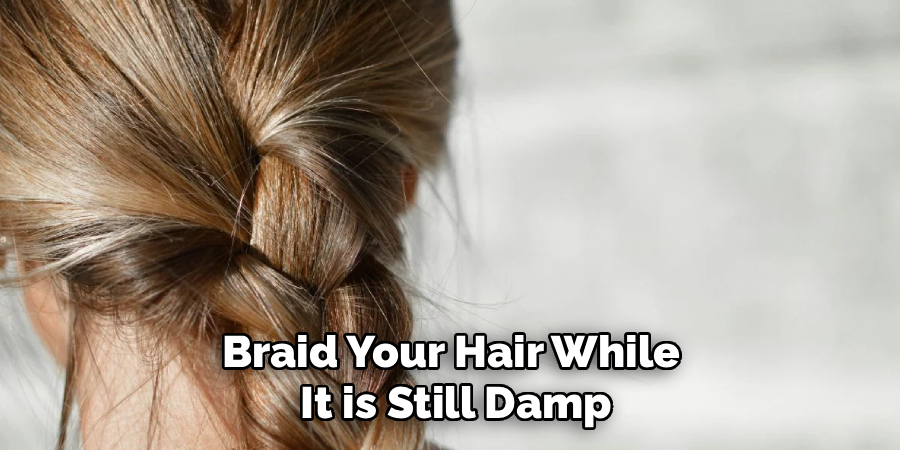
Step 3: Braid Your Hair
Braiding is one of the simplest and most effective techniques for transforming curls into waves. The size of the braids will determine the size of your waves. For looser, more relaxed waves, create one or two large, simple three-strand braids. For a slightly more defined wave pattern, you can create four to six smaller braids. Braid your hair while it is still damp, securing the ends with gentle hair ties that won’t create a kink. The tension of the braid will gently stretch your natural curl pattern as it dries, reforming it into a consistent, wavy texture.
Step 4: Try the Twisting or “Plopping” Method
If braiding isn’t for you, twisting offers another excellent way to elongate curls. Divide your damp hair into two or more sections. Twist each section tightly from root to tip, then coil the twist into a small bun and secure it with a soft scrunchie or pin. Alternatively, you can try “plopping.” After applying your products, lay a t-shirt or microfiber towel on a flat surface, then “plop” your hair onto the center of it. Wrap the fabric around your head like a turban. This method scrunches the hair upward, which can create softer, less-defined curls that appear more wavy.
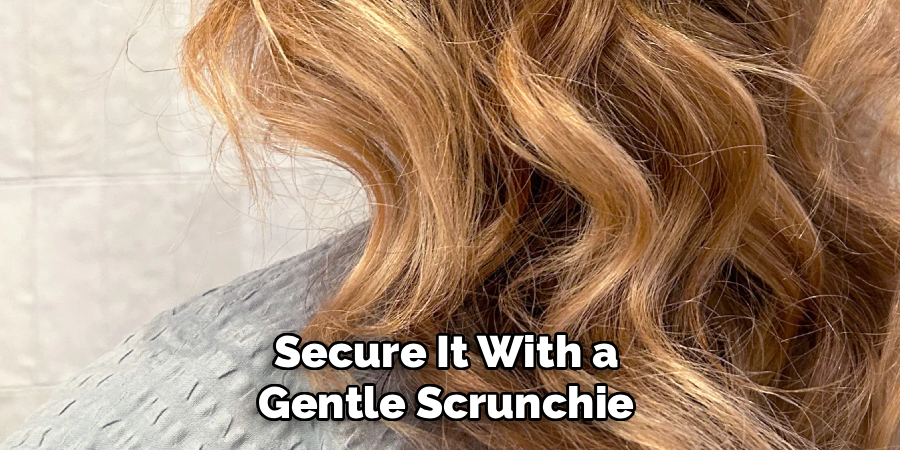
Step 5: Master the Art of the “Pineapple”
The “pineapple” method is a well-known technique in the curly hair community for preserving curls overnight, but it can also be adapted to create waves. While your hair is still damp, gather all of your hair into a very high, loose ponytail on top of your head, like a pineapple. Secure it with a gentle scrunchie. The key is to keep it loose to avoid creating a dent from the hair tie. This method uses gravity to gently stretch the curls at the nape of your neck and underneath, while preserving some texture at the ends, resulting in an elongated, wavy look once dry.
Step 6: Let Your Hair Air-Dry Completely
This step requires patience, but it is the most important one. Regardless of which shaping method you chose—braids, twists, or a pineapple—you must let your hair dry 100% before you take it down. Undoing your hair while it is still even slightly damp will cause the style to fall, and your natural curl pattern will try to re-emerge, resulting in frizz and an inconsistent texture. Allow several hours or, ideally, sleep on your style overnight. Protecting your hair with a silk or satin bonnet or sleeping on a silk pillowcase will reduce friction and help keep frizz at bay.
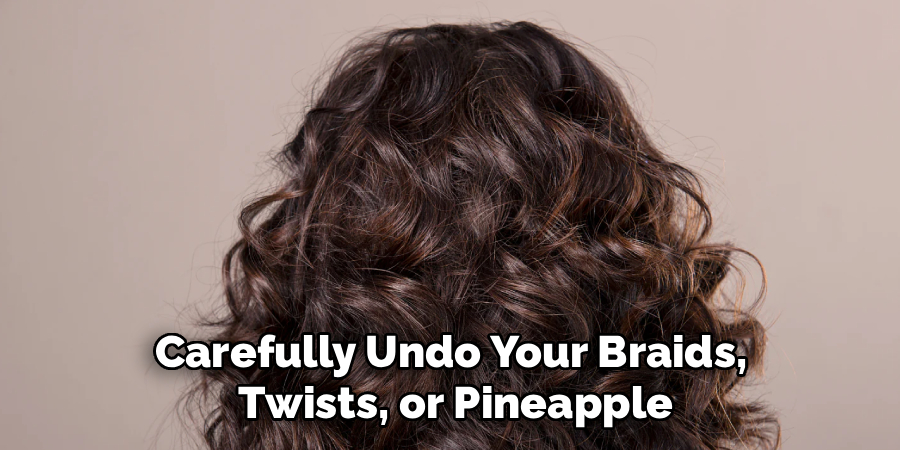
Step 7: Gently Release and Separate the Waves
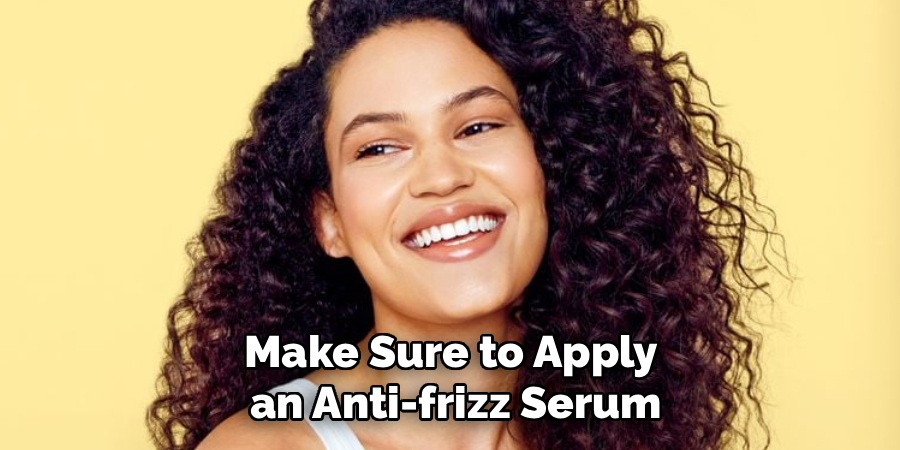
Once you are absolutely certain your hair is completely dry, it’s time for the reveal. Carefully undo your braids, twists, or pineapple. Your hair will be set in its new wavy pattern. Do not use a brush, as this will break up the waves and create a cloud of frizz. Instead, gently use your fingers to separate the sections. You can flip your head upside down and give your roots a gentle shake to add volume. If desired, you can apply a small amount of lightweight oil or anti-frizz serum to your palms and smooth it over the waves to add shine and tame any flyaways.
Additional Tips for Wavy Hair
Wavy hair can be tricky to style and maintain, but with the right techniques and products, you can achieve beautiful waves without damaging your natural texture. Here are some additional tips for maintaining and styling wavy hair:
- Invest in a satin or silk pillowcase: Cotton pillowcases can cause friction and create frizz in wavy hair. Switching to a satin or silk pillowcase can help preserve your waves while you sleep.
- Use a diffuser when blow-drying: If you need to blow-dry your hair, make sure to use a diffuser attachment on low heat. This will help distribute the air evenly and reduce frizz.
- Try a salt spray for beachy waves: Salt sprays can add texture and enhance the natural wave pattern in your hair. Just be sure to use a hydrating conditioner afterwards to prevent dryness.
- Embrace second-day hair: Wavy hair tends to look even better on the second or third day after washing. Instead of washing your hair every day, try using dry shampoo or refreshing your waves with some water and product.
- Use products specifically designed for wavy hair: Look for products that are formulated for wavy hair, such as mousse or curl enhancing creams. These can help define and hold your waves without weighing them down.
Frequently Asked Questions (FAQ)
Will These Methods Damage My Natural Curl Pattern?
No, these heat-free methods are completely safe for your hair and will not permanently alter your natural curl pattern. Your curls will return to their normal state the next time you wash your hair. These techniques simply reshape your hair temporarily while it dries, making them a great, damage-free way to switch up your style.
How Long Will the Waves Last?
The longevity of your waves depends on your hair type, the products you used, and the humidity in the air. Typically, you can expect the waves to last for one to three days. To refresh the style, you can lightly mist your hair with water and scrunch, or sleep with your hair in a loose pineapple to help preserve the shape.
What Products Are Best for Creating Waves in Curly Hair?
Look for products that offer light, flexible hold rather than strong curl definition. Good options include:
- A moisturizing leave-in conditioner as a base.
- A lightweight curl cream or mousse.
- A light-hold gel to control frizz without creating a hard cast.
- A sea salt spray can also enhance a beachy, wavy texture.
My Curls Are Very Tight. Will This Still Work for Me?
Yes, these methods can work for tight curls and coils, but the results may be different. Instead of loose, beachy waves, you might achieve a beautifully stretched and elongated curl pattern that appears looser and more defined. Using more braids or twists can help ensure that even very tight curl patterns are reshaped effectively.
How Can I Reduce Frizz When Creating Waves?
To minimize frizz, always handle your hair gently, especially when it’s dry. Make sure to apply an anti-frizz serum or a light-hold gel when your hair is wet. Sleeping on a silk or satin pillowcase or using a satin bonnet is also crucial, as it reduces friction overnight. Finally, when you take your hair down, use your fingers instead of a brush to separate the waves.
Conclusion
Embracing a heat-free styling routine is the ultimate form of self-care for your curly hair. It allows you to experiment with new looks without compromising the health and integrity of your beautiful curls. By using simple, gentle techniques like braiding or twisting on damp, well-moisturized hair, you can easily achieve the soft, flowing waves you desire. The process is all about working with your hair’s natural texture, not against it. Now that you have a clear plan for how to make curly hair wavy without heat, you can confidently enjoy a new style and healthier hair.
About the Author
Jane Hubbard is a passionate beauty expert with a wealth of experience in makeup, hair, and overall beauty techniques. After years of working as a hairdresser specialist, she followed her entrepreneurial spirit and started her own consultancy business.
Jane has always been driven by her desire to help others feel confident in their own skin, and she does this by sharing her knowledge, experiences, and practical beauty tips. Through her consultancy, she empowers individuals to embrace their unique beauty, offering tailored guidance that boosts both self-esteem and personal style.
Professional Focus
- Specializes in makeup, hairstyling, and beauty consulting.
- Provides personalized beauty advice, tips, and techniques to help individuals feel confident in their appearance.
- Dedicated to staying up-to-date with the latest industry trends and developments.
- Passionate about creating a comfortable and empowering experience for every client.
Education History
- University of Craft and Design – Bachelor of Fine Arts (BFA) in Woodworking and Furniture Design
- Woodworking Apprenticeships – Extensive hands-on training with skilled craftsmen to refine carpentry and furniture making techniques
- Online Courses & Masterclasses – Continued education in advanced woodworking techniques, design principles, and specialized tools
Expertise:
- Makeup artistry, hairstyling, and beauty consulting.
- Personalized beauty techniques to enhance confidence and self-expression.
- Educating clients on how to maintain their beauty routines at home.