
Are you tired of constantly buying expensive face mists? Why not make your own at home? Not only is it cost-effective, but you can also customize the ingredients to fit your specific skin needs. Here’s a step-by-step guide on how to make face mist.
Creating your diy face mist at home is an easy, cost-effective, and customizable way to care for your skin. Face mists are versatile skincare products that help hydrate, refresh, and soothe your complexion. Whether you’re looking for a cooling spritz in the summer, a quick boost of moisture, or a calming blend to unwind, making your own allows you to tailor the ingredients to suit your skin’s needs.

By using natural ingredients, you can avoid harsh chemicals and craft a face mist that is both effective and gentle.
What Are the Benefits of Making Your Face Mist?
- Cost-effective: Making your face mist can save you money in the long run compared to purchasing a pre-made product. You can buy ingredients in bulk and customize each batch to fit your skin’s needs, allowing you to get more use out of your products.
- Tailored to Your Skin Type: Everyone’s skin is unique, and making your face mist allows you to cater specifically to your skin’s needs. Whether you have dry, oily, or sensitive skin, various natural ingredients can target specific concerns and nourish your complexion.
- Avoid Harsh Chemicals: Many store-bought face mists contain artificial fragrances and preservatives that can irritate your skin. By making your face mist, you have complete control over the ingredients and can choose to use only natural and organic products.
- Multifunctional: Not only does a DIY face mist refresh your skin, but it can also serve multiple purposes, such as setting makeup, toning the skin, or providing hydration throughout the day. This makes it a versatile addition to your skincare routine.
What Will You Need?
To create your DIY face mist, you will need a few simple ingredients and materials:
- Spray Bottle: This can be any type of spray bottle, preferably glass or plastic to avoid any potential reactions with the ingredients.
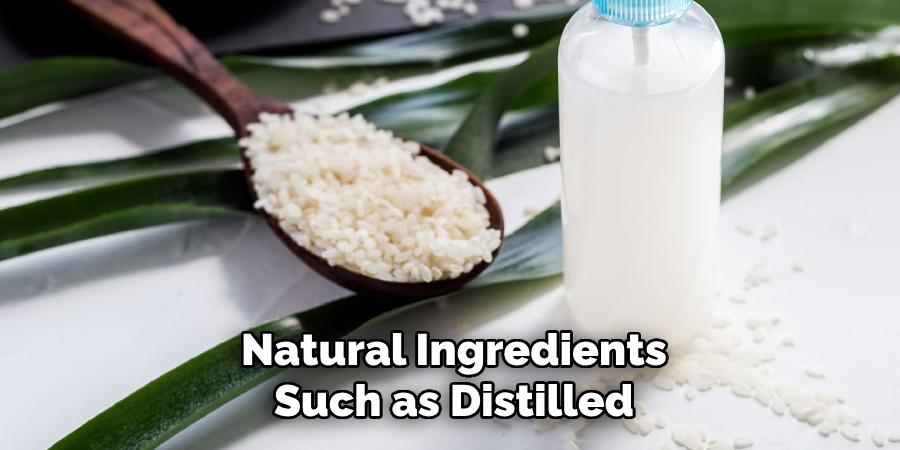
- Distilled Water: Distilled water is free from impurities and minerals, making it the best choice for skincare products.
- Essential Oils: Choose crucial oils based on your skin’s needs. Lavender is excellent for calming and soothing the skin, while tea tree oil has antibacterial properties and is suitable for acne-prone skin. You can also mix different oils for a customized blend.
- Hyaluronic Acid Serum (Optional): Hyaluronic acid is a popular ingredient in skincare products due to its ability to hold onto moisture, making the skin look plump and hydrated. If you choose to include this in your DIY serum, make sure to use a high-quality version from a reputable brand.
Once you have all your ingredients, it’s time to start making your DIY serum!
8 Easy Steps on How to Make Face Mist
Step 1. Choose a Spray Bottle
Selecting the right spray bottle is an essential step in creating your face mist. Opt for a bottle made of high-quality materials such as glass or BPA-free plastic to ensure durability and prevent any unwanted chemical reactions with the ingredients.
Consider the size of the bottle based on how portable you want your mist to be—smaller bottles are great for travel, while larger ones are ideal for at-home use. Additionally, ensure the spray nozzle dispenses a fine mist for even coverage across your face. Look for bottles with a secure, leak-proof cap to avoid spills, especially if you plan on carrying it in your bag. Airtight containers will also help preserve your mist’s freshness.
Step 2. Sterilize the Bottle
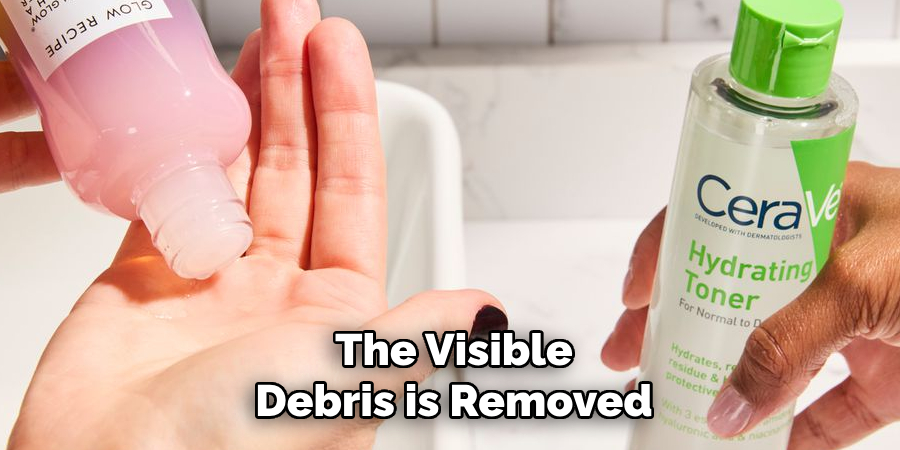
Before using your bottle, it’s crucial to sterilize it to ensure your facial mist remains clean and free from contamination. To sterilize, start by washing the bottle, spray nozzle, and cap thoroughly with warm water and mild soap. Once the visible debris is removed, rinse thoroughly to eliminate any soap residue. Next, prepare a sterilizing solution by mixing one part rubbing alcohol or white vinegar with two parts water.
Pour the solution into the bottle and shake it gently to ensure it comes into contact with all interior surfaces. Allow the solution to sit for a few minutes before discarding it.
Finally, rinse the bottle and its components with boiling water to remove any lingering residue from the sterilizing solution. Place everything on a clean, dry towel to air dry completely before proceeding to the next step. This careful sterilization process helps maintain the purity of your facial mist and extends its shelf life.
Step 3. Decide on the Formula
When choosing a formula for your facial mist, it’s essential to consider your skin type and the specific benefits you want to achieve. For instance, if you have dry skin, incorporating ingredients like rose water or glycerin can help provide hydration and lock in moisture.
For oily or acne-prone skin, look for soothing and purifying components such as witch hazel, tea tree oil, or green tea extract. Sensitive skin can benefit from calming ingredients like chamomile or aloe vera, which help reduce redness and irritation.

Step 4. Mix Your Ingredients
Once you have gathered the appropriate ingredients for your skin type, it’s time to combine them to create a balanced and effective formula. Begin by carefully measuring each ingredient according to the recipe or guideline you’ve chosen — precision is essential to ensure the mixture works harmoniously without overpowering any one component.
Use clean tools, such as glass bowls or measuring spoons, to avoid contamination and maintain the product’s purity. When mixing, stir slowly and thoroughly to ensure all ingredients are properly blended, forming a smooth and consistent texture.
If you’re using oils or water-based ingredients, consider emulsifying agents to help them mix evenly. Optionally, you can add a few drops of your favorite essential oils for fragrance or additional benefits, but make sure they are suitable for your skin type.
Step 5. Adjust the Scent and Consistency
Test the mixture by taking a small amount and applying it to your skin to evaluate the scent, texture, and absorption. If the smell feels too strong, dilute it by adding more base ingredients to balance the fragrance.
Conversely, if the aroma is too faint, you can carefully incorporate a few more drops of essential oil, blending thoroughly each time to avoid over-scenting. For consistency adjustments, if the mixture is too thick, consider adding a small amount of a compatible liquid, such as water or aloe vera juice.
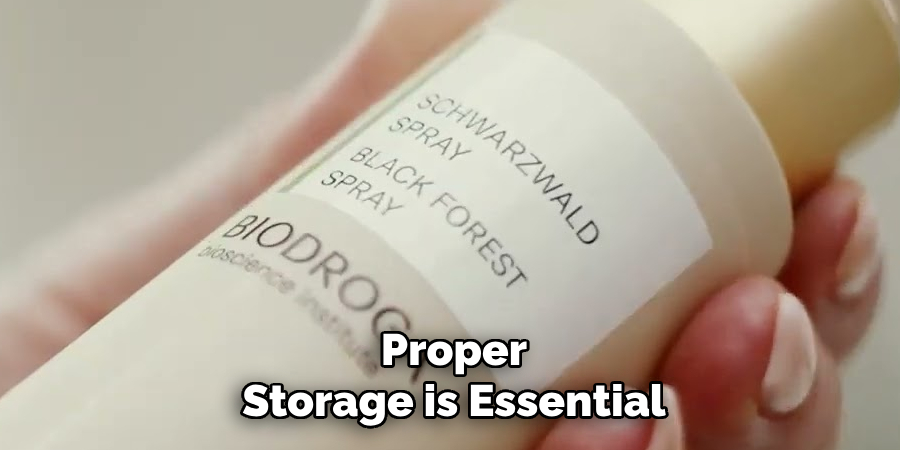
Step 6. Storage and Shelf Life
Proper storage is essential to maintain the quality and effectiveness of your handcrafted products. Store your mixture in a tightly sealed, clean container to prevent contamination and exposure to air. Glass containers are often preferred, especially those made of amber or cobalt blue, as they shield the contents from harmful light that can degrade sensitive ingredients like essential oils. Keep your product in a cool, dry place, away from direct sunlight or excessive heat, as both can affect its consistency and shorten its shelf life.
Step 6. Pour Into the Spray Bottle
Use a funnel to carefully pour the prepared mixture into the spray bottle, minimizing spillage and ensuring every drop is preserved. Choose a spray bottle with a fine mist nozzle for even application, which ensures the product is distributed efficiently and effectively. It’s essential to label the bottle with the product name, key ingredients, the date it was created, and any usage instructions.
This will not only help you identify the solution quickly but also remind you of its contents and shelf life. Regularly clean and sanitize your spray bottle to prevent any buildup or contamination, which can affect the quality and performance of your handmade product.
Step 7. Shake Well Before Use
Shaking the bottle thoroughly before each use is an essential step to ensure that all the ingredients are well mixed and effectively combined. Many handmade solutions tend to separate over time due to the lack of synthetic stabilizers, which are often found in commercial products.
By shaking well, you redistribute the active ingredients evenly throughout the mixture, allowing for consistent performance and results. This small but crucial action ensures that every spray delivers the intended benefits of your solution, whether it is for cleaning, personal care, or other purposes.
Step 8. Test on Skin
Before applying the solution widely, it’s essential to conduct a patch test to ensure it’s safe and compatible with your skin. Begin by using a small amount of the product to a discreet area, such as the inside of your wrist or elbow, where the skin is thin and sensitive.
Allow the solution to sit for at least 24 hours, monitoring for any signs of irritation, redness, or allergic reaction. This step is particularly crucial if the mixture contains essential oils, natural extracts, or other potent ingredients that may trigger sensitivities in some individuals. By performing this simple test, you can prevent discomfort or adverse reactions, ensuring the solution is effective and safe for regular use.
Following these steps, you can easily create your all-natural hand sanitizer at home. Not only is it cost-effective and easy to make, but it also allows you to customize the scent and ingredients according to your personal preferences.
Conclusion
How to make face mist at home is a simple and rewarding process that allows you to tailor the formula to your skin’s unique needs.
By using natural ingredients such as distilled water, essential oils, and hydrosols, you can ensure your mist is free from harmful chemicals and suits your personal preferences. Regular use of a DIY face mist can help hydrate, refresh, and rejuvenate your skin, making it an environmentally friendly and cost-effective alternative to store-bought products.
With the right ingredients and a few simple steps, you can easily create your own face mist at home.
About the Author
Jane Hubbard is a passionate beauty expert with a wealth of experience in makeup, hair, and overall beauty techniques. After years of working as a hairdresser specialist, she followed her entrepreneurial spirit and started her own consultancy business.
Jane has always been driven by her desire to help others feel confident in their own skin, and she does this by sharing her knowledge, experiences, and practical beauty tips. Through her consultancy, she empowers individuals to embrace their unique beauty, offering tailored guidance that boosts both self-esteem and personal style.
Professional Focus
- Specializes in makeup, hairstyling, and beauty consulting.
- Provides personalized beauty advice, tips, and techniques to help individuals feel confident in their appearance.
- Dedicated to staying up-to-date with the latest industry trends and developments.
- Passionate about creating a comfortable and empowering experience for every client.
Education History
- University of Craft and Design – Bachelor of Fine Arts (BFA) in Woodworking and Furniture Design
- Woodworking Apprenticeships – Extensive hands-on training with skilled craftsmen to refine carpentry and furniture making techniques
- Online Courses & Masterclasses – Continued education in advanced woodworking techniques, design principles, and specialized tools
Expertise:
- Makeup artistry, hairstyling, and beauty consulting.
- Personalized beauty techniques to enhance confidence and self-expression.
- Educating clients on how to maintain their beauty routines at home.