
Removing nail polish is an essential part of any manicure routine, and having the right nail polish remover makes the process quick and easy. While store-bought removers are convenient, making your own at home can be a cost-effective and eco-friendly alternative. DIY nail polish removers often utilize simple, natural ingredients that are gentle on the skin and nails, avoiding the harsh chemicals found in many commercial options.
This guide on how to make nail polish remover will walk you through the steps to create your own nail polish remover with ease.
Why Make Your Own Nail Polish Remover?
Cost-effective:
Making your own nail polish remover is often cheaper than buying it from a store, as most of the ingredients can be found in your kitchen pantry. This can be a great money-saving option for those who frequently use nail polish remover.
Eco-friendly:
Commercial nail polish removers often contain harsh chemicals that can be harmful to the environment and contribute to pollution. By making your own nail polish remover, you can control the ingredients and reduce your environmental impact.
Customizable:
When making your own nail polish remover, you have the freedom to customize it to suit your needs. You can choose specific ingredients based on your skin type or personal preferences. Plus, you can experiment with different scents and add essential oils for a spa-like experience.
Ingredients
To make your own nail polish remover, you will need:
- Acetone or Non-acetone Nail Polish Remover
- Lemon Juice or White Vinegar
- Olive Oil or Coconut Oil (Optional)
- Essential Oils (Optional)
10 Steps on How to Make Nail Polish Remover
Step 1: Prepare Your Materials
Gather all the ingredients and tools you will need to make your nail polish remover. This includes acetone or a non-acetone alternative, lemon juice or white vinegar, a small mixing bowl, and optional items like olive oil or coconut oil and essential oils.
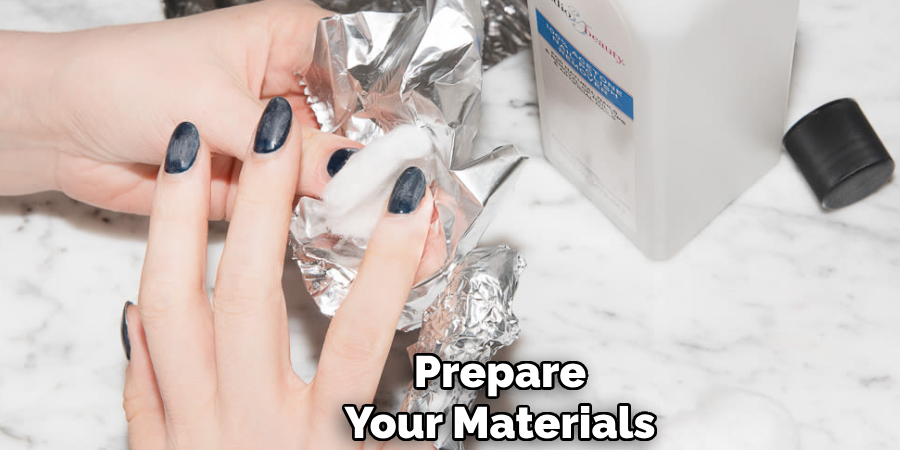
Having everything prepared and organized will make the process smoother and more efficient. Ensure your workspace is clean and well-ventilated.
Step 2: Choose Your Base
The base of your nail polish remover can be either acetone or a non-acetone alternative. Acetone is a strong solvent that effectively removes stubborn nail polish but can be harsh on the skin and nails. Non-acetone alternatives, like ethyl acetate, are gentler but may require more effort to remove certain types of polish.
Depending on your preferences and needs, choose the base that works best for you.
Step 3: Mix Equal Parts of Acetone and Lemon Juice or White Vinegar
In a small mixing bowl, combine equal parts of your chosen base (acetone or non-acetone alternative) with lemon juice or white vinegar. The acidic properties of lemon juice or vinegar help to break down nail polish, while the base works as the primary solvent.
Start with small amounts, such as one tablespoon of each, to ensure the mixture is easy to handle and store. Use a spoon or small whisk to mix the ingredients thoroughly until they are well combined.
Step 4: Optional: Add Olive Oil or Coconut Oil
If you have dry or sensitive skin, adding a small amount of olive oil or coconut oil to the mixture can help moisturize and protect your nails and cuticles. These oils also add a pleasant scent to the nail polish remover. Start with a few drops and adjust the ratio based on your preferences.
You can also use jojoba oil, sweet almond oil, or any other natural oils you have on hand.
Step 5: Optional: Add Essential Oils for Aromatherapy
To add a spa-like experience to your nail polish removal process, consider adding a few drops of your favorite essential oils. Lavender, peppermint, and tea trees are popular options that offer relaxing and rejuvenating benefits.
Do not add too much as the scent may become overwhelming. Start with 1-2 drops and adjust according to your preference.
Step 6: Transfer mixture to a Container
Carefully pour your prepared nail polish remover mixture into a clean, sealable container for storage. A small glass jar or a bottle with a tightly fitting lid works best to prevent spills and evaporation. Use a funnel if needed to avoid mess while transferring the mixture.
Make sure the container is properly labeled, especially if you have added essential oils, to ensure safe use and prevent confusion with other household items. Store the container in a cool, dry place away from direct sunlight for maximum shelf life.
Step 7: Shake Well Before Use
Before using your homemade nail polish remover, be sure to shake the container thoroughly. This step ensures that all ingredients, especially the oils and essential oils, are evenly mixed for optimal effectiveness.
Since natural ingredients may separate over time, shaking the mixture well is crucial for consistent results. Always give the container a quick shake before each use to maintain its performance.
Step 8: Test on A Small Area First
Before using your homemade nail polish remover on a full set of nails, it is important to test it on a small area first. Apply a small amount of the mixture to one nail using a cotton pad or swab. Gently rub to check its effectiveness and ensure there are no adverse reactions, such as skin irritation or discomfort.

Testing allows you to verify that the remover works well with your chosen ingredients and is safe for your skin and nails. If any issues arise, consider adjusting the formula to better suit your needs.
Step 9: Soak Nails for A Few Minutes
To make the nail polish removal process easier, soak your nails in warm water for a few minutes before applying the remover. Fill a small bowl with warm water and immerse your fingertips, allowing the warmth to soften the polish and loosen it from the nail surface. This step can be especially helpful for stubborn or long-lasting polish types.
Once your nails are thoroughly soaked, dry them with a clean towel and proceed with the application of your homemade nail polish remover.
Step 10: Apply and Remove the Homemade Nail Polish Remover
Using a cotton pad or swab, apply the homemade nail polish remover to your nails, gently rubbing in a circular motion until all the polish is removed. If using a non-acetone alternative, you may need to put in more effort compared to regular acetone-based removers. Be patient and continue rubbing until all traces of polish are gone.
Once done, wash your hands with soap and warm water to remove any residue left by the remover. Moisturize your skin and nails afterward with your preferred oil or lotion for added nourishment and protection.
Following these steps on how to make nail polish remover, you can easily make your own nail polish remover at home using natural and readily available ingredients. Not only is it a cost-effective alternative to store-bought removers, but it also allows you to customize the formula to suit your preferences and needs. Enjoy healthier and more eco-friendly nails with this simple DIY solution!
Additional Tips
- Store your homemade nail polish remover in a dark-colored container to prevent light from degrading its effectiveness.
- For deeper or tougher stains, let the remover sit on the nail for a few seconds before rubbing.
- Avoid using harsh and abrasive tools, such as metal nail files, when removing polish to prevent damage to your nails. Opt for gentler options like glass or crystal files.
- Remove any excess polish from the rim of the container after each use to prevent it from hardening or affecting the effectiveness of future batches.
- Consider adding a small amount of glycerin to your mixture for added moisturizing benefits.
- To remove glitter or gel polish, soak a cotton pad in the homemade remover and wrap it around the nail, securing it with aluminum foil for 5-10 minutes before gently rubbing off the polish.
- Use this DIY nail polish remover within 6 months for optimal results and freshness. Discard if any changes in appearance or scent occur.
- Have fun experimenting with different essential oil combinations to create personalized scents and enhance relaxation during your nail care routine. Enjoy!
Frequently Asked Questions
Q: Can I Use This Homemade Nail Polish Remover on Acrylic or Gel Nails?
A: This DIY solution is best suited for regular nail polish. If you have acrylic or gel nails, it is recommended to consult a professional for proper removal techniques to avoid damaging your artificial nails. It is also important to note that this homemade remover may not be as effective in removing these types of polish.
Q: Is This Homemade Nail Polish Remover Safe for Children to Use?
A: While this recipe uses natural ingredients, it is still important to exercise caution when handling and using the remover. Keep out of reach of children and supervise their use of the homemade solution to prevent any accidents or ingestion. If skin irritation occurs, discontinue use immediately and consult a doctor if necessary. Additionally, certain essential oils may not be suitable for children, so it is best to research and proceed with caution when adding them to your mixture.
Q: Can I Make a Larger Batch of This Homemade Nail Polish Remover?
A: Yes, you can double or triple the recipe as needed. However, it is recommended to make smaller batches and use them within 6 months for optimal freshness and effectiveness.
Q: Are There Any Other Natural Ingredients I Can Use to Make a Homemade Nail Polish Remover?
A: Yes, there are other natural ingredients you can try using in your homemade nail polish remover. Some options include lemon juice, white vinegar, or rubbing alcohol as the main solvent. However, these may not be as effective in removing darker or stubborn polish colors compared to the recipe shared above. Always test on a small area first before using your entire set of nails. Additionally, it is best to research and proceed with caution when using different ingredients that may have varying levels of effectiveness or potential side effects. Remember to always prioritize safety and consult a professional if needed.
Conclusion
Creating your own homemade nail polish remover is a fantastic way to take control of your nail care routine while using natural and eco-friendly ingredients. By following the steps outlined in this guide on how to make nail polish removers, you can achieve effective results without relying on harsh chemicals found in store-bought removers. This DIY solution not only supports healthier nails but also allows you to customize the formula to your preferences, adding a personal touch to your self-care experience.
Whether you’re looking for cost savings, sustainability, or a gentler option for your nails, homemade nail polish remover is a practical and rewarding alternative. Give it a try and enjoy the benefits of this simple yet effective solution!
About the Author
Jane Hubbard is a passionate beauty expert with a wealth of experience in makeup, hair, and overall beauty techniques. After years of working as a hairdresser specialist, she followed her entrepreneurial spirit and started her own consultancy business.
Jane has always been driven by her desire to help others feel confident in their own skin, and she does this by sharing her knowledge, experiences, and practical beauty tips. Through her consultancy, she empowers individuals to embrace their unique beauty, offering tailored guidance that boosts both self-esteem and personal style.
Professional Focus
- Specializes in makeup, hairstyling, and beauty consulting.
- Provides personalized beauty advice, tips, and techniques to help individuals feel confident in their appearance.
- Dedicated to staying up-to-date with the latest industry trends and developments.
- Passionate about creating a comfortable and empowering experience for every client.
Education History
- University of Craft and Design – Bachelor of Fine Arts (BFA) in Woodworking and Furniture Design
- Woodworking Apprenticeships – Extensive hands-on training with skilled craftsmen to refine carpentry and furniture making techniques
- Online Courses & Masterclasses – Continued education in advanced woodworking techniques, design principles, and specialized tools
Expertise:
- Makeup artistry, hairstyling, and beauty consulting.
- Personalized beauty techniques to enhance confidence and self-expression.
- Educating clients on how to maintain their beauty routines at home.