
Creating an ombre lipstick look is a fun and creative way to elevate your makeup game. This technique blends two or more colors seamlessly, giving your lips a gradient effect that transitions from dark to light. Ombre lips are perfect for making a bold statement or adding a touch of elegance to your overall look. With just a few steps and the right tools, you can achieve this trendy style at home and customize it to match any occasion or mood.
In this article on how to make ombre lipstick, we will discuss the step-by-step process of creating this look and some tips to help you perfect it. This ombre lipstick tutorial will show you how to blend two shades for a stunning gradient effect that enhances your lips with a pop of color.
Needed Materials
Before we begin, make sure you have the following items ready:
Two or More Lipstick Colors of Your Choice:
The key to achieving a beautiful ombre effect is choosing colors that complement each other. You can play around with different shades, such as red and orange for a fiery look or pink and purple for a more subtle gradient.
A Lip Brush:
A lip brush will help you blend the colors together easily and precisely.
Concealer or Foundation:
To clean up any mistakes and make your ombre lips stand out, you will need some concealer or foundation. Choose one that matches your skin tone.
8 Step-by-step Guides on How to Make Ombre Lipstick
Step 1: Prepare Your Lips
To ensure your ombre lipstick looks flawless and lasts longer, start by preparing your lips. Gently exfoliate them using a lip scrub or a soft toothbrush to remove any dead skin, leaving your lips smooth and ready for color application.
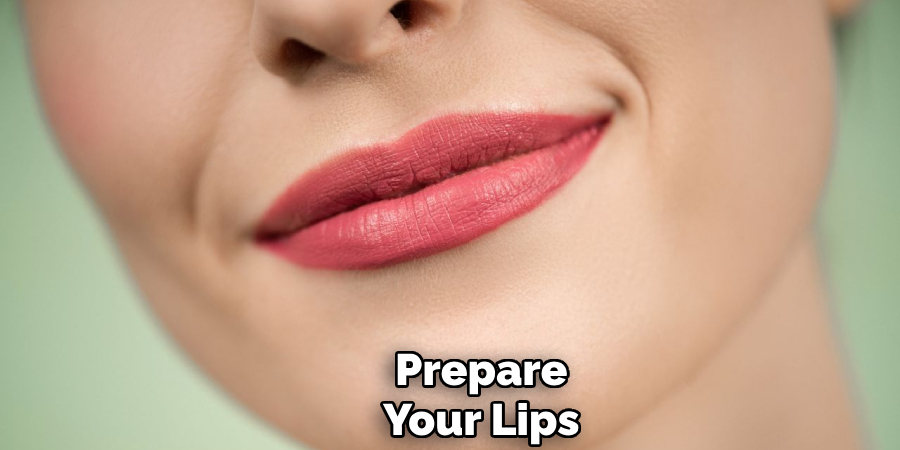
Next, apply a hydrating lip balm to keep your lips moisturized and prevent them from drying out during the process. Finally, blot away any excess balm with a tissue to create a clean and slightly matte base for the lipstick.
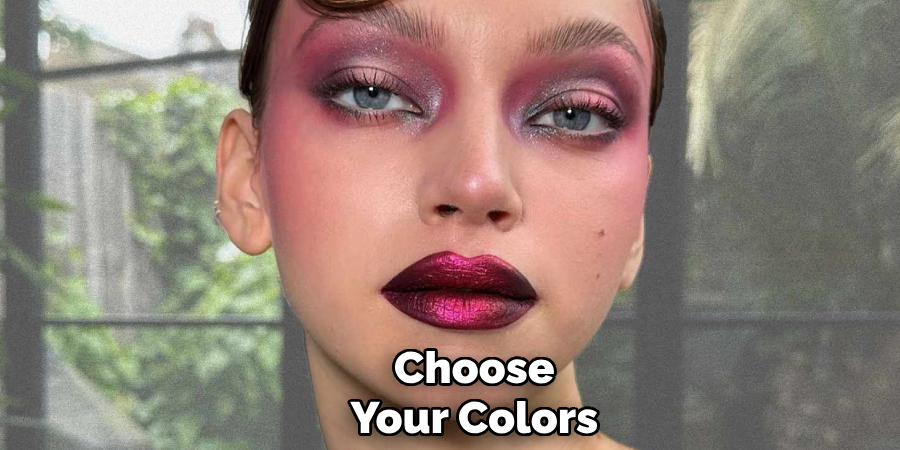
Step 2: Choose Your Colors
Selecting the right colors is crucial to achieving a stunning ombre effect. Opt for two or more shades that work well together—typically, a darker shade for the outer corners and a lighter shade for the center of your lips.
For a dramatic evening look, you might choose bold hues like deep red and bright pink. If you’re going for a softer daytime look, try nude and peach tones. Experiment with combinations to find the perfect match for your desired style and occasion.
Step 3: Apply the First Color
Start by applying the darker shade of lipstick to the outer corners of your lips. Use either the lipstick bullet directly or a lip brush for more precision. Carefully outline the edges of your lips with a darker color, creating a frame that defines your lip shape.
Be sure to leave the center of your lips bare, as this area will be blended with the lighter shade later. Once applied, check for evenness and touch up any uneven lines to ensure a smooth and polished look.
Step 4: Apply the Second Color
Now it’s time to apply the second color, which will be the lighter shade. Using a lip brush, apply the lipstick to the center of your lips, leaving some space between the two colors. Be sure to blend outwards towards the edges for a seamless transition between shades.
It’s important to use a clean lip brush or wipe off the first color from your brush before applying the second shade. This will prevent any color transfer and ensure that both shades remain vibrant.
Step 5: Blend the Colors
With both colors applied, it’s time to blend them together. Using your lip brush, gently blend the two colors where they meet, creating a gradient effect. Blend in small circular motions until you achieve a smooth and seamless transition between shades.
Don’t be afraid to go back and forth between the two colors until you’re happy with how they look together. Keep blending until there are no harsh lines visible and the ombre effect is evenly distributed.
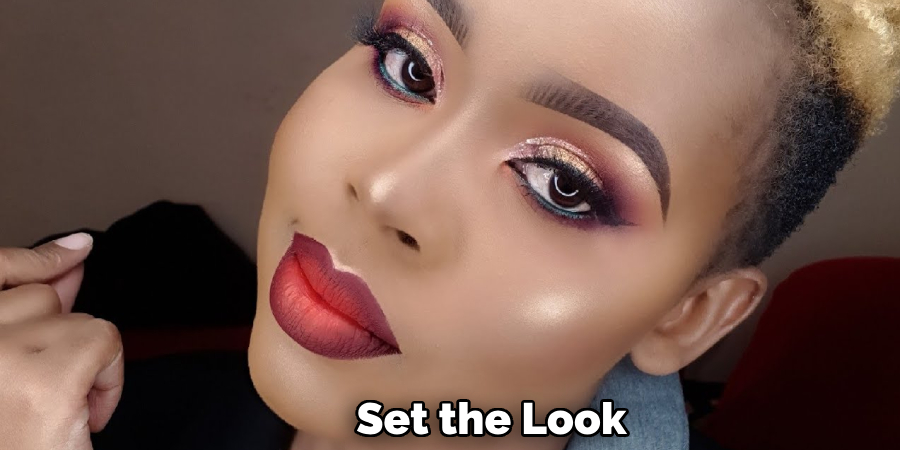
Step 6: Set the Look
After achieving your desired ombre effect, it’s essential to set the look to make it last longer. Use a tissue to gently blot your lips, removing any excess lipstick or moisture that may cause smudging.
Next, take some translucent powder and lightly dust it over your lips using a fluffy brush. This will help set the colors in place and prevent them from bleeding outside of your lip line.
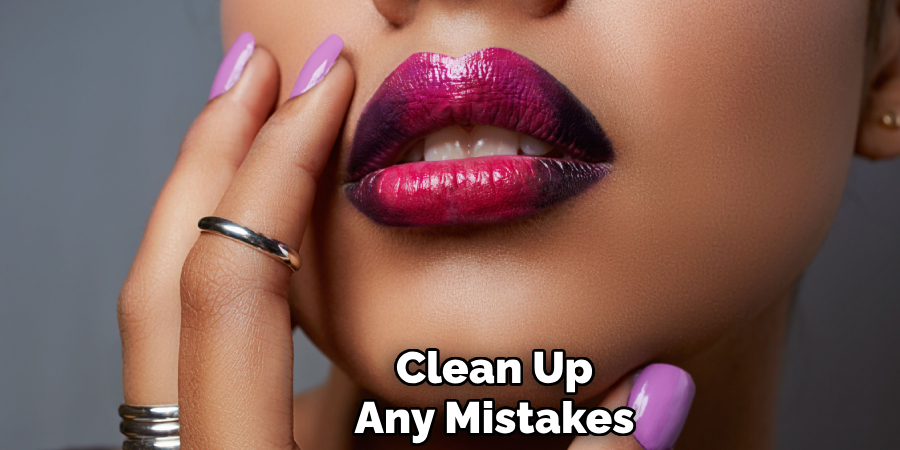
Step 7: Clean Up Any Mistakes
If you encounter any mistakes while creating an ombre lipstick look, don’t worry! Simply dip a cotton swab into some makeup remover or micellar water and use it to clean up any smudges or uneven lines.
Once you’ve cleaned up any mistakes, go back and blend the colors together again to ensure a seamless transition.
Step 8: Highlight Your Cupid’s Bow
To add extra dimension and make your ombre lipstick look stand out even more, highlight your cupid’s bow. Use a small brush or your finger to dab some highlighter onto the center of your cupid’s bow, creating a subtle shimmer that will catch the light and enhance the gradient effect.
Following these steps on how to make ombre lipstick will help you achieve beautiful ombre lips every time. With practice and experimentation, you can customize this look to suit your personal style and make a statement with your makeup. Try different color combinations and techniques to find the perfect ombre lipstick look for you!
Tips for Perfecting Your Ombre Lipstick
- Start with lighter shades if you’re new to ombré lipstick to get a feel for the blending technique.
- Use lip liners in shades similar to your chosen lipsticks to help define and shape your lips before applying color.
- If you want a more intense ombre effect, apply a third lipstick shade in the center of your lips and blend it with the other two colors.
- For longer-lasting results, use long-wearing or matte lipsticks instead of creamy formulas.
- Don’t be afraid to mix different textures, such as matte and gloss, for an eye-catching look.
- Be patient and take your time with blending to achieve a smooth gradient effect.
- Practice makes perfect, so keep experimenting with different shades and techniques until you find the ombre lipstick look that suits you best!
- Always remember to exfoliate and moisturize your lips regularly to keep them healthy and smooth for any makeup look.
- Have fun and be creative with your ombre lipstick! The possibilities are endless, so don’t be afraid to try new color combinations and techniques to make this trend your own.
Frequently Asked Questions
Q: Can I Create an Ombre Lipstick Look With Just One Color?
A: Technically, yes. You can use a single shade to create a subtle ombre effect by applying more layers of lipstick to the outer corners and less in the center of your lip. However, using two or more shades will give a more noticeable and defined ombre look.
Q: Can I Use Lip Gloss for the Lighter Shade in My Ombre Look?
A: Absolutely! Mixing different textures like matte and gloss can add an extra dimension to your ombre lipstick look. Just remember to blend them together well to avoid any unevenness.
Q: Do I Have to Use a Lip Brush for Ombre Lips?
A: Using a lip brush can provide more control and precision when applying lipstick, but you can also use the bullet directly if you prefer. Just make sure to blend the colors together well with your finger or a lip brush for a seamless gradient effect.
Q: Can I Use Any Lipstick Shades for Ombre Lips?
A: Yes, you can use any shades that complement each other or create a contrast that you like. Experiment with both light and dark hues to find the perfect combination for your desired look. It’s all about personal preference and having fun with your makeup!
Q: How Can I Make My Ombre Lips Last Longer?
A: To make your ombre lipstick last longer, start by exfoliating and moisturizing your lips beforehand. This will create a smooth base for the lipstick to adhere to. You can also use a lip primer or apply a thin layer of translucent powder over your lips before applying color. Additionally, using long-wearing or matte lipsticks can help prolong the wear of your ombre look. Lastly, avoid oily foods and drinks, and gently blot your lips throughout the day to keep the colors in place.
Conclusion
Creating an ombre lipstick look adds a unique touch to your makeup routine and can elevate any outfit or occasion. With these simple steps and tips on how to make ombre lipstick, you can achieve beautiful ombre lips that will turn heads and make a statement.
Remember to have fun with it, mix different shades, and find what works best for you. With practice, you’ll be an ombre lipstick pro in no time! So go ahead and give it a try – you never know, ombré lips may become your new favorite makeup technique! Happy blending!
About the Author
Jane Hubbard is a passionate beauty expert with a wealth of experience in makeup, hair, and overall beauty techniques. After years of working as a hairdresser specialist, she followed her entrepreneurial spirit and started her own consultancy business.
Jane has always been driven by her desire to help others feel confident in their own skin, and she does this by sharing her knowledge, experiences, and practical beauty tips. Through her consultancy, she empowers individuals to embrace their unique beauty, offering tailored guidance that boosts both self-esteem and personal style.
Professional Focus
- Specializes in makeup, hairstyling, and beauty consulting.
- Provides personalized beauty advice, tips, and techniques to help individuals feel confident in their appearance.
- Dedicated to staying up-to-date with the latest industry trends and developments.
- Passionate about creating a comfortable and empowering experience for every client.
Education History
- University of Craft and Design – Bachelor of Fine Arts (BFA) in Woodworking and Furniture Design
- Woodworking Apprenticeships – Extensive hands-on training with skilled craftsmen to refine carpentry and furniture making techniques
- Online Courses & Masterclasses – Continued education in advanced woodworking techniques, design principles, and specialized tools
Expertise:
- Makeup artistry, hairstyling, and beauty consulting.
- Personalized beauty techniques to enhance confidence and self-expression.
- Educating clients on how to maintain their beauty routines at home.