
Are you tired of following makeup tutorials that don’t work for your hooded eyes? Do you struggle with smudged eyeliner and disappearing eyeshadow? Look no further.
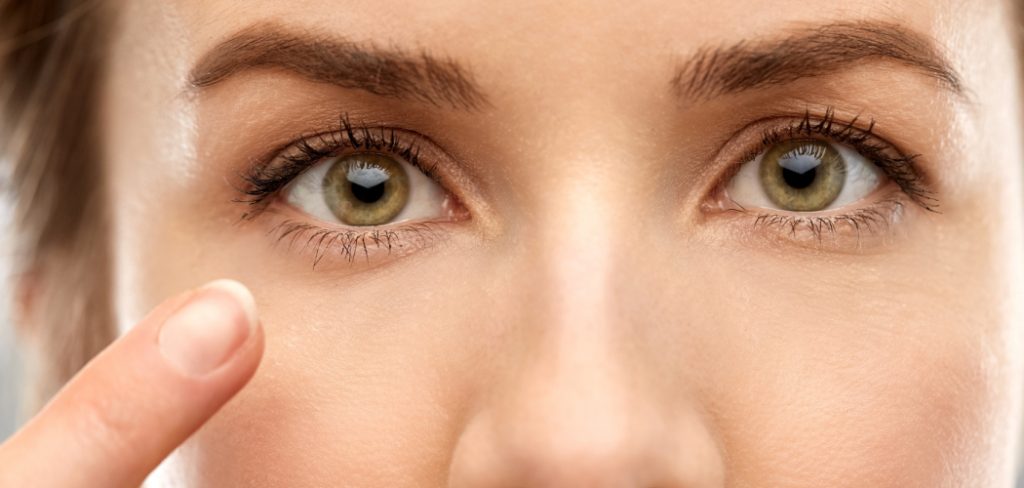
How to makeup hooded eyes can be both an art and a challenge for many. Hooded eyes have a unique structure where the eyelid appears smaller or partially hidden due to a prominent brow bone or excess skin folding over the crease. This shape often requires specific techniques to enhance and open up the eyes, creating the illusion of brighter, more lifted features. Additionally, hooded eyes makeup tends to have a shorter distance between the lash line and the brow bone, making it tricky to find the right balance in eyeshadow placement.
With the right approach and a few tailored tips, you can achieve stunning makeup looks that accentuate your natural beauty and highlight your eye shape effortlessly.
What Are the Benefits of Knowing Your Eye Shape?
Understanding your eye shape is essential for creating flattering makeup looks. By knowing your specific eye shape, you can tailor your makeup application to enhance and bring out your best features. It also allows you to avoid certain techniques that may not work well with your natural eye shape.
Additionally, knowing your eye shape can help you choose the right products and tools for achieving a flawless look. From eyeshadow placement to eyeliner techniques, having a clear understanding of your eye shape can make all the difference in achieving a polished and professional appearance.
What Will You Need?
To effectively apply makeup for your eye shape, you will need the following:
- A variety of eyeshadow colors to create different looks
- Eyeliner (gel, pencil, or liquid)
- Mascara to define and lengthen lashes
- An eyelash curler to open up your eyes
- Eye primer to make sure your makeup stays in place all day
- Various brushes for blending and precise application
Once you have gathered all of your supplies, it’s time to learn how to apply makeup specifically for your eye shape.
10 Easy Steps on How to Makeup Hooded Eyes
Step 1. Prime Your Eyelids
Priming your eyelids is a crucial first step when applying makeup to hooded eyes. Begin by selecting an eye primer that suits your skin type and tone — it will act as a base to ensure your eyeshadow stays in place throughout the day and prevents creasing, which is especially important for hooded eyes where the natural fold can cause makeup to smudge. Gently apply a small amount of primer onto your eyelids using a clean fingertip or a brush, blending it evenly from the lash line up to just below your brows.
This will not only provide a smooth surface for your makeup application but also enhance the intensity and longevity of the colors you use. If you do not have access to an eye primer, a concealer can also work as an alternative. The key is to create a stable, even canvas for the steps that follow.
Step 2. Choose a Transition Shade
A transition shade is a soft, neutral color that helps blend eyeshadow seamlessly, creating a gradient effect across the eyelid. To choose the right transition shade, opt for a color slightly darker than your skin tone but lighter than the main colors you plan to use. For fair skin tones, soft taupes or light peach tones work well, while medium skin tones may benefit from warm caramel or soft brown shades. For deeper skin tones, rich terracotta or muted cocoa hues can create a flawless transition.
Using a fluffy blending brush, apply the transition shade to the crease of your eye in soft, circular motions, blending slightly upwards towards the brow bone. This technique diffuses harsh lines and serves as the foundation for layering other shades, resulting in a polished, professional look.
Step 3. Deepen the Outer Corner
To add depth and dimension to your eye makeup, focus on deepening the outer corner of your eyelid. Choose a darker shade that complements your overall color scheme, such as a deep chocolate, charcoal gray, or even a bold plum. Using a small, dense brush, pack the color onto the outer V of your eyelid, starting near the lash line and blending it slightly into the crease. For a seamless transition, blend the edges carefully with a clean blending brush to avoid harsh lines. This step creates a gradient effect, adding drama and intensity to the look while maintaining balance.
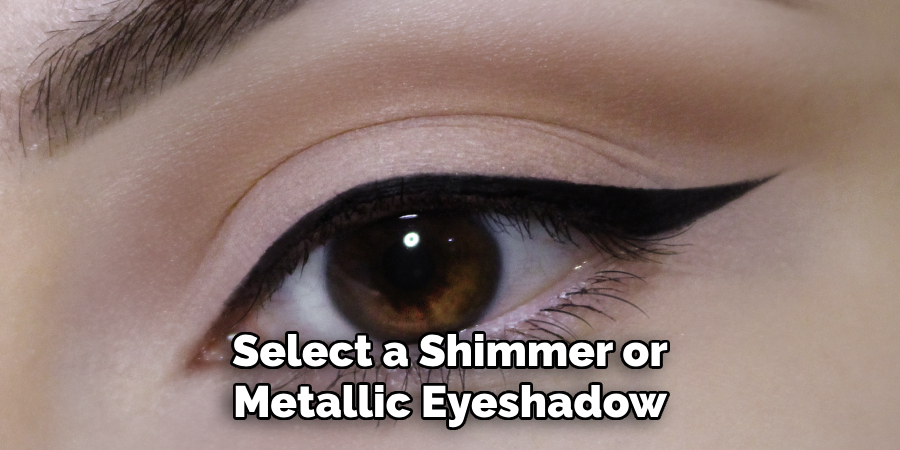
Step 4. Brighten the Lid
To brighten the lid, select a shimmer or metallic eyeshadow in a light, luminous shade—think champagne, gold, or soft rose. Using a flat eyeshadow brush or your fingertip, gently pat the color onto the center of your eyelid, extending it slightly toward the inner corner. This technique enhances the eyes by creating a pop of brightness, making them appear larger and more captivating.
For added dimension, you can layer the shimmer over a damp brush for a more intense, foiled finish. Ensure the edges of the shimmer blend seamlessly with the darker shades applied earlier for a cohesive and polished look.
Step 5. Highlight the Brow Bone
Using a small, precise brush, apply a light, shimmery shade directly underneath the highest point of your brow arch. This step adds lift and definition to your brows, creating a polished and refined appearance. Be careful not to overdo it—blend the highlight gently to avoid harsh lines, ensuring it complements the overall eye makeup look. A subtle shimmer or satin finish works best for a natural yet radiant effect that draws attention to your eyes effortlessly.
Step 6. Line Your Eyes Carefully
Using a steady hand, carefully line your eyes to enhance their shape and make them stand out. Start with a pencil or gel liner, as they offer more control, especially for beginners. Begin at the inner corner of your upper lash line and gently glide the liner outward along the lashes, keeping the line as close to the lash line as possible. For a softer look, smudge the line slightly with a small, angled brush. If you prefer a more dramatic effect, opt for liquid eyeliner to create a smooth, bold line or a classic wing. Take your time to ensure both eyes appear balanced and symmetrical.

Step 7. Tightline Your Upper Lash Line
Tightlining your upper lash line is a subtle way to define your eyes and make your lashes look fuller. To do this, use a waterproof pencil eyeliner with a fine tip. Gently lift your eyelid to expose the base of your lashes and carefully apply the liner directly onto the waterline between your lashes. Work in small, controlled strokes to fill in any gaps. This technique gives a natural yet polished finish, perfect for both everyday wear and more sophisticated looks.
Step 8. Skip the Heavy Liner on the Bottom
Heavy eyeliner on the lower lash line can sometimes make your eyes appear smaller or create a harsh look, especially for daytime wear. Instead, opt for a softer approach by using a light touch of eyeshadow or a smudged pencil liner just along the outer third of your lower lash line. This technique helps to subtly define your eyes without overpowering them, maintaining a fresh and balanced appearance. For added brightness, use a nude or white liner on your waterline to make your eyes appear wider and more awake.
Step 9. Curl Your Lashes and Apply Mascara
Using an eyelash curler, gently curl your lashes to open up your eyes and create a lifted effect. Position the curler at the base of your upper lashes, squeeze lightly, and hold for a few seconds before releasing. For an even curl, repeat this process along the length of your lashes as needed.
Once curled, apply a coat of mascara starting from the roots of your lashes and wiggling the wand upward to the tips. This technique ensures each lash is evenly coated, adding both volume and length. For a more dramatic look, layer additional coats as desired, but ensure the mascara does not clump for a polished finish. Don’t forget to coat your lower lashes lightly for balance.
Step 10. Set Your Look
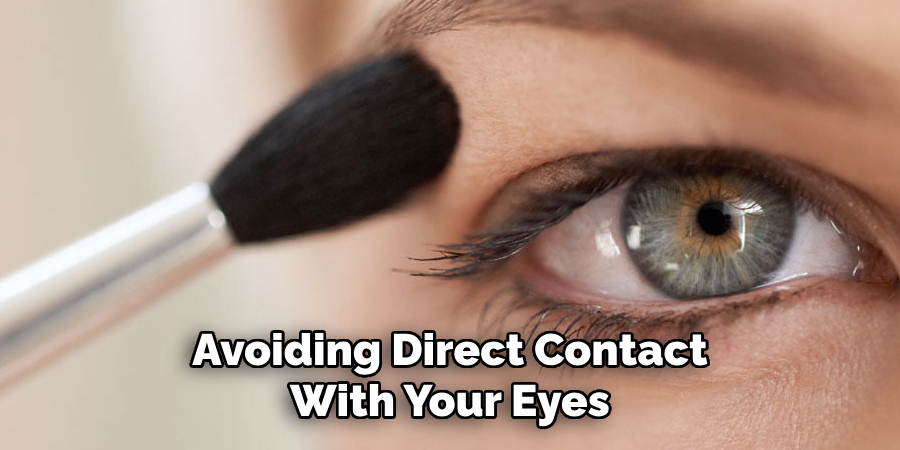
To ensure your makeup stays flawless throughout the day, use a setting spray or powder. Hold the setting spray about 8–10 inches away from your face and mist it evenly, avoiding direct contact with your eyes. If you prefer setting powder, use a fluffy brush to lightly dust it over areas prone to shine, such as your T-zone. This step locks your makeup in place, reduces smudging, and helps maintain a fresh, natural finish, leaving you ready to face the day with confidence.
By following these steps, you can create a makeup look that flatters hooded eyes and enhances your natural beauty.
Conclusion
How to makeup hooded eyes involves understanding your unique eye shape and learning how to enhance it with strategic techniques.
From focusing on a defined crease to using light and dark shades for added dimension, each step works together to create a flattering and balanced look. By practicing and experimenting, you can discover what works best for you, allowing your natural beauty to shine while showcasing your creativity.
With the right tools, products, and methods, achieving stunning makeup looks for hooded eyes is entirely within your reach.
About the Author
Jane Hubbard is a passionate beauty expert with a wealth of experience in makeup, hair, and overall beauty techniques. After years of working as a hairdresser specialist, she followed her entrepreneurial spirit and started her own consultancy business.
Jane has always been driven by her desire to help others feel confident in their own skin, and she does this by sharing her knowledge, experiences, and practical beauty tips. Through her consultancy, she empowers individuals to embrace their unique beauty, offering tailored guidance that boosts both self-esteem and personal style.
Professional Focus
- Specializes in makeup, hairstyling, and beauty consulting.
- Provides personalized beauty advice, tips, and techniques to help individuals feel confident in their appearance.
- Dedicated to staying up-to-date with the latest industry trends and developments.
- Passionate about creating a comfortable and empowering experience for every client.
Education History
- University of Craft and Design – Bachelor of Fine Arts (BFA) in Woodworking and Furniture Design
- Woodworking Apprenticeships – Extensive hands-on training with skilled craftsmen to refine carpentry and furniture making techniques
- Online Courses & Masterclasses – Continued education in advanced woodworking techniques, design principles, and specialized tools
Expertise:
- Makeup artistry, hairstyling, and beauty consulting.
- Personalized beauty techniques to enhance confidence and self-expression.
- Educating clients on how to maintain their beauty routines at home.