
Achieving that perfect, salon-quality hair color at home or in the salon depends heavily on one crucial step: the mix.
For professionals and enthusiasts who rely on Redken Color Gels Lacquers, understanding the proper mixing technique is the key to unlocking vibrant, consistent, and long-lasting results.
This guide on how to mix redken color gels will walk you through everything you need to know, from the benefits of this iconic product line to the precise steps for a flawless mix. Properly combining the color and developer ensures the formula works as intended, providing predictable outcomes and beautiful, saturated color every time.
What Will You Need?
Before you begin mixing, gathering all your tools and products is essential for a smooth and efficient process. Having everything on hand prevents interruptions and helps ensure accurate measurements.
- Redken Color Gels Lacquers: The specific shade or shades you have chosen for your formula.
- Redken Pro-Oxide Cream Developer: The recommended developer for Color Gels is 20 Volume (6%). Using the correct developer is critical for optimal results.
- Non-metallic Bowl: Choose based on your preferred application method. A bowl and brush are great for precise techniques, while a bottle is ideal for quick, all-over applications.
- Color Brush: If using the bowl method.
- Digital Bcale: For precise and accurate measurements of color and developer.
- Gloves: To protect your hands from staining and chemical contact.
- Whisk: A small color whisk will help you achieve a smooth, homogenous mixture.
- Cape: To protect clothing.
10 Easy Steps on How to Mix Redken Color Gels
Following these steps will ensure your color is mixed perfectly for predictable and professional results.
Step 1: Prepare Your Workspace
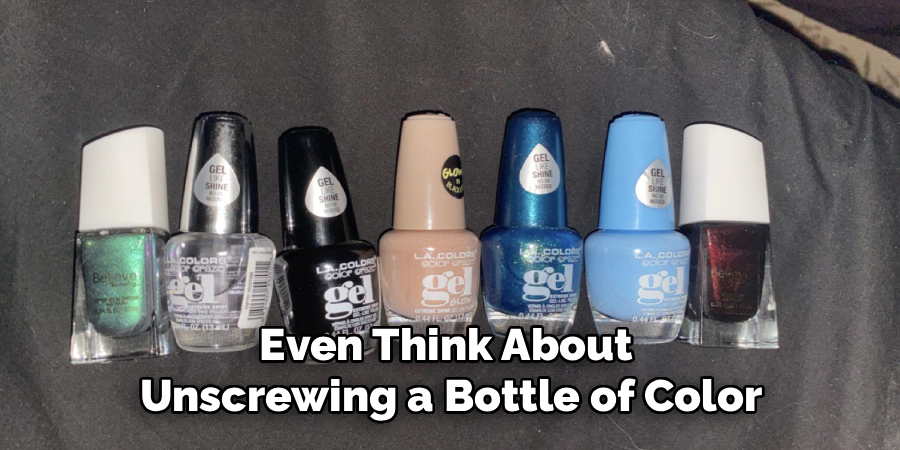
Before you even think about unscrewing a bottle of color, the first step is to create an organized and clean environment. A well-prepared station prevents cross-contamination, minimizes mess, and makes the entire process more efficient. Start by protecting your surfaces with a color-proof cape, an old towel, or a plastic covering. Next, assemble all your tools so they are within easy reach. You will need a non-metallic bowl or an applicator bottle, a color brush (if using a bowl), a color whisk, protective gloves, and, most importantly, a digital scale. Having everything ready eliminates the need to scramble for supplies with color-covered gloves, ensuring a smooth and professional workflow from start to finish.
Step 2: Select Your Redken Color Gels, Lacquers Shades
With your station prepared, it’s time to choose your color. Whether you’re working with a single shade for a uniform look or creating a custom blend, have your formula decided before you begin dispensing product. If you plan to mix shades—for example, to add warmth, cool down a tone, or enhance gray coverage by including an NN series shade—determine the exact ratio for each color. This foresight is critical for recreating the color in the future and for ensuring your final result matches your vision. Double-check your chosen shades and have the tubes or bottles ready.
Step 3: Put on Your Protective Gloves
This step is non-negotiable. Always put on your gloves before handling any chemical hair products. Hair color and developer can cause skin irritation or, in some cases, allergic reactions. Gloves also protect your hands and fingernails from stubborn stains that can be difficult to remove. Choose well-fitting nitrile or latex gloves that allow for good dexterity, so you can handle your tools and products without fumbling. Make this the first thing you do before touching any color or developer.
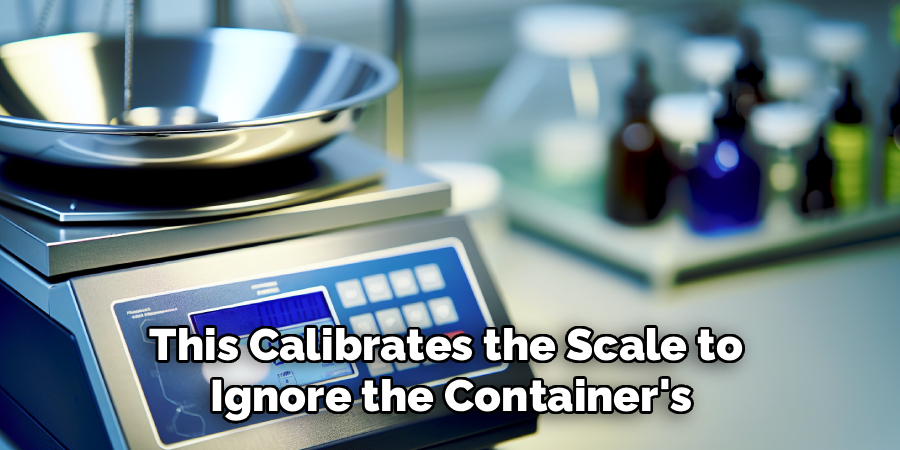
Step 4: Accurately Measure Your Color
Precision is the cornerstone of predictable hair color. Place your non-metallic bowl or applicator bottle on the digital scale and press the “tare” or “zero” button. This calibrates the scale to ignore the container’s weight, allowing you to measure only the product. Carefully squeeze the required amount of Redken Color Gels Lacquers into the container, watching the scale closely. Avoid “eyeballing” your measurements. Even a small deviation can alter the final tone and coverage. If you are mixing multiple shades, take the scale after adding each color to ensure each part of your formula is measured accurately.
Step 5: Understand the 1:1 Mixing Ratio
Redken Color Gels Lacquers are designed to be mixed in a straightforward 1:1 ratio with the developer. This means you must use an equal volume of developer to the total volume of color. For instance, if you have measured out 2 ounces (or 60 grams) of color, you will need exactly 2 ounces (or 60 grams) of developer. Adhering to this ratio is critical for the chemical reaction to occur correctly, enabling proper lift, deposit, and longevity of the color.
Step 6: Measure Your Redken Pro-Oxide Developer
With your color already measured in the bowl on the scale, it’s time to add the developer. Do not tear the scale again. You will add the Redken 20 Volume Pro-Oxide Cream Developer directly to the color until the scale reaches double the weight of the color. For example, if you started with 60g of color, you will slowly pour in the developer until the scale reads 120g. Using the designated 20 Volume Pro-Oxide is crucial, as it’s formulated to work in perfect synergy with the Color Gels Lacquers to achieve optimal results.
Step 7: Begin Combining the Color and Developer
Now that both components are in the container, it’s time to mix. If you are using a bowl, use a small color whisk for the most effective blending. A whisk is superior to a brush for this task because it incorporates the ingredients more quickly and thoroughly. If you are using an applicator bottle, ensure the cap is screwed on tightly and begin shaking it vigorously. The goal is to start the process of creating a single, uniform substance.

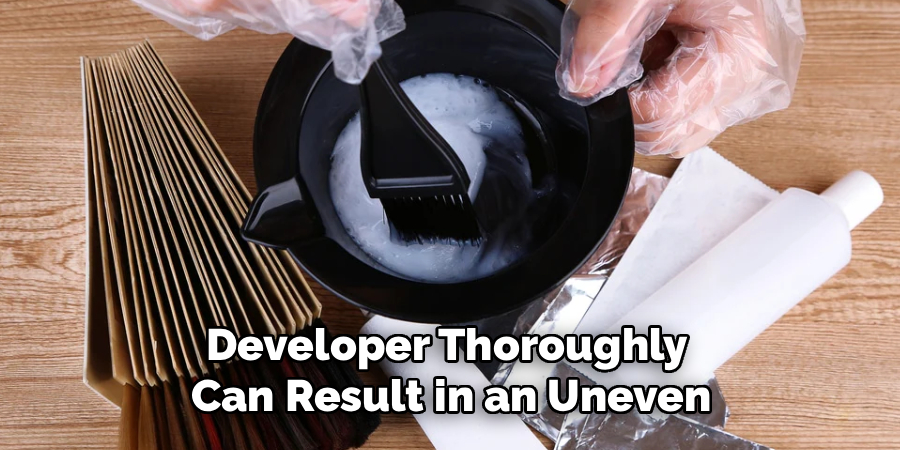
Step 8: Whisk or Shake Until Completely Homogeneous
This is arguably the most critical part of the physical mixing process. Continue whisking or shaking until the mixture is perfectly smooth and has a consistent texture and color. Look for any streaks of unmixed color or developer, which can appear as lighter or darker swirls. These pockets of unblended product will process differently on the hair, leading to splotchy, uneven results. Take an extra 30-60 seconds to ensure the formula is flawlessly combined. A well-mixed formula is the key to a professional, high-quality color result.
Step 9: Evaluate the Final Consistency
Once mixed, your Redken Color Gels Lacquers formula should have a rich, gel-like consistency. It should be thick enough to cling to the brush and hair without dripping, yet fluid enough to spread easily and saturate the hair strands completely. This ideal texture ensures a clean application, whether you are performing a precise root touch-up or a full global color. If the mixture feels too thin or thick, double-check your measurements, as this could indicate an incorrect ratio.
Step 10: Apply the Mixture Immediately
The clock starts ticking the moment the developer meets the color. The oxidation process, which activates the dye molecules, begins instantly. To achieve the most potent and effective results, you must apply the mixed color to the hair immediately. Letting the formula sit in the bowl for an extended period will cause it to lose its lifting and depositing power, resulting in a duller color, diminished vibrancy, and poor gray coverage. A swift transition from mixing to application ensures you harness the formula’s maximum potential.
By following these steps and techniques, you can achieve vibrant and long-lasting hair color results with ease.
5 Things You Should Avoid
To ensure the best possible outcome, be mindful of these common pitfalls.
- Using a Metal Bowl or Tools: Never use metal bowls, whisks, or clips when mixing or applying hair color. Metal can react with the chemicals in the color formula, altering its effectiveness and potentially causing unexpected results.
- Eyeballing Measurements: Guessing the amounts of color and developer is a recipe for inconsistency. Always use a scale or measuring beaker to ensure you adhere to the correct 1:1 ratio for predictable and reliable color.
- Using the Wrong Developer: Redken Color Gels are formulated to work specifically with Redken Pro-Oxide Cream Developer. Using a different brand or volume of developer can compromise the color result, affecting the lift, tone, and longevity.
- Mixing in Advance: Do not mix your color until you are ready to apply it. The oxidation process starts immediately, and letting the mixture sit for too long will reduce its potency, leading to less vibrant color and poor gray coverage.
- Under-mixing the Formula: Failing to mix the color and developer thoroughly can result in an uneven application. Pockets of unmixed product can lead to splotchy color, so take the extra minute to ensure your mixture is perfectly smooth.
Conclusion
Mastering how to mix redken color gels is a fundamental skill for anyone serious about achieving professional-grade hair color.
By following the correct 1:1 ratio, using the right tools, and avoiding common mistakes, you set the foundation for a flawless application. The process is straightforward but requires precision.
With the right preparation and technique, you can confidently create beautiful, vibrant, and long-lasting color results every single time.
About the Author
Jane Hubbard is a passionate beauty expert with a wealth of experience in makeup, hair, and overall beauty techniques. After years of working as a hairdresser specialist, she followed her entrepreneurial spirit and started her own consultancy business.
Jane has always been driven by her desire to help others feel confident in their own skin, and she does this by sharing her knowledge, experiences, and practical beauty tips. Through her consultancy, she empowers individuals to embrace their unique beauty, offering tailored guidance that boosts both self-esteem and personal style.
Professional Focus
- Specializes in makeup, hairstyling, and beauty consulting.
- Provides personalized beauty advice, tips, and techniques to help individuals feel confident in their appearance.
- Dedicated to staying up-to-date with the latest industry trends and developments.
- Passionate about creating a comfortable and empowering experience for every client.
Education History
- University of Craft and Design – Bachelor of Fine Arts (BFA) in Woodworking and Furniture Design
- Woodworking Apprenticeships – Extensive hands-on training with skilled craftsmen to refine carpentry and furniture making techniques
- Online Courses & Masterclasses – Continued education in advanced woodworking techniques, design principles, and specialized tools
Expertise:
- Makeup artistry, hairstyling, and beauty consulting.
- Personalized beauty techniques to enhance confidence and self-expression.
- Educating clients on how to maintain their beauty routines at home.