
Your skin is constantly renewing itself, shedding millions of dead skin cells daily to make way for fresh, healthy new ones. However, sometimes this natural process needs a gentle helping hand to reveal the smooth, radiant complexion hiding beneath the surface. Natural exfoliation offers a safe, effective way to remove buildup without harsh chemicals or expensive treatments.
Learning how to naturally exfoliate face skin empowers you to achieve professional-level results using ingredients you likely already have in your kitchen pantry. Unlike commercial scrubs loaded with synthetic abrasives and artificial fragrances, natural exfoliants work harmoniously with your skin’s biology while providing nourishing benefits.
Whether you’re dealing with dull skin, clogged pores, or simply want to maintain a healthy glow, natural exfoliation can transform your complexion while respecting your skin’s delicate balance.
Why Natural Face Exfoliation Matters
Natural exfoliation offers significant advantages over harsh chemical alternatives, making it an essential component of any healthy skincare routine. Regular removal of dead skin cells improves product absorption, allowing moisturizers and serums to penetrate deeper and work more effectively. Natural ingredients provide gentle yet effective exfoliation while delivering vitamins, minerals, and antioxidants that nourish and protect your skin.
Unlike synthetic scrubs that can cause micro-tears and irritation, natural exfoliants respect your skin’s protective barrier while promoting healthy cell turnover and circulation for a naturally radiant complexion.
8 Step-by-Step Guide: How to Naturally Exfoliate Face
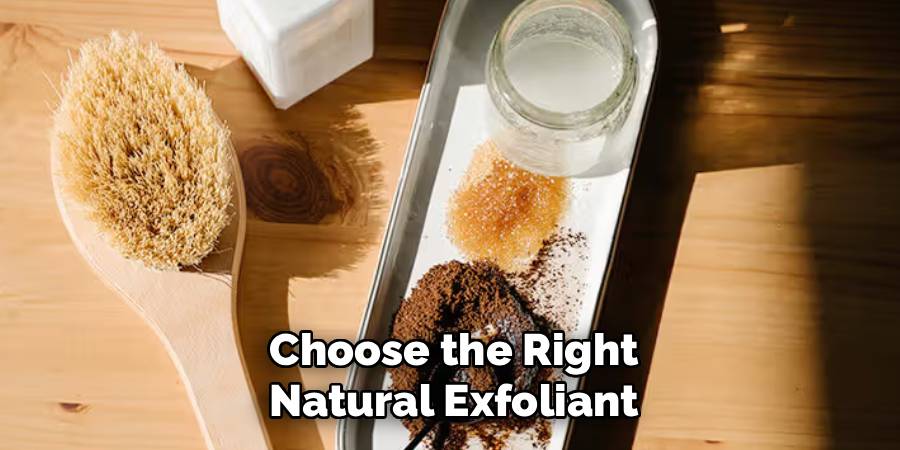
Step 1: Choose the Right Natural Exfoliant for Your Skin Type
Selecting an appropriate natural exfoliant depends on your skin’s specific needs and sensitivity level. Oily or acne-prone skin benefits from slightly more abrasive options like brown sugar or ground oatmeal, which help unclog pores and control excess sebum production. Sensitive or dry skin types should opt for gentler alternatives such as finely ground almonds or rice powder, which provide effective exfoliation without causing irritation.
Normal skin can handle medium-textured exfoliants like white sugar or baking soda mixed with honey. Consider your skin’s current condition, avoiding aggressive exfoliants if you’re experiencing active breakouts or inflammation. Always perform a patch test on your inner wrist before applying any new natural ingredient to your face to ensure compatibility.
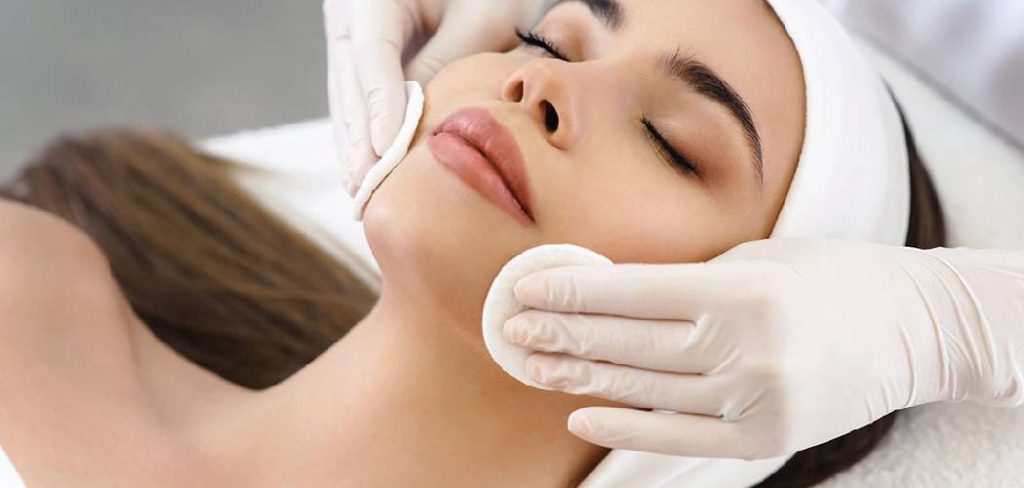
Step 2: Prepare Your Skin for the Exfoliation Process
Start by thoroughly cleansing your face with lukewarm water and a gentle cleanser to remove makeup, dirt, and surface impurities. Pat your skin dry with a clean towel, leaving it slightly damp to help the exfoliant adhere better and prevent excessive friction during application. Remove any hair accessories or jewelry that might interfere with the treatment, and consider pulling your hair back to keep it away from your face.
Examine your skin closely in good lighting to identify areas that need extra attention, such as rough patches around the nose or chin. Create a comfortable environment by ensuring good lighting and having clean towels within easy reach. This preparation phase sets the foundation for an effective and safe exfoliation experience.
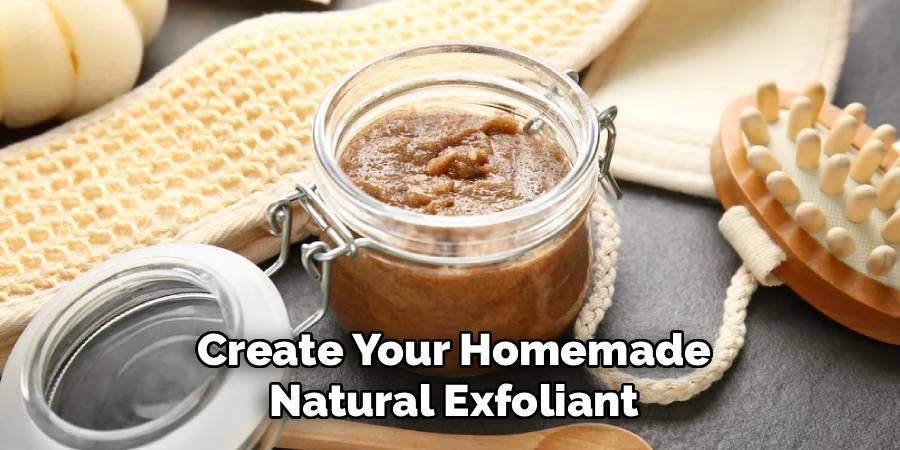
Step 3: Create Your Homemade Natural Exfoliant
Combine your chosen dry exfoliant with a nourishing liquid base to create an effective scrub mixture. Popular combinations include brown sugar with honey and lemon juice for oily skin, or oatmeal with milk and honey for sensitive skin types. Start with approximately one tablespoon of your dry ingredient and add liquid gradually until you achieve a paste-like consistency that’s neither too thick nor too runny.
The mixture should hold together while remaining spreadable and gentle on your skin. Consider adding a drop of essential oil like tea tree for acne-prone skin or lavender for sensitive skin, but avoid this step if you have known sensitivities. Mix thoroughly to ensure even distribution of all ingredients before application.
Step 4: Apply the Natural Exfoliant Using Proper Technique
Begin application by taking a small amount of your homemade scrub on clean fingertips and gently spreading it across your face in upward, circular motions. Start with less pressure than you think you need, as natural exfoliants can be more effective than anticipated.
Focus on areas prone to buildup like the T-zone, chin, and around the nose, while being extra gentle around the delicate eye area. Work the exfoliant into your skin for 30-60 seconds, allowing the natural ingredients to dissolve dead skin cells and stimulate circulation. Avoid scrubbing too vigorously or for too long, as this can cause irritation and redness. Pay attention to how your skin feels throughout the process, stopping immediately if you experience any discomfort or stinging sensations.
Step 5: Massage Gently to Maximize Benefits
Continue massaging the natural exfoliant in small, gentle circles, spending extra time on rough or congested areas that need additional attention. This massage action stimulates blood circulation, bringing fresh nutrients to the skin’s surface while helping the exfoliating particles work more effectively. Use light pressure and focus on the texture of your skin, noticing how it becomes smoother under your fingertips.

Spend approximately 1-2 minutes on this massage phase, ensuring you cover all areas of your face except the immediate eye area. The massaging motion helps natural ingredients penetrate slightly deeper while promoting lymphatic drainage and reducing puffiness. Understanding how to naturally exfoliate face effectively includes mastering this gentle massage technique that maximizes results without causing damage.
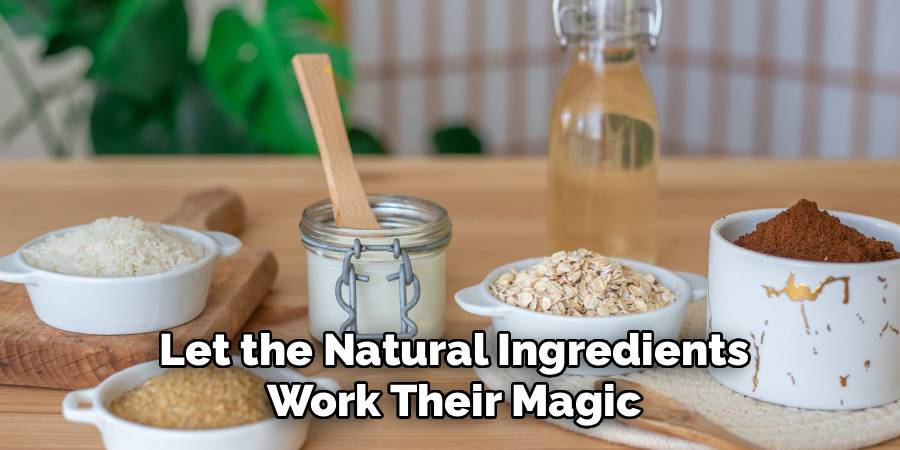
Step 6: Let the Natural Ingredients Work Their Magic
Allow the natural exfoliant to remain on your skin for an additional 2-3 minutes after completing the massage phase. This resting period lets beneficial ingredients like honey, fruit acids, or milk continue working to soften and nourish your skin. During this time, you might feel a slight tingling sensation as natural acids gently dissolve dead skin cells, which is completely normal for most people.
Use this moment to relax and enjoy the therapeutic benefits of your homemade treatment. Avoid touching or manipulating the mixture during this waiting period, as this can disrupt the process and potentially cause irritation. If you experience any burning or excessive discomfort, rinse immediately rather than waiting the full time period.
Step 7: Rinse Thoroughly with Cool Water
Remove the exfoliant using lukewarm to cool water, gently splashing your face repeatedly until all traces are completely gone. Use your hands to help remove stubborn particles, but avoid rubbing or scrubbing during the removal process. Cool water helps close pores and soothes any mild irritation that may have occurred during exfoliation.
Take your time with this step, ensuring no natural ingredients remain on your skin, as leftover particles can cause irritation or clogged pores. Pat your skin dry with a clean, soft towel using gentle pressing motions rather than rubbing. Your skin should feel noticeably smoother and appear brighter after proper removal of the natural exfoliant.

Step 8: Apply Appropriate Post-Exfoliation Care
Immediately after exfoliation, apply a gentle, hydrating moisturizer to replenish your skin’s moisture barrier and protect the newly revealed skin cells. Choose products without harsh chemicals or fragrances that could irritate freshly exfoliated skin. Consider using natural options like aloe vera gel, jojoba oil, or a simple moisturizer with ceramides to support skin recovery. Apply sunscreen if you’re exfoliating during the day, as fresh skin can be more sensitive to UV damage.
Avoid using other active ingredients like retinoids or acids for 24-48 hours after natural exfoliation to prevent over-processing your skin. This post-care routine ensures your skin remains healthy and hydrated while maximizing the benefits of your natural exfoliation treatment.
Monitor Your Skin’s Response
Observe how your skin responds to natural exfoliation over the next 24-48 hours, noting any changes in texture, appearance, or sensitivity levels. Most people can safely perform natural exfoliation 1-2 times per week, but this frequency may vary based on skin type and the intensity of your chosen method.
Oily skin types might tolerate more frequent treatments, while sensitive skin may require longer intervals between sessions. Watch for signs of over-exfoliation such as persistent redness, increased sensitivity, or excessive dryness, and adjust your routine accordingly. Keep a simple skin journal to track which natural ingredients work best for your skin and which combinations should be avoided in the future.
Frequently Asked Questions (FAQs)
How Often Should I Naturally Exfoliate My Face?
Most skin types benefit from natural exfoliation 1-2 times per week, though this varies based on individual skin sensitivity and the exfoliant used. Oily or acne-prone skin may tolerate 2-3 times weekly, while sensitive or dry skin should limit treatments to once weekly or every 10 days. Start conservatively with once per week and gradually increase frequency if your skin responds well. Signs of over-exfoliation include persistent redness, increased sensitivity, or excessive dryness.
What Are The Best Natural Ingredients For Face Exfoliation?
Effective natural exfoliants include brown sugar for oily skin, oatmeal for sensitive skin, baking soda for deep cleansing, and ground almonds for gentle daily use. Rice powder provides mild exfoliation suitable for most skin types. Honey acts as both a gentle exfoliant and moisturizer. Coffee grounds work well for body exfoliation but may be too harsh for facial skin. Always choose finely ground ingredients and avoid anything with sharp or irregular particles that could damage delicate facial skin.
Can I Use Lemon Juice As A Natural Exfoliant?
Lemon juice contains natural alpha hydroxy acids that provide chemical exfoliation, making it effective for removing dead skin cells. However, it can be quite acidic and potentially irritating, especially for sensitive skin types. Always dilute lemon juice with honey or water, and never use it before sun exposure as it can increase photosensitivity. Perform a patch test first, and discontinue use if you experience burning or excessive irritation. Consider gentler alternatives like honey or milk for regular use.
Is Natural Exfoliation Safe For Acne-Prone Skin?
Natural exfoliation can benefit acne-prone skin by removing dead cells that clog pores, but requires careful ingredient selection and gentle technique. Avoid harsh scrubs that can spread bacteria or irritate inflamed areas. Oatmeal, honey, and finely ground sugar are generally safe options. Never exfoliate active breakouts or inflamed acne, as this can worsen the condition. Focus on gentle, consistent treatments rather than aggressive scrubbing. If you have severe acne, consult a dermatologist before adding exfoliation to your routine.
What Should I Avoid When Making Natural Face Exfoliants?
Avoid ingredients with sharp or irregular edges like crushed walnut shells, apricot pits, or coarse salt, which can create micro-tears in facial skin. Don’t use citrus peels or highly acidic ingredients without proper dilution. Avoid essential oils if you have sensitive skin or known allergies. Never mix baking soda with acidic ingredients like lemon juice, as this neutralizes both components. Skip ingredients you’re allergic to, even if they’re considered “natural.” Always patch test new combinations before full facial application.
Conclusion
Mastering how to naturally exfoliate face skin opens the door to healthier, more radiant skin using simple, accessible ingredients from your own kitchen. This gentle approach respects your skin’s natural balance while effectively removing dead cells and revealing the smooth, glowing complexion beneath.
Remember that consistency and gentleness are more important than intensity when it comes to effective exfoliation. Start slowly, listen to your skin’s responses, and adjust your routine as needed. Natural exfoliation should never cause pain or excessive irritation – if it does, reduce frequency or switch to gentler ingredients.
About the Author
Jane Hubbard is a passionate beauty expert with a wealth of experience in makeup, hair, and overall beauty techniques. After years of working as a hairdresser specialist, she followed her entrepreneurial spirit and started her own consultancy business.
Jane has always been driven by her desire to help others feel confident in their own skin, and she does this by sharing her knowledge, experiences, and practical beauty tips. Through her consultancy, she empowers individuals to embrace their unique beauty, offering tailored guidance that boosts both self-esteem and personal style.
Professional Focus
- Specializes in makeup, hairstyling, and beauty consulting.
- Provides personalized beauty advice, tips, and techniques to help individuals feel confident in their appearance.
- Dedicated to staying up-to-date with the latest industry trends and developments.
- Passionate about creating a comfortable and empowering experience for every client.
Education History
- University of Craft and Design – Bachelor of Fine Arts (BFA) in Woodworking and Furniture Design
- Woodworking Apprenticeships – Extensive hands-on training with skilled craftsmen to refine carpentry and furniture making techniques
- Online Courses & Masterclasses – Continued education in advanced woodworking techniques, design principles, and specialized tools
Expertise:
- Makeup artistry, hairstyling, and beauty consulting.
- Personalized beauty techniques to enhance confidence and self-expression.
- Educating clients on how to maintain their beauty routines at home.