
Are you always left disappointed with your manicures? Do they chip too soon, leaving behind unsightly and uneven nails that don’t look fresh or professional? Well, the key to achieving a long-lasting manicure – one that is chip-free for days – lies in how well you prep your nails before polishing.
Preparing is essential in order for the nail polish to adhere properly and achieve optimal results. In this article, we will discuss step-by-step instructions on how to prep nails for nail polish.
Step-by-Step Guidelines on How to Prep Nails for Nail Polish
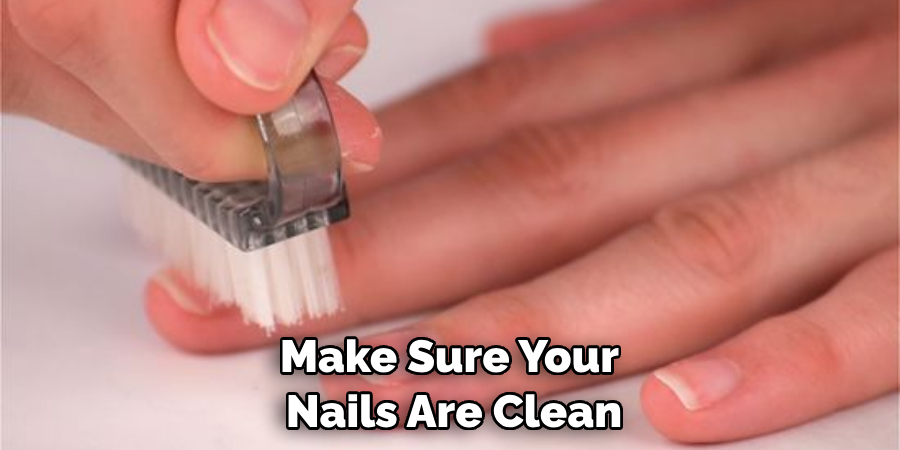
Step 1: Start With Clean Nails
Before you begin the process of prepping your nails, make sure they are clean and free from any traces of oil or dirt. To do this, wash your hands with warm water and soap and dry them thoroughly. Starting with clean nails is the key to a successful and long-lasting manicure. If you don’t properly clean your nails, the oil and dirt present on them will prevent the nail polish from adhering to them.
Step 2: File Your Nails
Using a nail file, shape and smooth out your nails into the desired shape. This could be squoval, round or square – whatever you prefer! Make sure to file gently and in one direction only. Filing your nails will help the nail polish adhere better as it removes any rough edges, bumps, or imperfections on the nail.
Step 3: Buff Your Nails
Using a buffer block, buff your nails in circular motions until they feel smooth. Buffing helps get rid of any excess oils or dirt present on the nails, allowing for a better bond between your nail and the polish. You don’t want to overdo this step, as it can make your nails too porous and prone to peeling or chipping.
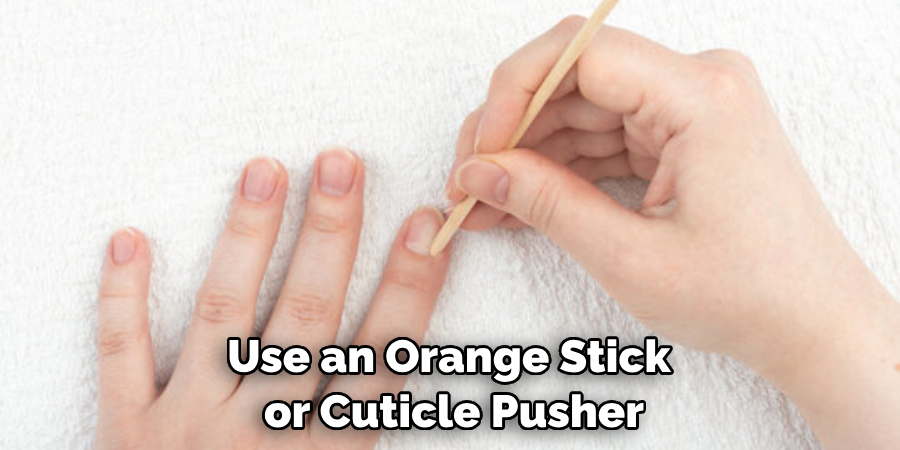
Step 4: Push Back Your Cuticles
Using a cuticle pusher, gently push back any excess skin around the base of your nails. Doing so will help give you a more professional-looking manicure as it gives you greater control over the application of your polish. Using an orange stick can also help to further neaten up the cuticles around your nails.
Step 5: Apply a Base Coat
Now that you have prepped your nails, it’s time to apply a base coat. A base coat helps give the nail polish something to adhere to and increases its longevity. Make sure to apply a thin, even layer of the base coat and let it dry completely before moving on to the next step. While it may seem like an unnecessary step, the base coat is actually essential if you want your manicure to last longer.
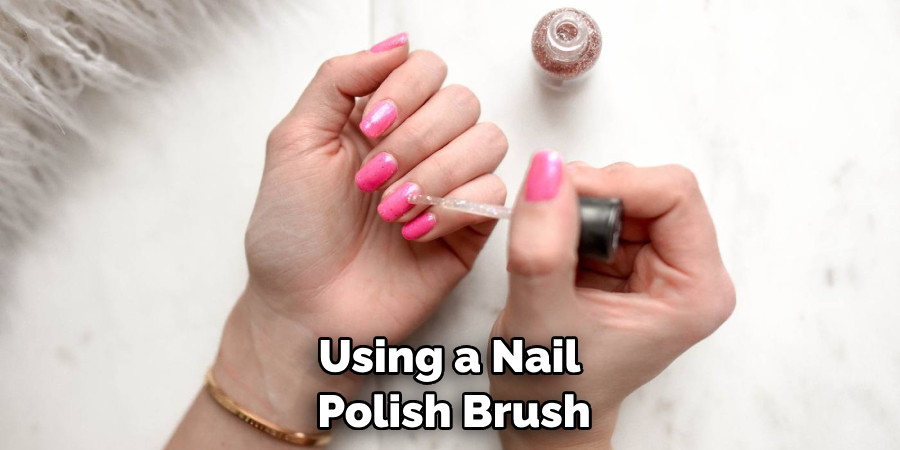
Step 6: Apply Your Nail Polish
Once your base coat is dry, it’s time for the fun part! Using a nail polish brush, carefully apply an even layer of your favorite color and let it dry completely. For best results, it’s recommended that you wait 2-3 minutes between coats. In this way, you can avoid the polish from smudging or pooling.
Step 7: Finish with a Top Coat
Once your color has completely dried, it’s time to apply the top coat! Doing so will help seal in and protect your color for a longer-lasting manicure. Once the topcoat is dry, you can go ahead and admire your beautiful nails!
Following these seven steps will ensure a successful and long-lasting manicure. Remember to start with clean nails, shape them with a nail file, and buff and push back cuticles before applying a base coat of polish. After that’s done, apply an even layer of your chosen color, let dry completely and seal it all with a top coat. With these steps in mind, you’re sure to have a beautiful manicure in no time!
Additional Tips and Tricks to Prep Nails for Nail Polish
1. Use a cuticle cream before starting your manicure and push back the cuticles with an orange stick. This will help remove any dead skin cells from around the nail bed.
2. Clean away any dirt, dust, or oils that may be on the nails by using nail polish remover to wipe them down. It is important to make sure your nails are clean and free of debris before painting them.
3. Use a nail buffer to smooth out the ridges on each nail, creating a flat surface for you to apply polish. Buffing also helps create shine and leaves a smooth surface that will show off the color best.
4. Once your nails are prepped, apply a base coat to each nail. This will help the polish stick better and last longer.
5. When choosing your polish, choose colors that complement your skin tone or outfit for the day. Apply two coats of the color you’ve chosen and allow them to fully dry before applying a topcoat.
6. Lastly, use a top coat to seal in the color and give your nails an extra bit of shine. This will also help to protect your manicure from chipping or peeling over time.
Following these tips and tricks will help ensure that your manicure stays looking great all day long! Happy painting!
Things You Should Consider in Preparing Nails for Nail Polish
1. Make sure your nails are clean, dry, and free of any old polish. Begin your manicure by washing your hands with soap and warm water and then dry them thoroughly. Use a cotton ball soaked in nail polish remover to remove any existing nail polish or residue from around the edges of the nails.
2. Shape your nails. Use a nail file or clipper to shape your nails in the desired manner—whether that’s square, oval, or rounded. Be careful not to over-file as it can weaken the nail structure and cause splits.
3. Moisturize your cuticles. Cuticle oil provides essential nutrients for healthier nails and helps to prevent cracking and splitting. Gently massage the cuticles to soften them before pushing them back and removing any excess skin with a cuticle stick.
4. Use a base coat. A base coat forms a protective barrier between your nails and the nail polish, helping it last longer. Make sure to let your base coat dry before applying nail polish.
5. Apply the color of your choice. Choose a nail polish that you are comfortable with and apply it in thin, even layers. Use a brush to make sure the edges of the nails are painted evenly. Let each coat dry before applying the next one, and finish off with a top coat for extra shine and long-lasting polish.
6. Let your nails dry completely. Give your nails some time to air-dry before resuming any activities that will expose them to water or harsh chemicals, as this can cause the nail polish to chip or fade quickly.
7. Take care of your nails. To keep your nails looking healthy and beautiful, avoid using harsh cleaning products or exposing them to water for long periods of time. Additionally, use a nail strengthener or a hardener if necessary to maintain strong and healthy nails. Make sure to give yourself regular manicures to nourish and protect the nails from damage.
With these considerations in mind, you are now ready to prepare your nails for nail polish. Remember, taking the time to properly prep your nails will help ensure that your manicure looks its best and lasts longer! Good luck!
Frequently Asked Questions
How Do I Remove Old Nail Polish?
Start by soaking a cotton ball in acetone-based nail polish remover and then use it to wipe away any existing nail polish on your nails. You can also use an orange stick or cuticle pusher to help remove difficult polishes. Once you’ve removed the nail polish, wash your hands and dry them thoroughly.
How Can I Make Nail Polish Last?
There are a few easy tips for making your nail polish last: start with clean, dry nails; use a base coat to protect and nourish your nails; apply thin coats of color or topcoat over the base coat; and finish with a clear topcoat. Additionally, moisturize your hands often and avoid contact with water or chemicals that could cause the polish to chip prematurely.
What Are Some Popular Nail Polish Colors?
Popular nail polish colors vary from season to season, but some perennially popular shades include reds, pinks, blues, purples, whites, blacks, metallics, and glittery colors. Neutral shades like taupe and beige are also popular because they look good on most skin tones.
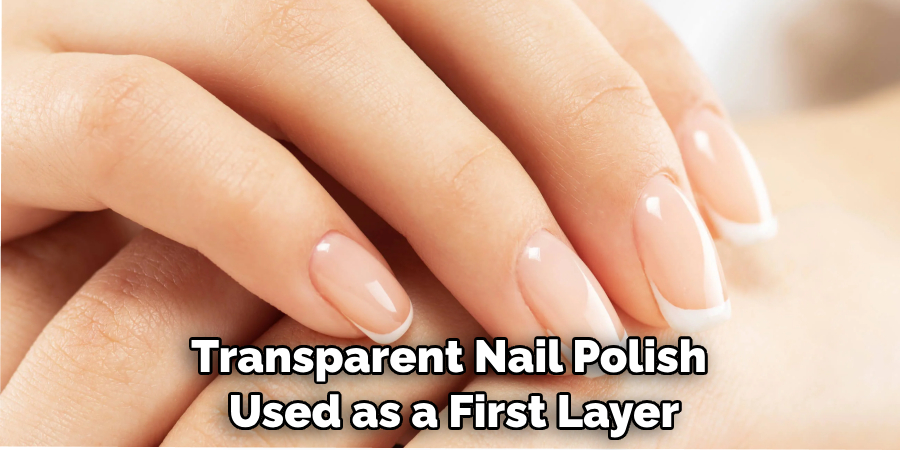
What Is a Base Coat?
A base coat is a transparent nail polish used as a first layer before applying colored polishes. Base coats protect your nails from staining, help the color go on smoothly, and can even increase the longevity of your manicure. Many base coats also contain nourishing oils to keep nails healthy and looking their best.
Conclusion
Knowing how to prep nails for nail polish is important for achieving a beautiful and long-lasting manicure. Start by removing old nail polish, then follow it up with clean, dry nails before applying a base coat to protect your nails. Finish with thin coats of color or topcoat and add a clear topcoat as the final step.
Popular nail polish colors include reds, pinks, blues, purples, whites, blacks, metallics, and glittery colors. Finally, keep your hands moisturized to get the most out of your manicure. With these tips in mind, you’ll be ready to show off a stunning manicure at any time!
About the Author
Jane Hubbard is a passionate beauty expert with a wealth of experience in makeup, hair, and overall beauty techniques. After years of working as a hairdresser specialist, she followed her entrepreneurial spirit and started her own consultancy business.
Jane has always been driven by her desire to help others feel confident in their own skin, and she does this by sharing her knowledge, experiences, and practical beauty tips. Through her consultancy, she empowers individuals to embrace their unique beauty, offering tailored guidance that boosts both self-esteem and personal style.
Professional Focus
Specializes in makeup, hairstyling, and beauty consulting.
Provides personalized beauty advice, tips, and techniques to help individuals feel confident in their appearance.
Dedicated to staying up-to-date with the latest industry trends and developments.
Passionate about creating a comfortable and empowering experience for every client.
Education History
University of Craft and Design – Bachelor of Fine Arts (BFA) in Woodworking and Furniture Design
Woodworking Apprenticeships – Extensive hands-on training with skilled craftsmen to refine carpentry and furniture making techniques
Online Courses & Masterclasses – Continued education in advanced woodworking techniques, design principles, and specialized tools
Expertise:
Makeup artistry, hairstyling, and beauty consulting.
Personalized beauty techniques to enhance confidence and self-expression.
Educating clients on how to maintain their beauty routines at home.