
If you’re a fan of wearing brightly colored or metallic gel nails but don’t know where to start, then this guide is for you! Applying and maintaining a long-lasting manicure with gel polish can be tricky if your natural nails are not adequately prepped.
Fortunately, it doesn’t have to be complicated; with the help of this guide, you’ll learn exactly how to prepare your natural nails for the perfect DIY mani or pedi. From pampering treatments like filing and moisturizing to choosing the best primer for long-term wear and preventing nail damage, here’s everything you need to know about how to prep natural nails for gel polish.
Can You Put Gel Polish on Natural Nails?
The short answer is yes. You can definitely put gel polish on natural nails. In fact, this type of product is designed to be used with both artificial and real nails.
However, it’s important to understand that not all natural nails are created equal, and each person’s nail bed has its own individual needs when it comes to prepping and priming.
Why is It Important to Prepare Your Nails?
When applied correctly, gel polish can last anywhere from two to four weeks without chipping or fading. To achieve longevity, your nails must be adequately prepped so that the product adheres to the nail bed with no air bubbles or other imperfections.
Failing to prep your nails and applying gel polish directly onto natural nails will result in uneven coverage and a manicure that won’t last as long. How you prep your nails for gel polish will determine how well the polish sticks, as well as its lasting power.
Needed Tools and Chemicals
Before getting started on your mani, you’ll need to gather the following supplies:
- Nail file
- Nail buffer
- Cuticle pusher
- Cuticle trimmer/nippers
- Isopropyl alcohol wipes or cotton and nail polish remover
- Primer (optional)
- Gel polish of your choice
10 Steps on How to Prep Natural Nails for Gel Polish
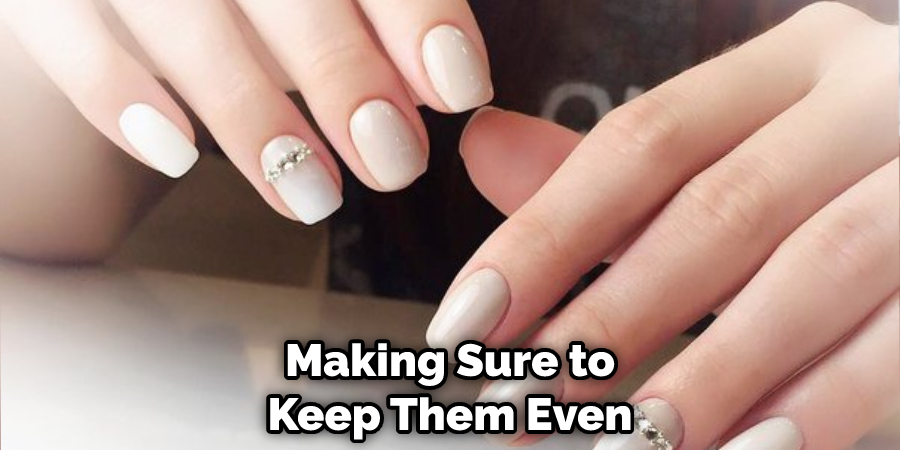
Step 1: File and Shape Your Nails
Use a nail file to shape the edges of your nails, making sure to keep them even. Don’t forget to smooth out any ridges in the middle or sides of your nails. If you don’t want to shape your nails, you can leave them as-is.
Step 2: Buff Your Nails
Using a nail buffer, gently buff the surface of each of your nails. This helps create a textured surface that gel polish will adhere to better than smooth nails. Be sure not to overdo it, as too much buffing will damage your nails.
Step 3: Push Back Your Cuticles
Gently push back your cuticles with a cuticle pusher or orange stick. This helps create a clean canvas to work on and also encourages nail growth. Cuticles protect your nails from bacteria, so be careful not to cut them.
Step 4: Trim Hangnails and Cuticles
If there are any hangnails or extra skin around your nails, use a cuticle nipper to trim them away carefully. This will help ensure that the gel polish doesn’t chip in those areas.
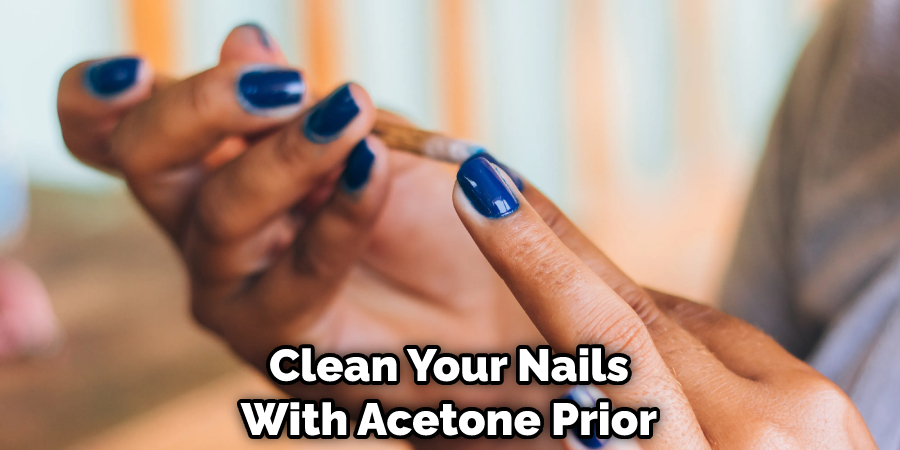
Step 5: Clean Your Nails
Using an alcohol wipe or a cotton ball soaked in nail polish remover, clean each of your nails to remove any oil and dirt. Make sure that the nail bed is completely dry before moving on to the next step.
Step 6: Apply Primer (if needed)
If you’re using a primer, apply it to each of your nails and allow it to dry completely. Primer helps the gel polish adhere better and can also help prevent staining in the long run.
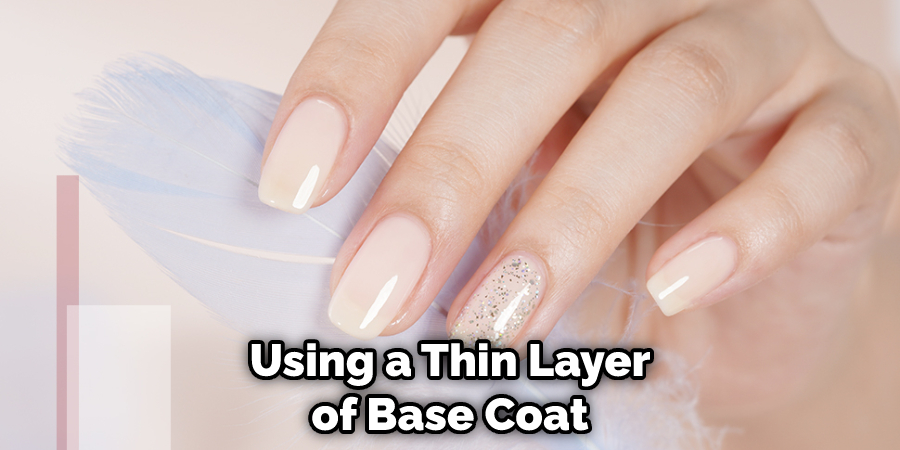
Step 7: Apply Base Coat
Using a thin layer of base coat, apply it to each of your nails and cure it in an LED or UV lamp. This helps protect your nails and also provides a base for the polish to adhere to. The base is essential for a long-lasting manicure.
Step 8: Apply Gel Polish
Apply the gel polish of your choice to each nail and cure it in the lamp for 30 seconds (LED) or two minutes (UV). Make sure you use thin coats and coat the entire nail bed, including the edges and sides.
Step 9: Apply Top Coat
Using a thin layer of top coat, apply it to each nail and then cure in the lamp for 30 seconds (LED) or two minutes (UV). This helps seal in color and gives your manicure extra shine.
Step 10: Clean Nails with Alcohol Wipes
Lastly, clean each of your nails with an alcohol wipe to get rid of any sticky residue left behind. Your nails are now ready for a long-lasting gel manicure!
Following these steps will ensure that you have healthy, prepped natural nails before applying gel polish.
A properly prepped nail bed provides a strong foundation for the polish and helps it last longer. With the right tools and some patience, you can create a salon-worthy mani at home!
5 Tips on How to Make the Gel Polish Last Long
- Make sure to apply a thin and even layer of the product. It will help to ensure that the gel polish will not chip or peel off.
- Wipe your nails with alcohol or a cleansing product before application and after curing. This will help remove any oils or dirt from the surface of the nail, which can interfere with the adhesion of the product.
- Apply a thin layer of topcoat, which will help to seal the gel polish and make it last longer. The topcoat will also give your nails a glossy finish.
- Avoid activities that cause excessive use of your hands, such as washing dishes or cleaning with harsh chemicals. These activities can weaken the bond between the nail and the gel polish, causing it to chip or peel off prematurely.
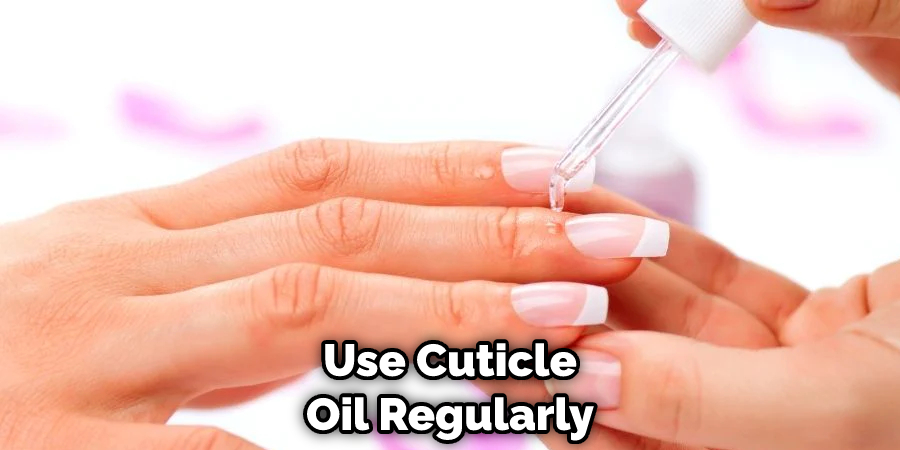
- Use cuticle oil regularly to keep your nails moisturized. This will help to keep your nails healthy and strong and can extend the life of the gel polish.
These tips can help you make sure that the gel polish lasts longer and looks great for a longer period of time. Following these steps when prepping natural nails for gel polish will ensure you get maximum wear and enjoyment out of your manicure.
Frequently Asked Questions
Is It Important to Apply the Base Code?
Yes, it is important to apply the base coat when you are prepping natural nails for gel polish. This helps to protect the nail and helps the nail color adhere better. Additionally, some base coats contain vitamins and minerals that can help improve your nail health.
Do I Need to Use a Buffer?
A buffer can be helpful in prepping natural nails for gel polish, as it helps to smooth the surface of the nail and remove ridges or bumps. However, be sure to use a gentle buffing motion that doesn’t cause excessive pressure on your nails. Buffing motion is important because it helps to distribute the product evenly.
Should I Cut My Nails Beforehand?
It is best to cut your nails before prepping them for gel polish in order to remove any long edges that might interfere with the application process. It’s also important to make sure that your nails are not too short, as this can cause the gel polish to lift or peel off.
Do I Need to Clean My Nails with Acetone?
It is best practice to clean your nails with acetone prior to applying gel polish. This will help remove any oils or dirt on the nail surface, which could affect the adhesion of the gel polish. Removing oil, dirt, and debris will also help the gel polish last longer.
Do I Need to Use a Cuticle Oil?
Using cuticle oil can be beneficial when prepping natural nails for gel polish, as it helps to keep cuticles soft and healthy. This can help the gel polish adhere better to the nail and last longer. Additionally, it can give your nails a nice shine and make them look healthier.
Conclusion
Preparing natural nails for gel polish can seem intimidating at first, but by following a few simple steps, it is definitely doable. Start by ensuring that the cuticles are pushed back and any dust, dirt, or oils are removed with an acetone-soaked cotton pad. Then, buff the nail plate to create adhesion between the natural nail plate and gel polish.
Although some people will omit this step, we highly recommend roughing up the surface of your nails with a 180-grit file – it’ll give your nail technician a clearer canvas on which to lay down their artistry. Finally, remember to apply a thin layer of base coat prior to curing so that your nail salon artist can protect your nails from staining and ensure a longer-lasting manicure experience.
Prioritizing prevention pays off in the long run – by following the steps on how to prep natural nails for gel polish, you’ll be sure to enjoy your glamorous glossy finish for weeks longer!
About the Author
Jane Hubbard is a passionate beauty expert with a wealth of experience in makeup, hair, and overall beauty techniques. After years of working as a hairdresser specialist, she followed her entrepreneurial spirit and started her own consultancy business.
Jane has always been driven by her desire to help others feel confident in their own skin, and she does this by sharing her knowledge, experiences, and practical beauty tips. Through her consultancy, she empowers individuals to embrace their unique beauty, offering tailored guidance that boosts both self-esteem and personal style.
Professional Focus
- Specializes in makeup, hairstyling, and beauty consulting.
- Provides personalized beauty advice, tips, and techniques to help individuals feel confident in their appearance.
- Dedicated to staying up-to-date with the latest industry trends and developments.
- Passionate about creating a comfortable and empowering experience for every client.
Education History
- University of Craft and Design – Bachelor of Fine Arts (BFA) in Woodworking and Furniture Design
- Woodworking Apprenticeships – Extensive hands-on training with skilled craftsmen to refine carpentry and furniture making techniques
- Online Courses & Masterclasses – Continued education in advanced woodworking techniques, design principles, and specialized tools
Expertise:
- Makeup artistry, hairstyling, and beauty consulting.
- Personalized beauty techniques to enhance confidence and self-expression.
- Educating clients on how to maintain their beauty routines at home.