
Are you tired of your lip gloss? Did you apply too much and now it’s messy? Or do you simply want to change up your look? Removing lip gloss can seem like a daunting task.
How to remove lip gloss may seem like a simple task, but doing it properly is essential to keep your lips clean, healthy, and free from residue. Whether you’re looking to switch to a new lip color or end your day with a fresh face, knowing the correct methods to remove lip gloss effectively can prevent irritation and leave your lips feeling soft and hydrated.
With the right tools and a gentle touch, you can ensure your lips stay in perfect condition while fully removing any gloss.
What Will You Need?
To effectively clear lip gloss, you will need the following items:
- A gentle makeup remover or oil-based cleanser
- Cotton pads or a soft washcloth
- Micellar water (optional)
- Lip balm or moisturizer
Once you have these items ready, you can proceed with the following steps.
10 Easy Steps on How to Remove Lip Gloss
Step 1: Prepare Your Supplies
Before starting, gather all the necessary items listed above to ensure a smooth and hassle-free process. Place them within easy reach—this avoids interruptions and ensures an efficient routine. If you’re using an oil-based cleanser or micellar water, ensure you have a clean cotton pad or washcloth ready to apply it. Additionally, choose a gentle lip balm or moisturizer to rehydrate your lips post-removal. Taking a moment to set up everything beforehand will make the process quicker and more effective.
Step 2: Apply the Makeup Remover or Oil-Based Cleanser
Using clean hands, take a small amount of your chosen makeup remover or oil-based cleanser and gently apply it to your face. Focus on areas with heavier makeup, such as the eyes and lips, using a soft, circular motion.
Be careful not to rub too hard, as this can irritate your skin. For eye makeup, close your eyes and use your fingertips or a cotton pad soaked with the remover, gently wiping from the inner to the outer corner of your eyes. This ensures that stubborn mascara or eyeliner dissolves effectively without causing discomfort. Take your time during this step to thoroughly break down all makeup for a complete and gentle removal.
Step 3: Gently Massage the Lips
Using a clean finger or a soft, damp cloth, gently massage your lips in small, circular motions. This process helps to enhance blood circulation while removing any remaining residue or dry skin. Be sure to use a light touch to avoid irritation or discomfort. If desired, you can apply a lip scrub or nourishing balm during this step to leave your lips feeling soft and hydrated. Take a moment to thoroughly care for your lips before proceeding to the next stage of your routine.
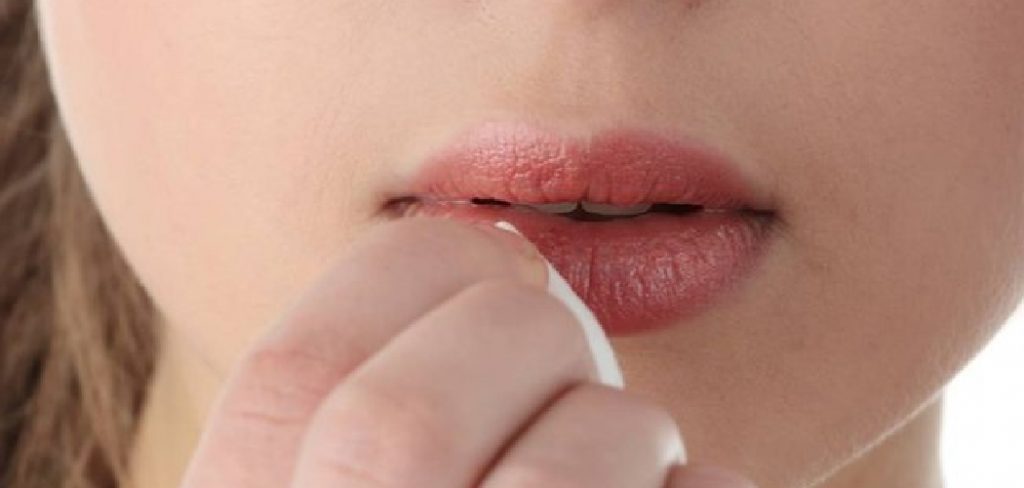
Step 4: Wipe Off the Gloss
Using a clean tissue or cotton pad, gently pat your lips to remove the excess gloss. Avoid rubbing harshly, as this could irritate your lips. Instead, use a gentle blotting motion to apply the product uniformly. If needed, apply a damp cotton pad for a more thorough clean, especially if the gloss has a sticky texture. This step ensures your lips are prepped and ready for the next application or treatment in your routine.
Step 5: Rinse and Cleanse
Once the gloss has been removed, rinse your lips with lukewarm water to ensure no residue is left behind. Gently pat them dry with a soft towel, avoiding any rough motions that might cause discomfort. For an added layer of cleansing, you can use a mild makeup remover or a gentle facial cleanser, ensuring the product is safe for use around the lips. This step leaves your lips feeling fresh, clean, and ready for further care or makeup application.
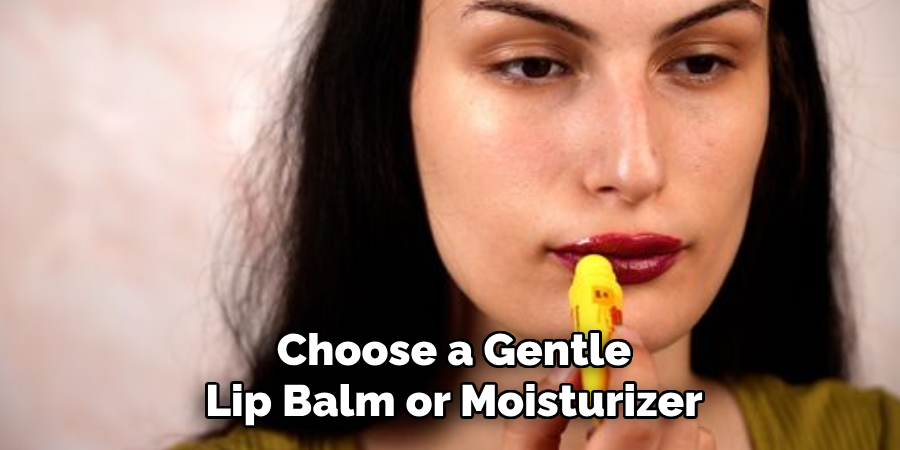
Step 6: Apply Lip Balm
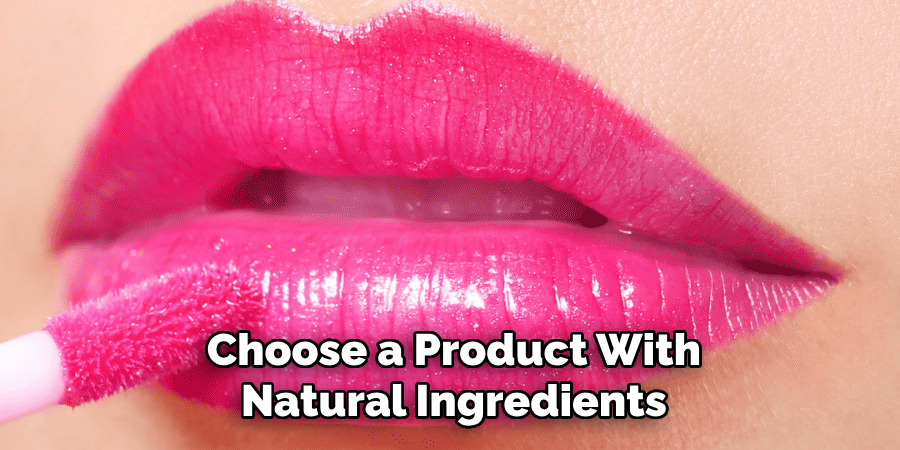
To keep your lips hydrated and nourished, apply a high-quality lip balm immediately after cleansing. Choose a product with natural ingredients, such as shea butter, vitamin E, or beeswax, as these provide deep hydration and protect your lips from dryness. Gently glide the balm over your lips to ensure even coverage. This step helps lock in moisture and creates a smooth base, whether you’re leaving your lips bare or preparing for makeup. Regular use of lip balm can improve the overall texture and health of your lips over time.
Step 7: Repeat as Needed
Regularly assess your lips throughout the day and reapply lip balm whenever they feel dry or chapped. Consistent hydration is crucial for maintaining soft, healthy lips, particularly in harsh weather conditions or environments with low humidity. Keeping a lip balm handy ensures you can refresh your lips as needed, providing continuous protection and nourishment.
Step 8: Add a Pop of Color
To enhance your look, opt for a tinted lip balm or layer your favorite lipstick over moisturized lips. Tinted lip balms provide a subtle wash of color while keeping your lips hydrated, making them an excellent option for everyday wear. Alternatively, applying lipstick on top of your lip balm creates a vibrant finish, ensuring your lips stay soft and smooth underneath. This step combines nourishment and style for a polished appearance.
Step 9: Remove Gloss Before Bed
Before going to bed, it is essential to remove any lip gloss or product from your lips to maintain their health. Use a gentle makeup remover or a soft cotton pad soaked in micellar water to wipe away the gloss completely. This step helps prevent product buildup, allowing your lips to breathe and reducing the risk of dryness or irritation. Following up with a nourishing lip balm can restore moisture overnight, leaving your lips refreshed and ready for the next day.
Step 10: Hydrate Throughout the Day
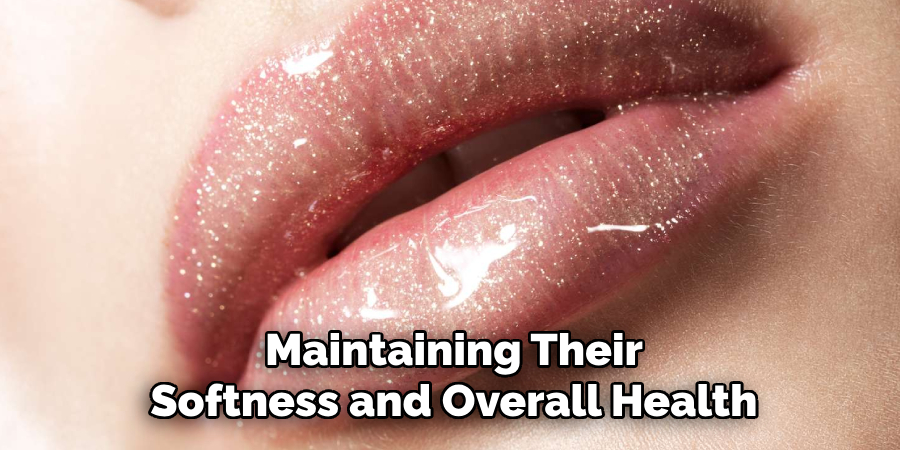
Keeping your lips hydrated from the inside out is crucial for maintaining their softness and overall health. Drink plenty of water throughout the day to stay hydrated, as dehydration can lead to chapped and dry lips. Incorporate foods rich in vitamins and healthy fats, such as fruits, vegetables, and nuts, into your diet to enhance lip health further. Consistent hydration promotes natural moisture, helping your lips stay smooth and supple.
By following these steps, you can achieve soft and healthy lips without relying on excessive lip balms or constant exfoliation.
5 Things You Should Avoid
- Using Harsh Chemicals
Avoid removing lip gloss with products containing harsh chemicals, such as makeup removers with strong alcohol content. These can dry out and irritate your lips, leaving them feeling rough and uncomfortable.
- Scrubbing Aggressively
Scrubbing your lips too hard to remove lip gloss can lead to damage, irritation, and even cuts. Always opt for a gentle approach to protect the delicate skin of your lips.
- Using Hot Water
Hot water may seem like a quick solution, but it can strip your lips of natural oils, making them prone to dryness and cracking. Stick to lukewarm water instead to gently help in the removal process.
- Using Tissues or Rough Cloths
Tissues or rough cloths can cause friction and irritation when removing lip gloss. Instead, use a soft cotton pad or a microfiber cloth to clean your lips safely and effectively.
- Skipping Moisturizer Afterwards
Failing to moisturize your lips after removing lip gloss can lead to dryness and discomfort. Always apply a hydrating lip balm or a natural oil like coconut oil to keep your lips nourished and healthy.
How Can You Maintain Healthy Lips?
Maintaining healthy lips requires consistent care and attention.
Start by staying hydrated, as dehydration can quickly lead to dry and chapped lips. Drink plenty of water throughout the day to keep your lips and body well-hydrated. Protect your lips from harsh weather conditions by using a lip balm with SPF to shield them from the sun and a heavier balm or ointment during cold, windy weather. Gently exfoliate your lips once or twice a week to remove dead skin cells, keeping them soft and smooth. Avoid licking your lips, as this can strip away natural moisture and cause further dryness.
Lastly, incorporate nutrient-rich foods into your diet, primarily those high in vitamins like E and C, to support overall lip health from within.
What Type of Lip Gloss Should You Use?
When choosing a lip gloss, consider your personal preference and the occasion. For everyday wear, opt for a tinted or clear gloss that provides moisture and a subtle shine. If you want to make a statement, go for a bold color like red or fuchsia.

Another factor to consider is the formula of the lip gloss. Some may be more moisturizing than others, so choose one that works best for your lips. Additionally, check if the lip gloss contains any ingredients to which you may be allergic.
For special occasions or events, try out different finishes such as matte or shimmer for a unique look. Matte lip glosses offer a velvety finish and are perfect for a more sophisticated look, while shimmery glosses add a touch of sparkle and glam.
Conclusion
To effectively remove lip gloss, it is best to use a gentle makeup remover or micellar water.
Apply a small amount to a cotton pad and gently swipe it across your lips until all the gloss is removed. For stubborn or long-lasting glosses, you should repeat this process a few times. Afterward, rinse your lips with lukewarm water and follow up with a lip balm to keep your lips hydrated and smooth.
Hopefully, with these tips on how to remove lip gloss, you can easily remove lip gloss without any hassle and maintain a gorgeous pout. Happy glossing!
About the Author
Jane Hubbard is a passionate beauty expert with a wealth of experience in makeup, hair, and overall beauty techniques. After years of working as a hairdresser specialist, she followed her entrepreneurial spirit and started her own consultancy business.
Jane has always been driven by her desire to help others feel confident in their own skin, and she does this by sharing her knowledge, experiences, and practical beauty tips. Through her consultancy, she empowers individuals to embrace their unique beauty, offering tailored guidance that boosts both self-esteem and personal style.
Professional Focus
- Specializes in makeup, hairstyling, and beauty consulting.
- Provides personalized beauty advice, tips, and techniques to help individuals feel confident in their appearance.
- Dedicated to staying up-to-date with the latest industry trends and developments.
- Passionate about creating a comfortable and empowering experience for every client.
Education History
- University of Craft and Design – Bachelor of Fine Arts (BFA) in Woodworking and Furniture Design
- Woodworking Apprenticeships – Extensive hands-on training with skilled craftsmen to refine carpentry and furniture making techniques
- Online Courses & Masterclasses – Continued education in advanced woodworking techniques, design principles, and specialized tools
Expertise:
- Makeup artistry, hairstyling, and beauty consulting.
- Personalized beauty techniques to enhance confidence and self-expression.
- Educating clients on how to maintain their beauty routines at home.