
If you love the deep pigment and lasting power of waterproof makeup, you know the flip side: it’s infamously stubborn at the end of the day. Whether it’s mascara clinging to your lashes, a matte lipstick outlasting dinner and drinks, or brow gel that won’t budge with water alone, learning how to remove waterproof makeup is the difference between healthy, happy skin and a chronically irritated face. Yet removal shouldn’t mean aggressive scrubbing or harsh formulas that leave your skin barrier stressed and your lashes thin.
Mastering the art of removing waterproof makeup means prioritizing patience and gentle technique over brute force. The process is less about how hard you scrub and more about how you allow modern removers to do the heavy lifting. This article will guide you through every step: understanding waterproof makeup chemistry, selecting the right removers, nailing the technique for eyes, face, and lips, adopting the essential practice of double cleansing, and ensuring proper aftercare for balanced, comfortable skin. By the end, you’ll confidently know how to remove waterproof makeup while protecting your natural lashes, brows, and complexion.
Know Your Formulas: What “Waterproof” Means
Understanding why waterproof products seem impossible to budge is key to selecting your removal approach. These are more than just “long-lasting”; they’re formulated with specific ingredients that create a physical barrier against water and sweat, keeping your look fresh for hours.
Film Formers, Waxes, and Volatile Silicones
The strength of waterproof makeup comes from a blend of film formers, waxes, and volatile silicones. Film formers are polymers that create a flexible, water-resistant layer on your skin or lashes. Waxes—like carnauba or beeswax—add structure and grip, anchoring pigment in place even when faced with oils or moisture. Volatile silicones help products spread smoothly and then evaporate, leaving behind that essential waterproof barrier. This molecular cocktail is what makes waterproof mascara defy rain or a liquid lipstick laugh in the face of a latte.
Difference Between Waterproof and Long-Wear
It’s common to see “waterproof” and “long-wear” used interchangeably, but the terms aren’t quite the same. Long-wear makeup is designed to resist fading, oil, and general wear throughout the day, but it may still break down or smudge with water or sweat. Waterproof formulas, in contrast, are specifically engineered to resist water entirely—for instance, they’ll endure tears, pool parties, or even a downpour without much smudging or transferring. This distinction is important when choosing removers, as not every long-wear product will require a full waterproof-removal routine.
Why Water Alone Won’t Cut It
Given the oil-repellent nature of these ingredients, water simply beads up and slides off waterproof makeup without making a dent. True removal requires a product that can dissolve the stubborn bonds created by waxes and silicones—typically something oil-based or specifically formulated to break through waterproof barriers. Using only water may leave pigments and film-formers lodged in pores, which can lead to irritation or breakouts.
Removers 101: Balms, Oils, Bi-Phase, Micellars
Choosing the right remover is half the battle. While there are dozens of products on shelves, most fall into a handful of categories, each with its own best-use scenario.
Cleansing Balms and Oils
Oil-based cleaners like balms and pure cleansing oils are the gold standard for dissolving waterproof makeup. Oil attracts oil, making it uniquely effective at breaking down waxes, polymers, and pigments without stripping the skin. Balm textures melt into an oil on skin contact, ensuring every curve of your face, even between lashes, is coated and working on tough makeup. These removers don’t require water at first; they’re designed to be massaged into dry skin, where they can trap and loosen even the most tenacious formulas.
Bi-Phase Removers for Eye and Lip
Bi-phase removers feature a clear division of oil and water in the bottle—shake to combine them before use. The oil phase targets waterproof products, while the water phase helps lift debris and hydrate sensitive areas. Bi-phase formulas are especially helpful for delicate eye and lip areas because they remove makeup gently, without excessive tugging or the need for aggressive rubbing. They excel at melting away waterproof mascaras and liquid lipsticks with just a soft press.
Micellar Waters: When and How
Micellar water has made a name as a go-to for quick makeup removal, and for good reason—it’s gentle, versatile, and leaves no residue. However, on its own, micellar water often falls short with waterproof products. It’s best suited as a preliminary sweep to remove light makeup or as a follow-up after using an oil-based remover, ensuring every trace is gone. Think of micellar water as a supporting player in your waterproof makeup removal ensemble.
How to Remove Waterproof Makeup: Step-by-Step Guide
Removing waterproof makeup requires deliberate, gentle steps. Rushing increases the risk of irritation, lash loss, or lingering residue.
Step 1: Saturate With Balm or Oil
Start with dry hands and a dry face. Scoop a nickel-sized amount of cleansing balm or dispense oil into your palm. Warm it between your fingers to thin the texture and then pat it all over your face, focusing especially on heavily made-up eyes and lips. Oil’s affinity for like materials means it immediately starts breaking down waterproof barriers.
Step 2: Emulsify and Massage Along the Lashline
Using gentle, circular motions, massage the remover into the skin. Pay special attention to your lashline—this is where waterproof mascara and liners cling most stubbornly. Close your eyes and use your ring finger to softly massage from root to tip. The goal is to saturate each lash and soften pigments without tugging or pulling.
Step 3: Hold Soaked Cotton Pads 10–20 Seconds
Once the initial dissolving is underway, take a cotton pad or soft reusable cloth and soak it with your chosen remover or micellar water. Hold the pad gently against your closed eyelid or lips for 10 to 20 seconds, letting the remover penetrate and lift the makeup. This “press and hold” method reduces friction and helps break apart even the toughest formulas with minimal effort.
Step 4: Swipe Gently Downward; Avoid Rubbing
After holding the cotton pad in place, swipe gently downward to remove lifted makeup. Always use a light hand, allowing the dissolved product and pigment to move away rather than being ground in by force. Avoid sideways rubbing or back-and-forth motions, especially on sensitive skin around your eyes or mouth.
Step 5: Second Cleanse and Residue Check
Once you’ve removed the bulk of the makeup, follow with a water-based cleanser to remove all traces of oil and pigment. This second cleanse ensures pores stay clear and that no film formers, silicones, or waxes linger to block your skin’s natural renewal process. Always check the water running off your face—if it’s clear and your towel comes away clean, you’re done.

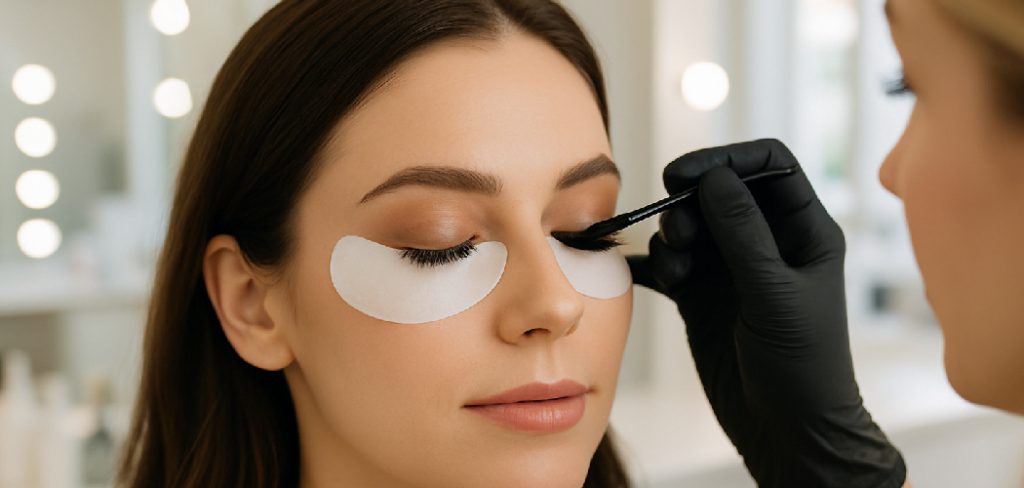
Eye and Lash Safety
Protecting the health of your lashes and eyes is essential when removing waterproof eye makeup. Harsh techniques can result in lash loss, irritation, or even injury if not handled with care.
Avoiding Tugging and Lash Fallout
The main culprit behind lash fallout is excessive rubbing and tugging. Instead of trying to “scrub” away mascara, always saturate and soften it first, allowing the product to break down before any wiping. Use light, downward strokes rather than side-to-side friction, and avoid using fingernails to pick off stubborn remnants—a consistent, gentle approach will protect your lash line over time.
Contact Lens and Sensitive-Eye Tips
If you wear contact lenses or have sensitive eyes, always remove contacts prior to using any oils, balms, or removers. Choose fragrance-free, ophthalmologist-tested formulas. Apply cleaner with minimal contact to the waterline and rinse thoroughly before reinserting lenses. If sensitivity persists, using a damp, soft cloth rather than multiple cotton pads can reduce fiber irritation.
Post-Removal Lash Conditioning
After cleansing, consider nourishing your lashes to offset any dryness caused by waterproof products and removers. Lightweight oils such as castor oil or dedicated lash serums can be gently brushed along the lashline to keep lashes flexible and healthier-looking.
Lip and Brow Considerations
Waterproof makeup isn’t just for eyes. Bold lips and defined brows have their own unique removal needs to ensure pigment comes off without stripping delicate skin or hair.
Breaking Down Liquid Lips and Stains
Long-wearing liquid lipsticks and stains are designed to grip hard and hold fast. Apply a small amount of oil-based remover directly to your lips and use your fingertip to gently massage it in, softening the product before using a damp cotton round or tissue to wipe away color. If pigment persists, repeat rather than scrubbing; slow and steady really is the best approach.
Removing Brow Gels and Tints
Waterproof brow gels can create a shellac-like coating that’s tough to remove. Massage balm or oil into your brows, moving with the direction of the hair. Let the product sit for a few moments to penetrate the formula, then wipe away gently to avoid hair loss or breakage. For heavy-duty tints, work in small sections for even coverage.

Preventing Dryness and Over-Exfoliation
Repeatedly removing waterproof products can lead to dryness and, if you overdo it, micro-exfoliation (unintentional removal of surface layers of skin). Always finish by replenishing the lips with a moisturizing balm. For brows, a lightweight conditioning oil or serum can help maintain skin comfort and hair strength.
Double Cleansing and Aftercare
Great makeup removal doesn’t end with taking color off your face. It’s what comes next that determines skin health, clarity, and comfort.
Choosing Your Second Cleanser
Once the initial oil phase has lifted waterproof makeup, reach for a gentle, water-based cleanser suited to your skin type: gel or foam for oily skin, a milk or cream cleanser for dry skin. Massage the second cleanser onto damp skin, focusing on areas where oil residues or product traces may linger. This phase dissolves anything left behind and preps skin for hydration.
Rebalance With Hydration
Cleansing, even when gentle, can disrupt the skin’s hydration balance and acid mantle. After drying your face, immediately follow with a hydrating toner, essence, or serum. These products help reset your pH and infuse moisture so the skin feels comfortable and looks refreshed.
Barrier Support Overnight
Finish your routine with a rich moisturizer designed for your skin barrier—ingredients like ceramides or squalane are particularly helpful for overnight recovery. This protects your skin from dehydration and encourages restorative processes while you sleep, leaving you with a soft, resilient complexion by morning.
Tools, Towels, and Pads
The right tools can make waterproof makeup removal quicker, gentler, and more eco-friendly.
Cotton vs. Reusable Cloths
Traditional cotton rounds are widely available and disposable, but they can be wasteful and may irritate sensitive skin with repeated use. Reusable microfiber cloths offer a soft touch and thorough removal while minimizing environmental impact. Whichever you choose, ensure it’s fresh and clean each time to prevent the transfer of oils and bacteria to your skin.
Warm Water and Steam Cues
Warmth helps soften waterproof formulas and opens pores, enhancing effectiveness. Dampen a cloth with comfortably warm water and hold it gently over your face before removal. Steam (while not too hot) can also help loosen stubborn makeup but should be used with caution, especially for sensitive or rosacea-prone skin.
Laundry Hygiene and Storage
If using reusable cloths, launder them regularly—ideally after each use—with fragrance-free detergent. Dry thoroughly before storage to prevent bacteria and mildew. Store clean cloths in a dry, ventilated area, and replace them if you notice staining or a persistent odor.
Common Mistakes and Fixes
Even seasoned makeup wearers can make removal errors that leave skin stressed. Stay mindful of the most frequent pitfalls.
Over-Rubbing and Irritation
Trying to rub away waterproof makeup is tempting, but harsh motions only irritate the skin and break delicate lashes and brow hairs. Instead, let removers work for you: saturate thoroughly and give them a few seconds to dissolve the product before wiping.
Under-Saturating Product
Skimping on remover actually requires more effort and increases the need for friction. Don’t be afraid to use enough product so the skin and makeup are fully coated—this speeds up the process and minimizes abrasion.
Skipping the Second Cleanse
It’s easy to think one cleanse is enough, but skipping the second round leaves behind film formers, pigments, and oil that can block pores and dull your complexion. The second cleanse is where clarity and skin health are truly preserved.

Conclusion
Learning how to remove waterproof makeup is not just about erasing color—it’s about protecting your skin, lashes, and brows from unnecessary stress and damage. The “melt–lift–cleanse” method, which prioritizes high-quality removers, gentle technique, and thorough aftercare, is the gold standard for any makeup routine. With patience and the right approach, your skin will remain healthy, your lashes intact, and your waterproof makeup days stress-free. Make it a habit to follow these steps, invest a few extra minutes each night, and enjoy makeup portability without compromise. Now you know how to remove waterproof makeup the gentle, effective way—your skin (and your future self) will thank you for it.
About the Author
Jane Hubbard is a passionate beauty expert with a wealth of experience in makeup, hair, and overall beauty techniques. After years of working as a hairdresser specialist, she followed her entrepreneurial spirit and started her own consultancy business.
Jane has always been driven by her desire to help others feel confident in their own skin, and she does this by sharing her knowledge, experiences, and practical beauty tips. Through her consultancy, she empowers individuals to embrace their unique beauty, offering tailored guidance that boosts both self-esteem and personal style.
Professional Focus
- Specializes in makeup, hairstyling, and beauty consulting.
- Provides personalized beauty advice, tips, and techniques to help individuals feel confident in their appearance.
- Dedicated to staying up-to-date with the latest industry trends and developments.
- Passionate about creating a comfortable and empowering experience for every client.
Education History
- University of Craft and Design – Bachelor of Fine Arts (BFA) in Woodworking and Furniture Design
- Woodworking Apprenticeships – Extensive hands-on training with skilled craftsmen to refine carpentry and furniture making techniques
- Online Courses & Masterclasses – Continued education in advanced woodworking techniques, design principles, and specialized tools
Expertise:
- Makeup artistry, hairstyling, and beauty consulting.
- Personalized beauty techniques to enhance confidence and self-expression.
- Educating clients on how to maintain their beauty routines at home.