
Cream makeup has gained popularity for its hydrating and blendable properties, making it a favorite among makeup enthusiasts and professionals alike. Unlike powder formulations, cream makeup provides a dewy finish that enhances the skin’s natural radiance. Cream products can be easily applied and blended for a flawless look, whether foundation, blush, or eyeshadow.
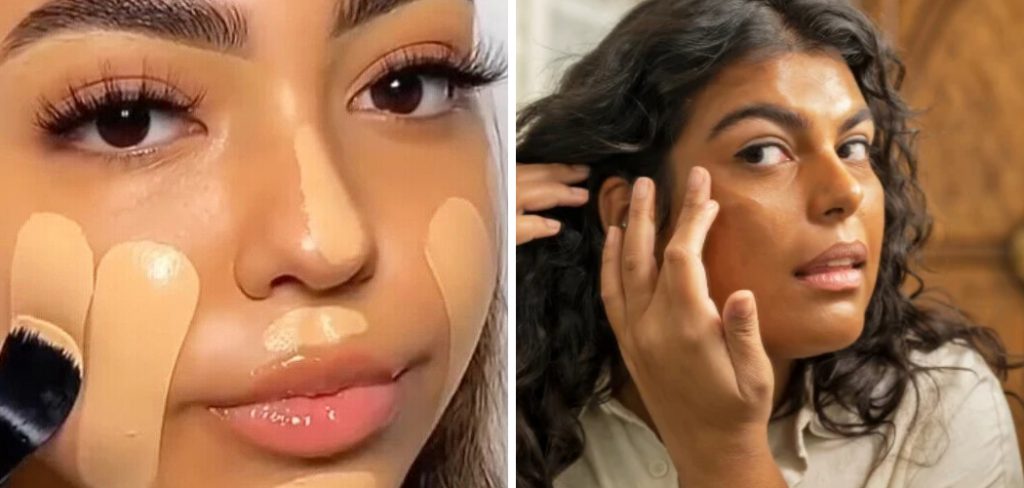
However, the luminous effect of cream makeup can often lead to challenges in maintaining its longevity throughout the day. This is where learning how to set cream makeup becomes essential. Properly setting cream makeup ensures it stays in place, resists smudging, and maintains its vibrant appearance. This article will guide you through the comprehensive steps to effectively set cream makeup, from prepping your skin to choosing the right setting products. Through this guide, you’ll discover the best practices and tips to enjoy long-lasting, beautiful makeup all day.
Understanding Cream Makeup
Cream makeup encompasses various cosmetic products with a creamy texture, offering a smooth and hydrating application. These products include cream foundation, blush, eyeshadow, contour, and highlighter, catering to different aspects of your makeup routine. The key characteristic of cream makeup is its emollient-rich formulation, which provides exceptional hydration to the skin, making it ideal for those with dry to normal skin types.
Different types of cream makeup serve various purposes: cream foundation delivers a dewy, skin-like finish and is easy to blend, while cream blush brings a natural flush to the cheeks that mimic the skin’s inherent hue. Cream eyeshadows offer intense pigment with a smooth application, and contour creams allow for the precision shaping of facial features. Furthermore, cream highlighters add a luminous glow without emphasizing skin texture.
The benefits of using cream makeup extend beyond its hydrating properties. Cream products are known for their superior blendability, allowing for seamless integration with the skin and other makeup products. They can be layered easily to build up intensity without looking cakey. Additionally, cream makeup tends to wear better on maturing skin, as it doesn’t settle into fine lines and provides a fresh, youthful appearance. These attributes make cream makeup a versatile and essential component in any makeup collection.

Prepping the Skin
Achieving a flawless and long-lasting cream makeup application begins with properly prepping your skin. The first essential step is to cleanse the skin thoroughly. Cleansing removes any dirt, oil, and impurities that could interfere with makeup adherence and longevity. Choose a gentle cleanser suited to your skin type to avoid over-drying or irritating the skin.
After cleansing, apply a moisturizer suitable for your skin type. A good moisturizer will hydrate your skin, providing a smooth and supple canvas for makeup application. If you have dry skin, opt for a rich, emollient moisturizer. For oily or combination skin, a lightweight, oil-free moisturizer works best. Adequately moisturized skin ensures that the cream makeup blends seamlessly and reduces the risk of dry patches or flakiness.
Once your skin is moisturized, using a primer is crucial to creating a smooth base for your makeup. A primer helps to blur imperfections, minimize the appearance of pores, and even out skin texture. Various primers are available, such as mattifying primers for oily skin, hydrating primers for dry skin, and color-correcting primers for specific concerns like redness or dullness. Apply the primer evenly across your face, focusing on areas where makeup tends to wear off more quickly, such as the T-zone.
Lastly, allowing each product to absorb fully before applying the next is vital. This ensures that each product layer is effectively absorbed into the skin, providing a stable foundation for the following steps. Rushing through this process can lead to product pilling, uneven texture, and reduced makeup longevity. Taking the time to properly prep your skin will significantly impact your cream makeup’s overall finish and durability.
How to Set Cream Makeup: Applying Cream Makeup
When it comes to applying cream makeup, using the right tools and techniques can significantly improve the outcome. Whether you opt for brushes, sponges, or your fingers, each tool offers unique benefits that cater to different aspects of your makeup routine.
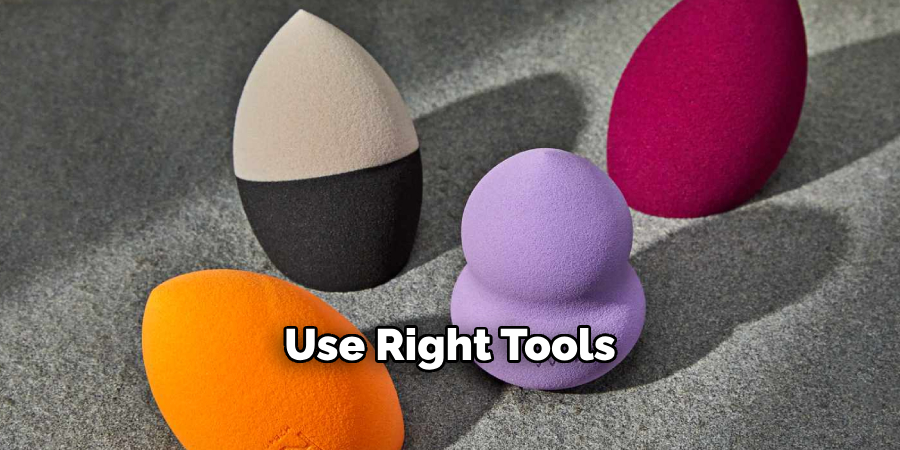
Using the Right Tools
- Brushes: Brushes, particularly synthetic ones, are excellent for applying cream products as they resist absorbing too much product. Brushes can be used for precision application and blending, making them perfect for foundation, blush, and eyeshadow.
- Sponges: Makeup sponges, such as beauty blenders, help achieve a smooth, airbrushed finish. Damp sponges are particularly effective in seamlessly blending cream makeup into the skin without leaving streaks.
- Fingers: Using fingers allows the warmth of your skin to melt the cream products, facilitating easy blending. Fingers are especially useful for applying cream blush and eyeshadow, providing a natural-looking finish.
Techniques for Applying Cream Foundation, Blush, and Eyeshadow
1.Cream Foundation:
- Start with a small amount of product, applying it in thin layers. This helps in building coverage and prevents the makeup from looking heavy.
- Dab the foundation onto your face using your preferred tool and blend it outwards with a brush or sponge. Pay attention to blending around the jawline and hairline for a seamless finish.
- Use tapping motions with a sponge or light strokes with a brush for an even application. If you’re using your fingers, press and blend the product into the skin for a more natural result.
2.Cream Blush:
- Smile to find the apples of your cheeks and then use your fingers or a brush to apply the blush in a circular motion.
- Blend the edges outwards towards your temples to ensure there are no harsh lines, using a sponge or brush for a smooth gradient.
3.Cream Eyeshadow:
- Apply a small amount onto your eyelids with your finger or a flat brush.
- Blend the edges using a clean, fluffy brush or your finger, focusing on creating a soft, diffused look. For more intensity, layer the product gradually until you achieve the desired effect.
4.Blending Techniques for a Seamless Finish
- Always blend upwards and outwards to lift the face and create a more natural look.
- Use circular motions with brushes and dabbing motions with sponges to avoid moving the product underneath.
- Check your work in different lighting to ensure there are no unblended areas or harsh lines.
5.Layering Cream Products for a Natural Look
- Start with a light layer of each product and build gradually. This layering technique prevents makeup from becoming cakey or feeling heavy on the skin.
- Blend each layer thoroughly before adding more product.
- Set the layered cream products with a light dusting of translucent powder if needed, to increase longevity without altering the dewy finish.
By mastering these application methods, you can achieve a naturally radiant and long-lasting look with cream makeup.
How to Set Cream Makeup: Setting Cream Makeup with Powder
Choosing the Right Setting Powder
Selecting the appropriate setting powder ensures your cream makeup lasts throughout the day. Setting powders come in various forms, including translucent, tinted, loose, and pressed options. Each type offers unique benefits tailored to specific needs.
- Translucent Powders: These are ideal for all skin tones, as they don’t alter the color of your foundation. They help control shine and set makeup with a natural, matte finish.
- Tinted Powders: Tinted powders provide an additional layer of coverage, potentially enhancing the overall complexion. They are available in various shades to match different skin tones.
- Loose Powders: Known for their lightweight texture, loose powders are excellent for achieving a flawless, airbrushed finish. They work best for setting makeup without adding extra weight.
- Pressed Powders: Compact and easy to carry, pressed powders are perfect for on-the-go touch-ups. They offer convenience and are less messy compared to loose powders.
Factors to Consider
When choosing a setting powder, consider your skin type and the desired finish. For oily skin, a mattifying powder that absorbs excess oil will help keep shine at bay. Those with dry skin might prefer a hydrating powder with a satin or luminous finish to avoid emphasizing dry patches. For combination skin, focusing on the T-zone with a mattifying powder while using a hydrating formula on other areas can balance the overall look.
Recommendations for Different Skin Types
- Oily Skin: Opt for a mattifying, translucent loose powder to control shine.
- Dry Skin: Choose a hydrating, luminous pressed powder for a subtle glow.
- Combination Skin: Use a mix of mattifying and luminous powders for tailored coverage.
- Sensitive Skin: Look for powders with minimal ingredients and avoid fragrances to prevent irritation.
Applying Setting Powder
To achieve a flawless finish, utilizing the correct tools and techniques is essential.
- Using a Large, Fluffy Brush: A large, fluffy brush is ideal for applying a light, even layer of powder. Dip the brush into the powder, tap off the excess, and gently sweep it across your face.
- Using a Damp Makeup Sponge: For a more precise application, especially in areas prone to creasing, use a damp makeup sponge. Press the sponge into the powder and then press it onto your skin, focusing on areas like under the eyes and the T-zone.
Techniques for Applying Powder
- Pressing vs. Sweeping: To avoid disturbing the underlying cream makeup, use a pressing motion with your brush or sponge. This technique helps the powder adhere better and provides a smoother finish. Sweeping motions can blend everything together for a final, light dusting.
- Focusing on Areas Prone to Creasing: Pay special attention to areas under the eyes, around the nose, and the T-zone, as these areas are more likely to show signs of makeup creasing and wear. Press powder into these areas to lock in the cream makeup and prevent settling into fine lines.
Tips for Avoiding a Cakey Finish
- Use a Light Hand: Apply powder sparingly and build up gradually if needed. Overloading your brush or sponge can result in a heavy, cakey finish.
- Blend Thoroughly: Ensure each layer of makeup is well-blended and absorbed into the skin before applying powder.
- Hydrate and Prep Skin: Properly hydrating and prepping the skin beforehand creates a smoother base, reducing the likelihood of a cakey finish.
Additional Tips for Long-Lasting Cream Makeup
Avoiding Heavy Layers of Product
Applying thin layers of product is crucial to achieving a long-lasting and natural look. Instead of layering on a thick coat of foundation or concealer, build up the coverage slowly. This technique prevents the makeup from looking heavy and allows each layer to be set properly, resulting in longer wear.
Using Oil-Control Products if You Have Oily Skin
Incorporating oil-control products into your routine is essential if you have oily skin. Primers, foundations, and setting powders formulated for oil control can help manage excess shine and keep your makeup in place throughout the day. Look for ingredients like salicylic acid and silica that absorb oil and reduce the appearance of pores.
Touch-Up Techniques Throughout the Day
Keeping your makeup fresh requires periodic touch-ups, especially in areas prone to wear. Carrying a small, portable setting powder and a brush for quick touch-ups can help mitigate any areas where makeup may have faded. For cream products, blending over any area with a damp sponge can refresh the application without adding additional products.
Using Blotting Papers to Reduce Shine
Blotting papers are handy for controlling midday shine without disturbing your makeup. These papers absorb excess oil, preventing your skin from appearing greasy and helping to maintain a matte finish. Simply press a blotting paper gently onto oily areas, such as the T-zone, to keep your makeup looking fresh.
Common Mistakes to Avoid
Over-Applying Powder
Applying too much powder can lead to a heavy, cakey finish, emphasizing fine lines and imperfections. Use a light hand and build up gradually for a more natural look.
Using Incompatible Products
Mixing products that are not formulated to work together can cause separation and patchiness. Ensure your primer, foundation, and setting powder are compatible to maintain a smooth finish.
Skipping Primer or Setting Steps
Neglecting to use a primer or setting powder can significantly impact the longevity of your makeup. Primer creates a smooth base while setting powder locks in your cream products for all-day wear.
Not Blending Cream Products Properly
Improperly blended cream products can appear uneven and textured. To achieve a flawless application, thoroughly blend your foundation, concealer, and other cream-based items.
Troubleshooting Issues
Dealing with Creasing or Fading Makeup
Ensure your skin is properly prepped and hydrated before application to prevent creasing or fading makeup. Use a high-quality primer to create a smooth base and set your makeup with a translucent powder to lock it in place. Use a damp makeup sponge to press the setting powder into the skin for areas prone to creasing, such as under the eyes or smile lines.

Solutions for Patchy or Uneven Applications
Patchy or uneven makeup can often be resolved by blending thoroughly with a damp sponge or brush. If the patchiness persists, lightly spritz your face with a setting spray and blend again to meld the layers together. To avoid this issue in the future, make sure to exfoliate regularly and use products that are compatible with your skin type.
When to Reapply or Touch Up Makeup
Reapplying or touching up makeup is typically needed after 4-6 hours, especially in areas like the T-zone, where oil breaks down the product. Carrying a compact setting powder and a brush or sponge for quick touch-ups can help maintain your look throughout the day. Avoid adding too many layers to prevent a cakey finish.
How to Fix Makeup Mishaps Without Starting Over
For minor mishaps such as smudged eyeliner or mascara, use a cotton swab dipped in micellar water to carefully clean the area without disturbing the rest of your makeup. Apply a bit of foundation with a damp sponge for patchy areas to blend seamlessly. If you have over-applied a product, use a clean brush to buff out the excess and even out the application.

Conclusion
Setting cream makeup effectively ensures a flawless and long-lasting finish. To recap, begin by selecting the right setting products for your skin type and use a pressing motion to apply powder. Focus on areas prone to creasing and avoid heavy layers to prevent a cakey finish. Hydrate and prep your skin thoroughly, and remember to employ touch-up techniques and blotting papers throughout the day. Implementing these steps on how to set cream makeup will improve the longevity and appearance of your look.
Practice and experimentation are vital to mastering these techniques. With time, you will learn the best methods and products for your unique skin type and needs. Properly setting cream makeup can transform the wear and feel of your makeup, providing you with a confident, polished appearance that lasts all day.
About the Author
Jane Hubbard is a passionate beauty expert with a wealth of experience in makeup, hair, and overall beauty techniques. After years of working as a hairdresser specialist, she followed her entrepreneurial spirit and started her own consultancy business.
Jane has always been driven by her desire to help others feel confident in their own skin, and she does this by sharing her knowledge, experiences, and practical beauty tips. Through her consultancy, she empowers individuals to embrace their unique beauty, offering tailored guidance that boosts both self-esteem and personal style.
Professional Focus
Specializes in makeup, hairstyling, and beauty consulting.
Provides personalized beauty advice, tips, and techniques to help individuals feel confident in their appearance.
Dedicated to staying up-to-date with the latest industry trends and developments.
Passionate about creating a comfortable and empowering experience for every client.
Education History
University of Craft and Design – Bachelor of Fine Arts (BFA) in Woodworking and Furniture Design
Woodworking Apprenticeships – Extensive hands-on training with skilled craftsmen to refine carpentry and furniture making techniques
Online Courses & Masterclasses – Continued education in advanced woodworking techniques, design principles, and specialized tools
Expertise:
Makeup artistry, hairstyling, and beauty consulting.
Personalized beauty techniques to enhance confidence and self-expression.
Educating clients on how to maintain their beauty routines at home.