
Are you tired of looking tired all the time? Dark circles under your eyes can make you appear sleep-deprived and aged. One way to combat this problem is by using the best under eye concealer.
Achieving a flawless and long-lasting makeup look often comes down to mastering the art of setting your under-eye concealer. The under-eye area is delicate and prone to creasing, which can lead to uneven coverage throughout the day. By properly setting your concealer, you can keep your makeup in place, ensure your under-eyes look smooth, and enhance the overall finish of your look.
Whether you’re preparing for a long day or a special occasion, the right technique and products can make all the difference. Let’s dive into how to set under-eye concealer.
What Are the Benefits of Setting Under-Eye Concealer?
- Keeps Makeup in Place: Setting your under-eye concealer helps prevent creasing, fading, and smudging throughout the day. This is especially important if you have oily skin or live in a humid climate.
- Smooths Out Fine Lines and Wrinkles: By setting your concealer, you can prevent the product from settling into fine lines and wrinkles around your eyes. This creates a smoother, more youthful appearance.
- Brightens Up the Under-eye Area: Using a translucent powder to set your concealer can help give the illusion of brighter, more awake under-eyes. This is especially helpful for those who struggle with dark circles.
What Will You Need?
To properly set your concealer, you will need a few key products:
- A concealer of your choice
- A translucent setting powder
- A fluffy brush or makeup sponge
Once you have these products, you are ready to begin the process of setting your concealer for a flawless finish.
10 Easy Steps on How to Set Under-eye Concealer
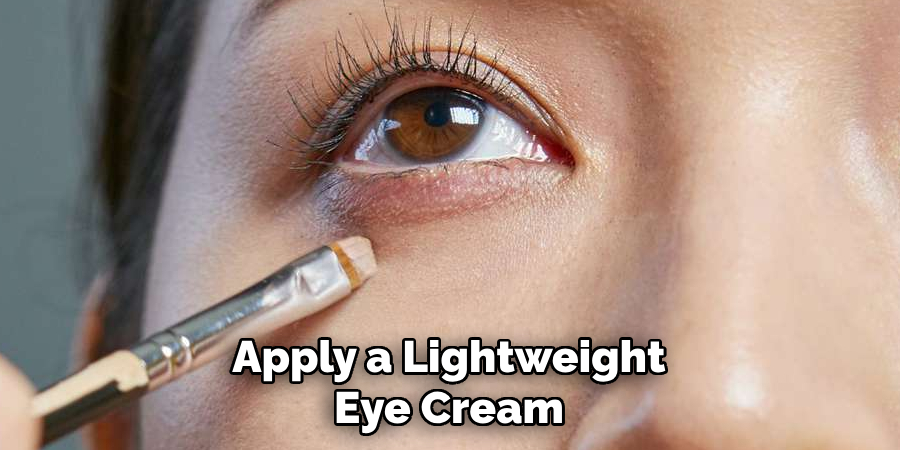
Step 1. Prep Your Under-Eye Area
Start by ensuring that your under-eye area is clean and moisturized. Apply a lightweight eye cream or a hydrating serum to keep the skin smooth and prevent the concealer from creasing. Gently tap the product into your skin with your ring finger for even absorption, allowing it to sit for a few minutes before proceeding to the next step. This preparation creates the perfect canvas for applying concealer.
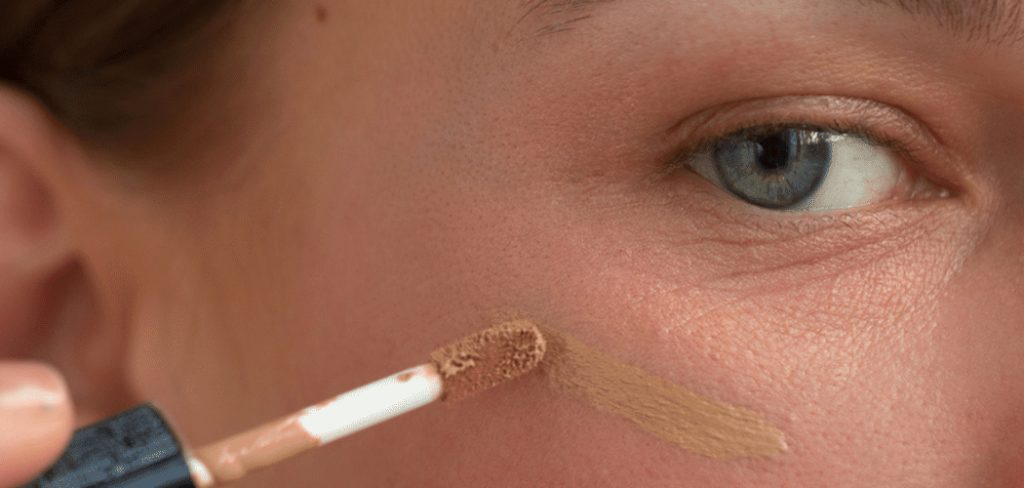
Step 2. Apply Your Concealer
Choose a concealer shade that complements your skin tone or is one to two shades lighter for brightening effects. Using a small brush, sponge, or your fingertip, apply the concealer in dots or a triangular shape under your eyes, focusing on the areas with dark circles or discoloration. Blend gently by tapping or pressing the product into your skin, working from the inner corner of your eye outward. Avoid rubbing, as this can disturb the delicate skin and reduce coverage. For a seamless finish, ensure the edges of the concealer blend smoothly into the surrounding skin.
Step 3. Blend the Concealer
To achieve the best results, consider using a damp makeup sponge or a soft, fluffy brush for blending, as these tools can help diffuse the product evenly and create a natural finish. If you prefer using your fingers, the warmth of your fingertips may aid in melting the concealer into your skin, making it appear more seamless. Take your time with this step, as proper blending ensures that the concealer doesn’t settle into fine lines or appear cakey.
For added brightness, extend the concealer slightly outward and upward, creating a natural lift to the under-eye area. Once blending is complete, step back and check for any harsh lines or unblended edges under natural light, and gently correct them if necessary.
Step 4. Tap Out Any Creases
Using a clean fingertip or a damp makeup sponge, gently tap out any creases that may have formed as the concealer settled into your skin. This step helps to ensure a smooth and even finish, preventing the makeup from emphasizing fine lines throughout the day. Be careful not to apply too much pressure, as this could disturb the already blended concealer. For best results, focus on the areas where creasing is most likely, such as the under-eye area or around expressions lines.
Step 5. Pick Up Setting Powder
To lock your concealer in place and maintain a flawless look, lightly dip a soft, fluffy brush or a powder puff into a finely-milled setting powder. Tap off the excess powder to avoid applying too much, which could create a cakey appearance. Focus on the areas where concealer was applied, gently pressing the powder onto the skin to ensure it adheres evenly. This step helps to reduce shine, prevent creasing, and prolong the wear of your makeup throughout the day. Use a translucent or skin-toned powder to blend seamlessly with the rest of your makeup for a natural finish.
Step 6. Apply the Powder

After setting your concealer, take a fluffy brush or a powder puff to lightly set the rest of your face. Focus on areas that tend to get oily, such as the T-zone, while leaving the perimeter of your face with minimal product for a natural glow. Press the powder gently into the skin rather than sweeping it to avoid moving your foundation or other base products. For a flawless finish, finish by brushing away any excess powder, ensuring everything is blended seamlessly. This step not only helps to lock in your makeup but also creates a smooth, matte canvas.
Step 7. Blend the Powder
Blending the powder is an essential step to achieving a polished and natural look. Use a soft, fluffy brush or a damp makeup sponge to gently diffuse the powder, ensuring there are no harsh lines or uneven patches. Work in small, circular motions to seamlessly blend the powder into your foundation, allowing it to meld with your skin for a flawless finish. Pay close attention to areas like the jawline, hairline, and around the nose to prevent any visible buildup or texture.
This step is especially important if you are layering powders, such as setting powder and bronzer, as it helps to create a smooth transition between products. Remember that less is often more with powder—it’s always easier to add a little extra than to fix a cakey or over-powdered look.
Step 8. Set the Rest of Your Face
Once you’ve blended your foundation and concealer, it’s time to set the rest of your face to ensure your makeup stays in place all day. Use a fluffy powder brush to lightly dust a translucent setting powder over any areas prone to oiliness, such as the T-zone. This will help to minimize shine and keep your skin matte without feeling heavy.
Be sure to use a light hand and focus on pressing the powder into the skin rather than sweeping it, as this technique prevents product movement and ensures a long-lasting, natural finish. If you prefer a dewy look, you can skip powdering areas where you want your skin to glow, such as the high points of your cheeks.
Step 9. Apply a Setting Spray
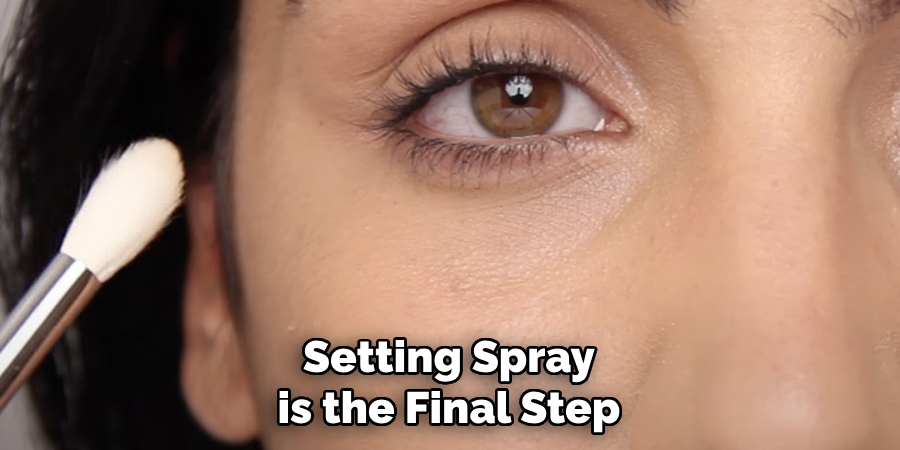
A setting spray is the final step to lock in your makeup and ensure it lasts throughout the day. Hold the spray bottle about 8-10 inches away from your face and mist evenly in an “X” and “T” motion for full coverage. This step not only helps to set your makeup but can also refresh your skin and give you a radiant or matte finish, depending on the formula you choose. Allow the spray to dry naturally without touching your face to maintain your flawless look.
Step 10. Touch Up if Necessary
Throughout the day, you may notice slight creasing, fading, or oiliness, especially in areas like the T-zone. To touch up your makeup, start by blotting any excess oil with blotting papers or tissues. Then, apply a light layer of powder to mattify and refresh your look. For areas where coverage has faded, gently pat on concealer or foundation with a clean sponge or your fingertips. Reapply lipstick or gloss as needed to keep your lips looking vibrant.
By following these steps, you can achieve a crease-free, long-lasting, and flawless look for your under-eye concealer.
5 Things You Should Avoid
- Skipping Moisturizer or Eye Cream
Dry under-eye skin can cause concealer to cling to dry patches or settle into fine lines. Always prep the area with a hydrating moisturizer or eye cream before application.
- Using Too Much Powder
Overloading the under-eye area with powder can result in a cakey or dry appearance. Use a light, translucent powder and apply it sparingly with a fluffy brush or a damp sponge.
- Applying Too Much Concealer
Less is more when it comes to under-eye concealer. Using excessive product can create a thick, heavy layer prone to creasing. Focus on a thin application for a natural finish.
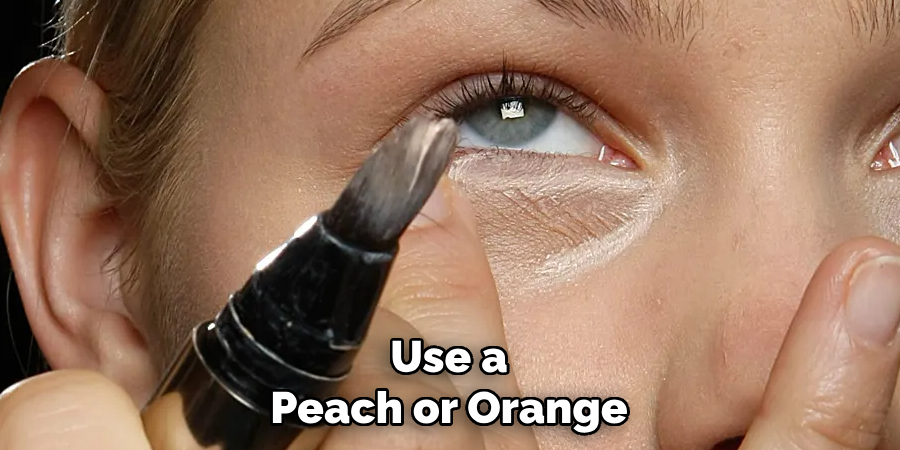
- Skipping a Color Corrector
If you have noticeable dark circles, applying concealer directly without a color corrector may not cover the discoloration effectively. Use a peach or orange-toned corrector first for better results.
- Dragging or Tugging the Skin
Rough handling of the delicate under-eye area can lead to irritation or premature wrinkles. Always use gentle tapping motions with your fingers, a sponge, or a brush to apply and set concealer.
Conclusion
How to set under-eye concealer properly is key to achieving a smooth, long-lasting finish.
By preparing the skin with moisturizer and primer, selecting the correct shade, using gentle application techniques, and setting the concealer with a light powder, you can avoid common pitfalls like creasing or uneven coverage. Remember, less is often more when it comes to under-eye products; build coverage gradually to maintain a natural look.
With these tips, your concealer can stay flawless throughout the day, enhancing your overall makeup look.
About the Author
Jane Hubbard is a passionate beauty expert with a wealth of experience in makeup, hair, and overall beauty techniques. After years of working as a hairdresser specialist, she followed her entrepreneurial spirit and started her own consultancy business.
Jane has always been driven by her desire to help others feel confident in their own skin, and she does this by sharing her knowledge, experiences, and practical beauty tips. Through her consultancy, she empowers individuals to embrace their unique beauty, offering tailored guidance that boosts both self-esteem and personal style.
Professional Focus
- Specializes in makeup, hairstyling, and beauty consulting.
- Provides personalized beauty advice, tips, and techniques to help individuals feel confident in their appearance.
- Dedicated to staying up-to-date with the latest industry trends and developments.
- Passionate about creating a comfortable and empowering experience for every client.
Education History
- University of Craft and Design – Bachelor of Fine Arts (BFA) in Woodworking and Furniture Design
- Woodworking Apprenticeships – Extensive hands-on training with skilled craftsmen to refine carpentry and furniture making techniques
- Online Courses & Masterclasses – Continued education in advanced woodworking techniques, design principles, and specialized tools
Expertise:
- Makeup artistry, hairstyling, and beauty consulting.
- Personalized beauty techniques to enhance confidence and self-expression.
- Educating clients on how to maintain their beauty routines at home.