
The coffin nail shape, sometimes referred to as the “ballerina” style, has taken the beauty world by storm, gracing the hands of celebrities and influencers alike. It is bold, edgy, and undeniably glamorous, featuring long, tapered sides with a distinctive flat tip that mimics the shape of a traditional coffin or a ballerina’s slipper.
While this look often screams “expensive salon visit,” achieving it at home is entirely possible with the right tools and a bit of patience. Whether you are working with your natural nails, acrylics, or press-ons, mastering this specific silhouette can elevate your entire aesthetic. This guide is designed to demystify the filing process and give you the confidence to create salon-quality results from your own vanity. We will walk you through exactly how to shape coffin nails, turning your manicure routine into a professional-grade art form.
When it comes to achieving the perfect coffin nails, precision and technique are key. This nail shape, recognizable by its tapered sides and flat tip, has gained immense popularity for its sleek, modern look. While it may seem challenging at first, shaping coffin nails is a skill that anyone can master with the right approach. By following a few simple steps and using the proper tools, you’ll be able to craft stunning nails that showcase your personal style and creativity.
How to Shape Coffin Nails: A Step-by-Step Guide
Step 1: Determine the Ideal Length and Start Prep
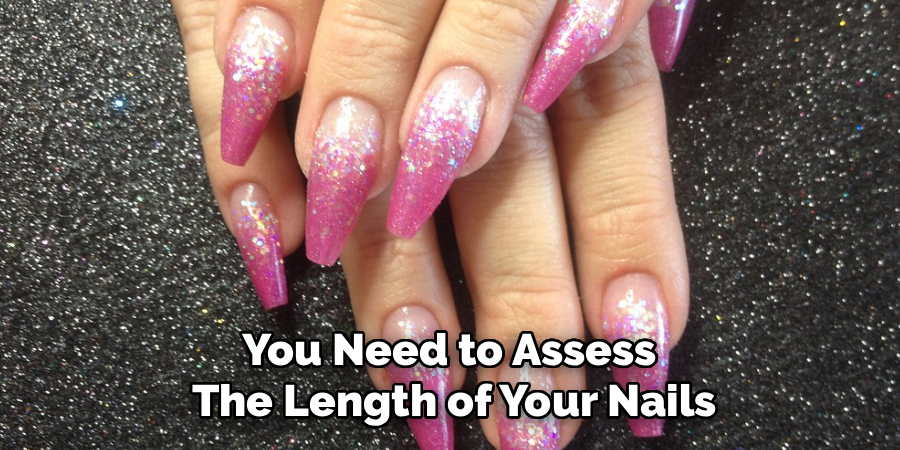
Before you even pick up a file, you need to assess the length of your nails. The coffin shape requires a significant amount of length to be effective because the tapered sides need room to narrow before hitting the flat tip. If your nails are too short, you might end up with a shape that looks more like a stubby square than an elegant coffin. Begin by ensuring your nails are clean and free of old polish. If you are using tips or extensions, apply them securely now. Visualize the center point of your nail, as this will guide your filing later. Having a clear mental image of the final length ensures that all ten fingers end up looking uniform and balanced.
Step 2: Trim the Sides for the Initial Taper
Once your length is established, use nail clippers to make the initial cuts that define the coffin silhouette. Instead of clipping straight across, angle your clippers from the side of the nail towards the center tip. You want to cut away the corners to create a shape that resembles a long triangle or a stiletto nail initially, but do not make it too sharp just yet. Be conservative with your cuts; you can always file more away, but you cannot put the nail back once it is gone. This rough cut saves you a tremendous amount of filing time later and sets the foundation for those signature tapered sidewalls that define the look.
Step 3: File the Sidewalls Straight and Sharp
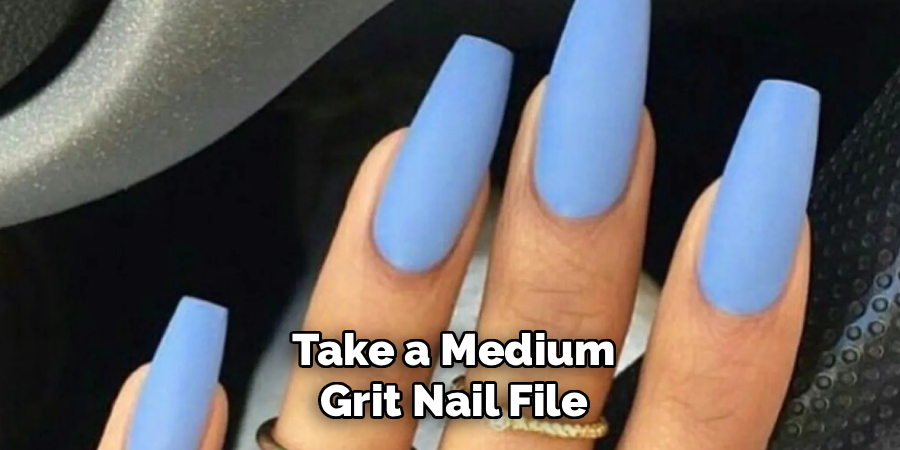
Now comes the most crucial part of defining the structure. Take a medium-grit nail file, preferably a 100/180 grit, and place it along the side of your nail. Hold the file completely straight and firm against the sidewall. You need to file in long, smooth strokes from the nail bed toward the free edge. Avoid sawing back and forth, as this can weaken the nail structure and cause jagged edges. The goal here is to create a straight line that angles inward toward the center of the nail tip. Both sides must be filed at the exact same angle to ensure symmetry. Check your progress frequently by holding your hand up and looking at the nail down the barrel to ensure the taper is even on both sides.
Step 4: Flatten the Tip
The defining characteristic of this style is the flat, squared-off tip. Once your sides are tapered to your satisfaction, hold your file perpendicular to the end of the nail. File straight across the tip to create a sharp, flat edge. This creates the “coffin” appearance by cutting off the point of the triangle you created earlier. Ensure that you are holding the file at a 90-degree angle to the finger to prevent a slanted tip. The width of this flat edge depends on your personal preference, but typically, a narrower flat tip looks more elegant and elongating than a wide one. This step transforms the tapered shape into the iconic silhouette.
Step 5: Refine the Corners and Edges
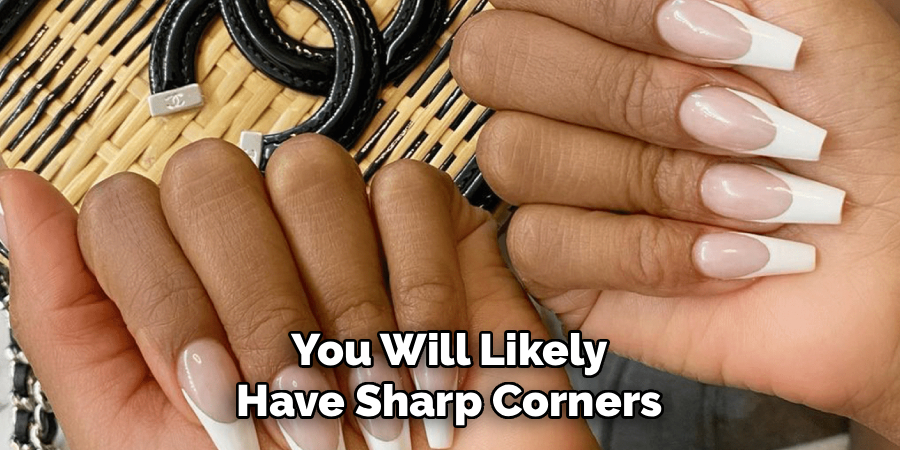
After creating the flat tip, you will likely have sharp corners where the flat edge meets the tapered sides. While the look is geometric, you do not want these corners to be so sharp that they snag on clothing or scratch your skin. Take your file and very gently soften these corners. You are not trying to round them—that would turn the shape into a “squoval”—but rather just lightly buffing away the extreme sharpness. This micro-adjustment preserves the bold, angular look of the coffin shape while making it practical for everyday wear. Run your finger over the edges to feel for any burrs or rough spots that need smoothing out.
Step 6: Smooth and Buff the Surface
Filing the sides and tip can sometimes leave the surface of the nail looking a bit rough or dusty. Now is the time to focus on the texture. Use a buffer block to gently smooth out the top of the nail, removing any ridges or scratches left by the coarser file. If you are working with acrylics or dip powder, this step is essential to blend the extension with your natural cuticle area for a seamless transition. Buffing also prepares the nail plate for polish application, ensuring that your base coat adheres properly and lasts longer. A smooth surface reflects light better, giving your final manicure a professional, high-gloss finish.
Step 7: Final Inspection and Clean Up
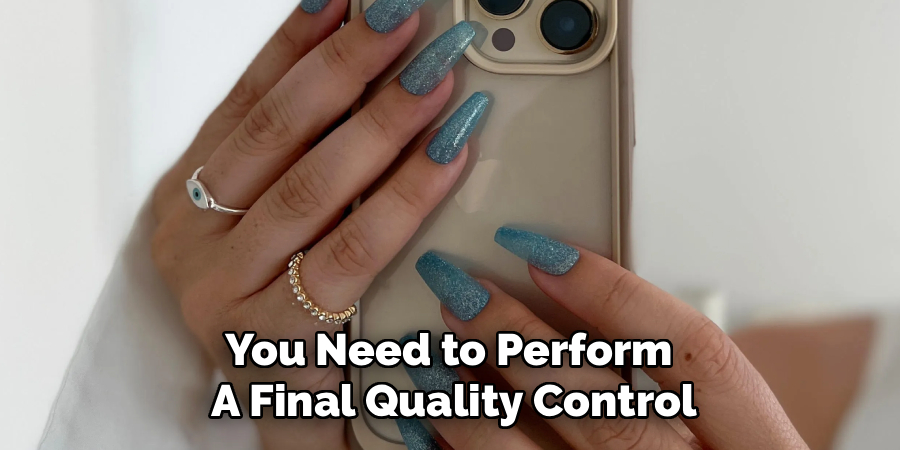
Before applying any polish, you need to perform a final quality control check on all ten fingers. Hold your hands out in front of you, turn them over, and look at them from different angles. Compare the length of the pinky nail on your left hand to the pinky on your right, and so on. Ensure that the taper angles are consistent across all nails. If you spot any irregularities, now is the time to make minor adjustments with a fine-grit file. Wash your hands thoroughly to remove all nail dust and debris. Once dry, wipe the nails with alcohol or nail dehydrator to ensure a completely clean canvas for your polish application.
Frequently Asked Questions
Can I Shape Natural Nails into a Coffin Shape?
Yes, you can shape natural nails into a coffin shape, but there is a catch. Your natural nails need to be quite long and strong to support this style. Because you file away a significant amount of the sidewalls to create the taper, the nail structure can become weakened. If your natural nails are brittle or prone to breaking, you might struggle to maintain this shape without a strengthening overlay like gel or acrylic.
What Is the Difference Between Coffin and Ballerina Nails?
The terms are often used interchangeably, but there is a subtle difference for nail purists.
- Coffin Nails: Typically have very straight, sharp, and angular sidewalls leading to the flat tip.
- Ballerina Nails: Often feature slightly curved sidewalls, mimicking the soft curve of a ballerina’s slipper, though they still end in a flat tip.
In everyday salon language, however, most people consider them to be the same shape.
What Are the Best Tools for Shaping Coffin Nails?
To achieve crisp lines, you need the right tools.
- Nail Clippers: A straight-edge clipper is often better than a curved one for the initial cut.
- 100/180 Grit File: This coarseness is perfect for shaping acrylics or hard gels.
- 240 Grit File: Use this softer file for natural nails to prevent shredding.
- Buffer Block: Essential for smoothing the surface after shaping.
Why Do My Coffin Nails Look Crooked?
Crooked nails usually happen for two reasons. First, you might be filing while looking at your hand from a weird angle. Always flip your hand over (palm facing you) to check symmetry from the viewer’s perspective. Second, you might be filing one side more aggressively than the other. Count your strokes on each side to keep things even.
Is the Coffin Shape Prone to Breaking?
Yes, unfortunately, this shape can be more fragile than others. The tapered sides remove support from the stress points of the nail, and the long length adds leverage that can cause snaps. The sharp corners can also catch on things. Using a builder gel, dip powder, or acrylic overlay adds necessary structural integrity to prevent breakage.
Conclusion
Creating the perfect manicure is an art form that combines precision, patience, and a bit of geometric vision. While the coffin shape may seem intimidating due to its sharp angles and required length, breaking the process down into manageable steps makes it accessible for anyone. By focusing on establishing a strong length, maintaining symmetry in your tapered sides, and executing a clean, flat tip, you can achieve a look that rivals any high-end salon.
Remember that practice makes perfect; do not be discouraged if your first attempt isn’t flawless. With these tips on how to shape coffin nails, you are well on your way to sporting one of the most stylish and sophisticated nail trends of the modern era, right from the comfort of your own home.
About the Author
Jane Hubbard is a passionate beauty expert with a wealth of experience in makeup, hair, and overall beauty techniques. After years of working as a hairdresser specialist, she followed her entrepreneurial spirit and started her own consultancy business.
Jane has always been driven by her desire to help others feel confident in their own skin, and she does this by sharing her knowledge, experiences, and practical beauty tips. Through her consultancy, she empowers individuals to embrace their unique beauty, offering tailored guidance that boosts both self-esteem and personal style.
Professional Focus
- Specializes in makeup, hairstyling, and beauty consulting.
- Provides personalized beauty advice, tips, and techniques to help individuals feel confident in their appearance.
- Dedicated to staying up-to-date with the latest industry trends and developments.
- Passionate about creating a comfortable and empowering experience for every client.
Education History
- University of Craft and Design – Bachelor of Fine Arts (BFA) in Woodworking and Furniture Design
- Woodworking Apprenticeships – Extensive hands-on training with skilled craftsmen to refine carpentry and furniture making techniques
- Online Courses & Masterclasses – Continued education in advanced woodworking techniques, design principles, and specialized tools
Expertise:
- Makeup artistry, hairstyling, and beauty consulting.
- Personalized beauty techniques to enhance confidence and self-expression.
- Educating clients on how to maintain their beauty routines at home.