
If you’ve ever taken a midday glance in the mirror, only to see your foundation breaking apart and settling into lines, you know the struggle of makeup separation. It’s frustrating: you invested time into your look, expecting it to last, but by lunchtime, your once-flawless base is patchy, cakey, or sliding around your skin. The reality is, makeup separation is a universal beauty problem—but it doesn’t have to be inevitable. Whether you have dry, oily, or combination skin, learning how to stop makeup from separating can help you achieve a smooth, long-lasting finish every day.

This comprehensive guide unpacks what causes makeup to split, pill, or separate, and provides actionable strategies for prevention. We’ll walk you through essential steps—from prepping your skin and matching your primer and foundation, to mastering the right layering logic and setting methods. You’ll learn professional techniques for locking in your base, using the right powders and sprays, and touching up on the go. With these insights, you can confidently create a flawless, budget-proof complexion that endures heat, humidity, and a busy schedule.
Ready to take control? Here’s everything you need to know about how to stop makeup from separating.
Why Does Makeup Separate? The Hidden Causes
Every beauty dilemma has an origin story, and foundation splitting or breaking up is rarely due to just one factor. Understanding what’s going wrong is the first step towards fixing it.
Oil vs. Dehydration Breakdown
Your skin’s oil (sebum) production and its hydration levels have a huge impact on makeup adherence. Excess oil can break down the foundation, leaving it sliding off your face or settling in your pores. On the flip side, dehydrated skin might cause your makeup to cling to dry patches and separate as the day progresses. Ideally, balance is key—but most skin types swing too far in one direction or the other.
Product Incompatibility (Oil- vs. Water-Based)
Not all makeup plays well together. If you use a water-based primer with an oil-based foundation (or vice versa), the two formulas can repel each other, causing your foundation to lift, pill, or pool on the skin. Checking your product labels and ensuring compatibility keeps your makeup united for longer wear.
Texture and Environmental Factors
Texture matters just as much as ingredients. Layering too many heavy creams or powders can disrupt your foundation’s stability, especially in humid or dry climates. Sweat, heat, wind, and even air conditioning can accelerate separation by interfering with how your makeup sits on your face.
Skin Prep: Your Foundation’s Anchor
A strong building needs a solid foundation, and the same is true for your makeup routine. Effective skin prep is the secret to a foundation that grips, not slips.
Balancing Hydration for Your Skin Type
Understanding what your skin needs is crucial. Oily types might gravitate towards light, water-based moisturizers, while dry skins thrive on creams that replenish their moisture barrier. Regardless of type, prepping with a hydrating base ensures your skin is plump, smooth, and ready to hold foundation all day.
The Role of Exfoliation in a Smooth Canvas
Flaky patches and clogged pores act like potholes for the foundation—they interrupt the smoothness and create room for separation. Gentle exfoliation 1–2 times weekly removes dead skin cells and allows makeup to sit evenly. Avoid aggressive scrubs; opt for mild chemical exfoliants if your skin tolerates them.
Letting Skincare Fully Absorb Before Priming
It’s tempting to move quickly, but patience pays off. Allow each skincare step (especially moisturizing) to absorb for a few minutes before layering primer and foundation. This minimizes pilling and helps each layer work as intended, improving overall makeup longevity.
Primer and Foundation Pairing: Building the Right Base
Your primer and foundation should function as a team, not adversaries. The right pairing sets the tone for long-lasting performance.
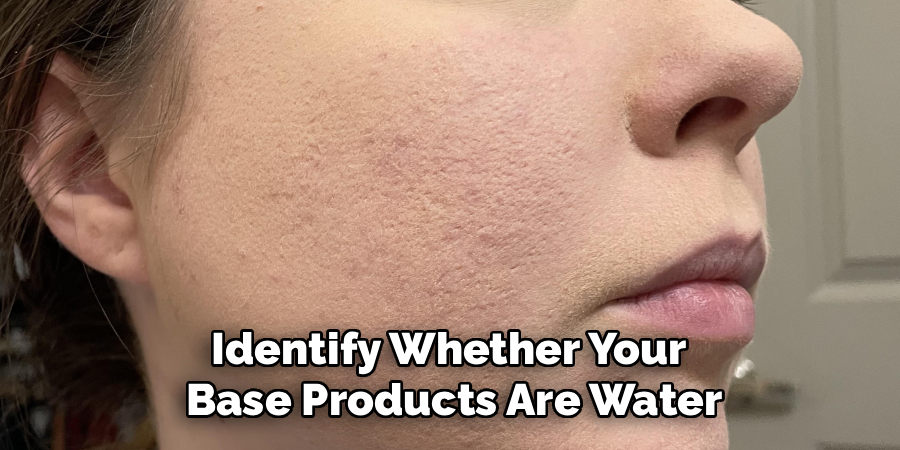
Matching Your Primer to Your Foundation Base
Oil and water may not mix—but your makeup can, if you choose wisely. Identify whether your base products are water- or oil-based, and stick to the same type across both primer and foundation. This “like with like” approach helps products bind together and reduces the risk of separation.
Gripping vs. Smoothing vs. Mattifying Primers
Not all primers are created equal. Gripping primers (often gel-based) boost foundation adhesion and wear-time, smoothing formulas blur pores and create an even surface, and mattifying primers reduce oil and shine in the T-zone. Select a primer that suits your primary skin concern, or try multi-priming (using different primers on different zones) for combination skin.
Targeted Priming for Combination Skin
If your cheeks are dry but your nose is oily, don’t force one solution everywhere. Apply hydrating primer to dry zones and mattifying primer only to oily areas for tailored longevity and comfort.
Step-by-Step Guide: How to Stop Makeup from Separating
Now, let’s break down a professional, stepwise approach to create a base that resists separation, melting, or caking.
Step 1: Prime and Wait
After prepping your skin and selecting the right primer, gently apply a thin layer to your face. Focus on high-movement or problematic areas (forehead, nose, chin). Allow at least one minute for your primer to set before moving to the foundation. This helps create an effective barrier that holds makeup in place.
Step 2: Apply Foundation in Thin, Even Layers
Resist the temptation to pile it on. Instead, use a damp sponge or brush to dot foundation on the face, then blend outward with light pressure. Build up coverage gradually, waiting several seconds between layers. Thin applications reduce the likelihood of the foundation separating or caking throughout the day.
Step 3: Conceal and Allow for Dry-Down Time
Target blemishes, redness, or dark circles with concealer—again, in thin layers. Tap product into skin and let it dry for at least 30 seconds before blending out the edges. This staged approach prevents makeup from pooling or sliding around your face.

Step 4: Set Strategically with a Powder Puff
Press, don’t sweep, a small amount of setting powder with a puff or clean sponge on key areas: sides of the nose, under the eyes, chin, and any oily zones. This locks in the cream products beneath, reducing mid-day movement and shine without adding heaviness.
Step 5: Mist with Setting Spray and Let It Dry
A few spritzes of setting spray lock everything in. Hold the bottle at arm’s length to distribute a fine mist across your face. Let your face dry fully before touching or layering on any more product. This step adds a subtle “seal” to your entire look.
Layering Logic: The Art of Timing and Texture
The way you layer your products—and when you allow them to set—can make or break your look.
The Importance of Dry-Down Time Between Layers
Rushing from one step to the next can cause layers to “slip” rather than stick. After skincare, primer, foundation, or concealer, always allow a brief pause for each to set—this locks in your progress and helps the next layer adhere.
Cream-Then-Powder Protocol
The age-old rule: liquids and creams before powders. Applying cream blush, bronzer, or highlighter before setting with powder prevents patchiness and separation. Layering powder products over unset creams creates mud or streaks, so ensure cream layers are fully blended first.
How Much Is Too Much? Avoiding Over-Layering
It’s easy to get carried away, but too many layers suffocate your skin and increase the odds of separation. Keep applications sheer and targeted, only adding more coverage where you truly need it.
The Power of Powder: Application That Sets, Not Cakes
Powder is your best friend—or your worst enemy—depending on how you use it. Here’s how to maximize setting power without going cakey.

Loose vs. Pressed Powder for Longevity
Loose powders are finely milled and provide lighter, more customizable coverage, ideal for setting the entire face. Pressed powders are travel-friendly and better for targeted touch-ups. Use loose powder to set at home, saving pressed powder for on-the-go.
The Press-and-Roll Technique with a Puff
Instead of sweeping powder, press and gently roll a powder puff onto your skin. This method pushes powder into the foundation without disturbing the layers beneath, minimizing crusty or uneven finish. Focus especially on the nose, chin, and forehead.
Targeted Powdering for High-Movement Zones
Powder only where you need it—think smile lines, around the nostrils, and the eyelids. These are the first areas to break up or crack, so targeted powdering helps maintain a polished look for longer.
Setting Spray Secrets for a Bulletproof Finish
A strategic mistake can mean the difference between a face that holds and one that melts. Here’s how to make the most of your setting spray.
Film-Forming vs. Hydrating Mists
Film-forming sprays (often labeled “long-wear” or “matte”) create a nearly invisible net to secure your makeup. Hydrating mists re-energize the skin while softening any powdery look. Depending on your skin’s needs, choose the right spray or layer both—matte to lock, hydrating to refresh.
The “Spray-Powder-Spray” Sandwich Method
For major staying power, try the sandwich method: Spray after foundation, apply setting powder, then spray again to finish. This dual-layer protection ensures the powder “melts” into the base, creating a flexible, transfer-resistant hold.

Application Distance and Amount
Hold your setting spray about 8–12 inches (20–30cm) from your face and mist in a gentle “X” and “T” pattern. Avoid soaking the skin—just a fine, even layer will do. Over-spraying can disrupt your foundation or cause droplets.
On-the-Go Fixes: Smart Touch-Up Strategy
Nobody’s skin stays the same from dawn to dusk. Here’s how to freshen up without causing separation or caking.
Blotting Before Powdering
Always blot away oil with blotting papers or a single ply of tissue before touching up with powder. Applying powder over an oily or sweaty surface only amplifies separation and adds to the buildup.
Using a Damp Sponge to Re-Blend Separated Areas
A clean, slightly damp sponge can quickly press the separated foundation back into place. Bounce the sponge over affected areas to merge makeup without disrupting what’s still working—then, set lightly with powder if needed.
What to Carry in Your Touch-Up Kit
For all-day perfection, stock your touch-up kit with: blotting papers, a small pressed powder, a mini setting spray, and a travel-size sponge. With these essentials, you can tackle shine, touch up faded areas, and even rehydrate your base without ever needing to start over.
Conclusion
Mastering how to stop makeup from separating is all about preparation, precision, and choosing the right products at every stage. By balancing your skin’s hydration, understanding product compatibility, layering thoughtfully, and using powder and sprays strategically, you can ensure your foundation stays fresh and even from morning until night.
Don’t be discouraged by setbacks—every face is different, and some trial and error is necessary to find what your skin loves best. Keep these principles in mind, and practice regularly to refine your routine. With time and the methods you’ve learned, a flawless, lasting base is truly within your reach—no more midday makeup meltdowns.
Ready to see the difference? Let these tips guide you to smooth, separation-free skin—because your makeup should move with your life, not against it.
About the Author
Jane Hubbard is a passionate beauty expert with a wealth of experience in makeup, hair, and overall beauty techniques. After years of working as a hairdresser specialist, she followed her entrepreneurial spirit and started her own consultancy business.
Jane has always been driven by her desire to help others feel confident in their own skin, and she does this by sharing her knowledge, experiences, and practical beauty tips. Through her consultancy, she empowers individuals to embrace their unique beauty, offering tailored guidance that boosts both self-esteem and personal style.
Professional Focus
- Specializes in makeup, hairstyling, and beauty consulting.
- Provides personalized beauty advice, tips, and techniques to help individuals feel confident in their appearance.
- Dedicated to staying up-to-date with the latest industry trends and developments.
- Passionate about creating a comfortable and empowering experience for every client.
Education History
- University of Craft and Design – Bachelor of Fine Arts (BFA) in Woodworking and Furniture Design
- Woodworking Apprenticeships – Extensive hands-on training with skilled craftsmen to refine carpentry and furniture making techniques
- Online Courses & Masterclasses – Continued education in advanced woodworking techniques, design principles, and specialized tools
Expertise:
- Makeup artistry, hairstyling, and beauty consulting.
- Personalized beauty techniques to enhance confidence and self-expression.
- Educating clients on how to maintain their beauty routines at home.