
Achieving that sleek, glossy salon look at home often feels like a challenge, especially if you are worried about heat damage. Many people shy away from styling tools because they fear frying their locks or ending up with frizz instead of smoothness. However, the right tool can make all the difference, and that is where ceramic technology shines. Unlike metal plates that can heat unevenly and cause hot spots, ceramic plates distribute heat gently and consistently, sealing the hair cuticle for a frizz-free finish.
If you have recently purchased a new tool or dusted off an old one and are wondering exactly how to use a ceramic hair straightener plates effectively, you are in the right place. Mastering this tool is not just about clamping down and pulling; it requires technique to ensure your hair stays healthy and shiny. In this guide, we will walk you through everything you need to know, from preparation to the final pass, ensuring you get professional results without compromising the health of your hair.
Why Use Ceramic Hair Straighteners?
Ceramic hair straighteners are a popular choice for styling due to their ability to distribute heat evenly across the plates, minimizing the risk of hotspots that can damage your hair. Unlike other materials, ceramic retains heat consistently, allowing you to achieve smooth, sleek results with fewer passes. Additionally, ceramic plates emit negative ions, which help to seal the hair cuticle, reducing frizz and enhancing shine. This makes them ideal for a variety of hair types, providing a balance between effective styling and maintaining healthy, vibrant hair. Whether you’re straightening curls or taming waves, ceramic straighteners are designed to deliver professional-quality results while being gentle on your hair.
A Guide on How to Use a Ceramic Hair Straightener
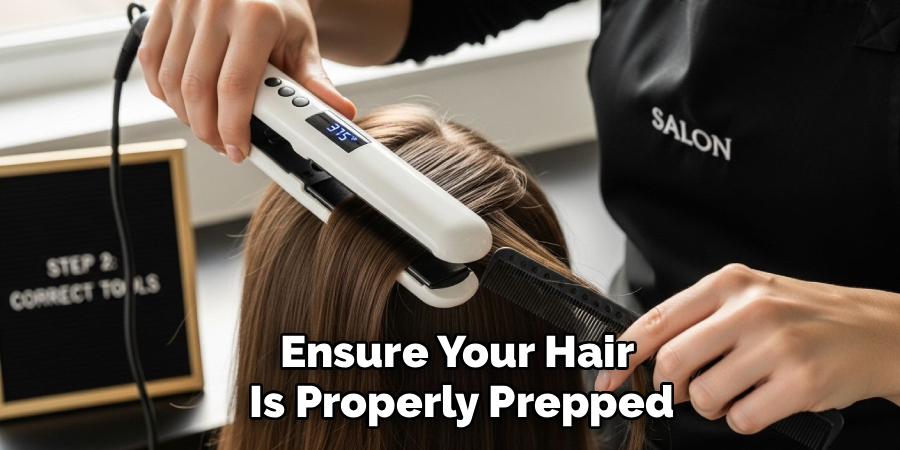
Step 1: Start with Clean, Completely Dry Hair
Before you even think about plugging in your flat iron, it is essential to ensure your hair is properly prepped. Styling on dirty hair can cause product buildup to burn, creating an unpleasant smell and damaging both your hair and the ceramic plates. More importantly, your hair must be 100% dry. Using a hot tool on damp hair can boil the water within the hair shaft, leading to severe breakage and “bubble hair,” which is irreversible damage. After washing and conditioning, use a blow dryer to thoroughly dry your hair from root to tip, aiming the nozzle downwards to encourage smoothness.
Step 2: Apply a Quality Heat Protectant
This step is non-negotiable for maintaining healthy hair. A good heat protectant spray or serum creates a protective barrier between your strands and the hot ceramic plates, minimizing moisture loss and reducing the risk of heat damage. Mist the product evenly throughout your hair, focusing on the mid-lengths and ends, which are often the most fragile parts. Use a comb to distribute the product evenly, ensuring every strand is coated. This simple action not only shields your hair but also helps the straightener glide more smoothly, resulting in a shinier, longer-lasting style and better overall hair health.
Step 3: Section Your Hair for Better Control
One of the biggest mistakes beginners make is trying to straighten large, thick chunks of hair at once. This approach leads to uneven results and requires multiple passes, which ultimately causes more damage. To avoid this, section your hair into small, manageable parts. Use clips to separate the top layers of your hair, starting with the bottom sections first. Working with smaller sections, about one to two inches wide, allows the ceramic plates to distribute heat evenly across every strand. This ensures you achieve a perfectly straight look with just one or two slow passes, saving time and protecting your hair.

Step 4: Select the Correct Heat Setting
Ceramic straighteners are popular because they offer a range of temperature settings, but it’s crucial to choose the right one for your hair type. Not everyone needs the highest setting. For fine, thin, or color-treated hair, a lower temperature between 250-300°F is usually sufficient. If you have normal, healthy hair, a medium setting of 300-350°F will work well. Thick, coarse, or very curly hair types may require higher temperatures, around 350-400°F, to achieve smooth results. Always start with a lower setting and gradually increase it only if necessary. This prevents unnecessary heat exposure and damage.
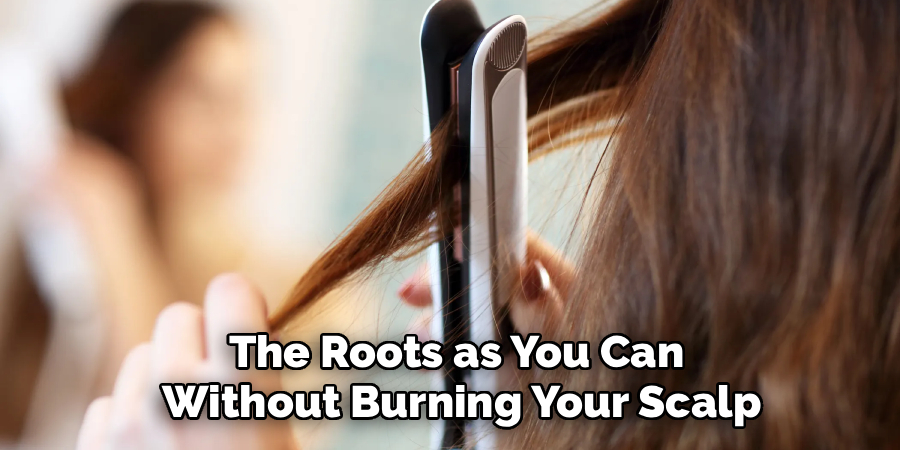
Step 5: Master the Gliding Technique
Now for the main event. Take one of your prepared one-inch sections and place the ceramic straightener as close to the roots as you can without burning your scalp. Clamp the plates down firmly but gently and glide the iron down the hair shaft in one smooth, continuous motion. The key is to maintain a consistent speed—not too fast that it doesn’t straighten, and not too slow that it singes the hair. A steady, fluid pass locks in smoothness and shine. Avoid stopping midway down the strand, as this can create unsightly creases and cause heat damage.
Step 6: Perfecting with a Comb
For an extra-sleek, professional finish, try the “chase” method. This technique involves running a fine-tooth comb through the section of hair just in front of the straightener as you glide it down. The comb detangles the hair right before the plates pass over it, ensuring there are no knots or bumps. This allows the heat to be applied to a perfectly smooth surface, resulting in a straighter, glossier finish. Mastering this aspect of how to use a ceramic hair straightener can elevate your styling from good to great, giving you that salon-perfect look every time.
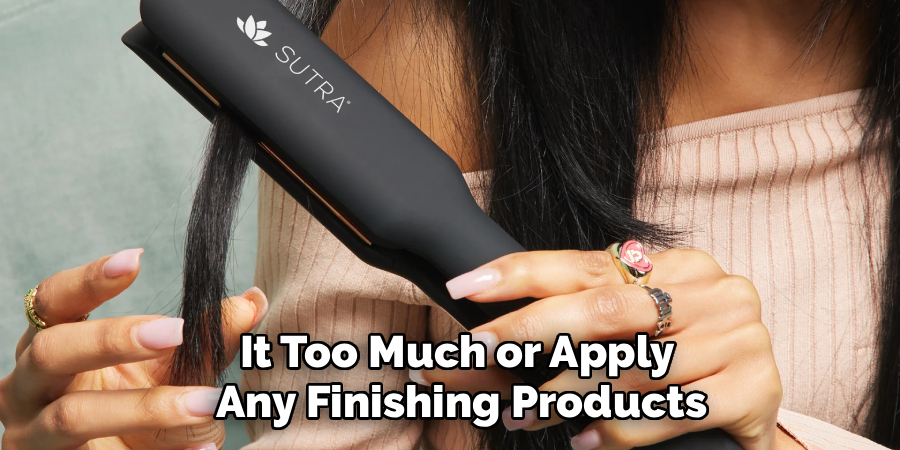
Step 7: Let Your Hair Cool Down Completely
After you have finished straightening each section, your hair will still be holding a lot of heat. It is vital to let it cool down completely before you touch it too much or apply any finishing products. The cooling process is what sets the style in place, ensuring it remains straight and smooth for as long as possible. If you start running your fingers through it or brushing it while it is still warm, you risk creating frizz and disrupting the sleek finish you just worked so hard to achieve. Be patient and allow a few minutes for the strands to cool and settle.
Step 8: Apply a Finishing Product for Shine and Hold
Once your hair has cooled, it is time to add the final touch. A lightweight finishing product can make a world of difference. A few drops of a shine serum or a light mist of anti-humidity hairspray will help fight frizz, add a beautiful gloss, and provide a light hold to keep your style in place all day. Apply the product sparingly, focusing on the mid-lengths and ends to avoid weighing down your roots. This last step seals the cuticle, enhances the sleekness, and protects your perfectly straight hair from environmental factors like humidity.
Frequently Asked Questions
Is Ceramic Better Than Titanium for a Straightener?
Ceramic is generally better for fine, thin, or damaged hair because it heats evenly and uses infrared technology to gently warm the hair from within. Titanium heats up faster and can reach higher temperatures, making it more suitable for very thick, coarse, or resistant hair types.
Can I Use a Ceramic Straightener Every Day?
Daily use of any heat styling tool is not recommended, as it can lead to dryness, breakage, and long-term damage. If you must use it daily, always use a heat protectant and the lowest effective temperature setting for your hair type to minimize potential harm.
Why Does My Hair Smell Burnt After Straightening?
A burnt smell can be caused by a few things: the heat setting is too high for your hair type, you are styling on hair that isn’t completely clean, or product buildup on the straightener’s plates is scorching. Always clean your plates and use the correct temperature.
How Do I Clean My Ceramic Straightener Plates?
When the iron is completely cool and unplugged, wipe the ceramic plates with a soft, damp cloth. For stubborn product buildup, you can use a cotton ball soaked in a small amount of rubbing alcohol. Regular cleaning ensures the tool glides smoothly and heats effectively.
Can I Curl My Hair With a Ceramic Straightener?
Yes, absolutely! A ceramic straightener is a versatile tool for creating curls and waves. Simply clamp a section of hair, and as you pull the straightener down the hair shaft, rotate it 180 degrees away from your face. The smooth plates will create a beautiful curl.
Conclusion
Mastering your styling tool is the key to unlocking endless good hair days. By following these steps—from proper preparation and sectioning to choosing the right heat and using a smooth gliding motion—you can achieve a flawless, professional-looking style right at home. Remember that protecting your hair with heat protectant and allowing it to cool are just as important as the straightening process itself. With a little practice, understanding how to use a ceramic hair straightener will become second nature, giving you the confidence to create sleek, shiny, and healthy-looking hair whenever you desire.
About the Author
Jane Hubbard is a passionate beauty expert with a wealth of experience in makeup, hair, and overall beauty techniques. After years of working as a hairdresser specialist, she followed her entrepreneurial spirit and started her own consultancy business.
Jane has always been driven by her desire to help others feel confident in their own skin, and she does this by sharing her knowledge, experiences, and practical beauty tips. Through her consultancy, she empowers individuals to embrace their unique beauty, offering tailored guidance that boosts both self-esteem and personal style.
Professional Focus
- Specializes in makeup, hairstyling, and beauty consulting.
- Provides personalized beauty advice, tips, and techniques to help individuals feel confident in their appearance.
- Dedicated to staying up-to-date with the latest industry trends and developments.
- Passionate about creating a comfortable and empowering experience for every client.
Education History
- University of Craft and Design – Bachelor of Fine Arts (BFA) in Woodworking and Furniture Design
- Woodworking Apprenticeships – Extensive hands-on training with skilled craftsmen to refine carpentry and furniture making techniques
- Online Courses & Masterclasses – Continued education in advanced woodworking techniques, design principles, and specialized tools
Expertise:
- Makeup artistry, hairstyling, and beauty consulting.
- Personalized beauty techniques to enhance confidence and self-expression.
- Educating clients on how to maintain their beauty routines at home.