
Do you ever experience the disappointment of your eyebrow products not staying in place and constantly sliding off? Who hasn’t? Lucky for us, there is a revolutionary product that will help keep our brows looking fierce all day – Brow Glue. This incredible ‘glue’ holds brow products, such as pencils or pomades, in place and adds a solid hold to ensure your eyebrows stay exactly where you want them to be.
Brow glue is easy to use and can be a game-changer for your eyebrow routine. Additionally, it can also save you time and money as it eliminates the need for constant touch-ups throughout the day.
In this post, we are going to be exploring how to use Brow glue so that you can have perfect arches with unstoppable staying power!
What Will You Need?
Before we get into how to use brow glue, let’s make sure you have all the necessary tools on hand. Here’s a list of what you will need:
- A clean spoolie brush
- Brow glue (obviously)
- Your preferred eyebrow product (pencil, pomade, powder, etc.)
- An angled brush (if using a pomade)
- Any other eyebrow tools you may need, such as tweezers or scissors
Now that we have everything we need let’s dive into the step-by-step process of using brow glue. Follow these simple steps, and you’ll have perfect eyebrows in no time!
10 Easy Steps on How to Use Brow Glue
Step 1: Clean Your Eyebrows
Cleanliness is vital to starting any makeup routine. Start by cleaning your eyebrows with a gentle makeup remover or facial cleanser to remove any oil or makeup. This ensures the brow glue and other products adhere correctly. Dry your eyebrows thoroughly after cleaning.
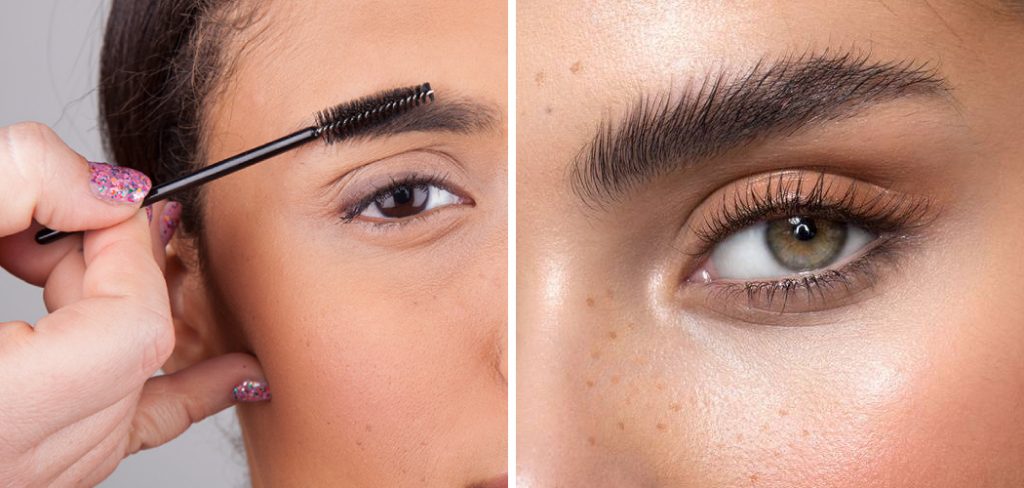
Step 2: Brush Your Eyebrows
Next, take your clean spoolie brush and comb through your eyebrows. Brush upwards and outwards, following the natural growth of your hair. This will help to shape your brows and prepare them for the application of the brow glue. Brushing your brows also helps to remove any leftover cleanser or makeup, ensuring a clean slate for the brow glue.
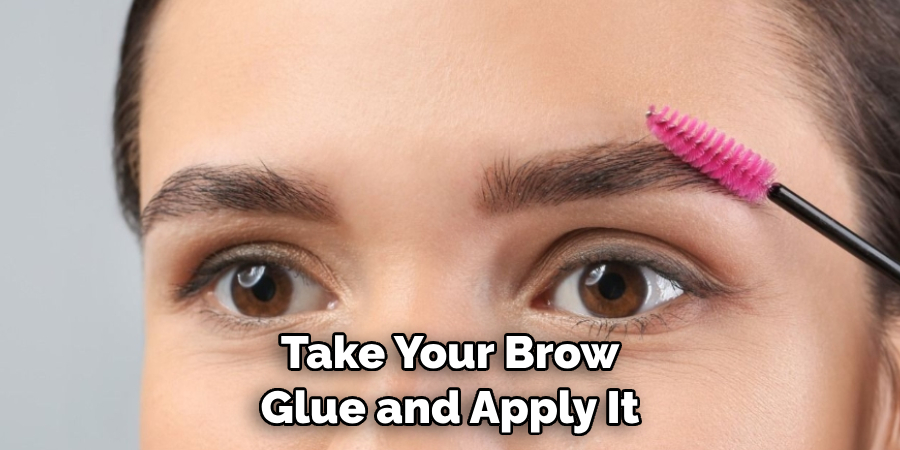
Step 3: Apply Brow Glue
Take your brow glue and apply it directly onto your eyebrows. Use a small amount to avoid a sticky or heavy feel. Apply the product in the direction of your eyebrow growth. For most people, this means brushing the glue upwards at the start of your brow and outwards as you move towards the tail of your eyebrow. After applying, give it a few seconds to dry before moving on to the next step.
Step 4: Sculpt Your Eyebrows
Once the brow glue has dried, it’s time to shape your brows. Using a clean spoolie brush, comb through your eyebrows again, sculpting them into your desired shape. The brow glue should provide ample hold, allowing you to manipulate your eyebrow hairs easily. Whether you prefer a natural, brushed-up look or a precise, defined shape, the brow glue will assist in achieving your desired effect.
Step 5: Apply Your Eyebrow Product
Now that your eyebrows are shaped and ready, it’s time to apply your preferred eyebrow product. If you’re using an eyebrow pencil, lightly fill in any sparse areas and define the shape of your brows. For pomades or powders, use an angled brush to apply the product, starting from the arch and working your way toward the eyebrow’s tail. Remember, the goal is to enhance your natural brows, not to draw them on thoroughly. Be sure to blend the product well for a natural look. The brow glue will ensure your product stays in place all day.
Step 6: Review and Clean Up
After applying your eyebrow product, review your brows for any mistakes or smudges. If your eyebrows look too harsh, use the spoolie to brush through and soften the look gently. If you’ve made a mistake or gone outside your natural brow line, take a cotton bud dipped in makeup remover and carefully clean up the area. Once you’re satisfied with how your eyebrows look, let the product set for a minute or two before you move on to the rest of your makeup. The brow glue should keep everything in place, ensuring your brows look perfect all day.
Step 7: Set Your Eyebrows
After your eyebrow product has set for a minute or two, it’s time to seal everything with another layer of brow glue. Apply a thin layer of the glue over your eyebrows, once again following the direction of your hair growth. This will ensure your brow product stays in place and your brows maintain shape throughout the day. Allow the brow glue to dry completely before moving on.
Step 8: Final Touches
Now that you’ve applied and set your eyebrows with brow glue, it’s time for the final touches. If you’d like to add some highlight, swipe a light, shimmery eyeshadow or highlighter just beneath your eyebrow arch. This will add lift and make your eyebrows stand out even more. Remember to blend well for a seamless finish.
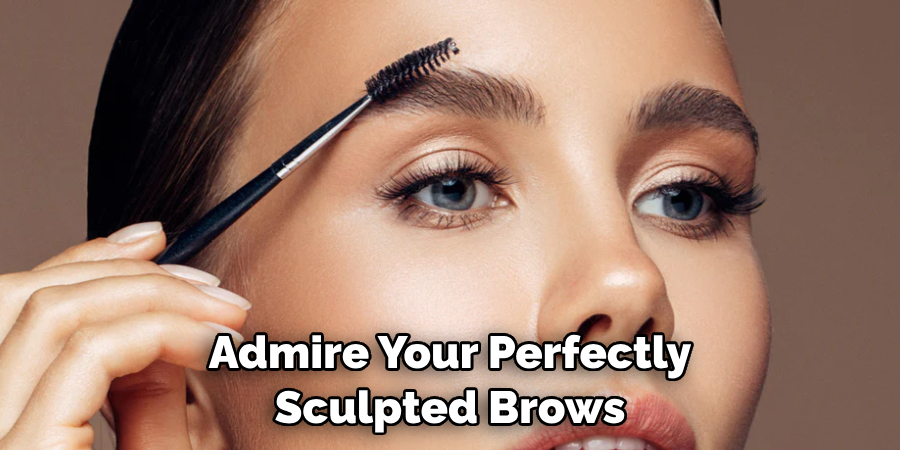
Step 9: Enjoy Your Perfect Brows!
Look in the mirror and admire your perfectly sculpted brows! Whether for a natural look or a dramatic arch, your brows should now be perfect and ready to face the day. Thanks to the brow glue, you can have confidence that your brows will stay in place, no matter what the day brings.
Step 10: Removal
When your day is done, remove the brow glue and other brow products with a gentle makeup remover. This will prevent any potential irritation and ensure your brows are clean and ready for the next application! Avoid rubbing or pulling at your eyebrow hairs when removing the products.
By following these simple steps, you can achieve perfect brows with the help of brow glue. Remember to use a small amount of product and to comb through your eyebrows in the direction of hair growth for the best results.
5 Additional Tips and Tricks
- Start With a Clean Base: Before applying brow glue, ensure your eyebrows are clean and free of any makeup or oils. This allows the brow glue to adhere properly and last longer.
- Brush Upwards First: When applying, start by brushing your brows upwards. This will help to reveal any sparse areas that need extra attention and create a fuller, more lifted look.
- Apply in Sections: Rather than attempting to cover your entire brow at once, apply the brow glue in sections. This gives you more control and ensures even coverage.
- Shape while wet: After applying the glue, shape your brows while the glue is still wet. Once it dries, it becomes much more challenging to alter the shape.
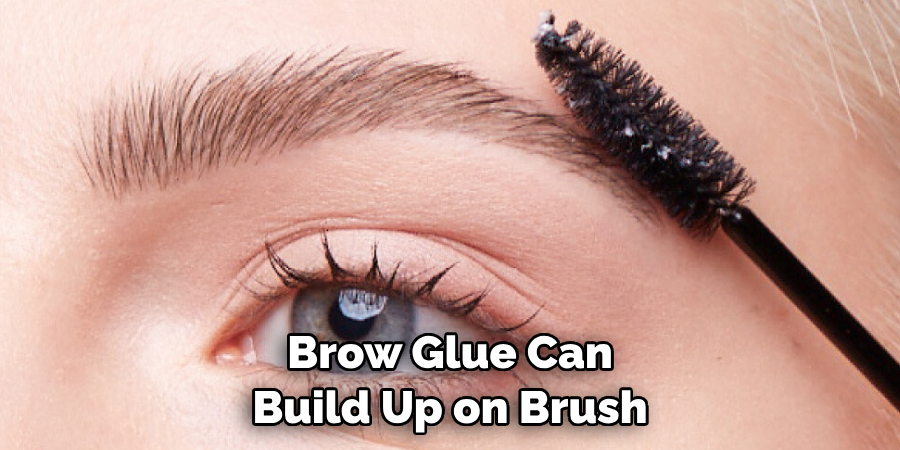
- Clean Your Brush Regularly: Brow glue can build up on brush over time, making it less effective. Periodically cleaning your brush will ensure it works optimally every time you need it.
With these extra tips and tricks, you’ll be a pro at using brow glue in no time!
5 Things You Should Avoid
- Don’t Over-apply: Too much brow glue can create a stiff, unnatural look. Use sparingly and build up if necessary.
- Avoid Touching Your Brows: After you’ve applied the brow glue, avoid touching your brows, as this can disrupt the shape and cause the glue to wear off quicker.
- Don’t Rush the Drying Process: Allow the glue to dry naturally. Using a blow dryer or fanning your brows may cause the glue to dry unevenly.
- Avoid Using Old Product: Brow glue, like any makeup product, has a shelf life. Using old glue can lead to ineffective results and potentially irritate your skin.
- Don’t Neglect Brow Care: Regular use of brow glue can dry out your brows. Make sure to incorporate a nourishing brow serum into your routine to keep your brows healthy.
Avoiding these common mistakes can help you get the most out of your brow glue and achieve stunning, long-lasting results.
Can You Use Glue as Brow Gel?
The answer is yes, but it’s not recommended. While both serve a similar purpose of keeping your brows in place, there are some key differences between brow glue and brow gel.
- Brow Glue: As the name suggests, brow glue is explicitly designed for use on eyebrows. It has a stronger hold than brow gel and can keep even the most unruly hairs in place. It’s also usually clear, making it great for all hair colors.
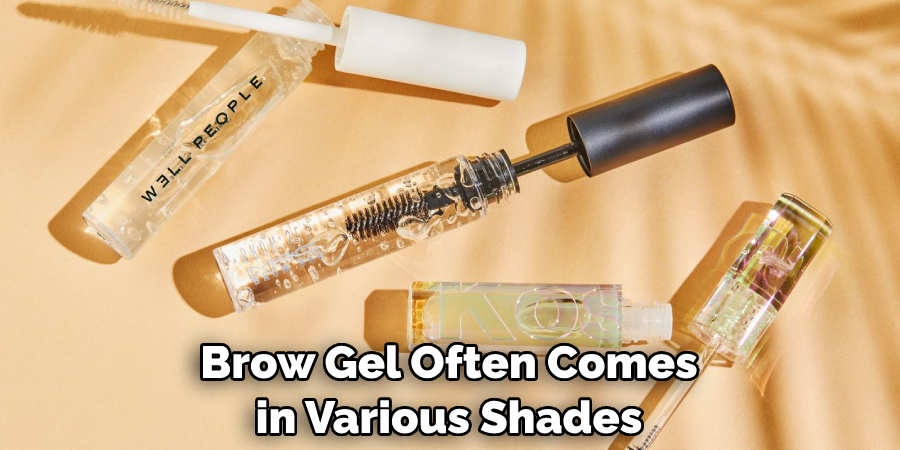
- Brow Gel: Brow gel often comes in various shades to match your hair color and can add volume and definition to your brows. However, it doesn’t have the same level of hold as brow glue and may not be as effective at keeping stubborn hairs in place.
In short, while glue as a makeshift brow gel may work in a pinch, it’s best to stick with products designed explicitly for eyebrows. So, give your brows the TLC they deserve by using brow glue and achieving flawless, long-lasting results!
Conclusion
With the right supplies, knowing the techniques, and spending some time to practice, you can become a master of applying brow glue. Now that you know the basics of how to use brow glue, you can create show-stopping looks with your eyebrows.
Keep experimenting and have fun – try bold, unique looks for an even more dramatic appearance. Don’t forget – when in doubt or experimenting with a new look, just use less brow glue as opposed to more. You can always go right if you take your time and build up color gradually!
So don’t be afraid to try something new today; your brows deserve it just as much as any other part of your makeup routine.
You Can Also Check This Out to Clean a Wax Brush
About the Author
Jane Hubbard is a passionate beauty expert with a wealth of experience in makeup, hair, and overall beauty techniques. After years of working as a hairdresser specialist, she followed her entrepreneurial spirit and started her own consultancy business.
Jane has always been driven by her desire to help others feel confident in their own skin, and she does this by sharing her knowledge, experiences, and practical beauty tips. Through her consultancy, she empowers individuals to embrace their unique beauty, offering tailored guidance that boosts both self-esteem and personal style.
Professional Focus
- Specializes in makeup, hairstyling, and beauty consulting.
- Provides personalized beauty advice, tips, and techniques to help individuals feel confident in their appearance.
- Dedicated to staying up-to-date with the latest industry trends and developments.
- Passionate about creating a comfortable and empowering experience for every client.
Education History
- University of Craft and Design – Bachelor of Fine Arts (BFA) in Woodworking and Furniture Design
- Woodworking Apprenticeships – Extensive hands-on training with skilled craftsmen to refine carpentry and furniture making techniques
- Online Courses & Masterclasses – Continued education in advanced woodworking techniques, design principles, and specialized tools
Expertise:
- Makeup artistry, hairstyling, and beauty consulting.
- Personalized beauty techniques to enhance confidence and self-expression.
- Educating clients on how to maintain their beauty routines at home.