
Laura Geller’s Spackle primer has revolutionized the way makeup enthusiasts approach their beauty routines, offering a unique solution for creating a smooth, flawless canvas for makeup application. This innovative primer combines the benefits of traditional makeup primers with advanced hydrating and smoothing properties, making it a favorite among both professional makeup artists and everyday users. Learning how to use laura geller spackle properly can transform your entire makeup experience, helping you achieve longer-lasting coverage while addressing common skin concerns like uneven texture and enlarged pores.
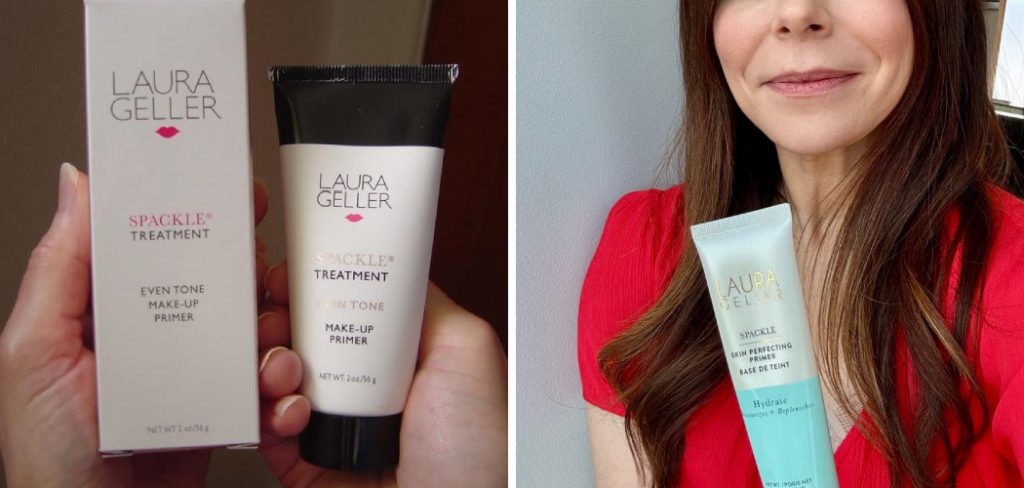
What sets Laura Geller Spackle apart from conventional primers is its distinctive formulation that works to fill in fine lines and imperfections while providing intense hydration to the skin. The lightweight, silky texture glides effortlessly across the face, creating an instant smoothing effect that makes foundation application easier and more even. Whether you’re dealing with dry skin, visible pores, or simply want your makeup to last all day, this versatile primer offers multiple benefits in one convenient product.
Why Understanding Laura Geller Spackle Application Matters
Proper application technique is crucial for maximizing the benefits of this high-performance primer and ensuring your makeup looks professional and polished. Without the correct method, you may miss out on the product’s smoothing and hydrating properties, leading to uneven foundation coverage and shorter makeup wear time. Understanding the nuances of application—from the right amount to use to the proper blending technique—can mean the difference between a good makeup day and an exceptional one. This knowledge becomes especially valuable when investing in premium makeup products, as proper usage ensures you get the best value from your purchase.
Step-by-Step Guide: How to Use Laura Geller Spackle
Step 1: Prep Your Skin with Proper Cleansing
Begin your makeup routine with a thorough cleansing to remove any impurities, excess oils, or residue from previous skincare products. Use a gentle cleanser appropriate for your skin type, followed by a toner if desired. This clean foundation ensures that the primer can adhere properly to your skin and perform optimally.

Pat your face dry with a clean towel, being careful not to rub or irritate the skin. Allow your skin to settle for a few minutes after cleansing before proceeding to the next step, as this brief waiting period helps your skin return to its natural pH balance and prepares it for optimal product absorption.
Step 2: Apply Your Regular Skincare Routine
Follow your typical skincare regimen, including any serums, moisturizers, or targeted treatments you normally use. However, be mindful of the products you choose, as some heavy creams or oil-based products may interfere with primer adhesion. If you use a moisturizer, opt for a lightweight, fast-absorbing formula and allow it to fully penetrate your skin before moving to the primer step. This usually takes about 5-10 minutes, depending on your skin type and the products used. Proper hydration at this stage actually enhances the primer’s performance, creating an ideal base that allows the Spackle to work more effectively in smoothing and filling imperfections.
Step 3: Dispense the Right Amount of Laura Geller Spackle
The key to successful primer application lies in using the correct amount of product. For Laura Geller Spackle, start with a small, pea-sized amount for your entire face. This primer is highly concentrated and a little goes a long way, so resist the urge to use too much product initially. You can always add more if needed, but using too much can create a heavy feeling on the skin and may actually interfere with foundation application. Squeeze the primer onto the back of your clean hand or directly onto your fingertips, and warm it slightly between your fingers before application. This warming process helps the primer blend more seamlessly into your skin.
Step 4: Master the Proper Application Technique for Laura Geller Spackle
Apply the primer using gentle, upward strokes, starting from the center of your face and working outward toward your hairline and jawline. Focus particularly on areas where you have visible pores, fine lines, or texture issues, as these are where the Spackle’s smoothing properties will be most beneficial.
Use your fingertips or a damp beauty sponge to blend the product evenly, ensuring there are no visible lines or patches. Pay special attention to the T-zone area, which typically requires more smoothing, and don’t forget often-overlooked areas like the sides of your nose and around your nostrils. The primer should feel lightweight and smooth once properly blended.

Step 5: Allow Proper Setting Time
After application, give the primer adequate time to set before applying foundation or other makeup products. This crucial waiting period, typically 2-3 minutes, allows the primer to form a proper base and ensures optimal performance throughout the day. During this time, you can attend to other parts of your beauty routine, such as applying eye primer or setting up your foundation and concealer products. The primer is ready for the next step when it feels dry to the touch and has a slightly tacky texture that will help your foundation adhere better. Rushing this step can lead to pilling or uneven foundation application.
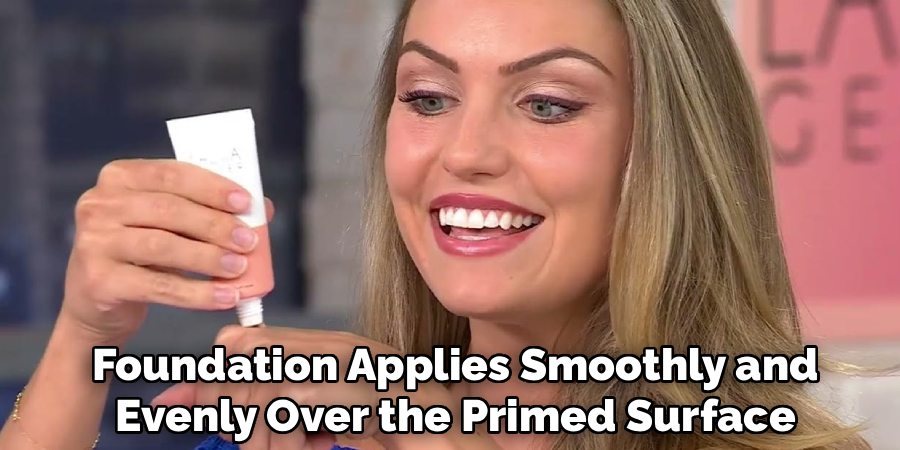
Step 6: Apply Foundation Over the Primed Surface
Once the primer has set, proceed with your foundation application using your preferred method, whether that’s a beauty sponge, brush, or fingertips. You’ll likely notice that your foundation applies more smoothly and evenly over the primed surface, requiring less product to achieve your desired coverage level. The Spackle primer creates an ideal grip for foundation while simultaneously smoothing the skin’s texture, resulting in a more polished, professional-looking finish. Work in thin layers, building up coverage gradually if needed, as the primer’s smoothing effect often means you can achieve great results with lighter foundation application than usual.
Step 7: Complete Your Makeup Look
Continue with the rest of your makeup routine as normal, applying concealer, powder, blush, and other products as desired. You should notice that your makeup appears more refined and adheres better to the primed skin surface. The hydrating properties of the Spackle primer help prevent makeup from looking cakey or settling into fine lines throughout the day. Many users find that their makeup stays fresh-looking for longer periods when applied over this primer base. Take note of how your makeup performs throughout the day, as this will help you adjust application techniques or amounts for future use.
Step 8: Maintain and Touch Up Throughout the Day
Throughout your day, monitor how your makeup is holding up and make any necessary touch-ups. The long-lasting properties of Laura Geller Spackle typically mean fewer touch-ups are needed, but everyone’s skin is different. If you do need to refresh your makeup, use a clean tissue to gently blot any excess oils in your T-zone before applying additional powder or foundation. The primer’s staying power often means that a light dusting of powder is sufficient to restore your makeup’s fresh appearance. Keep track of how long your makeup looks optimal with this primer, as this information will help you perfect your routine over time.
Common Beginner Mistakes
Using Too Much Primer – Applying an excessive amount of primer can lead to a heavy or cakey look, and it may prevent your other makeup products from adhering properly. A pea-sized amount is typically sufficient for the entire face.
Skipping Moisturizer – Primer should not replace moisturizer. Without properly hydrated skin, your makeup may not apply evenly or last as long.
Failing to Match Primer to Skin Type – Not all primers are created equal. Selecting a primer that does not suit your skin type (e.g., using a mattifying primer on dry skin) can cause discomfort and uneven makeup application.
Not Waiting for Primer to Set – Applying foundation immediately after primer without giving it time to set can result in streaky or patchy makeup. Wait a minute or two for the primer to dry.
Using Primer Without Purpose – Applying primer without understanding its function can lead to unpredictable results. Whether you need a pore-filling, color-correcting, or hydrating primer, be sure to choose one that meets your specific needs.
Frequently Asked Questions (FAQs)
Can I Use Laura Geller Spackle on Oily Skin?
Yes, Laura Geller Spackle works well on oily skin types, though you may want to use slightly less product and ensure your skincare routine includes oil-control elements. The primer’s lightweight formula won’t clog pores, but oily skin may benefit from using a mattifying moisturizer beforehand. Some users with very oily skin prefer to use the Spackle only in areas where they need smoothing, rather than all over the face, to maintain oil control while still getting the primer’s benefits.
How Long Does the Primer Effect Last?
When applied correctly, Laura Geller Spackle typically provides smoothing and extending benefits for 8-12 hours, depending on your skin type and environmental factors. The primer’s hydrating formula helps prevent makeup from breaking down due to dryness, while its smoothing properties maintain a polished appearance throughout the day. Users with very oily skin may find the effect lasts closer to 8 hours, while those with normal to dry skin often experience the full 12-hour benefit.

Should I Use Setting Spray After Application?
Setting spray can complement Laura Geller Spackle nicely, providing an extra layer of makeup longevity. However, it’s not strictly necessary as the primer itself offers excellent staying power. If you choose to use setting spray, apply it as the final step in your makeup routine, holding the bottle 6-8 inches from your face and misting lightly. Allow the spray to dry naturally rather than fanning or touching your face, which could disturb your carefully applied makeup.
Conclusion
Mastering how to use laura geller spackle effectively can elevate your entire makeup routine, providing a professional-quality base that enhances both the application and longevity of your cosmetics. The key elements for success include proper skin preparation, using the right amount of product, allowing adequate setting time, and maintaining a consistent application technique that works with your individual skin needs.
Remember that finding your perfect technique may require some experimentation, as everyone’s skin responds differently to makeup products. Don’t be discouraged if your first attempt isn’t perfect—even professional makeup artists needed practice to master primer application. With consistent use and attention to these guidelines, you’ll soon discover why Laura Geller Spackle has become a beloved staple in so many makeup routines, delivering the smooth, long-lasting results that make every makeup application a success.
About the Author
Jane Hubbard is a passionate beauty expert with a wealth of experience in makeup, hair, and overall beauty techniques. After years of working as a hairdresser specialist, she followed her entrepreneurial spirit and started her own consultancy business.
Jane has always been driven by her desire to help others feel confident in their own skin, and she does this by sharing her knowledge, experiences, and practical beauty tips. Through her consultancy, she empowers individuals to embrace their unique beauty, offering tailored guidance that boosts both self-esteem and personal style.
Professional Focus
- Specializes in makeup, hairstyling, and beauty consulting.
- Provides personalized beauty advice, tips, and techniques to help individuals feel confident in their appearance.
- Dedicated to staying up-to-date with the latest industry trends and developments.
- Passionate about creating a comfortable and empowering experience for every client.
Education History
- University of Craft and Design – Bachelor of Fine Arts (BFA) in Woodworking and Furniture Design
- Woodworking Apprenticeships – Extensive hands-on training with skilled craftsmen to refine carpentry and furniture making techniques
- Online Courses & Masterclasses – Continued education in advanced woodworking techniques, design principles, and specialized tools
Expertise:
- Makeup artistry, hairstyling, and beauty consulting.
- Personalized beauty techniques to enhance confidence and self-expression.
- Educating clients on how to maintain their beauty routines at home.