
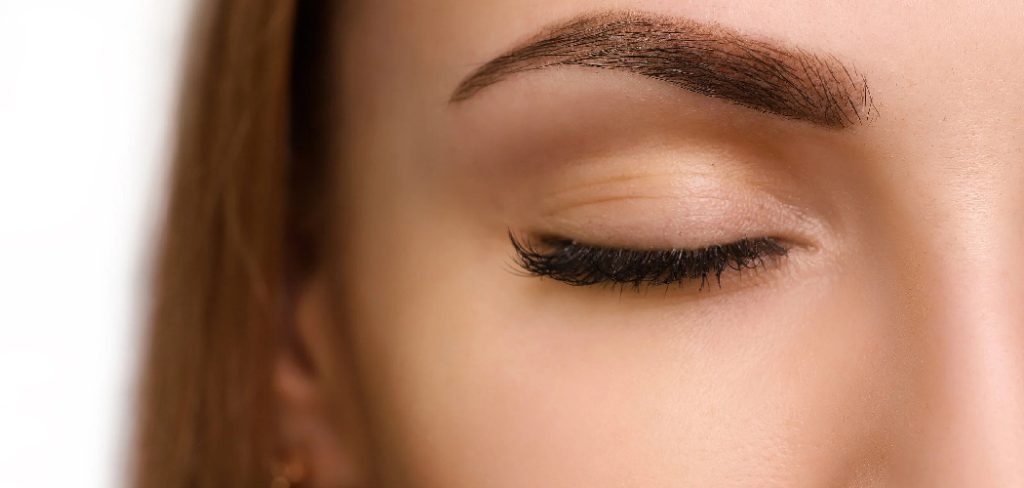
The skin under your eyes is incredibly thin and delicate, and it moves constantly every time you blink, smile, or squint. This constant movement is exactly why liquid products tend to separate and settle into lines so quickly. While many people skip powder for fear of looking dry or “cakey,” omitting this step is usually the culprit behind poor longevity. A good setting strategy acts as a safety net for your concealer, keeping pigment where it belongs while blurring texture.
Mastering this technique does not require a professional certification, but it does require understanding the nuance of application. It is about balancing hydration with hold. If you have ever wondered how to use setting powder under eyes to prevent this mess and achieve that airbrushed finish, you are in the right place. By following a specific order of operations, you can ensure your brightness stays put from your morning coffee all the way through to your evening skincare routine.
A Step-by-Step Guide on How to Use Setting Powder Under Eyes
Step 1: Hydrate and Prep the Undereye Area
The journey to flawless makeup actually begins with skincare. Before you even reach for a makeup brush, you must ensure the delicate skin under your eyes is properly hydrated. If this area is dry and parched, your concealer will cling to dry patches, and the powder you apply later will only emphasize texture, creating a crepey appearance. Start by applying a lightweight, hydrating eye cream. Use your ring finger to gently tap the product into the skin, which ensures you are not applying too much pressure to this sensitive area.

Step 2: Apply Your Color Corrector and Concealer
Once your skin is prepped, it is time to apply your liquid or cream base products. If you struggle with dark circles that show through your concealer, start with a thin layer of color corrector—usually a peach or orange tone depending on your skin depth—to neutralize the blue or purple shadows. Follow this with your concealer of choice. The key here is moderation. A common mistake is applying a large triangle of thick concealer, which inevitably leads to cakeinenss because there is simply too much product sitting on the surface of the skin.
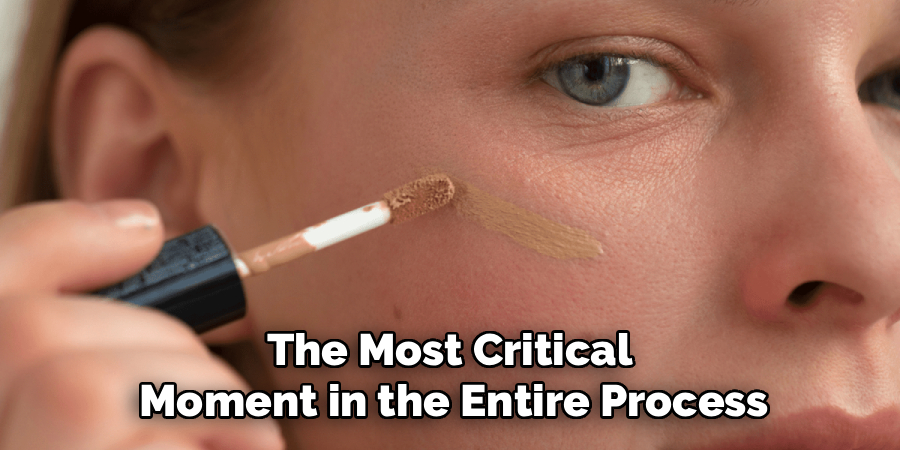
Step 3: Smooth Out Any Creases Before Setting
This is arguably the most critical moment in the entire process, yet it is the step most people skip. Between the time you blend your concealer and the time you grab your powder, your makeup has likely already started to settle into the fine lines of your skin. If you apply powder directly over these settled lines, you are effectively “setting” the crease in place for the rest of the day. No amount of buffing later will fix a crease that has been locked in with powder.
Step 4: Select the Right Tools for Application
If you prefer using a brush, opt for a small, tapered setting brush that fits specifically in the undereye contour. Whatever tool you choose, the technique remains similar: pick up a small amount of powder and—this is crucial—tap the excess off on the back of your hand. You want the powder to be evenly distributed on your tool, not sitting in a clump. Mastering how to use setting powder under eyes requires understanding that you are building thin veils of product, not packing on a thick mask.
Step 5: Press the Powder In, Do Not Swipe
Now that your tool is loaded and your concealer is smooth, it is time to set. The motion you use here can make or break your look. Do not drag or swipe the tool across your skin. Swiping will disturb the concealer underneath, moving it around and creating streaks or patchiness. Instead, you need to use a pressing or rolling motion. If you are using a puff or sponge, gently press the powder directly onto the concealer. This pushes the powder into the liquid, merging them together to create a long-lasting bond.
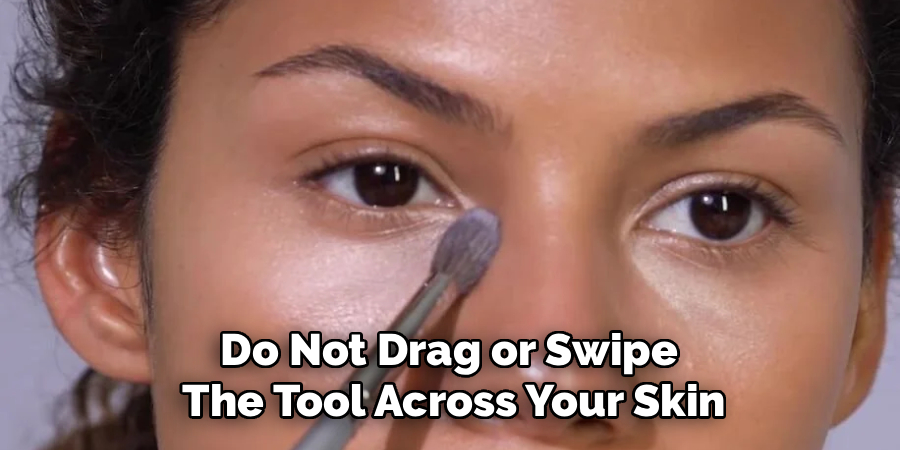
Start from the outer corner and work your way in, or vice versa, ensuring every millimeter of concealer is covered. You should feel a slight pressure as you deposit the product. If you are using a brush, the motion is a “stipple” or a light tap rather than a back-and-forth sweep. By pressing the product in, you are filling in the pores and texture rather than just sitting product on top of them, which creates that coveted “filtered” appearance. Continue this pressing motion until the area looks matte and feels velvety to the touch.
Step 6: Let It Bake or Set for a Moment
Depending on your skin type and the longevity you need, you might choose to “bake” or simply let the powder set. Baking involves applying a slightly generous layer of loose powder over your concealer and letting it sit for five to ten minutes. During this time, the heat from your face works with the powder to fully absorb the oils in the concealer and the skin. This technique is fantastic for stage makeup, photography, or incredibly oily skin types, as it practically guarantees the makeup will not budge.
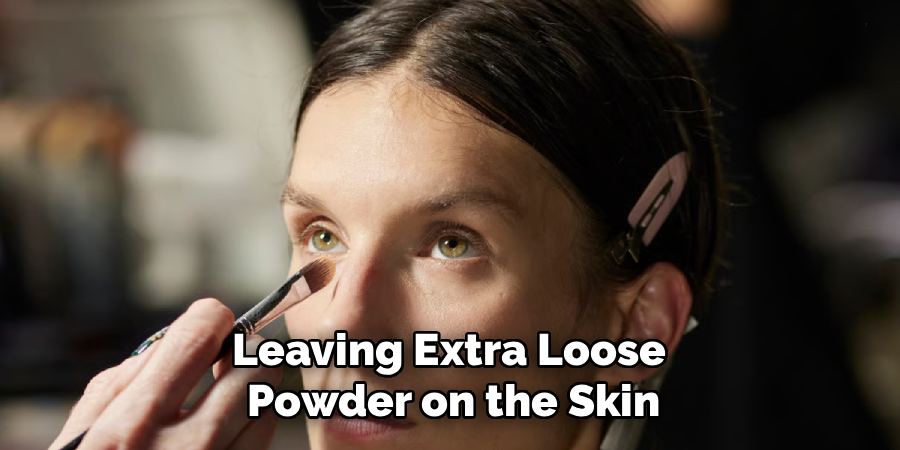
Step 7: Dust Away Excess and Finish the Look
Once the powder has had a moment to do its job, you need to remove any excess product that hasn’t been absorbed by the makeup. Leaving extra loose powder on the skin can cause “flashback” in photos (where you look like you have white circles under your eyes) and can look chalky in natural light. Take a clean, fluffy brush—different from the one you used to apply the product—and very gently sweep away the loose powder with a light hand.
Frequently Asked Questions
What Is The Difference Between Loose And Pressed Powder?
Loose powder consists of finely milled particles in a jar and is generally preferred for setting the undereye area because it is lightweight and less likely to look cakey. It is ideal for “baking” and achieving a blurred finish. Pressed powder comes in a compact and usually contains binding agents like oils or waxes to keep it solid. While pressed powder is excellent for touch-ups on the go and offers more coverage, it can sometimes look heavier under the eyes if applied too liberally. For the most natural, crease-free finish, a finely milled loose translucent powder is usually the superior choice.
Can I Use Setting Powder If I Have Dry Skin?
Absolutely, people with dry skin can and should use setting powder to prolong their makeup wear, but the type of product matters. Look for powders that are formulated with hydrating ingredients like hyaluronic acid or that are specifically marketed as “non-drying” or “satin finish.” Avoid ultra-matte powders designed for oil control, as these will suck the moisture out of your skin. Additionally, use much less product than someone with oily skin would. A very light dusting pressed in with a damp sponge helps set the makeup without emphasizing dry patches or creating a tight, uncomfortable sensation.
How Do I Stop My Undereyes From Looking Cakey?
Cakiness usually occurs when there is too much product buildup on the skin. To prevent this, apply your concealer in thin layers, only placing coverage exactly where you need it. Ensure your undereyes are well-hydrated before starting makeup application. When it comes to the powder, tap off the excess from your brush or puff before it touches your face. If you finish your makeup and it looks cakey, spray a hydration mist or setting spray over the area and gently tap it with a clean, damp sponge to melt the products together and restore a skin-like texture.
Is Translucent Powder Better Than Colored Powder?
Translucent powder is generally the safest bet for setting undereyes because it does not alter the color of your concealer and works across various skin tones without leaving a cast. It is strictly for setting and mattifying. However, colored powders (like banana, peach, or pink shades) can offer additional brightening benefits. A pink powder can brighten fair skin, while a banana powder helps correct darkness on medium to deep skin tones. If your goal is purely longevity, stick to translucent. If you want to brighten dark circles further while setting, a tinted powder might be beneficial.
Why Does My Concealer Still Crease After Setting It?
If you are setting your makeup but still seeing creases, the issue might be occurring before the powder touches your face. The most common reason is that you did not smooth out the concealer creases immediately before applying the powder. Another reason could be applying too much eye cream (causing the makeup to slip) or applying too much concealer (which creates a thick layer that powder cannot fully penetrate). Finally, check your powder placement; make sure you are pressing the powder into the skin rather than swiping it, which ensures the bond between the liquid and the powder is secure.
Conclusion
Perfecting your undereye makeup routine is less about buying the most expensive products on the market and more about understanding the chemistry of application. It is the combination of proper hydration, thin layers, and the “press-and-roll” powder technique that creates that professional, soft-focus finish. When you take the time to smooth out creases and lock your concealer in correctly, you stop worrying about how your face looks in harsh elevator lighting or during late-night video calls.
Makeup should be a tool that enhances your confidence, not a source of stress or constant maintenance. By implementing these steps, you ensure that your look remains as fresh at dinner as it was at breakfast. Now that you know how to use setting powder under eyes, you can say goodbye to midday touch-ups and hello to a bright, smooth, and resilient gaze that lasts as long as you do.
About the Author
Jane Hubbard is a passionate beauty expert with a wealth of experience in makeup, hair, and overall beauty techniques. After years of working as a hairdresser specialist, she followed her entrepreneurial spirit and started her own consultancy business.
Jane has always been driven by her desire to help others feel confident in their own skin, and she does this by sharing her knowledge, experiences, and practical beauty tips. Through her consultancy, she empowers individuals to embrace their unique beauty, offering tailored guidance that boosts both self-esteem and personal style.
Professional Focus
Specializes in makeup, hairstyling, and beauty consulting.
Provides personalized beauty advice, tips, and techniques to help individuals feel confident in their appearance.
Dedicated to staying up-to-date with the latest industry trends and developments.
Passionate about creating a comfortable and empowering experience for every client.
Education History
University of Craft and Design – Bachelor of Fine Arts (BFA) in Woodworking and Furniture Design
Woodworking Apprenticeships – Extensive hands-on training with skilled craftsmen to refine carpentry and furniture making techniques
Online Courses & Masterclasses – Continued education in advanced woodworking techniques, design principles, and specialized tools
Expertise:
Makeup artistry, hairstyling, and beauty consulting.
Personalized beauty techniques to enhance confidence and self-expression.
Educating clients on how to maintain their beauty routines at home.