
Achieving that perfect, salon-quality blonde at home is entirely possible when you understand how to use professional products correctly. Wella toners are the gold standard for neutralizing unwanted brassy tones, turning yellow bleach jobs into cool, icy platinum or soft beige masterpieces.
Using this product effectively requires patience and precision, as the chemical reaction happens quickly and transforms your hair color right before your eyes. By following the right procedure on how to use wella toner, you can save hundreds of dollars on salon visits while maintaining full control over your hair’s final shade and overall health.
Understanding
Wella Color Charm toners are liquid toners that require a developer to activate, and they are specifically designed to correct the tone of pre-lightened hair. When you bleach your hair, you are stripping away pigment, but the underlying raw pigment—often pale yellow or orange—remains visible. This is where the toner comes in; it deposits a specific hue (usually violet or blue-violet base) to cancel out those warm, brassy frequencies according to the rules of color theory.
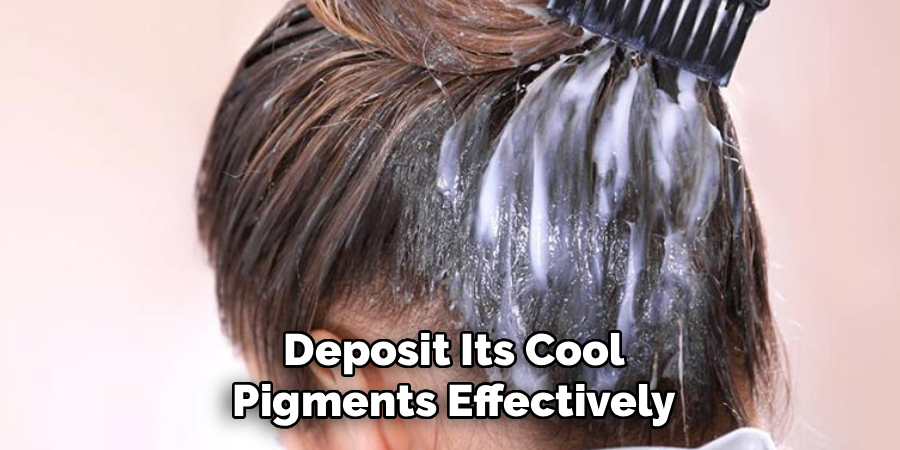
It is crucial to understand that toner is not a hair dye in the traditional sense; it does not lift color or lighten hair further on its own. It only works if your hair has already been lightened to the appropriate level, usually a pale yellow (level 9 or 10) for the most popular shades like T18. Applying toner to dark hair or hair that hasn’t been lightened enough will result in wasted product and disappointment, as the toner needs a light canvas to deposit its cool pigments effectively.
Tools and Materials You’ll Need
- Lightening kit or bleach powder
- Developer (20 volume is recommended for most toners)
- Toner of your choice
- Mixing bowl and brush
- Gloves
- Sectioning clips
- An old t-shirt or towel to protect clothing
- Optional: purple shampoo
7 Simple Step-By-Step Guidelines on How to Use Wella Toner
Step 1: Pre-Lighten Your Hair to the Correct Level
Before you even open the bottle of toner, you must ensure your hair is the correct lightness level for the toner to work. Wella toners are generally designed to work on hair that has been pre-lightened to a level 9 or 10, which looks like the inside of a banana peel. If your hair is still orange or a dark gold, the toner will likely not be strong enough to neutralize those deep, warm tones, and you may end up with a muddy color rather than a cool blonde. You must bleach your hair first, rinse out the bleach thoroughly, and inspect the color to ensure it is light enough for the specific toner you have purchased.
If you find that your hair has uneven patches or is still too dark in certain areas, do not proceed with toning just yet. Toning over uneven bleach results will only highlight the inconsistencies, leaving you with splotchy hair that looks purple in some spots and brassy in others. Take the time to spot-bleach any dark areas if necessary, but be extremely careful not to overlap onto already lightened hair to avoid breakage. Once you have a consistent, pale yellow canvas across your head, you are ready to proceed to the actual toning process.

Step 2: Prepare Your Hair for Application
Your hair needs to be damp, but not dripping wet, for the best application of Wella liquid toner. After rinsing out your bleach, towel-dry your hair gently to remove excess water; if the hair is too wet, the water will dilute the toner mixture, making it less effective and causing it to slip off the hair shaft. However, applying it to completely dry hair can make it difficult to spread the product evenly and quickly, which is essential because the toner starts working immediately. Aim for hair that feels like it has been towel-dried for about five to ten minutes—damp enough to be manageable, but dry enough to absorb the product.
At this stage, you should also detangle your hair carefully using a wide-tooth comb. Trying to apply toner to tangled hair will result in uneven processing because the product won’t be able to penetrate the knots or clumps of hair effectively. Start combing from the ends and work your way up to the roots to minimize breakage, as wet, bleached hair is in its most fragile state. Once your hair is detangled and at the right moisture level, section it into four equal quadrants (down the middle and ear-to-ear) using plastic clips to make the application systematic and organized.
Step 3: Mix the Toner and Developer
The standard mixing ratio for Wella Color Charm liquid toners is 1 part toner to 2 parts developer. This ratio is non-negotiable for achieving the correct consistency and chemical balance required for the color deposit to work as intended. In your plastic mixing bowl, pour out the entire bottle of toner (which is usually 1.4 oz) and then measure out exactly 2.8 oz of 20 volume developer. Using a kitchen scale is the most accurate method, but you can also use a measuring cup if you are careful with your amounts.
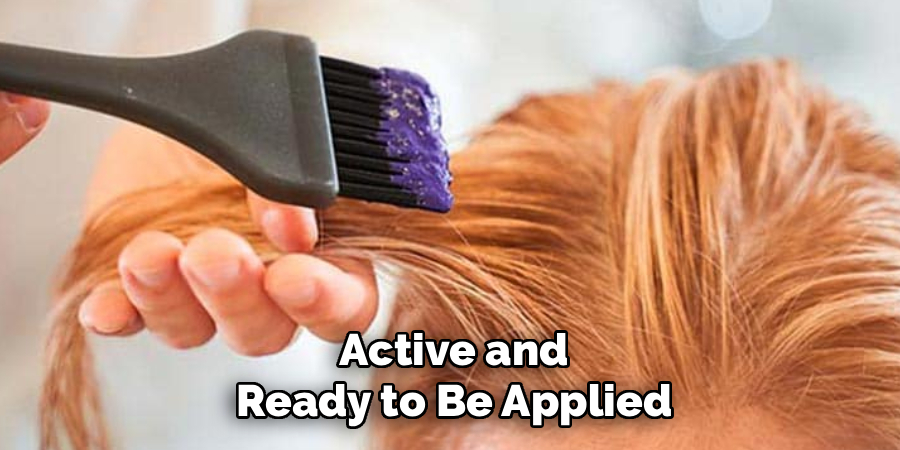
Stir the mixture thoroughly with your applicator brush until the consistency becomes a smooth, gel-like liquid. At first, the mixture might look quite liquid and runny, but as you stir, it will start to thicken slightly into a more manageable gel consistency. Ensure there are no lumps and that the two liquids are completely integrated. The color of the mixture in the bowl might start to change quickly, turning purple or dark blue; do not be alarmed by this, as it is a normal part of the oxidation process and indicates that the product is active and ready to be applied.
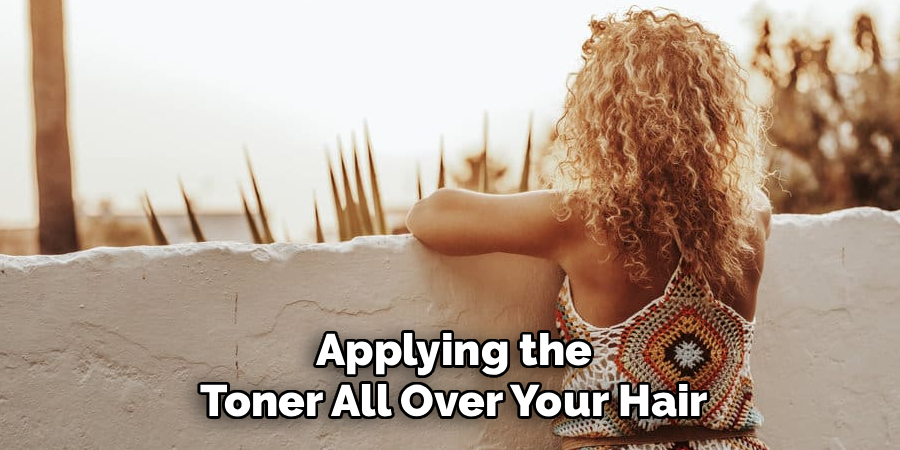
Step 4: Apply the Mixture Methodically
Put on your gloves and begin applying the toner mixture to your hair, starting with the sections that need the most correction or tend to be the most brassy. Usually, this means starting at the back of the head, where hair is often darker or more resistant, and working your way forward. Use the applicator brush to saturate the hair thoroughly, taking thin slices of hair to ensure that the product penetrates through the entire section from root to tip. Speed is somewhat important here because the toner begins oxidizing immediately, so you want the processing time to be relatively even across your whole head.
If you have just bleached your roots and they are lighter than the lengths, apply the toner to the lengths first and the roots last to avoid “hot roots” or over-toning the fresh bleach. However, if your whole head is an even pale yellow, you can apply from roots to ends. Be generous with the product; dry spots will result in yellow patches, so don’t try to stretch the product too thin. If you have long or thick hair, it is always better to buy two bottles of toner to ensure you have enough saturation. Once applied, massage the product into the hair with your gloved hands to ensure even distribution.
Step 5: Monitor the Processing Time Closely
Once the toner is applied, set your timer for up to 30 minutes, but do not simply walk away and ignore your hair. Wella toners are fast-acting, and depending on the porosity of your hair, the desired color can be achieved in as little as 10 to 15 minutes. Watch your hair in a mirror constantly; the mixture will turn a scary dark purple or blue color on your head. This is normal and necessary for the neutralization process, but it can look alarming to first-time users who fear their hair is turning violet.
To check the actual progress, pick a small strand of hair and use your gloved finger or a wet towel to wipe away some of the purple product. Look at the color of the hair underneath the product to see if the yellow tones have been neutralized to your liking. If it still looks yellow, reapply the product to that strand and wait a few more minutes. Do not exceed 45 minutes, as the toner stops working after a certain point and leaving it on too long can dry out your hair or deposit too much grey/purple pigment, leaving you with a muddy look rather than a crisp blonde.
Step 6: Rinse with Cool Water
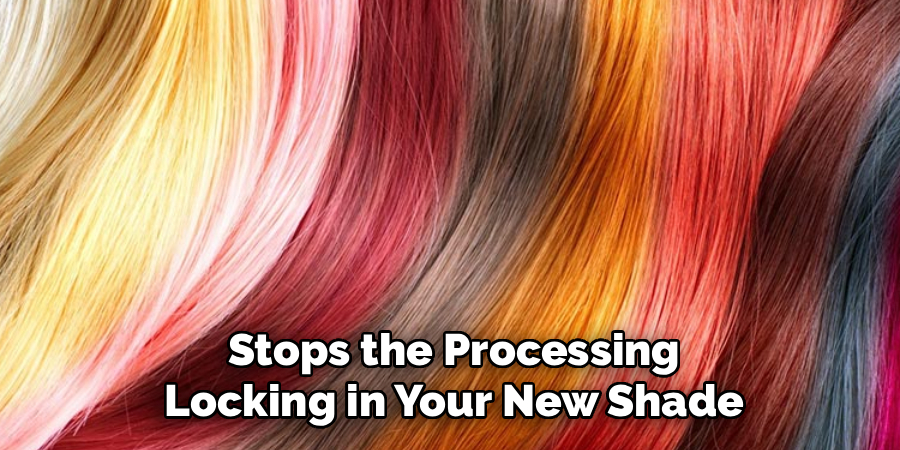
When you are satisfied with the color, it is time to rinse the product out of your hair immediately. Use cool or lukewarm water rather than hot water; hot water can open the hair cuticle further, allowing the color molecules you just deposited to slip out, potentially fading your new tone instantly. Rinse thoroughly until the water runs completely clear and you don’t feel any slimy residue on your scalp or hair. This step removes the chemical agents and stops the processing, locking in your new shade.
After rinsing, it is highly recommended to shampoo your hair lightly to ensure all traces of the developer are removed, although some stylists prefer to skip shampoo and go straight to conditioner to preserve the color. If you do shampoo, use a sulfate-free, color-safe formula. Following the rinse (or shampoo), apply a deep conditioner or a hair mask. Your hair has just undergone a chemical process involving ammonia and peroxide, so it will be thirsty for moisture. Let the conditioner sit for at least 5 to 10 minutes to restore softness and seal the cuticle down, which adds shine to your new color.
Step 7: Dry and Evaluate Your Color
Finally, rinse out your conditioner with cold water and gently towel-dry your hair. It is important to remember that wet hair always looks darker than dry hair, so do not panic if the color looks slightly darker or more grey than you anticipated while it is still damp. Proceed to blow-dry your hair or let it air-dry completely to see the true result of your toning session. As the hair dries, the platinum or ash tones will become more apparent and reflective, revealing the true level of neutralization you achieved.
If you notice any slight purple hues after drying, don’t worry—this is common with porous hair and usually washes out after one or two shampoos. If you missed a spot, you can spot-tone that specific area carefully, but generally, it is best to let your hair rest for a few days before applying more chemicals. Examine your hair in natural lighting, preferably outdoors or near a window, to get the most accurate read on the tone. Indoor artificial lighting can often cast yellow or blue hues that skew your perception of the actual hair color.
Following these steps on how to use Wella toner can help you achieve your desired hair color. However, it is important to keep in mind that hair toner is not a one-size-fits-all solution and may react differently on different hair types. It is always recommended to do a patch test before applying the toner all over your hair.
Tips for Beginners
If you are new to using Wella toner, always conduct a strand test before applying the product to your entire head. This involves mixing a tiny amount of toner and developer and applying it to a small, hidden section of hair to see how fast it processes and what the final color will be. This simple step can save you from a hair disaster, such as turning your hair completely grey or purple because your hair was more porous than you realized.
Additionally, if your hair is extremely damaged, consider adding a protein filler before toning to ensure even absorption.
Common Mistakes to Avoid
One of the most frequent mistakes is toning hair that isn’t light enough; remember, toner cannot fix orange hair if you are using a platinum toner like T18. Another error is waiting too long to apply the mixture; if you mix the toner and let it sit in the bowl for 20 minutes before applying, it loses its potency.
Finally, avoid washing your hair with harsh shampoos immediately after toning, as this strips the color out quickly.
Maintenance and Care
Maintaining that perfect cool blonde requires a dedicated haircare routine focused on hydration and color preservation. You should incorporate a purple shampoo into your routine once a week to counteract any brassiness that starts to creep back in as the toner fades. However, be careful not to overuse purple shampoo, as it can be drying and make your hair look dull or dark if used daily. Stick to sulfate-free shampoos for your regular washes to prevent stripping the toner prematurely.
Deep conditioning is non-negotiable for chemically treated blonde hair. Aim to use a reparative hair mask at least once a week to restore elasticity and moisture to your strands. Avoid excessive heat styling, and when you do use hot tools, always apply a high-quality heat protectant spray. The more damaged your hair is, the faster the toner will fade, so keeping your hair healthy is actually the best way to keep your color looking vibrant and salon-fresh for longer.

Frequently Asked Questions
Q1: How Long Does Wella Toner Last?
The longevity of Wella toner typically ranges between 3 and 6 weeks, depending largely on how often you wash your hair and the products you use. If you wash your hair every day with hot water and sulfates, the toner may fade in less than two weeks. To extend the life of your color, wash your hair less frequently (2-3 times a week), use cool water, and utilize color-safe products designed for blonde hair.
Q2: Can I Use Wella Toner On Dark Hair?
Generally, Wella Color Charm liquid toners like T18 or T14 are not designed for dark hair; they are specifically formulated to polish and neutralize pale yellow tones on pre-lightened hair. Applying these specific toners to brown or black hair will likely result in no visible change, or perhaps a slight shift in tone that exposes unwanted warmth (orange hues) due to the developer lifting the natural base slightly. If you want to tone dark hair, you need a different type of product, such as a demi-permanent color matched to your darker level.

Conclusion
Mastering the use of Wella toner is a game-changer for anyone who loves maintaining blonde hair at home. While the process involves chemicals and requires careful attention to detail, the results are undeniably worth the effort.
By properly prepping your hair, following the mixing ratios strictly, and monitoring the processing time, you can achieve that stunning, icy blonde look that usually costs a fortune at the salon. Don’t be afraid to experiment with different shades to find your perfect custom blend, and enjoy your beautiful new color! Thanks for reading this guide on how to use Wella toner.
About the Author
Jane Hubbard is a passionate beauty expert with a wealth of experience in makeup, hair, and overall beauty techniques. After years of working as a hairdresser specialist, she followed her entrepreneurial spirit and started her own consultancy business.
Jane has always been driven by her desire to help others feel confident in their own skin, and she does this by sharing her knowledge, experiences, and practical beauty tips. Through her consultancy, she empowers individuals to embrace their unique beauty, offering tailored guidance that boosts both self-esteem and personal style.
Professional Focus
- Specializes in makeup, hairstyling, and beauty consulting.
- Provides personalized beauty advice, tips, and techniques to help individuals feel confident in their appearance.
- Dedicated to staying up-to-date with the latest industry trends and developments.
- Passionate about creating a comfortable and empowering experience for every client.
Education History
- University of Craft and Design – Bachelor of Fine Arts (BFA) in Woodworking and Furniture Design
- Woodworking Apprenticeships – Extensive hands-on training with skilled craftsmen to refine carpentry and furniture making techniques
- Online Courses & Masterclasses – Continued education in advanced woodworking techniques, design principles, and specialized tools
Expertise:
- Makeup artistry, hairstyling, and beauty consulting.
- Personalized beauty techniques to enhance confidence and self-expression.
- Educating clients on how to maintain their beauty routines at home.