
Keeping your makeup eraser clean is essential for maintaining both your skin’s health and the longevity of the eraser itself. With proper care, you can keep it fresh, stain-free, and ready for everyday use without hassle.

Washing your makeup eraser may seem daunting if you’re new to the process, but it’s surprisingly easy once you know the right steps. This guide on how to wash makeup eraser will walk you through everything you need to restore your makeup eraser to its best condition, so it works efficiently for many uses to come.
Why Wash Your Makeup Eraser Regularly?
Most people use their makeup erasers daily, and with each use comes a buildup of makeup residue, oils, and bacteria. If left unwashed, this can lead to clogged pores, breakouts, and even skin irritation.
In addition to benefiting your skin’s health, regularly washing your eraser also helps to maintain its effectiveness. Over time, the fabric fibers can become weighed down by product buildup and lose their ability to effectively remove makeup. By keeping it clean, you ensure that your makeup eraser continues to work efficiently.
Tools and Materials You’ll Need
- Used Makeup Eraser(S)
- Mild Liquid Laundry Detergent or Gentle Soap
- Clean Sink or Basin
- Soft-bristled Brush (Optional)
- Towel for Drying
- Washing Machine (Optional)
- Mesh Laundry Bag (if Using a Machine)
- Cold or Warm Water Supply
- Gentle Fabric Softener (Optional)
9 Step-by-step Guidelines on How to Wash Makeup Eraser
Step 1: Shake Off Excess Debris

Before starting the wash, gently shake your makeup eraser to remove any loose debris, powders, or makeup particles. This helps make the cleaning process smoother by minimizing excess residue.
You can do this over your bathroom sink or trash can. Giving it a good shake also helps prevent makeup clumps from clogging your sink during the wash.
Step 2: Pre-Rinse with Warm Water
Begin by rinsing your makeup eraser under warm running water. Doing this helps loosen surface makeup and prepares the fabric for deeper cleaning.
Squeeze gently as you rinse to encourage old makeup to escape from the fibers. Make sure the eraser is completely saturated before moving to the next step.
Step 3: Apply Mild Detergent or Soap
Squeeze a small amount of mild laundry detergent or gentle soap directly onto the damp eraser. Avoid harsh chemicals, as these can damage the delicate microfiber fabric.
Work the soap gently into all areas of the eraser, focusing on visibly stained spots. Let the detergent sit for 2-3 minutes to break down makeup and oils.
Step 4: Gently Scrub Stubborn Stains
For persistent spots, use your fingers or a soft-bristled brush to gently scrub the fabric. Avoid using excessive force—microfiber is delicate and should be treated with care.
Focus on targeted motions over stained areas until you see improvement. Don’t worry if some stains linger after the first wash; regular cleaning will lighten them over time.
Step 5: Thoroughly Rinse Away Soap
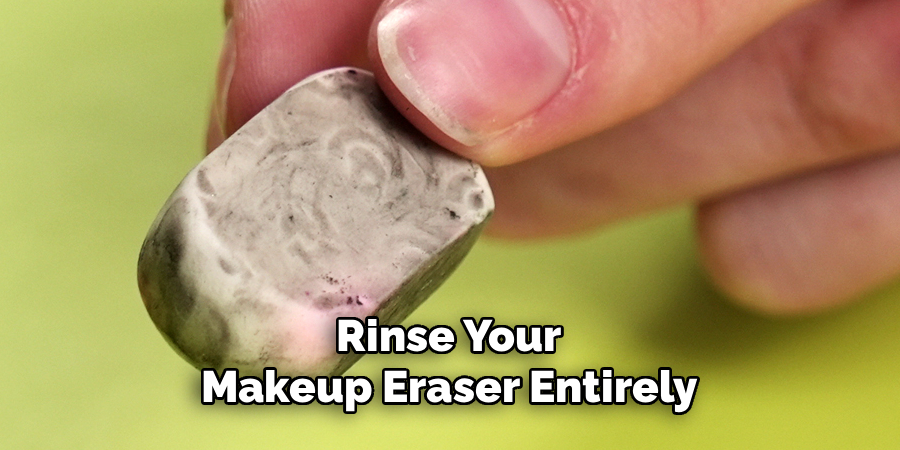
Rinse your makeup eraser entirely under running water, making sure all soap and suds are completely gone. Squeeze it several times to help flush detergent from deep inside the fibers.
Continue rinsing until the water runs clear and there is no slippery or soapy residue left on the eraser. This step prevents skin irritation and keeps your eraser effective.
Step 6: Machine Wash for Deep Cleaning (Optional)
For a thorough clean, place your makeup eraser in a mesh laundry bag and wash it with a load of towels or other gentle fabrics. Use a mild detergent and choose a cold or warm delicate cycle.
Avoid bleach and fabric softeners, as these can damage the eraser’s fibers. This process is great for regular, routine cleaning every week or two.
Step 7: Air Dry or Tumble Dry On Low
After washing, either lay the makeup eraser flat on a clean towel or pop it into the dryer on a low heat setting. High heat can weaken microfiber over time, so always use the gentlest drying option available.
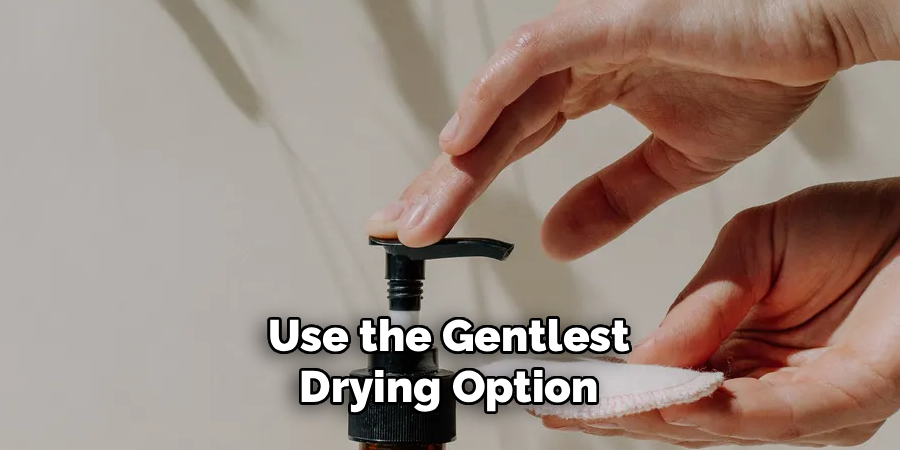
Allowing the eraser to dry completely ensures that no moisture is trapped, which can otherwise lead to odors or mildew.
Step 8: Fluff and Shape for Next Use
Once dry, gently shake and fluff your makeup eraser to help restore its softness and shape. Microfiber can clump or stiffen after washing, so this step keeps it plush and absorbent.
This also ensures your eraser feels comfortable during use and picks up makeup effectively each time.
Step 9: Store Properly Until Needed
Store your clean, dry makeup eraser in a cool, dry place, away from dust or moisture. A drawer, breathable pouch, or storage box works well.
Proper storage helps maintain the eraser’s cleanliness and prevents it from picking up unwanted contaminants before its next use.
Following these steps on how to wash makeup eraser will help prolong its lifespan and keep it working effectively for a long time. Now you can enjoy using your makeup eraser without worry, knowing that it’s clean and ready to go whenever you need it.
Additional Tips
- Wash your makeup eraser at least once a week, or more often if you use heavy makeup.
- Avoid using bleach or harsh chemicals to preserve the softness and function of the fabric.
- Always let your eraser dry completely before storing it to prevent unpleasant smells or mildew.
- Consider keeping multiple makeup erasers on hand so you always have a clean one ready.
- For stubborn stains, pre-soak in a solution of water and a little detergent before scrubbing and rinsing.
- Never iron your makeup eraser, as heat can ruin the microfiber texture.
- Instead, let it air dry or tumble dry on low heat.
- Remember to wash your makeup eraser separately from other laundry items to avoid color transfer.
Do You Need to Use Professionals?
Using professionals for cleaning and maintaining your makeup erasers is generally unnecessary. These products are designed for easy at-home care using basic laundry techniques.
However, if you have particularly delicate or expensive specialty items with similar microfiber properties, consulting a professional cleaner might be a wise choice. For most users, following the care instructions provided above will ensure your makeup erasers stay in excellent condition without requiring outside help.

How Much Will It Cost?
The cost of cleaning and maintaining your makeup erasers is minimal. Since these products are reusable and machine washable, all that’s typically required is your regular laundry detergent and access to a washing machine. If you already do laundry at home, there’s no significant additional expense involved.
For those choosing to consult a professional cleaner for specialty items, the cost will vary depending on the service provider and the type of item being cleaned. Generally, caring for makeup erasers at home remains an affordable and sustainable option, saving money over time compared to disposable alternatives.
Frequently Asked Questions
Q1: How Often Should I Wash My Makeup Eraser?
You should wash your makeup eraser after every few uses, depending on how much product you remove with it. Washing it regularly helps maintain hygiene and ensures it continues to remove makeup effectively. If you use heavy or waterproof makeup daily, you may want to wash it after each use to prevent buildup. Regular cleaning also extends the life of your eraser and keeps your skin healthy.
Q2: Can I Use Bleach or Fabric Softener on My Makeup Eraser?
It’s best to avoid both bleach and fabric softener when cleaning your makeup eraser. Bleach can break down the delicate microfiber fibers, causing them to lose effectiveness. Fabric softeners leave behind residues that can clog the eraser and reduce its absorbency. Stick to mild detergents for optimal cleaning and preservation of your eraser.
Q3: What’s the Best Way to Remove Tough Stains?
Tough stains can be broken down by letting your makeup eraser soak in warm, soapy water for 15-30 minutes before washing. You may also gently scrub with a soft brush if needed. Repeating the process several times can help erase stubborn spots. Using gentle methods ensures the fabric remains undamaged, while persistent care gradually fades stains.
Q4: Is Air Drying or Machine Drying Better for Makeup Erasers?
Air drying is the gentlest option, as it avoids heat damage and keeps your eraser soft. However, machine drying on a low heat setting is also acceptable and helps speed up the process. Always avoid high heat, as it can damage the fibers over time. Whichever method you choose, making sure the eraser dries completely is essential for hygiene and performance.
Conclusion
Washing your makeup eraser properly is simple and highly effective when following these detailed steps. A clean eraser not only extends its lifespan but also helps your skin stay free of impurities.
By using mild detergents, gentle handling, and regular care, you’ll enjoy a fresh and dependable makeup tool every day. Thanks for reading this guide on how to wash makeup eraser. Happy cleaning!
About the Author
Jane Hubbard is a passionate beauty expert with a wealth of experience in makeup, hair, and overall beauty techniques. After years of working as a hairdresser specialist, she followed her entrepreneurial spirit and started her own consultancy business.
Jane has always been driven by her desire to help others feel confident in their own skin, and she does this by sharing her knowledge, experiences, and practical beauty tips. Through her consultancy, she empowers individuals to embrace their unique beauty, offering tailored guidance that boosts both self-esteem and personal style.
Professional Focus
- Specializes in makeup, hairstyling, and beauty consulting.
- Provides personalized beauty advice, tips, and techniques to help individuals feel confident in their appearance.
- Dedicated to staying up-to-date with the latest industry trends and developments.
- Passionate about creating a comfortable and empowering experience for every client.
Education History
- University of Craft and Design – Bachelor of Fine Arts (BFA) in Woodworking and Furniture Design
- Woodworking Apprenticeships – Extensive hands-on training with skilled craftsmen to refine carpentry and furniture making techniques
- Online Courses & Masterclasses – Continued education in advanced woodworking techniques, design principles, and specialized tools
Expertise:
- Makeup artistry, hairstyling, and beauty consulting.
- Personalized beauty techniques to enhance confidence and self-expression.
- Educating clients on how to maintain their beauty routines at home.