
Are you tired of dealing with frizzy, unruly hair? Do you wish your hair was more manageable and could hold a style better? Heat training may be the solution for you.
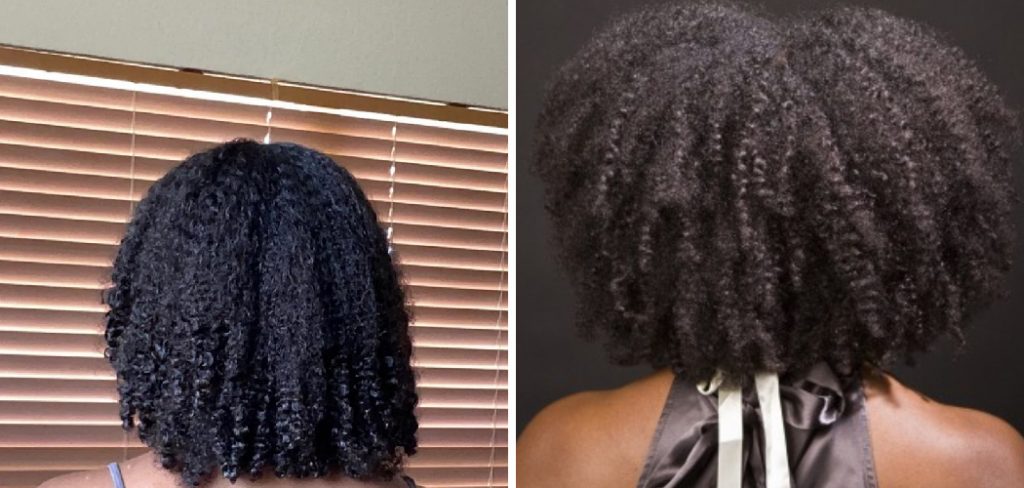
How to heat train your hair is a popular technique used to achieve long-lasting straightened or stretched hair without chemicals. It involves the controlled application of heat to gradually alter the hair’s natural curl pattern, resulting in a sleeker and more manageable texture. Heat training allows individuals with naturally curly or coily hair to achieve a variety of hairstyles, from smooth and straight to bouncy waves.
In this guide, we will explore the process of heat training, including the tools and techniques needed, as well as important tips to ensure the health and integrity of your hair throughout the process. Get ready to unlock a world of versatile hairstyles with heat training!
What Will You Need?
To successfully heat train your hair, you will need the following materials:
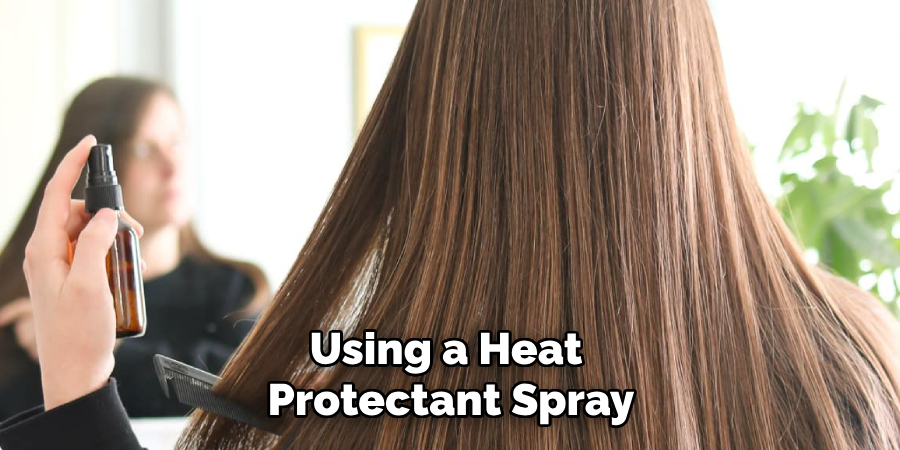
- A Heat Protectant: This is a crucial step in heat training as it provides a barrier between your hair and the heat source. Choose a heat protectant specifically designed for curly or coily hair.
- A Quality Heat Styling Tool: Invest in a high-quality flat iron or blow dryer with adjustable temperature settings. Cheaper tools may not distribute heat evenly, damaging the hair.
- A Wide-tooth Comb: This will detangle and separate your hair into smaller sections for easier styling.
- Hair Clips: These are useful for sectioning off your hair while straightening, making the process more manageable.
- A Hair Serum or Oil: After heat training, nourishing and hydrating your hair is essential. Choose a lightweight serum or oil specifically formulated for curly or coily hair to avoid weighing down your strands.
Once you have these materials, you can start heat training your hair.

8 Easy Steps on How to Heat Train Your Hair
Step 1: Start with Clean, Moisturized Hair
Before beginning the heat training process, it’s essential to ensure your hair is clean and moisturized. This helps to create a healthy foundation for heat styling and minimizes the risk of damage. Follow these steps to prepare your hair:
- Shampoo and Condition: Use a gentle, moisturizing shampoo and conditioner specifically formulated for curly or coily hair. This helps to hydrate your strands and maintain their natural moisture balance.
- Apply a Leave-In Conditioner: After washing your hair, apply a Leave-In conditioner to provide extra hydration and moisture. This helps to protect your hair from the drying effects of heat styling tools.
- Detangle Gently: Use a wide-tooth comb or your fingers to gently detangle your hair, starting from the ends and working your way up to the roots. This helps to remove any knots or tangles and makes it easier to style your hair.
- Apply a Heat Protectant: Before applying any heat to your hair, it’s essential to use a heat protectant spray or serum. This creates a barrier between your hair and the heat source, helping to prevent damage and maintain the health of your strands.
By starting with clean, moisturized hair, you lay the foundation for successful heat training and minimize the risk of heat damage, ensuring that your hair remains healthy and vibrant throughout the process.
Step 2: Section Your Hair
Sectioning your hair into smaller parts makes it easier to manage and ensures that all sections of your hair receive equal heat exposure. Follow these steps to section your hair:

- Use Clips: Use hair clips to divide your hair into four or more sections, depending on the thickness of your hair.
- Create Subsections: Within each more extensive section, create smaller subsections using a comb. This allows you to work with smaller chunks of hair simultaneously, ensuring you get the best results.
Step 3: Set the Right Temperature
To protect your hair from heat damage, setting the right temperature on your styling tool is crucial. Here’s how:
- Know Your Hair Type: Different hair types have different heat tolerance levels. Fine or damaged hair is more susceptible to heat damage, so it’s best to use lower temperatures. Thicker or coarser hair may require slightly higher temperatures to style effectively.
- Start Low and Gradually Increase: Begin with the lowest temperature setting on your styling tool and test it on a small section of hair. If it doesn’t provide the desired results, gradually increase the temperature in small increments until you find the optimal setting.
- Avoid Excessive Heat: Higher temperatures don’t necessarily mean better styling results. Excessive heat can damage your hair, so always aim for the lowest practical temperature to minimize the risk of heat damage.
- Consider Your Styling Tool: Different styling tools have different heat settings and capabilities. For example, flat and curling irons often have adjustable temperature settings, while hair dryers typically have multiple heat and speed settings. Familiarize yourself with your specific styling tool and its recommended temperature ranges.
- Protective Heat Styling Products: Using a heat protectant spray or serum can provide an extra layer of protection for your hair. Apply the product evenly throughout your hair before using heat-styling tools to reduce the risk of damage further.
Step 4: Straighten Your Hair in Sections
Now that your hair is prepped and the temperature is set, it’s time to start straightening. Follow these steps:
- Section Off Smaller Parts: Begin with one of the smaller subsections you created in Step 2. Slowly run a fine-tooth comb through the section to remove any remaining tangles.
- Run the Flat Iron Through the Section: Starting from the root, clamp the flat iron onto a small section of hair and slowly glide it down towards the ends. Repeat this process until all sections within that more extensive section are straightened.
- Repeat for Each Section: Unclip another subsection and repeat the process until all sections have been straightened.
- Avoid Overlapping: Avoid overlapping the flat iron over previously straightened sections, which can lead to excessive heat exposure and damage.
Step 5: Shift Your Focus to the Roots
After straightening the length of your hair, it’s time to focus on your roots. This helps to create a smooth and seamless transition between your roots and the rest of your hair. Follow these steps:
- Create Smaller Subsections: Use a fine-tooth or rattail comb to create smaller subsections at the root of your hair.
- Run Flat Iron Through Roots: Starting from the roots, slowly glide the flat iron down towards the ends. Repeat this process until all sections at the roots are straightened.
Step 6: Clip and Move On
Here’s how to proceed:
- Use Hair Clips: Secure the already straightened sections with hair or sectioning clips. This keeps them separate and out of the way while you work on the remaining sections.
- Work in Sections: Divide your hair into manageable subsections, depending on the thickness and length of your hair. Unclip one section at a time to focus on straightening it from roots to ends.
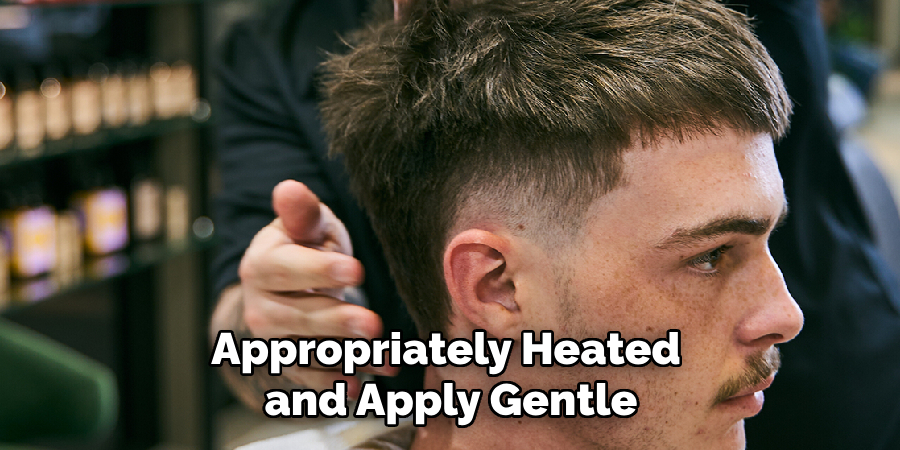
- Repeat the Straightening Process: Glide the flat iron slowly from the roots to the ends with each unclipped section, following the earlier straightening technique. Ensure the flat iron is appropriately heated and apply gentle pressure to avoid hair damage.
- Continue Clipping and Straightening: After straightening a section, clip it back with a hair clip. Gradually move through the remaining sections, unclipping and straightening one section at a time. Repeat this process until all sections are straightened.
Step 7: Let Your Hair Cool Down
After straightening each section, allowing your hair to cool down before styling or touching it is crucial. This step is essential for setting the straightened hair in place and ensuring long-lasting results. Giving your hair time to cool allows the hair cuticles to lock in the straightened shape, providing a smoother and sleeker appearance. Avoid running your fingers or styling tools through your hair until it has completely cooled down to prevent any potential damage or loss of the straightened style. Once your hair has cooled, you can continue with your desired styling, whether it be leaving it down, putting it up in a ponytail, or adding any finishing touches.
Step 8: Finishing Touches
To complete your straightened look, consider these finishing touches:
- Hair Serum: Apply a small amount of hair serum to your ends for added shine and smoothness.
- Hair Spray: For extra hold and to combat frizz or flyaways, lightly spray with hairspray.
- Texture or Volume: If you prefer texture or volume in your straightened hair, use a volumizing powder or texturizing spray at the roots. This can help to add dimension and prevent your hair from looking too flat or limp.
You can achieve a professional-looking straightened hairstyle at home by following these steps and tips.
Conclusion
Straightening your hair can be time-consuming, but with the right tools and techniques, you can achieve smooth and straight locks at home. Remember to prep your hair properly, set the appropriate temperature on your styling tool, work in small sections, and allow your hair to cool down before finishing touches.
By following these steps how to heat train your hair, you can maintain healthy and beautiful hair while enjoying a sleek and stylish look. So go ahead, grab that flat iron or straightening brush, and get ready to rock those straight tresses!
Happy styling! Keep experimenting with different techniques until you find what works best for you.
About the Author
Jane Hubbard is a passionate beauty expert with a wealth of experience in makeup, hair, and overall beauty techniques. After years of working as a hairdresser specialist, she followed her entrepreneurial spirit and started her own consultancy business.
Jane has always been driven by her desire to help others feel confident in their own skin, and she does this by sharing her knowledge, experiences, and practical beauty tips. Through her consultancy, she empowers individuals to embrace their unique beauty, offering tailored guidance that boosts both self-esteem and personal style.
Professional Focus
Specializes in makeup, hairstyling, and beauty consulting.
Provides personalized beauty advice, tips, and techniques to help individuals feel confident in their appearance.
Dedicated to staying up-to-date with the latest industry trends and developments.
Passionate about creating a comfortable and empowering experience for every client.
Education History
University of Craft and Design – Bachelor of Fine Arts (BFA) in Woodworking and Furniture Design
Woodworking Apprenticeships – Extensive hands-on training with skilled craftsmen to refine carpentry and furniture making techniques
Online Courses & Masterclasses – Continued education in advanced woodworking techniques, design principles, and specialized tools
Expertise:
Makeup artistry, hairstyling, and beauty consulting.
Personalized beauty techniques to enhance confidence and self-expression.
Educating clients on how to maintain their beauty routines at home.