
Are you planning on getting box braids soon? If so, you’ll want to prep your hair beforehand to ensure the best results properly.

How to prep hair for box braids is a crucial step that can significantly impact the longevity and overall look of your protective style. Before diving into the braiding process, ensuring that your hair is clean, well-moisturised, and free of tangles is essential. This preparation helps achieve neat and even braids and enhances the health of your hair and scalp.
This guide will explore practical methods to prep your hair, including cleansing, conditioning, and sectioning techniques that will create the perfect foundation for beautiful box braids. Whether you’re a novice or a seasoned braider, these tips will help you achieve a flawless finish.
What Will You Need?
Before you begin prepping your hair, gathering all the necessary tools and products is essential. Here are some items that will come in handy:
- Wide-tooth comb
- Shampoo and conditioner
- Leave-in conditioner or detangler
- Hair clips or elastics
- Towel
You can start the prepping process once you have all your tools and products ready.
10 Easy Steps on How to Prep Hair for Box Braids
Step 1: Cleanse Your Hair
The first step in prepping your hair for box braids is to cleanse it thoroughly. This ensures a clean scalp, removes any product build-up, and creates a fresh canvas for styling. Use a clarifying shampoo specifically designed for braiding to ensure your hair is free of dirt, oil, and residue. Gently massage your scalp with the shampoo and rinse it out thoroughly.
Step 2: Deep Condition Your Hair
After cleansing, the next vital step is to deep condition your hair. Deep conditioning treatments provide intense moisture and nourishment, which is crucial for maintaining healthy hair during and after the braiding process.
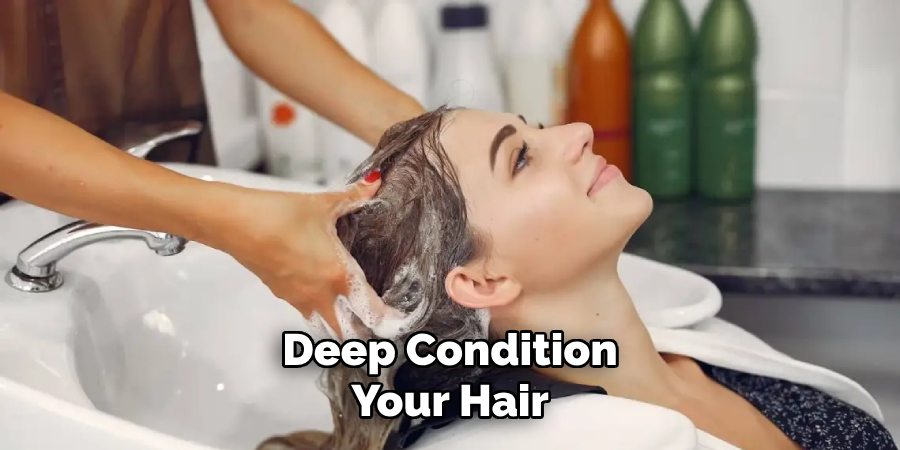
Choose a deep conditioner that is rich in hydrating ingredients, such as shea butter, coconut oil, or argan oil, to penetrate the hair shaft effectively. Apply the deep conditioner generously, focusing on the ends of your hair, which tends to be drier and more damaged.
Once the conditioner is evenly distributed, cover your hair with a plastic cap to create heat, which helps the product work more effectively. Allow the conditioner to sit for at least 30 minutes or longer if time permits.
For optimal results, you can sit under a hooded dryer or wrap a warm towel around your head. After the conditioning treatment, thoroughly rinse your hair with cool water to seal it in moisture and add shine, setting a solid foundation for your box braids.
Step 3: Detangle Your Hair
Once your hair is clean and conditioned, the next step is to detangle it to prevent any knots that could complicate the braiding process. Use a wide-tooth comb or your fingers to gently work through any tangles, starting from the ends and gradually moving up to the roots. This will help maintain the integrity of your hair and ensure that your box braids are smooth and even.
Step 4: Rinse and Apply Leave-In Conditioner
After detangling, rinse your hair again to remove any remaining deep conditioner. Once your hair is clean, apply a leave-in conditioner or lightweight moisturizer to help with hydration. This step is vital for keeping your hair soft and manageable, minimizing breakage, and making it easier to part for braiding.
Step 5: Section Your Hair
To make braiding more efficient, section your hair into manageable parts. Use hair clips or elastics to secure each section, deciding on the size of the parts based on your desired braid size. A standard method is to create a rectangular or box-shaped section that aligns with how the braids will sit on your scalp.
Step 6: Prepare Your Edges
Preparing your edges is a crucial step that often gets overlooked but can significantly enhance the overall look of your box braids. To begin, gently brush or comb your edges using a soft bristle or fine-toothed comb. This will help smooth them out and blend seamlessly with the braids.
Use a small amount of edge control or a lightweight styling gel to tame any flyaways and create a polished, neat appearance. Apply the product sparingly, focusing on the front hairline and other areas where your edges may need extra attention.
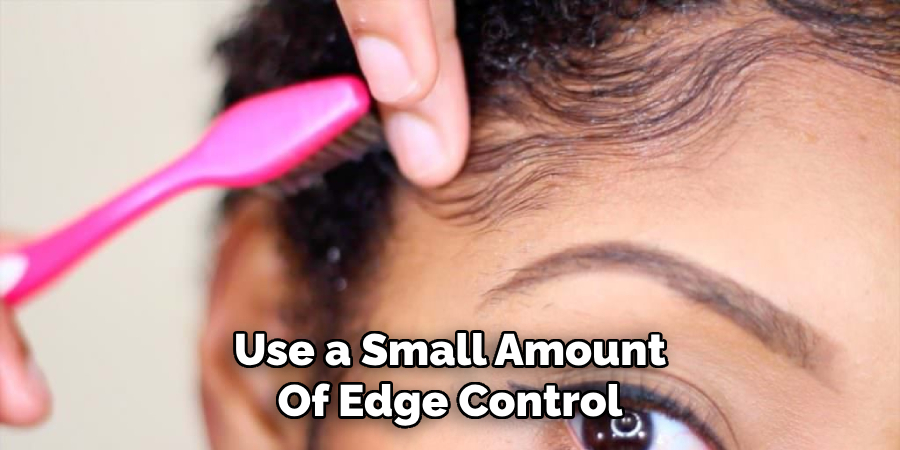
Allow the product to set for a few minutes before you start braiding, as this will provide a sleek finish and help ensure that your braids lay flat against your scalp. Preparing your edges can elevate the entire style, giving your box braids a clean and fashionable look.
Step 7: Moisturise Your Hair
Once your hair is sectioned and your edges are prepared, it’s essential to moisturize each section before braiding. Use your favorite lightweight oil or cream to apply a small amount to each section, focusing on the ends where dryness is most common.
This added moisture protects your hair from breakage and keeps it healthy in braids. Ensure the product is evenly distributed through each section to promote shine and manageability. Taking this step will help your hair retain moisture during the life of your box braids, allowing for a neater and healthier look overall.
Step 8: Start Braiding
Having prepped and moisturized your hair, it’s time to begin braiding. Take one of the prepared sections and divide it into three equal parts for traditional braiding. If you’re using additional hair, prepare it by aligning it with your natural hair for a seamless blend.
Start braiding from the roots, ensuring you maintain tension without pulling too tightly, as this can cause discomfort and damage. Continue braiding until you reach the desired length, then secure the end with a hair tie or braid sealant to prevent unraveling.
Step 9: Repeat the Process
Continue the braiding process, working your way through each section of hair. Maintain the same technique to ensure consistency and neatness throughout your braids.
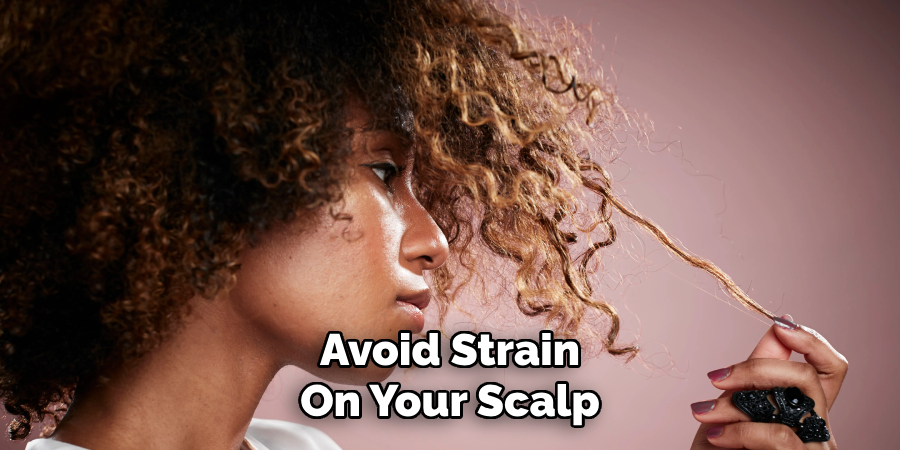
Take breaks if needed, and check the tension regularly to avoid strain on your scalp. If you’re using different colors or types of hair extensions, make sure to incorporate them evenly for a balanced look.
Step 10: Final Touches
Once all sections are braided, give your completed braids a final check. Trim any frayed ends for a polished appearance and apply a light mist of hair oil or sheen spray to add shine and reduce frizz. Additionally, style your edges once more for that perfect finish.
Finally, remember to cover your braids at night with a silk or satin scarf or sleep on a satin pillowcase to maintain their integrity and prolong their lifespan.
By following these steps, you can easily achieve beautiful and long-lasting box braids. Remember to regularly moisturise your scalp and edges while wearing your braids to keep them looking fresh and healthy.
5 Additional Tips and Tricks
- Stretch Your Hair: Consider stretching your hair before braiding to achieve longer-looking box braids. You can do this by braiding or twisting your hair while it’s wet and allowing it to dry.
- Protect the Edges: If your hair is prone to breakage, use a small amount of edge control or styling gel on your hairline and edges. This will help protect those areas while keeping everything neat during braiding.
- Check for Consistency: As you braid, ensure that each section’s size and tension are consistent. This will result in a neater and more uniform look.
- Refresh Your Style: To keep your box braids looking fresh, consider spritzing them with a mixture of water and conditioner every few days. This will help keep them moisturized and prevent frizz.
- Try Different Parts: Feel free to experiment with different parts when braiding your hair. You can create a unique look by trying out diagonal, zigzag, or even triangular parts instead of the traditional straight ones.
With these additional tips and tricks, you can take your box braids to the next level. Whether it’s achieving longer-looking braids, protecting your edges, or adding variety to your style, these tips will help you achieve the perfect braid every time.
5 Things You Should Avoid
- Overloading on Product: Applying too much styling product or heavy creams can weigh down your hair and lead to buildup. Keep your prep routine light to ensure your braids move and have a clean finish.
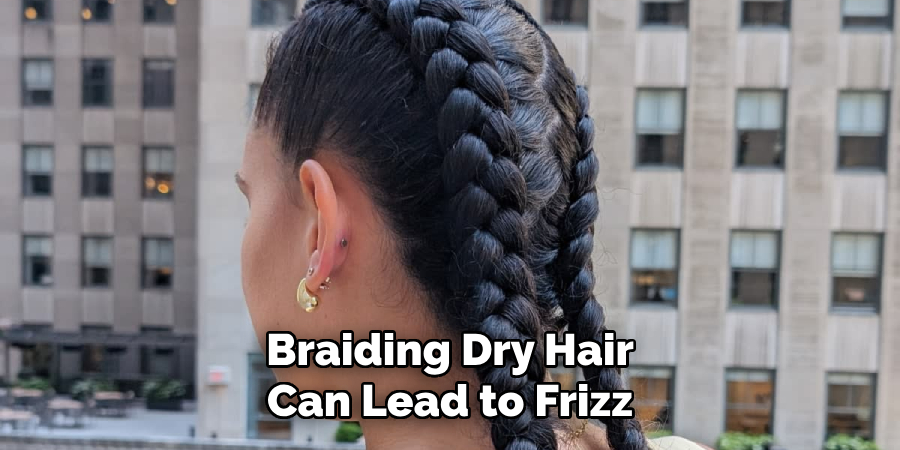
- Skipping the Detangling Process: Please thoroughly detangle your hair before braiding can result in knots and tangles. Take the time to comb through your hair gently to prevent discomfort and damage.
- Braiding on Dirty Hair: While some may think that dirtier hair holds better, starting with clean hair is essential. Accumulated oil and dirt can cause your braids to look dull and may lead to scalp irritation.
- Neglecting Moisture: Braiding dry hair can lead to breakage and frizz. Hydrating your hair with a leave-in conditioner or moisturizing spray is crucial to ensure it’s in good health before you start your braiding process.
- Choosing the Wrong Time: Attempting to braid your hair when you’re rushed or tired can lead to mistakes and uneven braids. Set aside adequate time so you can focus and achieve the best results.
Avoiding these common pitfalls can help you achieve a seamless and beautiful box braid look, ensuring your prep routine sets you up for success.
Conclusion:
How to prep hair for box braids is a vital step toward achieving a polished and long-lasting style.
By following the tips outlined above, you can ensure that your hair is clean, well-moisturized, and detangled prior to starting the braiding process. It’s equally important to avoid common mistakes, such as using excessive product or braiding on dirty hair, which can cause discomfort and diminish the overall look of your braids.
Taking the time to stretch your hair, protect your edges, and maintain consistency in size and tension will lead to more defined and beautiful results. With proper preparation and care, you can enjoy flawless box braids that enhance your style while keeping your hair healthy.
About the Author
Jane Hubbard is a passionate beauty expert with a wealth of experience in makeup, hair, and overall beauty techniques. After years of working as a hairdresser specialist, she followed her entrepreneurial spirit and started her own consultancy business.
Jane has always been driven by her desire to help others feel confident in their own skin, and she does this by sharing her knowledge, experiences, and practical beauty tips. Through her consultancy, she empowers individuals to embrace their unique beauty, offering tailored guidance that boosts both self-esteem and personal style.
Professional Focus
Specializes in makeup, hairstyling, and beauty consulting.
Provides personalized beauty advice, tips, and techniques to help individuals feel confident in their appearance.
Dedicated to staying up-to-date with the latest industry trends and developments.
Passionate about creating a comfortable and empowering experience for every client.
Education History
University of Craft and Design – Bachelor of Fine Arts (BFA) in Woodworking and Furniture Design
Woodworking Apprenticeships – Extensive hands-on training with skilled craftsmen to refine carpentry and furniture making techniques
Online Courses & Masterclasses – Continued education in advanced woodworking techniques, design principles, and specialized tools
Expertise:
Makeup artistry, hairstyling, and beauty consulting.
Personalized beauty techniques to enhance confidence and self-expression.
Educating clients on how to maintain their beauty routines at home.