

Flawless, filter-free skin doesn’t require a professional makeup artist or a studio full of equipment. The airbrushed effect—smooth, even-toned, naturally radiant—is entirely achievable with the right products and a bit of technique.
Achieving an airbrushed makeup look comes down to proper skin prep, the right base products, and a few key application techniques. This guide walks you through six straightforward steps—plus tips for troubleshooting, avoiding common mistakes, and adapting the look for your skin type.
Here’s what most tutorials get wrong: they focus almost entirely on what to buy, not how to use it. The real difference between a polished finish and a cakey one often comes down to application method, timing, and skin prep—not the price of your foundation. This guide on how to get airbrushed makeup look covers all of it, from understanding what the airbrushed effect actually involves to diagnosing the most common problems that quietly sabotage an otherwise good base.
What Does the Airbrushed Effect Actually Mean?
The airbrushed effect refers to a seamless, skin-like finish that softens imperfections without looking heavy. It mimics the result of professional airbrush machines—which spray ultra-fine layers of foundation—but uses standard products applied with intention.
The defining qualities are even skin tone, minimized pores, a soft-focus finish, and a natural luminosity that reads as neither matte nor dewy. Critically, achieving this look has less to do with coverage level and more to do with how layers are built and set.
Which Base Products Work Best for an Airbrushed Finish?
Your product choices matter—but perhaps not in the way you’d expect. Lightweight, buildable formulas tend to outperform thick, full-coverage options for this look. Specifically, consider:
- Silicone-based or water-based primers that smooth the texture and create a uniform surface
- Lightweight foundations or skin tints with a satin or natural finish
- Finely-milled setting powders that blur without adding visible weight
- Hydrating setting sprays that melt product layers together
One thing worth avoiding: thick concealers applied directly to dry, unprepped skin. Rather than concealing texture, they tend to settle into it—making fine lines and pores appear more prominent, not less.
6 Steps on How to Get Airbrushed Makeup Look
Step 1: Start With Thorough Skin Prep
Prep may be unglamorous, but skipping it is likely the single biggest reason a flawless look falls apart within a few hours. Start with a clean, gently exfoliated face—a mild chemical exfoliant or soft cleansing brush works well here. Follow with a hydrating toner and a lightweight moisturizer suited to your skin type. Let it fully absorb before moving on.
Hydrated skin accepts makeup more evenly and holds it longer. There’s no formula that compensates for a dehydrated surface underneath.

Step 2: Apply a Smoothing Primer
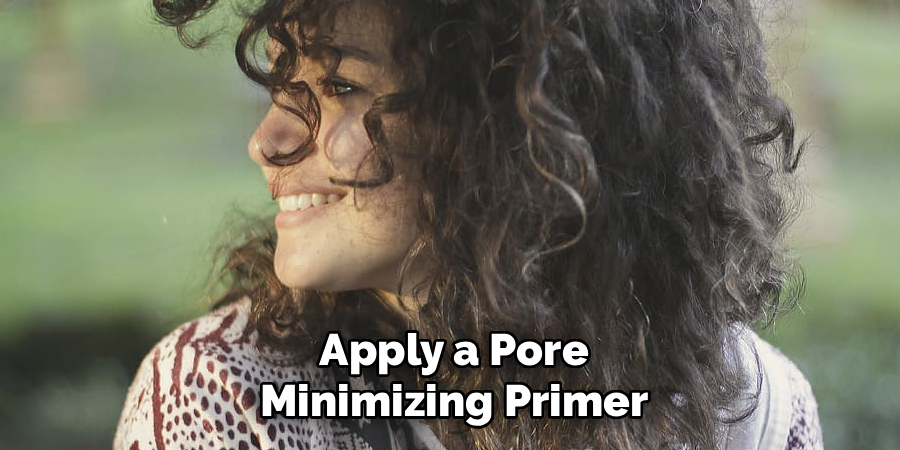
Once your moisturizer has absorbed, apply a pore-minimizing primer to the areas where texture is most visible—typically the nose, cheeks, and forehead. Press it in with your fingertips rather than swiping it across. The pressing motion appears to help it bond more effectively to the skin’s surface.
Then wait. Let the primer sit for 60–90 seconds before applying foundation. This brief pause allows it to set and create that smooth base layer the rest of your makeup depends on.
Step 3: Apply Foundation With a Damp Beauty Sponge
A damp sponge is the most important tool for this particular look—arguably more important than the foundation itself. Wet it thoroughly, squeeze out the excess, then apply a small amount of foundation directly to the sponge. Use a bouncing, stippling motion across the face rather than dragging.
Start light. Build coverage only where you need it, concentrating on the center of the face and blending outward. Stippling pushes product into the skin rather than sitting it on top, which is what creates that skin-like quality people associate with an airbrushed result.
Step 4: Conceal Strategically
Restraint matters here. Under the eyes, apply a small amount in a downward triangle shape, then blend with your fingertip or a small sponge. For blemishes, use a fine brush to press concealer directly onto the spot—spreading it outward tends to flatten that area of the skin and draw more attention to it, not less.
Layering too much concealer over a wide area creates a mask-like effect that works against everything you’ve built so far.
Step 5: Set With a Light Dusting of Powder
Use a large, fluffy brush and apply finely-milled translucent powder in a light, sweeping motion. Focus on areas prone to shine—the T-zone, the under-eye area. Avoid packing it heavily onto the cheeks or temples, where it could settle into fine lines and disrupt the seamless finish you’re after.
Dry skin? You may want to skip powder altogether or limit it to oilier zones only. The goal is to lock in your base without introducing visible texture.
Step 6: Finish With a Setting Spray
This is the step that genuinely fuses everything together. Hold a hydrating setting spray 8–10 inches from your face and mist it in an X and T motion across the skin. This softens the powdery appearance, melds the product layers, and adds a subtle glow that makes skin look healthy rather than made up.
Let it dry naturally. Don’t fan it or rub it. Once set, the finish should look smooth, even, and genuinely seamless.
Following these steps on how to get airbrushed makeup look, you’ll achieve a natural and flawless finish that will last all day.
Troubleshooting the Most Common Airbrushed Makeup Problems

Makeup Looks Cakey
This usually suggests too much product was applied, or the skin wasn’t adequately hydrated beforehand. Try sheering out your foundation with a drop of moisturizer, and make sure your primer and moisturizer have fully absorbed before you begin layering.
Finish Looks Patchy
Uneven application often traces back to a dry sponge or a missed primer on textured areas. Re-wet your sponge and go back over problem areas with a light stippling motion.
Makeup Oxidizes or Turns Orange
This can occur when a silicone-based primer is layered under an incompatible foundation. Keeping all layers either water-based or silicone-based—not mixing them—may help prevent this.
Look Fades Quickly
Setting spray makes a larger difference here than most people expect. If your finish isn’t lasting, try a longer-wear primer and apply setting spray in two light layers rather than one heavy coat.
Tips for a More Professional Finish
A few extra details can shift the result from decent to genuinely polished:
- Color-correct before foundation — peach or salmon correctors neutralize dark circles more effectively than piling on concealer
- Bake under the eyes — let translucent powder sit for five minutes, then dust away for a bright, smooth finish
- Keep a clean, damp sponge nearby — press it lightly over any areas that feel heavy throughout the process
- Use a small fan brush for powder — the application comes out lighter and more diffused than a standard powder brush allows
- Work in natural light — it’s the most reliable way to catch unblended edges before they set
How to Adapt the Airbrushed Look for Your Skin Type
Oily Skin
Use an oil-free, mattifying primer and a long-wear foundation. Set with translucent powder and finish with a mattifying spray. Midday, blot with oil-control papers rather than adding more powder.
Dry Skin
Prioritize hydration at every step. A dewy or satin-finish foundation works better than a matte one here; skip powder on dry areas, and choose a hydrating setting spray. A luminizing primer adds glow without visible texture.
Combination Skin
Treat zones differently. Apply a pore-minimizing primer to the T-zone and a hydrating primer to drier areas. Concentrate powder only where shine actually appears.
Mature Skin
Heavy powders and matte formulas tend to settle into fine lines. A lightweight skin tint blended with a sponge gives coverage without drawing attention to texture.
Sensitive or Acne-prone Skin
Non-comedogenic, fragrance-free formulas throughout. A gentle hydrating primer may help create a buffer between skin and makeup without clogging pores.
Frequently Asked Questions
How Can I Make My Airbrushed Makeup Last All Day?
The most reliable combination for longevity is a grip-style primer, a long-wear foundation, and setting spray applied in two light layers rather than one. Blotting papers help manage shine throughout the day without disturbing the base. Touching your face frequently is probably the most underrated reason makeup fades—minimizing that habit alone can extend wear time considerably.
What Is the Best Foundation Formula for an Airbrushed Makeup Look?
Lightweight, buildable foundations with a satin or natural finish tend to work best for this effect. Very matte formulas can look flat and emphasize texture, while overly dewy ones may migrate as the day goes on. A medium-coverage, skin-like foundation applied in thin layers typically gives the most convincing result.
Can You Achieve the Airbrushed Look Without a Primer?
Primer is not strictly required, but it does improve the outcome—particularly on skin with enlarged pores or uneven texture. If you skip it, allow your moisturizer to fully absorb first, and consider applying a light layer of setting spray both before and after foundation to help everything adhere more smoothly.
Does the Airbrushed Look Work on Textured Skin?
It can, yes—though the approach shifts slightly. The goal on textured skin is to minimize the appearance of texture, not cover it entirely. A silicone-based primer pressed into the skin, followed by a lightweight foundation in thin layers, tends to soften texture more convincingly than heavy coverage products.
Achieve Your Best Skin Every Time
The airbrushed makeup look gets easier the more you practice it. Once the logic clicks—hydrate, smooth, layer, set—the steps become second nature, and you’ll start to notice which parts of your routine make the biggest difference for your specific skin.
The most useful mindset shift is this: treat your makeup as something you’re working with your skin, not applying on top of it. That single adjustment tends to change how every product performs—and it’s what separates a genuinely polished finish from one that just looks like a lot of effort. Thanks for reading this guide on how to get airbrushed makeup look

About the Author
Jane Hubbard is a passionate beauty expert with a wealth of experience in makeup, hair, and overall beauty techniques. After years of working as a hairdresser specialist, she followed her entrepreneurial spirit and started her own consultancy business.
Jane has always been driven by her desire to help others feel confident in their own skin, and she does this by sharing her knowledge, experiences, and practical beauty tips. Through her consultancy, she empowers individuals to embrace their unique beauty, offering tailored guidance that boosts both self-esteem and personal style.
Professional Focus
Specializes in makeup, hairstyling, and beauty consulting.
Provides personalized beauty advice, tips, and techniques to help individuals feel confident in their appearance.
Dedicated to staying up-to-date with the latest industry trends and developments.
Passionate about creating a comfortable and empowering experience for every client.
Education History
University of Craft and Design – Bachelor of Fine Arts (BFA) in Woodworking and Furniture Design
Woodworking Apprenticeships – Extensive hands-on training with skilled craftsmen to refine carpentry and furniture making techniques
Online Courses & Masterclasses – Continued education in advanced woodworking techniques, design principles, and specialized tools
Expertise:
Makeup artistry, hairstyling, and beauty consulting.
Personalized beauty techniques to enhance confidence and self-expression.
Educating clients on how to maintain their beauty routines at home.