
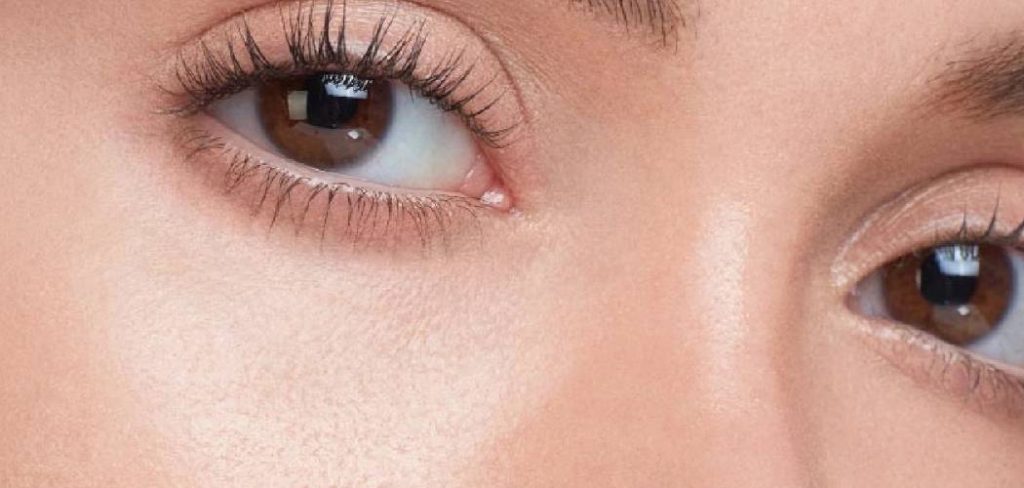
False eyelashes can enhance your eyes, giving them a fuller and more dramatic look. However, achieving a natural appearance often requires customization. Cutting false eyelashes to suit the shape of your eyes is a crucial step to ensure they blend seamlessly and avoid looking overly dramatic or mismatched. With the right techniques, you can create a look that’s both flattering and realistic. This guide will help you learn How to Cut False Eyelashes to Look Natural for the most natural effect.
Understanding False Eyelashes
False eyelashes come in a variety of styles, materials, and designs to cater to different needs and preferences. They can range from full strips to individual lashes, allowing you to choose based on the level of drama or natural enhancement you desire. Materials commonly include synthetic fibers, silk, or mink, each providing a distinct texture and appearance.
Synthetic lashes are often more affordable and durable, while silk and mink options tend to look and feel more natural. Additionally, false eyelashes vary in length, volume, and curl, making it essential to pick a style that complements your eye shape and desired look. By understanding the different types of false eyelashes available, you can make informed decisions to achieve the perfect finish for any occasion.
Types of False Eyelashes
False eyelashes come in a variety of styles to suit different preferences and occasions. Here are the main types:
- Strip Lashes
These are a single band of lashes that can be easily applied along the natural lash line. They are ideal for a quick and dramatic enhancement and come in various lengths and densities.
- Individual Lashes
Individual lashes are applied one at a time for a more natural and customizable look. These are perfect for filling in sparse areas or adding subtle volume.
- Cluster Lashes
Also known as flare or knot-free lashes, these come in small groups of 2-6 lashes. They provide a balance between the natural finish of individual lashes and the boldness of strip lashes.
- Magnetic Lashes
Magnetic lashes use tiny magnets to adhere instead of glue, making them reusable and less messy to apply. They offer convenience and are popular among those looking for a damage-free option.
- Pre-Glued Lashes
These lashes come with adhesive already applied, making them a great choice for beginners or quick applications. They are user-friendly but may not offer the same longevity as other options.
By exploring the various types of false eyelashes, you can find the perfect match that aligns with your personal style and level of expertise.
Tools and Materials You’ll Need
To successfully apply false eyelashes, having the right tools and materials is essential. Here’s a list of items that will make the process easier and more effective:
- Tweezers or Lash Applicator
These tools help you securely hold and position the lashes for precise application.
- Eyelash Glue
A reliable adhesive is crucial for keeping the lashes in place. Choose between clear or black glue depending on your desired look.
- Small Scissors
Trimming false eyelashes natural look to match the width of your eyelid ensures a comfortable fit.
- Eyelash Curler
Pre-curling your natural lashes allows them to blend seamlessly with the falsies.
- Mascara
A coat of mascara can help integrate your natural lashes with the false ones.
- Cotton Swabs or Q-tips
These are useful for cleaning up any excess glue and ensuring a neat application.
Having these tools and materials on hand will streamline the process and help you achieve a flawless lash look every time.
10 Methods How to Cut False Eyelashes to Look Natural
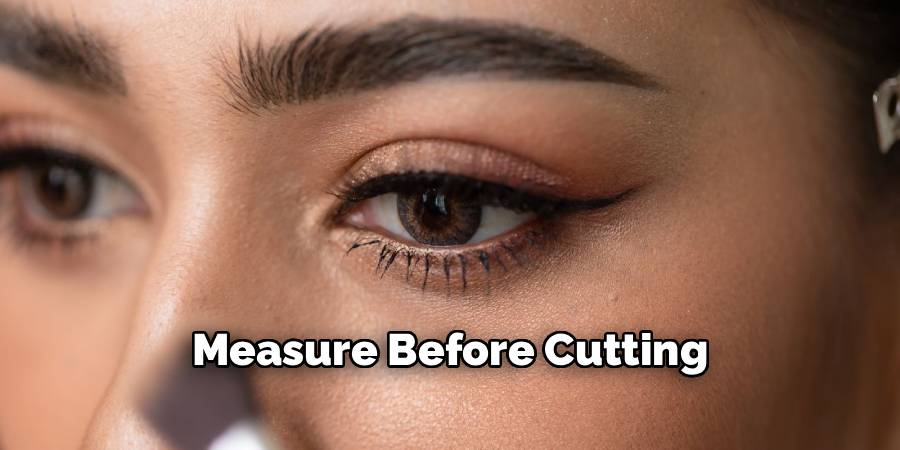
1. Measure Before Cutting
The first step to achieving natural-looking false eyelashes is to measure them against your natural lash line. Gently place the lash strip along your upper lash line without adhesive to check the fit. Most strips are longer than the natural lash line, particularly at the outer corners. Use this measurement as a guide to trim the excess. Measuring first prevents cutting too much and ensures the lashes align seamlessly with your natural eyes, creating a balanced, realistic appearance.
2. Trim from the Outer Edge
Always trim false eyelashes from the outer edge, not the inner corner. The inner corner usually tapers naturally, while the outer corner can be slightly longer to create a subtle, winged effect. Use small, precise scissors and trim a little at a time, checking the fit as you go. Trimming from the outer edge maintains the natural curve and ensures the lashes blend with your natural ones, giving a soft and flattering look.
3. Cut in Small Sections
Instead of trimming large portions at once, cut in small sections to control the length accurately. Take tiny snips, then place the lash back on your lash line to assess the fit. This method reduces the risk of cutting too much and allows for a gradual, customized adjustment. Cutting incrementally ensures the false eyelashes maintain their shape and curve, which is essential for a natural appearance.
4. Customize Lash Clusters
For a more natural effect, consider trimming individual lash clusters or sections. Some false lashes come in pre-clustered designs. You can separate these clusters slightly or shorten them individually to mimic the growth pattern of natural lashes. This technique creates a soft, feathery look instead of a uniform, artificial strip. Customized lash clusters help the false eyelashes blend seamlessly with your real lashes, enhancing realism.
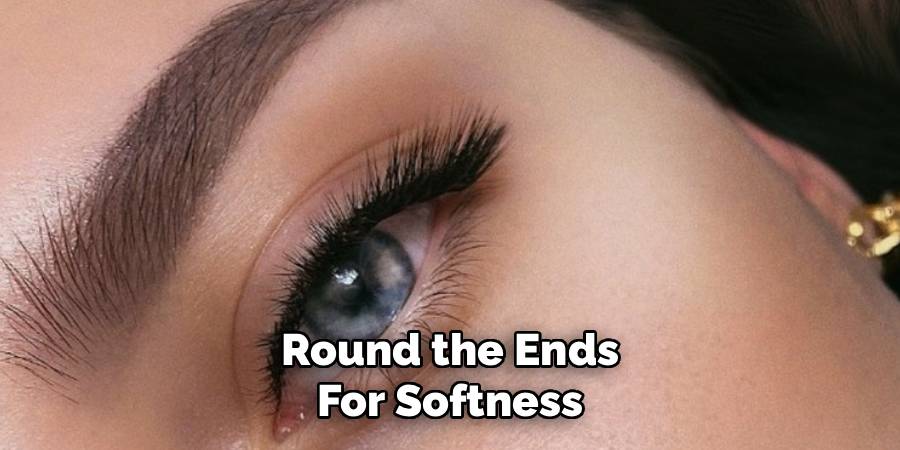
5. Round the Ends for Softness
After trimming the length, use small scissors to round off the ends of the false eyelashes slightly. Pointed or blunt ends can appear harsh or unnatural. Rounding the tips softens the overall look, making the false lashes blend better with natural lashes. This subtle adjustment can make a dramatic difference, especially for daytime or subtle makeup looks, ensuring a natural and elegant finish.
6. Layer for Dimensional Effect
Creating a layered effect by cutting and stacking lashes of varying lengths can add dimension without looking overdone. Trim some lashes slightly shorter in the inner corner and keep the outer lashes longer. Alternating the lengths mimics the natural growth pattern of real eyelashes, giving depth and realism. Layering adds subtle volume and texture while avoiding the overly uniform or fake appearance that sometimes occurs with full-strip lashes.
7. Adjust Thickness if Necessary
Some false eyelashes are dense or heavy, which can appear unnatural when worn. If the lash strip is too thick, carefully remove a few strands from the inner or middle sections to reduce bulk. Thinning the lashes makes them lighter and more flexible, allowing them to lay flat against the eyelid. This adjustment is particularly useful for natural daytime looks, ensuring the lashes complement your eye shape without overpowering it.
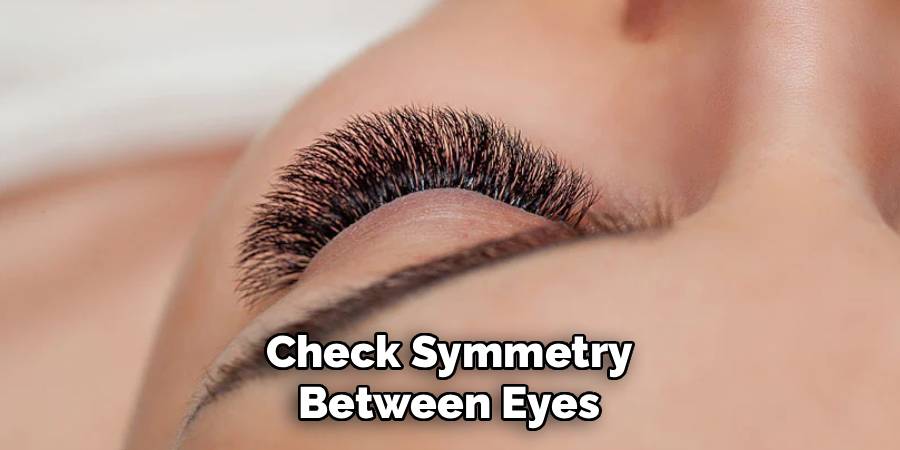
8. Check Symmetry Between Eyes
Always compare the trimmed lashes for both eyes to ensure symmetry. Differences in length or shape between the left and right lashes can look uneven and unnatural. Place both strips along the lash lines before applying adhesive and make minor adjustments as needed. Symmetry is crucial for creating a polished, natural appearance, and careful comparison ensures that both eyes are balanced and flattering.
9. Test Fit with Adhesive Before Final Application
After trimming, test the false eyelashes with a small amount of adhesive to see how they fit on your lash line. Position them carefully to check alignment, curve, and length. This step allows you to make any final adjustments before committing to full application. Testing ensures that the lashes fit comfortably, lie flat against the eyelid, and enhance your eyes naturally without lifting at the corners or looking disproportionate.
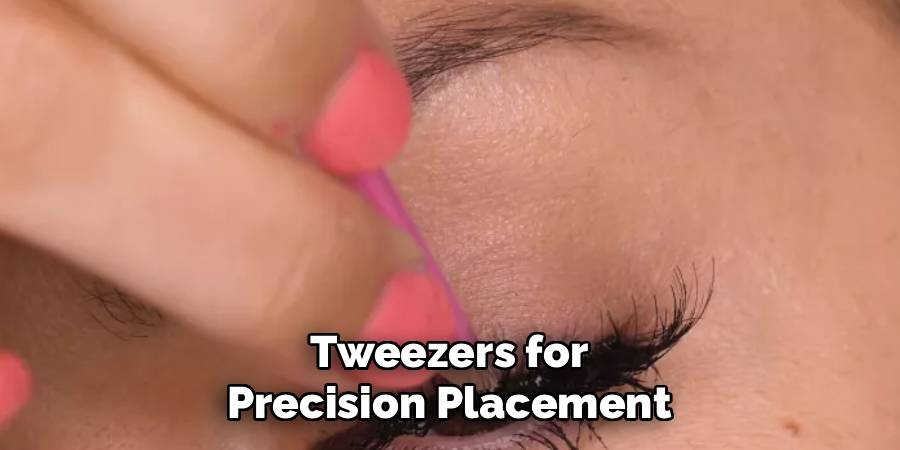
10. Use Tweezers for Precision Placement
Once trimmed, use tweezers to place the false eyelashes precisely along your lash line. Tweezers provide better control than fingers, particularly near the inner and outer corners. Position the lashes gently, pressing them into place and adjusting the angle for a natural blend. Precision placement after trimming is essential for achieving a seamless, undetectable look where the false lashes appear as an extension of your natural lashes.
Things to Consider When Applying False Eyelashes
- Choose the Right Adhesive: Selecting a high-quality and skin-safe adhesive is vital for ensuring that your false eyelashes stay in place all day without causing irritation. Opt for clear or black glue depending on your preference for a natural or bold finish.
- Pay Attention to Allergies: If you have sensitive skin or allergies, test the glue on a small area of skin before full application. This helps avoid potential adverse reactions near the delicate eye area.
- Blend with Makeup: To create a seamless look, ensure your false lashes blend well with your natural ones. Use eyeliner to conceal the lash band and apply mascara sparingly to integrate both sets of lashes.
- Consider Your Eye Shape: Different styles suit different eye shapes. Take the time to match the lash style to your unique eye shape for the most flattering effect.
- Practice Makes Perfect: Applying false eyelashes can be tricky initially, but regular practice will improve your technique over time, making the process quicker and easier.
Conclusion
Cutting false eyelashes to look natural requires careful measurement, precise trimming, and attention to detail. Measuring against the lash line ensures proper length, while trimming from the outer edge preserves the natural taper of the lashes. Be sure to follow all instructions on how to cut false eyelashes to look natural carefully, and always consult an expert when in doubt.
About the Author
Jane Hubbard is a passionate beauty expert with a wealth of experience in makeup, hair, and overall beauty techniques. After years of working as a hairdresser specialist, she followed her entrepreneurial spirit and started her own consultancy business.
Jane has always been driven by her desire to help others feel confident in their own skin, and she does this by sharing her knowledge, experiences, and practical beauty tips. Through her consultancy, she empowers individuals to embrace their unique beauty, offering tailored guidance that boosts both self-esteem and personal style.
Professional Focus
Specializes in makeup, hairstyling, and beauty consulting.
Provides personalized beauty advice, tips, and techniques to help individuals feel confident in their appearance.
Dedicated to staying up-to-date with the latest industry trends and developments.
Passionate about creating a comfortable and empowering experience for every client.
Education History
University of Craft and Design – Bachelor of Fine Arts (BFA) in Woodworking and Furniture Design
Woodworking Apprenticeships – Extensive hands-on training with skilled craftsmen to refine carpentry and furniture making techniques
Online Courses & Masterclasses – Continued education in advanced woodworking techniques, design principles, and specialized tools
Expertise:
Makeup artistry, hairstyling, and beauty consulting.
Personalized beauty techniques to enhance confidence and self-expression.
Educating clients on how to maintain their beauty routines at home.