
Traditional kitchen sponges have long been the go-to cleaning tool, but they come with significant drawbacks including bacterial buildup, rapid deterioration, and the need for frequent replacement. Silicone sponges are revolutionizing kitchen cleaning with their superior hygiene, durability, and versatility. These innovative cleaning tools are made from food-grade silicone material that resists bacteria growth while providing effective scrubbing power for various surfaces.
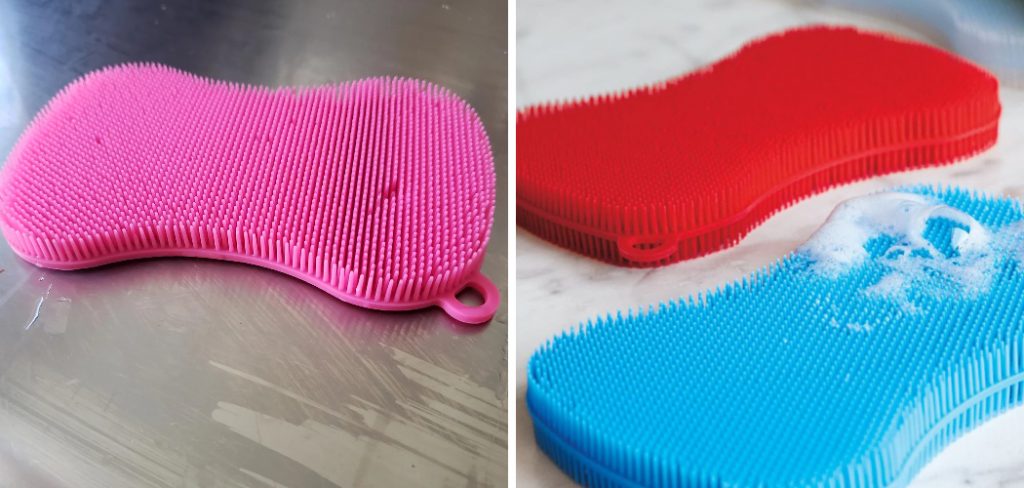
Learning how to use silicone sponge properly can transform your kitchen cleaning routine and save money over time. Unlike traditional cellulose or foam sponges, silicone versions don’t harbor germs, dry quickly, and can withstand high temperatures for thorough sanitization. They’re also eco-friendly alternatives that reduce waste since they last significantly longer than conventional options.
Why Using Silicone Sponges Matters
Silicone sponges represent a significant advancement in kitchen hygiene and sustainability. Traditional sponges become breeding grounds for harmful bacteria within days of use, potentially contaminating dishes and surfaces rather than cleaning them. The non-porous nature of silicone prevents bacterial growth while maintaining cleaning effectiveness over extended periods.
These reusable cleaning tools also address environmental concerns by lasting months or even years compared to weekly sponge replacements. The initial investment pays dividends through reduced waste and elimination of recurring purchases, making them both economically and environmentally responsible choices for modern households.
Step-by-Step Guide: How to Use Silicone Sponge
Step 1: Select the Right Silicone Sponge for Your Needs
Different silicone sponges are designed for specific cleaning tasks, so choosing the appropriate type ensures optimal results. Standard dishwashing models feature flexible bristles perfect for plates, bowls, and cookware, while firmer versions handle baked-on food and stubborn stains.
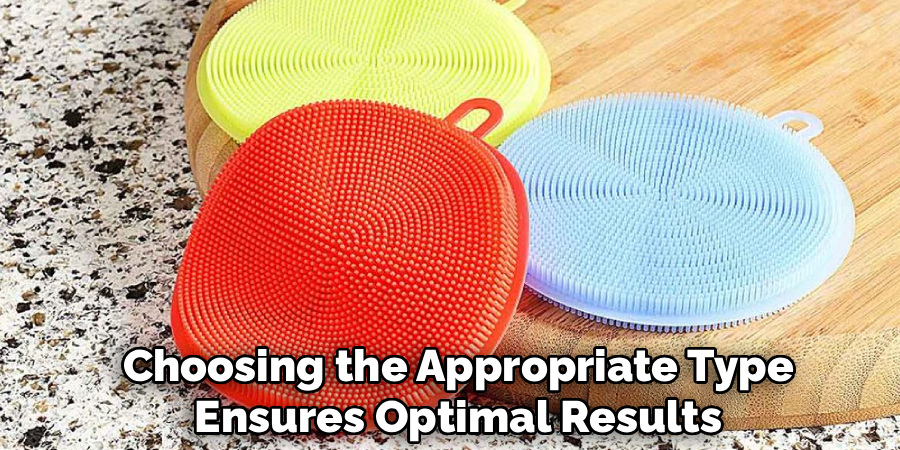
Some models include ergonomic handles for comfortable gripping during extended use. Examine the bristle density and firmness level before purchasing, as softer bristles work best for delicate surfaces like non-stick cookware, while firmer options tackle heavy-duty cleaning tasks. Consider purchasing multiple types for different applications throughout your kitchen, ensuring you have the right tool for every cleaning challenge you encounter.
Step 2: Prepare Your Cleaning Area and Workspace
Organize your washing station before beginning to ensure efficient workflow and prevent cross-contamination between dirty and clean items. Clear the sink of any debris or standing water, then arrange dirty dishes in order from least to most soiled. Fill one side of a double sink with warm, soapy water for washing and the other with clean rinse water.
If you have a single sink, use a large bowl for the rinse water. Gather your dish soap, silicone sponge, and any additional cleaning supplies you might need. Having everything organized and within reach makes the cleaning process smoother and more hygienic, preventing the need to touch other surfaces with soapy hands during the washing process.
Step 3: Wet and Apply Soap to Your Silicone Cleaning Tool
Begin by thoroughly saturating your silicone sponge with warm water, which helps activate the cleaning properties and makes the bristles more flexible for effective scrubbing action. Apply a small amount of dish soap directly to the sponge’s surface, working it into the bristles with gentle rubbing motions.
The silicone material holds soap effectively, creating a rich lather that enhances cleaning power. Unlike traditional sponges that absorb large amounts of soap, silicone versions require less detergent while maintaining excellent cleaning capability. Ensure the soap is evenly distributed across the sponge’s surface before beginning to clean dishes, as this prevents waste and ensures consistent cleaning performance throughout your washing session.
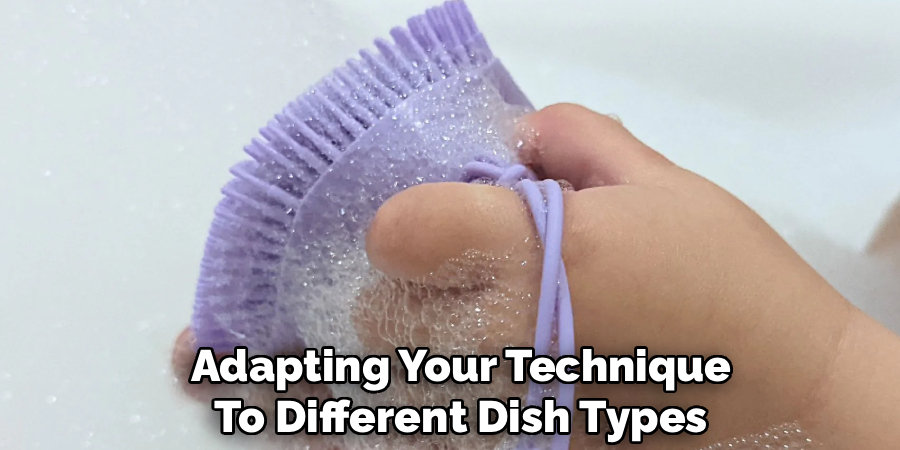
Step 4: Master Proper Scrubbing Techniques for Different Surfaces
Effective silicone sponge use requires adapting your technique to different dish types and soil levels. For delicate items like glassware and non-stick surfaces, use gentle circular motions with light pressure, allowing the bristles to do the work without applying excessive force. Heavily soiled pots and pans benefit from firm, back-and-forth scrubbing motions that leverage the sponge’s flexibility.
The key to successful cleaning lies in patience and consistent motion rather than aggressive scrubbing, which can damage surfaces or reduce cleaning effectiveness. Vary your approach based on the item being cleaned, using the sponge’s different areas for maximum efficiency while maintaining proper hygiene throughout the washing process.
Step 5: Rinse Dishes and Sponge Thoroughly After Cleaning
Proper rinsing technique ensures complete removal of soap residue and food particles from both dishes and your silicone cleaning tool. Hold dishes under running water or dip them in clean rinse water, checking for any remaining soap bubbles or debris before setting them aside to dry. Pay special attention to areas where food might hide, such as glass rims and utensil handles.
Similarly, rinse your silicone sponge thoroughly under warm running water, working your fingers through the bristles to remove trapped food particles and soap residue. A well-rinsed sponge maintains its cleaning effectiveness and prevents soap buildup that could affect future cleaning performance.
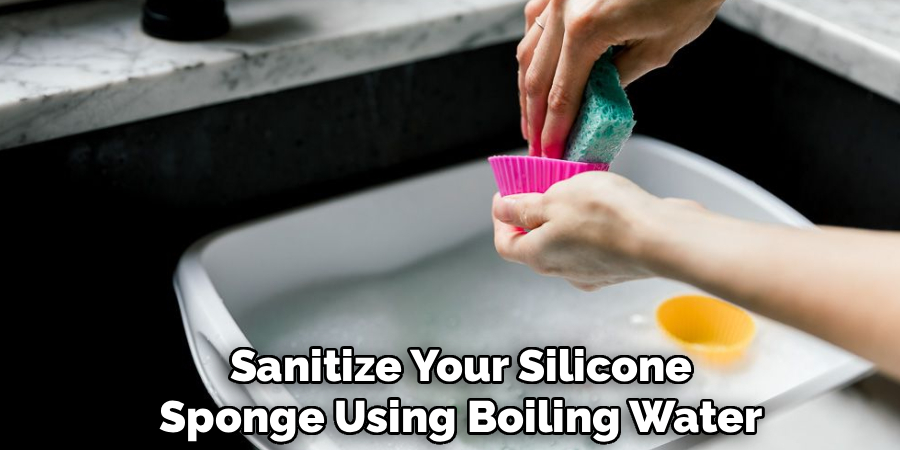
Step 6: Sanitize Your Silicone Sponge for Optimal Hygiene
One of the greatest advantages of silicone sponges is their ability to withstand high-temperature sanitization methods that would destroy traditional alternatives. After completing your dishwashing session, sanitize your silicone sponge using boiling water, dishwasher cycles, or microwave sterilization.
For boiling water treatment, immerse the sponge for 2-3 minutes to eliminate any remaining bacteria or germs. Dishwasher sanitization involves placing the sponge on the top rack during a normal wash cycle with heated dry option. Microwave sterilization requires placing the damp sponge in the microwave for 30-60 seconds on high power. These sanitization methods ensure your reusable cleaning tool remains hygienic and safe for continued use.
Step 7: Store Your Silicone Sponge Properly Between Uses
Correct storage practices extend your silicone sponge’s lifespan while maintaining optimal hygiene standards between cleaning sessions. After sanitizing, shake off excess water and place the sponge in a well-ventilated area where air can circulate freely around all surfaces. Avoid enclosed containers or damp areas that might promote bacterial growth or trap moisture.
Some users prefer dedicated sponge holders that allow air circulation while keeping the cleaning tool easily accessible. The quick-drying nature of silicone makes proper storage straightforward, but ensuring adequate airflow prevents any potential issues. A properly stored silicone sponge will remain fresh, odor-free, and ready for your next cleaning session.
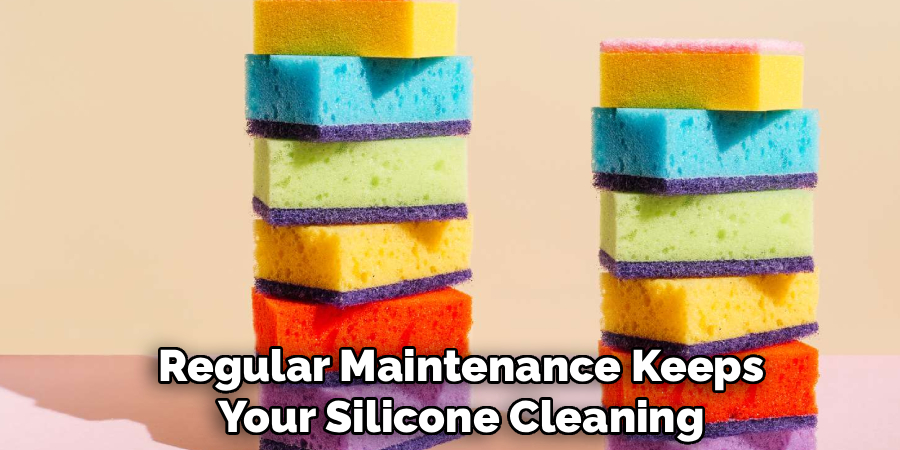
Maintain and Replace Your Silicone Sponge
Regular maintenance keeps your silicone cleaning tool performing at its best throughout its extended lifespan. Inspect the bristles weekly for signs of wear, damage, or excessive buildup that might affect cleaning performance. Deep clean monthly using baking soda paste or specialized silicone cleaners to remove any stubborn residue or stains. Most quality silicone sponges last 6-12 months with proper care, far longer than traditional alternatives.
Signs that replacement is needed include permanently bent bristles, cracks in the material, or persistent odors that don’t respond to sanitization efforts. Investing in quality silicone sponges and maintaining them properly ensures consistent cleaning performance while maximizing your investment in these innovative kitchen tools.
Frequently Asked Questions (FAQs)
Can I Put My Silicone Sponge in the Dishwasher?
Yes, silicone sponges are completely dishwasher-safe and can withstand the high temperatures and harsh detergents used in dishwasher cycles. Place them on the top rack during normal wash cycles for effective cleaning and sanitization. The heated dry option provides additional sterilization benefits. This convenience makes silicone sponges ideal for busy households where thorough sanitization is essential but time is limited.
How Long Do Silicone Sponges Typically Last?
High-quality silicone sponges can last 6-12 months with proper care and regular sanitization, significantly longer than traditional sponges that require weekly replacement. Factors affecting lifespan include usage frequency, cleaning intensity, and maintenance practices. Some users report using the same silicone sponge for over a year with consistent performance. Regular inspection helps determine when replacement is necessary based on bristle condition and cleaning effectiveness.
Are Silicone Sponges Safe for Non-Stick Cookware?
Silicone sponges are excellent for non-stick surfaces because they provide effective cleaning without the abrasive action that can damage delicate coatings. The flexible bristles conform to surface contours while maintaining gentle contact that preserves non-stick properties. However, always use light pressure and avoid aggressive scrubbing motions that might compromise any coating, regardless of the cleaning tool used.
Do Silicone Sponges Work Well with Different Types of Dish Soap?
Silicone sponges work effectively with all types of dish soap, including concentrated formulas, natural alternatives, and antibacterial varieties. They actually require less soap than traditional sponges because the non-porous surface doesn’t absorb detergent. Experiment with different soap amounts to find the optimal balance for your cleaning needs, typically starting with smaller quantities and adding more if necessary.
How Do I Remove Stains from My Silicone Sponge?
Stubborn stains can be removed using baking soda paste, white vinegar, or hydrogen peroxide treatments. Create a paste with baking soda and water, work it into the stained areas, then rinse thoroughly. For persistent discoloration, soak the sponge in diluted hydrogen peroxide for 15-20 minutes before rinsing. These natural cleaning methods restore the sponge’s appearance without damaging the silicone material or compromising its cleaning effectiveness.
Conclusion
Mastering how to use silicone sponge effectively transforms your kitchen cleaning routine while promoting better hygiene and environmental responsibility. These innovative tools offer superior performance compared to traditional alternatives when used with proper techniques and maintenance practices.
By following these detailed steps and maintenance guidelines, you’ll maximize the performance and longevity of these remarkable cleaning tools. Start incorporating silicone sponges into your kitchen routine today and experience the difference that modern cleaning technology can make in your daily life.
About the Author
Jane Hubbard is a passionate beauty expert with a wealth of experience in makeup, hair, and overall beauty techniques. After years of working as a hairdresser specialist, she followed her entrepreneurial spirit and started her own consultancy business.
Jane has always been driven by her desire to help others feel confident in their own skin, and she does this by sharing her knowledge, experiences, and practical beauty tips. Through her consultancy, she empowers individuals to embrace their unique beauty, offering tailored guidance that boosts both self-esteem and personal style.
Professional Focus
Specializes in makeup, hairstyling, and beauty consulting.
Provides personalized beauty advice, tips, and techniques to help individuals feel confident in their appearance.
Dedicated to staying up-to-date with the latest industry trends and developments.
Passionate about creating a comfortable and empowering experience for every client.
Education History
University of Craft and Design – Bachelor of Fine Arts (BFA) in Woodworking and Furniture Design
Woodworking Apprenticeships – Extensive hands-on training with skilled craftsmen to refine carpentry and furniture making techniques
Online Courses & Masterclasses – Continued education in advanced woodworking techniques, design principles, and specialized tools
Expertise:
Makeup artistry, hairstyling, and beauty consulting.
Personalized beauty techniques to enhance confidence and self-expression.
Educating clients on how to maintain their beauty routines at home.