
Contouring is a transformative makeup technique that uses light and shadow to redefine and sculpt your facial features. For those with a round face, which is characterized by softer angles and a similar width and length, contouring can be a particularly powerful tool. It allows you to create the illusion of more defined cheekbones, a sharper jawline, and a more angular structure, adding balance to your features. While it might seem like a skill reserved for professional makeup artists, it’s actually quite simple to learn.

This guide will demystify the process and provide you with easy, actionable steps. We will show you exactly how to contour a round face, helping you enhance your natural beauty with confidence.
Why Contouring Is Essential for Round Faces
Contouring is especially effective for round faces because it directly addresses the very features that define this face shape: a softer jawline and fuller cheeks. The primary goal of contour for round face is to introduce angles and dimension. By strategically placing shadows in specific areas, you can create the illusion of a more oval or sculpted facial structure. It allows you to carve out cheekbones that may not be naturally prominent, giving your face a lifted and more defined appearance.
Furthermore, contouring adds a sophisticated structure that can elevate your entire makeup look. It’s not about changing your face, but rather about enhancing what you already have. The interplay of light (highlighting) and shadow (contouring) brings your best features forward, creating a balanced and beautifully defined look that photographs exceptionally well and boosts your confidence.
9 Steps on How to Contour a Round Face
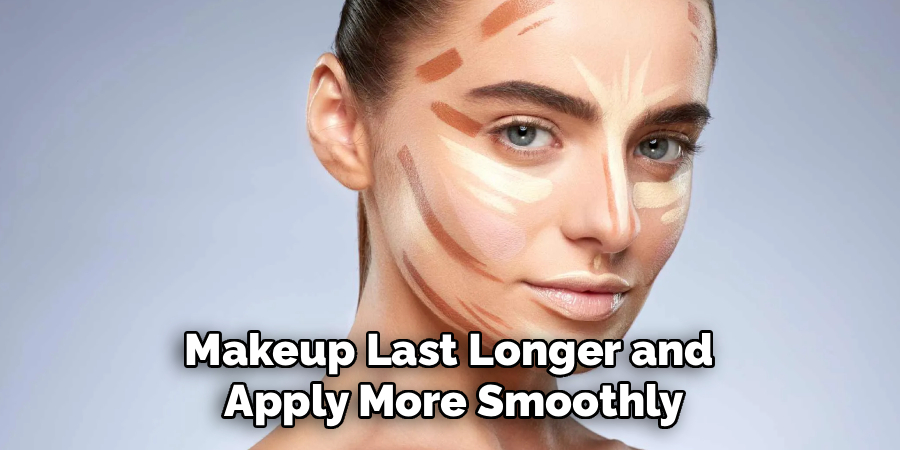
Step 1: Prep Your Skin for a Smooth Canvas
Before you begin any face sculpting, it’s essential to create a flawless base. Start by cleansing and moisturizing your skin, then apply a primer to help your makeup last longer and apply more smoothly. Follow this with your favorite foundation, ensuring it is blended evenly across your entire face and neck. This clean, uniform canvas is crucial because it ensures that your contour and highlight products will blend seamlessly without looking patchy or uneven. A well-prepped base allows the focus to be on the dimension you create, not on skin texture.
Step 2: Choose the Right Contour Products and Shades
Selecting the right shade is the most important part of achieving a natural-looking contour. Your contour product, whether it’s a cream, liquid, or powder, should be about two to three shades darker than your skin tone and have a cool or neutral undertone to mimic a natural shadow. Avoid warm, shimmery bronzers for contouring, as they can look unnatural. For your highlight, choose a shade that is one to two shades lighter than your skin tone. The right makeup brushes are also key; an angled contour brush and a smaller blending brush are perfect for this task.
Step 3: Contour the Sides of Your Forehead
For a round face shape, the goal is often to create a slightly more oval appearance. To achieve this, you should apply your contour product along the temples and the sides of your forehead. Using an angled brush, lightly sweep the contour along your hairline, from one temple to the other. This technique helps to create a subtle shadow that visually narrows the width of the upper part of your face. Be sure to blend the product upwards into your hairline to avoid any harsh, obvious lines, ensuring a soft and natural finish.
Step 4: Define and Sculpt the Cheekbones
This is the step that creates the biggest impact. To find the perfect placement for your cheekbone contour, suck in your cheeks slightly to find the hollows. Apply the contour product in a line starting from near the top of your ear and extending downwards towards the corner of your mouth, but stopping about halfway. This placement will lift your face. Blending is critical here; use a clean brush or one of the many available blending tools, like a beauty sponge, to blend the line upwards towards your cheekbone, not downwards, to maintain that lifted effect.
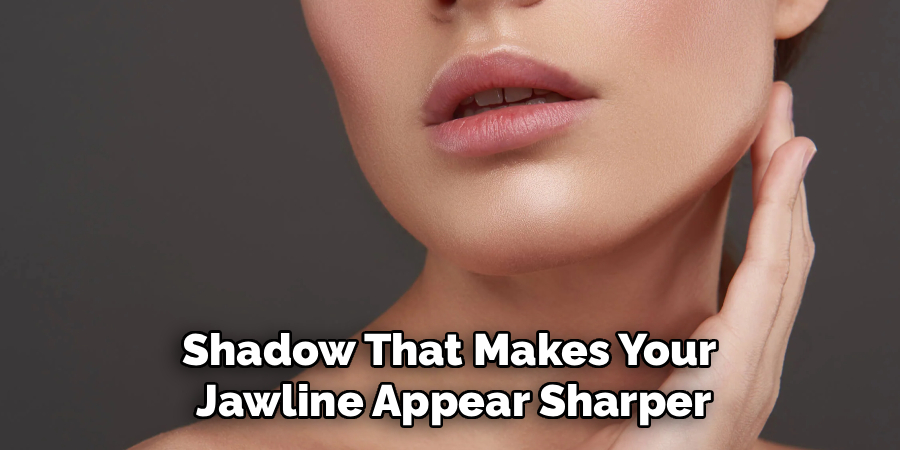
Step 5: Add Definition to Your Jawline
A soft, rounded jaw is a common characteristic of a round face shape. Creating sharp jawline definition is a key part of this contouring process. Apply your contour product along the edge of your jawbone, from just below your earlobe down to your chin. This creates a shadow that makes your jawline appear sharper and more chiseled. Be sure to blend the contour down your neck to create a seamless transition. This step is essential for a complete face sculpting effect and prevents the “floating head” look.
Step 6: Use Highlighting Techniques to Bring Features Forward
Highlighting is just as important as contouring, as it brings light and dimension to the center of your face. Apply your chosen highlighter to the high points where light would naturally hit. This includes the top of your cheekbones (just above where you placed your contour), down the bridge of your nose, on your cupid’s bow, and in the center of your forehead and chin. This strategic placement of light draws attention inward and upward, further enhancing the sculpted look and giving your skin a healthy glow.
Step 7: Contour the Nose
Contouring your nose can help it appear slimmer and more defined, which adds to the overall balance of the face. Using a small, thin makeup brush, draw two parallel lines down the sides of your nose, starting from the inner part of your eyebrows. The closer these lines are to each other, the narrower your nose will appear. Then, apply a small amount of highlighter down the bridge of your nose, between the two contour lines. Blend the lines carefully with a small brush or your finger until they are soft and subtle.
Step 8: Blend Everything Seamlessly
The secret to a believable contour is blending. Harsh, unblended lines are a dead giveaway. After you have applied all your contour and highlight products, take a clean, damp beauty sponge or a large, fluffy brush and gently pat or buff over all the areas to meld the products together. The goal is to have no visible start or end points, just a soft, seamless transition from the highlighted areas to the shadowed ones. This is the most important part of how to contour a round face for a natural look.
Step 9: Set Your Makeup
Once you are happy with your blend, you need to set your work to ensure it lasts all day. If you used cream or liquid products, it’s especially important to set them. Lightly dust a translucent setting powder over your entire face, focusing on the areas where you applied cream products. You can also use a setting spray to lock everything in place and help the different layers of makeup melt together for a more skin-like finish.
Frequently Asked Questions (FAQs)
What’s the difference between bronzer and contour?
The main difference is their purpose and undertone.
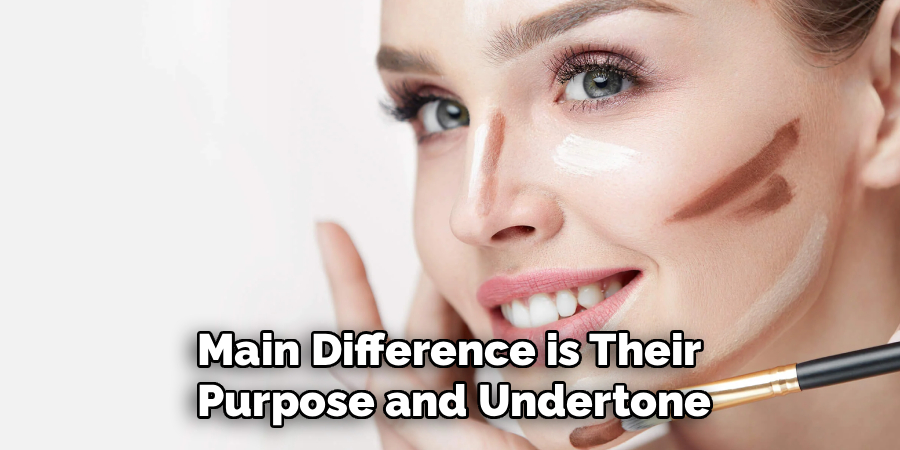
- Contour products have cool or neutral undertones and are used to create shadows, which sculpt and define your features.
- Bronzer typically has warm, golden undertones and is used to add warmth to the face where the sun would naturally hit, like the tops of the cheeks and forehead.
Should I use cream or powder to contour?
This depends on your skin type and preferred finish.
- Cream products are great for dry or normal skin and provide a more natural, dewy finish. They blend seamlessly into the skin.
- Powder products are ideal for oily skin as they help control shine and offer a more matte, defined look. They also have great staying power.
How can I make my contour look natural and not muddy?
To avoid a muddy look, always start with a light hand and build up the product slowly. Choose a contour shade that is only two to three shades darker than your skin and has the right undertone. Most importantly, blend thoroughly with a clean brush or sponge until there are no harsh lines.
Where should you not contour on a round face?
On a round face, you should avoid contouring the cheeks directly or bringing the cheekbone contour too close to your mouth. This can make the face appear shorter or drag it down. The goal is to lift and elongate, so focus on blending your cheek contour upwards and keeping it in the outer third of your face.
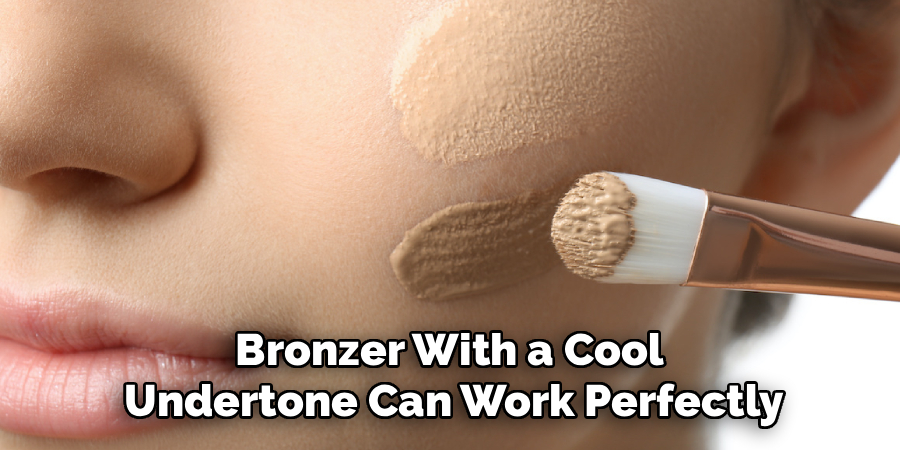
Can I contour without a special contour palette?
Yes, you absolutely can! You don’t need a dedicated palette. You can easily use products you might already own. A matte eyeshadow or a matte bronzer with a cool undertone can work perfectly as a contour powder. Similarly, a concealer or foundation stick that is a few shades darker than your skin tone can be used for cream contouring.
Conclusion
Contouring is a fantastic skill that allows you to play with light and shadow to enhance your unique beauty. For those with a round face, it’s an especially effective way to add structure and definition, celebrating your features while creating a look you love. The key to success is understanding the right placement, choosing the correct shades, and, above all, blending until everything is seamless.
Don’t be afraid to practice and experiment to find what works best for you. Now that you have a comprehensive guide on how to contour a round face, you can confidently use this technique to sculpt, define, and elevate your everyday makeup routine.
About the Author
Jane Hubbard is a passionate beauty expert with a wealth of experience in makeup, hair, and overall beauty techniques. After years of working as a hairdresser specialist, she followed her entrepreneurial spirit and started her own consultancy business.
Jane has always been driven by her desire to help others feel confident in their own skin, and she does this by sharing her knowledge, experiences, and practical beauty tips. Through her consultancy, she empowers individuals to embrace their unique beauty, offering tailored guidance that boosts both self-esteem and personal style.
Professional Focus
Specializes in makeup, hairstyling, and beauty consulting.
Provides personalized beauty advice, tips, and techniques to help individuals feel confident in their appearance.
Dedicated to staying up-to-date with the latest industry trends and developments.
Passionate about creating a comfortable and empowering experience for every client.
Education History
University of Craft and Design – Bachelor of Fine Arts (BFA) in Woodworking and Furniture Design
Woodworking Apprenticeships – Extensive hands-on training with skilled craftsmen to refine carpentry and furniture making techniques
Online Courses & Masterclasses – Continued education in advanced woodworking techniques, design principles, and specialized tools
Expertise:
Makeup artistry, hairstyling, and beauty consulting.
Personalized beauty techniques to enhance confidence and self-expression.
Educating clients on how to maintain their beauty routines at home.