
Finding a skincare product that genuinely delivers intense hydration and repair can feel like searching for a needle in a haystack. Amidst the thousands of serums and moisturizers on the market, Ialuset Hyaluronic Acid Cream has emerged as a cult favorite, particularly in French pharmacy circles.

Originally designed as a medical-grade product for wound healing, its incredibly high concentration of hyaluronic acid has made it a secret weapon for beauty enthusiasts looking to plump, hydrate, and rejuvenate their skin.
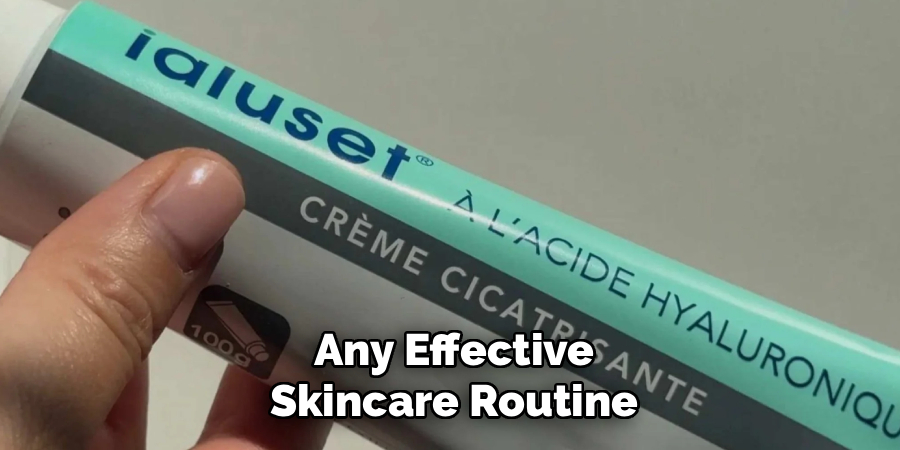
If you have recently acquired a tube of this powerhouse cream, you might be wondering exactly how to incorporate it into your routine. Because it is potent and thick, proper application is key to unlocking its full potential without overwhelming your skin. This guide on how to use ialuset hyaluronic acid cream will walk you through everything you need to know to achieve that coveted glow.
What Will You Need?
Before you begin your application routine, gather the following items to ensure the best results:
- Ialuset Hyaluronic Acid Cream: Your star product.
- A Gentle Cleanser: To ensure your canvas is clean.
- Facial Mist or Thermal Water: This is crucial. Hyaluronic acid needs water to work; applying it to dry skin can actually dehydrate you.
- A Facial Oil or Heavy Moisturizer: To seal in the hydration (occlusive layer).
- Clean Towel: For patting your face (do not rub).
10 Easy Steps on How to Use Ialuset Hyaluronic Acid Cream
Step 1: Cleanse Your Skin Thoroughly
The first step in any effective skincare routine is starting with a fresh, clean slate. Throughout the day, your skin accumulates dirt, oil, pollutants, and residue from other products. If you apply a potent ingredient like hyaluronic acid on top of this debris, you are essentially trapping impurities against your skin, which can lead to clogged pores and breakouts.
Use a gentle, pH-balanced cleanser suitable for your skin type. Massage the cleanser into your skin for at least 60 seconds to break down oils and grime effectively. Rinse with lukewarm water—never hot, as hot water can strip your natural moisture barrier. Gently pat your face with a clean towel, but stop before your skin is completely dry. Leaving a bit of dampness is actually the perfect prep for the steps to follow.
Step 2: Dampen Your Face with a Mist
This is perhaps the most critical step when using Ialuset or any high-concentration hyaluronic acid product. Hyaluronic acid is a humectant, which means it works like a magnet for moisture. If you apply it to dry skin in a dry environment, it may pull moisture out of the deeper layers of your skin to surface, potentially leaving you drier than before.
To prevent this, liberally spritz your face with a facial mist, rose water, or simple thermal spring water. You want your face to be visibly wet, not just tacky. This provides an external reservoir of water for the hyaluronic acid to grab onto and pull into your epidermis. Think of the water as the fuel and the Ialuset as the engine; without the fuel, the engine cannot run efficiently.
Step 3: Dispense the Correct Amount
Ialuset is thick, creamy, and incredibly concentrated. A common mistake first-time users make is treating it like a standard lotion and applying a huge dollop. Because of its texture, a little goes a very long way. Squeezing out too much can result in a white cast that takes forever to rub in, or a sticky residue that feels heavy on the skin.
Start with a pea-sized amount for your entire face. You can always add a tiny bit more if you feel you haven’t covered a specific area, but it is much harder to remove excess product once it is on your face. Squeeze the product onto the back of your clean hand first. This warms up the cream slightly, making it easier to spread, and prevents you from contaminating the tube tip by touching it directly to your face.
Step 4: Warm the Product Between Fingers
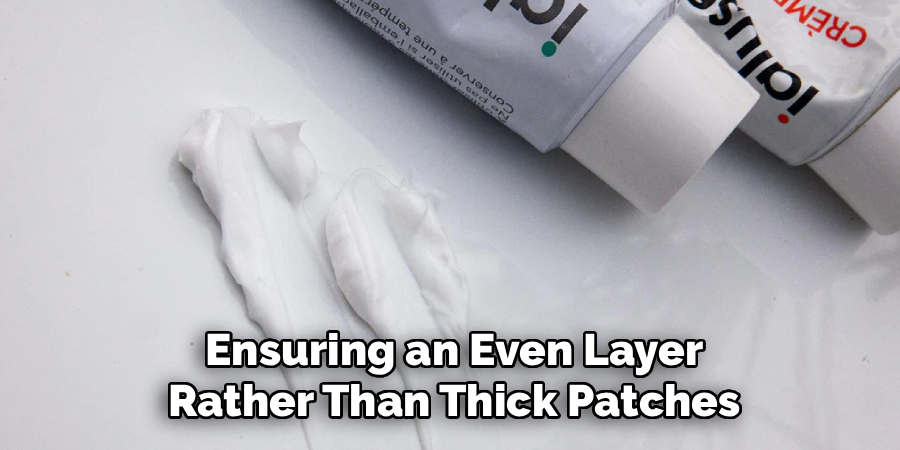
Once the pea-sized amount is on the back of your hand, use your fingertips to lightly massage it. This brief warming period changes the consistency of the cream slightly, making it more emollient and spreadable. Cold cream straight from the tube can be stiff and might drag on the delicate skin of your face during application.
By warming it for just 5 to 10 seconds, you ensure a smoother glide. This also allows you to thin out the product slightly before it touches your face, ensuring an even layer rather than thick patches. This technique is especially helpful if you have sensitive skin that reacts to friction or rubbing.
Step 5: Apply to Key Areas First
Instead of slapping the cream onto your cheeks and trying to push it outward, use a strategic dotting method. Dab small dots of the warmed cream onto your forehead, both cheeks, your nose, chin, and neck. This distribution ensures that every zone of your face gets an equal share of the hydration.
Don’t forget the neck and décolletage! These areas are often neglected but show signs of aging just as quickly as the face. Because Ialuset is so effective at plumping fine lines, it works wonders on neck rings and chest creases. Once the dots are placed, you are ready to blend without worrying that you will run out of product before reaching your forehead.
Step 6: Massage Gently into the Skin
Now begins the blending process. Using upward, circular motions, massage the cream into your skin. Work against gravity—lifting the skin upwards rather than dragging it down. Because your face is still damp from Step 2 (re-mist if it dried!), the thick cream should mix with the water droplets and turn into a milky emulsion.
This is normal and desired. It means the hyaluronic acid is mixing with the water and penetrating the skin. Take your time massaging it in. Focus on areas where you have fine lines, such as around the mouth (nasolabial folds) or between the eyebrows. The massage stimulates blood flow, which can help with absorption and give your skin a healthy flush. Continue until the white streaks disappear and the product feels absorbed.
Step 7: Let it Absorb (The “Sticky” Phase)
After massaging, your skin might feel slightly tacky or sticky. Do not panic; this is a characteristic trait of high-quality hyaluronic acid. It indicates that the humectant layer is sitting on the skin, holding onto that moisture. Many people make the mistake of thinking the product hasn’t absorbed and try to rub it off or wash it away.
Patience is key here. Give the product about 60 to 90 seconds to settle. During this time, the “wet” feeling will diminish as the ingredients sink into the stratum corneum. Avoid touching your face or applying makeup immediately. Let the Ialuset do its work. If it feels excessively sticky after two minutes, you likely used too much product—remember this for next time and use slightly less.
Step 8: Seal it with an Occlusive
This step is non-negotiable. Hyaluronic acid pulls water in, but it doesn’t necessarily keep it there. If the air around you is dry, that water can evaporate, taking your skin’s hydration with it (Transepidermal Water Loss). To lock that moisture in permanently, you need an occlusive layer.
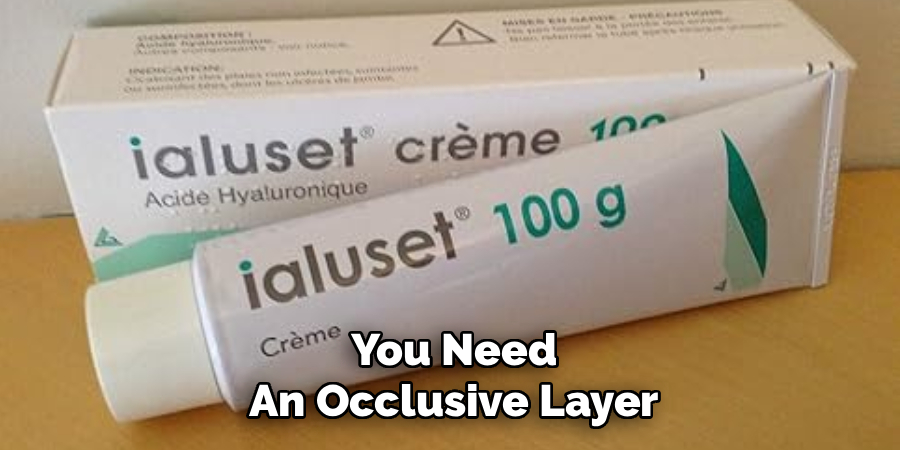
Apply a facial oil, a thicker moisturizer, or a night cream over the Ialuset. This top layer acts as a seal or a lid on a pot, trapping the moisture inside your skin. If you have oily skin, a lightweight squalane oil or gel moisturizer works well. If you have dry skin, go for a heavier cream or rosehip oil. This step ensures you wake up with plump skin rather than tight, dehydrated skin.
Step 9: Spot Treat Specific Issues (Optional)
Because Ialuset was originally designed for wound healing, it is excellent for spot-treating specific issues like acne scars, fresh blemishes, or particularly dry patches. If you have a healing pimple or a small cut, you can dab a tiny, concentrated amount of Ialuset directly onto that spot after your general application.
The regenerative properties of the cream help speed up cell turnover and repair damaged tissue. For this step, you don’t need to spread it out thin; a small, targeted dab left to sit on the affected area overnight can significantly reduce redness and speed up healing time. Just be sure not to apply it to open, weeping wounds unless directed by a doctor.
Step 10: Consistent Application Schedule
The final step is actually a long-term commitment. Ialuset is a treatment, not a magic wand. While you will see immediate plumping effects due to hydration, the long-term benefits of improved texture and elasticity come from consistent use.
Determine a schedule that works for your skin type. For very dry or mature skin, using it every night might be perfect. For oily or combination skin, 2-3 times a week might be sufficient to boost hydration without clogging pores. Monitor how your skin reacts. If you notice small whiteheads (milia) or congestion, scale back the frequency. Consistency, tailored to your skin’s tolerance, is the secret to getting the most out of this French pharmacy gem.
5 Things You Should Avoid
To ensure you don’t irritate your skin or waste product, steer clear of these common pitfalls:
- Applying to Dry Skin: As mentioned, hyaluronic acid on dry skin in a dry climate can dehydrate you. Always apply to a damp face.
- Using Too Much Product: A thick layer does not equal better results; it usually equals clogged pores and pilling under other products.
- Skipping the Occlusive Layer: Leaving Ialuset on the skin without sealing it in with a moisturizer or oil renders it much less effective and can lead to dryness.
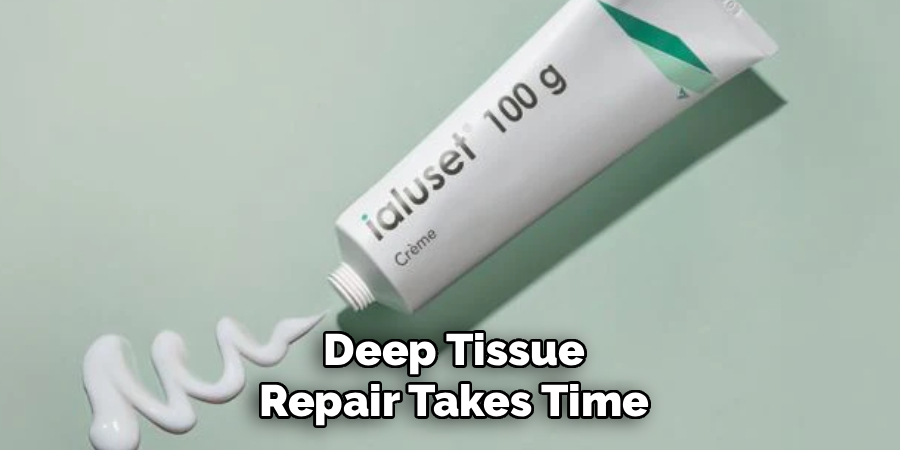
- Expecting Miracles Overnight: While hydration is instant, deep tissue repair takes time. Do not give up if your scars don’t vanish in two days.
- Ignoring Expiration Dates: Once opened, tube-based creams can degrade. Pay attention to the “Period After Opening” symbol (usually a jar icon with a number like 6M or 12M) to ensure efficacy.
Conclusion
Ialuset Hyaluronic Acid Cream is a powerful tool in the arsenal of skincare, bridging the gap between medical efficacy and cosmetic beauty.
By following these ten steps on how to use ialuset hyaluronic acid cream—specifically focusing on damp application and sealing in the moisture—you can transform dry, lackluster skin into a hydrated, glowing complexion. Remember that skincare is personal; listen to your skin, adjust the frequency as needed, and enjoy the process of self-care.
Used responsibly, this French pharmacy staple can be a game-changer for your skin health.
About the Author
Jane Hubbard is a passionate beauty expert with a wealth of experience in makeup, hair, and overall beauty techniques. After years of working as a hairdresser specialist, she followed her entrepreneurial spirit and started her own consultancy business.
Jane has always been driven by her desire to help others feel confident in their own skin, and she does this by sharing her knowledge, experiences, and practical beauty tips. Through her consultancy, she empowers individuals to embrace their unique beauty, offering tailored guidance that boosts both self-esteem and personal style.
Professional Focus
Specializes in makeup, hairstyling, and beauty consulting.
Provides personalized beauty advice, tips, and techniques to help individuals feel confident in their appearance.
Dedicated to staying up-to-date with the latest industry trends and developments.
Passionate about creating a comfortable and empowering experience for every client.
Education History
University of Craft and Design – Bachelor of Fine Arts (BFA) in Woodworking and Furniture Design
Woodworking Apprenticeships – Extensive hands-on training with skilled craftsmen to refine carpentry and furniture making techniques
Online Courses & Masterclasses – Continued education in advanced woodworking techniques, design principles, and specialized tools
Expertise:
Makeup artistry, hairstyling, and beauty consulting.
Personalized beauty techniques to enhance confidence and self-expression.
Educating clients on how to maintain their beauty routines at home.