
Achieving that coveted, lit-from-within glow often feels like a secret handshake only professional makeup artists know. You’ve seen the Instagram filters and the red carpet photos, but recreating that radiant finish at home can be tricky. Sometimes, it results in a look that’s more “oily mess” than “ethereal goddess.” The key usually isn’t the foundation you layer on top, but what lies beneath. Primers are the unsung heroes of the makeup world, and lately, one particular product has taken the beauty community by storm for its ability to smooth pores while adding a soft, candlelight glow.
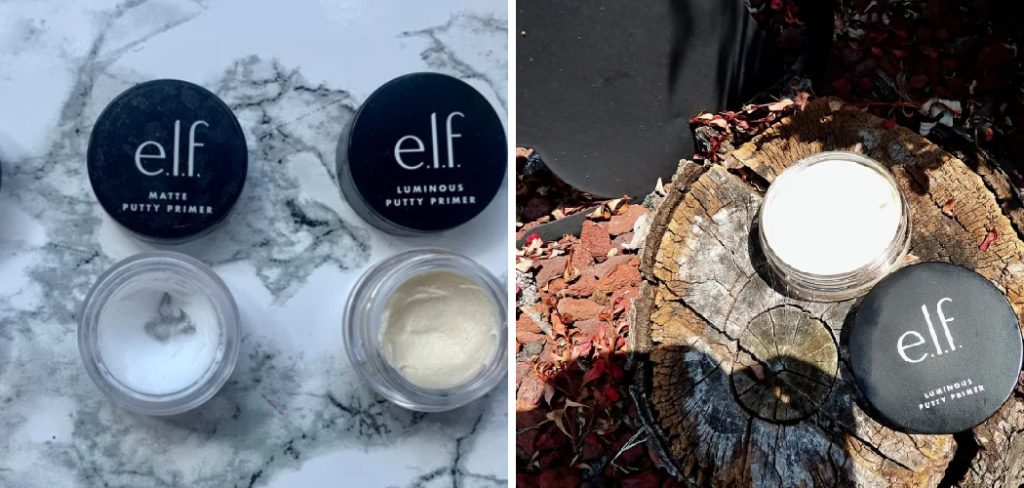
Enter the Elf Luminous Putty Primer. This affordable drugstore gem has been hailed as a dupe for high-end luxury primers, offering a velvety texture that blurs imperfections while infusing the skin with hydration and shimmer. But unlike traditional silicone-based primers that you just slap on, this putty formula requires a bit of finesse to truly shine. If you have been wondering how to use Elf Luminous Putty Primer to get that perfect, glass-skin finish, you are in the right place. This guide will walk you through the exact steps to prep, prime, and perfect your base for a look that lasts all day.
Step-by-Step Guide: How to Use Elf Luminous Putty Primer
Step 1: Prep Your Canvas With Skincare
Before you even reach for your makeup bag, the most critical step in any routine is skin preparation. Think of your face as a canvas; if the canvas is rough or dry, the paint won’t sit right. Start by cleansing your face to remove any excess oil or dirt. Follow up with a lightweight moisturizer suitable for your skin type. This is crucial because while the primer is hydrating, it works best on skin that is already balanced.
Let your moisturizer sink in for at least five minutes. Applying primer immediately after moisturizer can cause pilling or sliding, which defeats the purpose of a long-lasting base. If you are going out during the day, don’t forget your sunscreen. This initial hydration layer ensures that the luminous particles in the primer don’t cling to dry patches, giving you a smooth, even start.
Step 2: Warm Up The Product For Smooth Application
The unique texture of this product is what sets it apart, but it can also be a little confusing for first-time users. In the jar, the formula looks solid and somewhat waxy. To get the best application, you need to manipulate the texture slightly. Take a small amount of the product—about the size of a pea—out of the jar using a clean spatula or the back of your fingernail. Place it on the back of your hand.
Using your finger, gently rub the product in circular motions. The heat from your skin will melt the solid balm into a creamy, spreadable lotion consistency. This step is vital because applying the cold, hard putty directly to your face can result in a patchy application. Warming it up activates the ingredients and ensures that when you apply it, it glides effortlessly over your pores rather than sitting on top of them.
Step 3: Target Areas Needing Extra Radiance
Now that your product is warmed up and creamy, it is time to apply it. Unlike a moisturizer that you rub all over, you want to be strategic here. Focus on the areas of your face where you want to blur pores and add a subtle highlight. typically, this means the center of the face. Dab the product onto your cheeks, nose, chin, and the center of your forehead.
These are the “high points” where light naturally hits, and where pores tend to be most visible. If you have very oily skin, you might want to avoid the T-zone or use a matte primer there instead, reserving the luminous formula for the high points of your cheeks. By concentrating the product in these specific zones, you create dimension before you’ve even applied foundation. This strategic placement ensures you look glowing, not sweaty, and helps how to use Elf Luminous Putty Primer effectively for your specific face shape.
Step 4: Blend Using A Stippling Motion
The technique you use to blend the primer into your skin is just as important as where you place it. Avoid rubbing or dragging the product across your skin, as this can disturb the skincare underneath and cause streaks. Instead, use your fingers or a dense synthetic brush to press the product into the skin. This technique is often called “stippling.” Gently tap and push the putty into your pores.
The goal is to fill in the texture of the skin to create a smooth surface, rather than just coating it. The warmth of your fingers is particularly good for this, helping to melt the product further into the skin for a seamless finish. If you use a brush, make sure it is clean and damp; a dry brush might soak up too much product. Continue this tapping motion until the primer creates a thin, even veil over your targeted areas.
Step 5: Allow The Primer To Set Completely
Patience is a virtue, especially when it comes to makeup application. Once you have blended the primer into your skin, stop. Do not immediately go in with your foundation or concealer. The primer needs time to “set” or dry down slightly to form that gripping layer that will hold your makeup in place.
Wait for about 30 to 60 seconds. You will know it is ready when the surface of your skin feels slightly tacky to the touch but not wet or slippery. This tackiness is exactly what you want; it acts like double-sided tape for your foundation, grabbing onto the pigment and locking it down for extended wear. Rushing this step can cause your foundation to mix with the wet primer, leading to a muddy or patchy appearance. Use this time to dampen your beauty sponge or organize your makeup station.
Step 6: Layer Your Base Makeup Strategically
With your primer set and your skin looking radiant, you are ready for coverage. Because you have used a luminous primer, you have options for your foundation. If you want a full-glam glow, pair it with a dewy or satin-finish foundation. If you have oily skin but still want that inner radiance, try a soft-matte foundation; the glow from the primer will peek through subtly, giving you a natural, dimensional look without the grease.
Apply your foundation starting from the center of your face and blending outwards. You will notice that the foundation glides on much smoother than usual. Be careful not to use too much heavy powder immediately after. Since the goal is luminosity, you want to maintain that sheen. If you must set your makeup, use a translucent powder sparingly, only on areas where you tend to get creased, like under the eyes or around the nose.
Frequently Asked Questions
Is The Elf Luminous Putty Primer Good For Oily Skin?
Yes, it can work for oily skin, but moderation is key. Because it is luminous, it adds shine. Oily skin types should apply it sparingly, focusing only on the cheeks or areas where they want a highlight, avoiding the T-zone. Setting with a lightweight powder is also recommended.
Can I Wear This Primer Without Makeup?
Absolutely! Many people wear this primer on its own for a “no-makeup” makeup look. It blurs imperfections, minimizes the appearance of pores, and adds a healthy, radiant glow to bare skin. It is perfect for days when you want to look fresh and polished without full coverage.
Does This Primer Clog Pores Or Cause Breakouts?
The formula is infused with hyaluronic acid and collagen, which are skin-loving ingredients. However, it is a silicone-based product designed to fill pores. As with any cosmetic product, it is essential to double-cleanse at the end of the day to fully remove it and prevent potential congestion or breakouts.
What Is The Difference Between The Luminous And Original Putty Primer?
The original Poreless Putty Primer typically has a matte or natural finish and focuses strictly on smoothing texture. The Luminous version contains fine shimmering pearls that add a glow while smoothing. The Luminous version is better for dry or dull skin, while the Original is more universal or for oily skin.
How Much Product Should I Use For My Whole Face?
A little goes a long way with this product. You generally only need a pea-sized amount to cover the main areas of your face (cheeks, nose, chin, forehead). Using too much can make your foundation slide around or feel heavy. Start small and add more only if necessary.
Conclusion
Mastering a new makeup product is always a bit of a trial-and-error process, but understanding the right techniques can save you a lot of time and frustration. By taking the time to warm up the formula and press it into your skin, you unlock the true potential of this budget-friendly beauty star. Whether you are prepping for a big event or just want to look a little more awake for a Zoom call, knowing how to use Elf Luminous Putty Primer correctly is a game-changer. It bridges the gap between skincare and makeup, providing hydration and a filter-like finish that boosts confidence. So go ahead, grab that jar, and get ready to glow like never before.
About the Author
Jane Hubbard is a passionate beauty expert with a wealth of experience in makeup, hair, and overall beauty techniques. After years of working as a hairdresser specialist, she followed her entrepreneurial spirit and started her own consultancy business.
Jane has always been driven by her desire to help others feel confident in their own skin, and she does this by sharing her knowledge, experiences, and practical beauty tips. Through her consultancy, she empowers individuals to embrace their unique beauty, offering tailored guidance that boosts both self-esteem and personal style.
Professional Focus
Specializes in makeup, hairstyling, and beauty consulting.
Provides personalized beauty advice, tips, and techniques to help individuals feel confident in their appearance.
Dedicated to staying up-to-date with the latest industry trends and developments.
Passionate about creating a comfortable and empowering experience for every client.
Education History
University of Craft and Design – Bachelor of Fine Arts (BFA) in Woodworking and Furniture Design
Woodworking Apprenticeships – Extensive hands-on training with skilled craftsmen to refine carpentry and furniture making techniques
Online Courses & Masterclasses – Continued education in advanced woodworking techniques, design principles, and specialized tools
Expertise:
Makeup artistry, hairstyling, and beauty consulting.
Personalized beauty techniques to enhance confidence and self-expression.
Educating clients on how to maintain their beauty routines at home.