
If you have ever looked in the mirror and wished for fuller, darker brows without the harsh chemicals of commercial dyes, you are not alone. Many of us are turning away from synthetic beauty products in favor of gentler, earth-friendly alternatives. Whether you have sensitive skin or simply prefer a more organic lifestyle, learning how to dye your eyebrows without dye is a game-changer. It allows you to enhance your natural features using ingredients you likely already have in your kitchen or garden.

The process is surprisingly simple, cost-effective, and safe for most skin types. By using natural pigments like coffee, cocoa, or henna, you can achieve a rich, custom shade that defines your face without the risk of chemical burns or allergic reactions. This method grants you total control over the ingredients, ensuring that what goes near your eyes is pure and non-toxic. In this guide, we will walk you through a foolproof, step-by-step process to achieve salon-worthy results right at home. Get ready to embrace a greener beauty routine and wake up with perfect brows every single day.
Step-by-Step Guide: How to Dye Your Eyebrows Without Dye
Step 1: Cleanse and Prep the Brow Area
Before you begin any tinting process, it is absolutely crucial to start with a clean canvas to ensure the natural pigment adheres properly. The oils, makeup, and daily grime that accumulate on your skin and hair can create a barrier, preventing the tint from soaking in evenly. Start by washing your entire face with a gentle cleanser, paying extra attention to your eyebrows.
You want to remove every trace of foundation, brow gel, or moisturizer. Pat your face dry with a clean towel, ensuring no dampness remains on the brow hairs. If you have particularly oily skin, you might want to wipe the brow area with a cotton pad soaked in a little witch hazel or rubbing alcohol to remove excess sebum. This preparation step sets the stage for a successful application and helps the color last longer.
Step 2: Mix Your Natural Tinting Paste
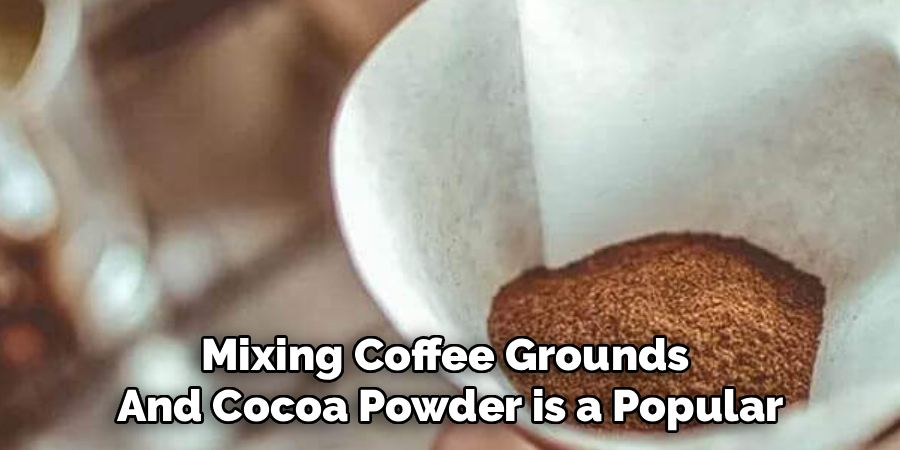
Now comes the fun part where you get to play chemist with natural ingredients to create your custom brow tint. For a standard dark brown shade, mixing coffee grounds and cocoa powder is a popular and effective method. Take two tablespoons of leftover coffee grounds and mix them with one teaspoon of cocoa powder in a small bowl.
To bind these dry ingredients into a spreadable paste, add two tablespoons of natural oil, such as coconut oil or olive oil, and a little bit of honey to help the mixture stick to your hairs. Stir this combination thoroughly until it reaches a smooth consistency free of lumps. You want the texture to be similar to a thick yogurt so it stays on your brows without dripping. If you need a darker shade, add more coffee; for a lighter shade, add more cocoa. This step is where you truly learn how to dye your eyebrows without dye using simple pantry staples.
Step 3: Outline Your Desired Brow Shape
Precision is key when applying any type of color to your face, even when using natural ingredients. To avoid staining the skin around your eyebrows and to ensure a symmetrical result, you need to create a barrier. Dip a cotton swab or a small, angled makeup brush into a heavy barrier cream like petroleum jelly or a thick lip balm.
Carefully trace the outline of your desired brow shape, applying the barrier cream to the skin immediately surrounding the hair. This creates a protective shield that prevents the natural dye from coloring your skin where you do not want it. Take your time with this step, as it defines the final shape of your brows. If you have stray hairs outside your desired shape, cover them with the barrier cream as well. A well-defined outline ensures that your tint looks professional and polished rather than messy or uneven.
Step 4: Apply the Mixture to Your Brows
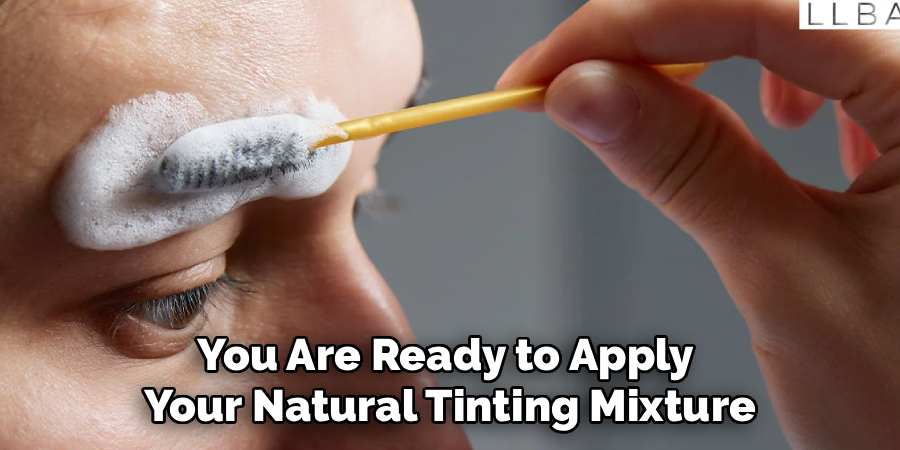
With your brow shape defined and your skin protected, you are ready to apply your natural tinting mixture. Using a clean spoolie brush or a small angled brow brush, scoop up a generous amount of your coffee and cocoa paste. Apply it directly to your eyebrows, starting from the inner corner and working your way out to the tail. It is important to be generous with the application; you want to coat every single hair thoroughly. Make sure the paste penetrates through the top layer of hair down to the roots.
Use short, upward strokes to mimic the natural direction of hair growth. If you are learning how to dye your eyebrows without dye for the first time, do not be afraid to layer it on thick. The mixture needs to be dense enough to stain the hair effectively. Check in a mirror to ensure both brows are evenly coated and that the paste stays within the lines of your barrier cream.
Step 5: Allow the Natural Pigment to Set
Patience is a virtue when it comes to natural beauty treatments. Unlike chemical dyes that work in minutes, natural pigments need more time to deposit color into the hair shaft. Once you have applied the paste, you need to let it sit for at least 20 minutes. For a deeper, more dramatic look, you can leave it on for up to an hour or even longer.
Since the ingredients are natural and gentle, there is very little risk of irritation or over-processing. Find a comfortable spot to relax, maybe read a book or listen to a podcast, while the magic happens. Avoid touching your brows or getting them wet during this time. The oil in the mixture will help condition your brow hairs while the pigments do their work. If the paste starts to dry out and flake, you can gently dab a little more oil on top to keep it moist and active.
Step 6: Gently Remove the Residue
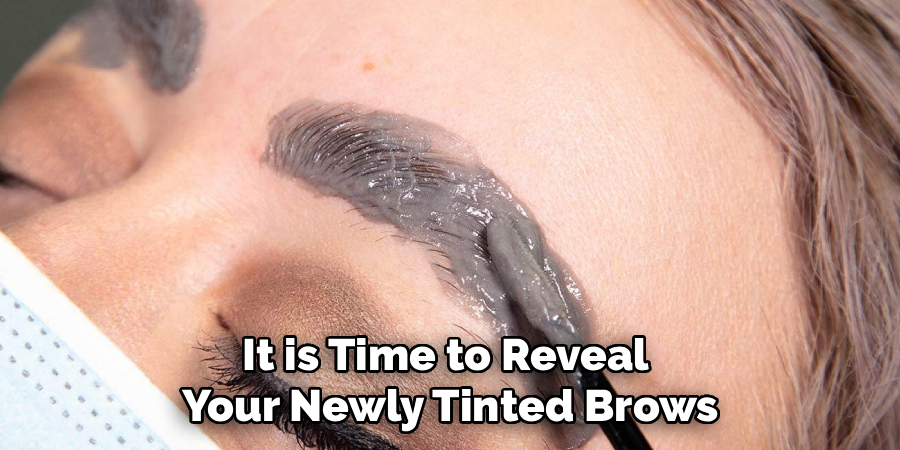
After the waiting period is over, it is time to reveal your newly tinted brows. Take a damp cotton pad or a soft washcloth and gently wipe away the paste. Start from the inner corner and wipe outwards towards the tail of the brow. You might need to use a few pads to get all the gritty coffee grounds and sticky honey off. Be gentle; there is no need to scrub harshly, as you do not want to pull out any brow hairs or irritate the skin.
Once the bulk of the paste is removed, rinse your brows with cool water to ensure they are completely clean. Pat them dry with a clean towel. At this stage, you should notice a subtle but visible difference in the color and definition of your brows. If the color isn’t as dark as you would like, don’t worry—natural tinting is safe enough to repeat immediately for a more intense result.
Frequently Asked Questions
FAQ 1: Can I Use Coffee Grounds For Tinting?
Yes, absolutely! Coffee grounds are one of the most popular and effective ingredients for DIY natural brow tinting. The caffeine in coffee can actually help stimulate hair growth, while the dark pigments stain the hair naturally.
- Mix it right: Combine used coffee grounds with a binder like honey or oil.
- Adjust shade: Add cocoa powder to warm up the tone if the coffee alone is too cool or dark.
- Be patient: Coffee stains take longer to set than chemical dyes, so be prepared to leave the mixture on for at least 20-30 minutes.
FAQ 2: How Long Does Natural Tinting Last?
Natural eyebrow tints generally do not last as long as chemical dyes because they coat the hair shaft rather than penetrating it deeply with ammonia or other chemicals.
- Duration: Expect the color to last anywhere from a few days to a week.
- Fading: The color will fade gradually with each face wash.
- Maintenance: Because the ingredients are gentle, you can reapply the tint as often as you like to maintain the color without damaging your brow hairs.
- Skin type: Oily skin may cause the tint to fade faster than dry skin.
FAQ 3: Is Henna A Safe Alternative?
Henna is an excellent, plant-based alternative for dyeing eyebrows and is widely considered safe for most people. It provides a longer-lasting stain on both the skin and hair compared to coffee or cocoa.
- Patch test: Always perform a patch test 48 hours before application to rule out allergies.
- Purity matters: Ensure you buy body-art quality, 100% natural henna without added metallic salts or PPD (p-phenylenediamine).
- Color payoff: Henna tends to oxidize and darken over a few hours, so the color you see immediately after removal might deepen.
FAQ 4: Can I Darken Brows With Charcoal?
Activated charcoal is another potent natural ingredient that can be used to darken eyebrows, especially if you want a black or very dark grey shade.
- Potency: Charcoal is very pigmented, so start with a small amount.
- Mixture: Mix the charcoal powder with aloe vera gel or oil to create a smooth paste.
- Application: Apply carefully as it can stain skin quickly.
- Combining: You can mix a tiny pinch of charcoal with your cocoa or coffee mixture to create a cooler, ashier brown tone rather than a warm brown.
FAQ 5: How Do I Prevent Skin Staining?
Preventing skin staining is all about preparation and precision during the application process. Natural dyes can stain skin just as they stain hair.
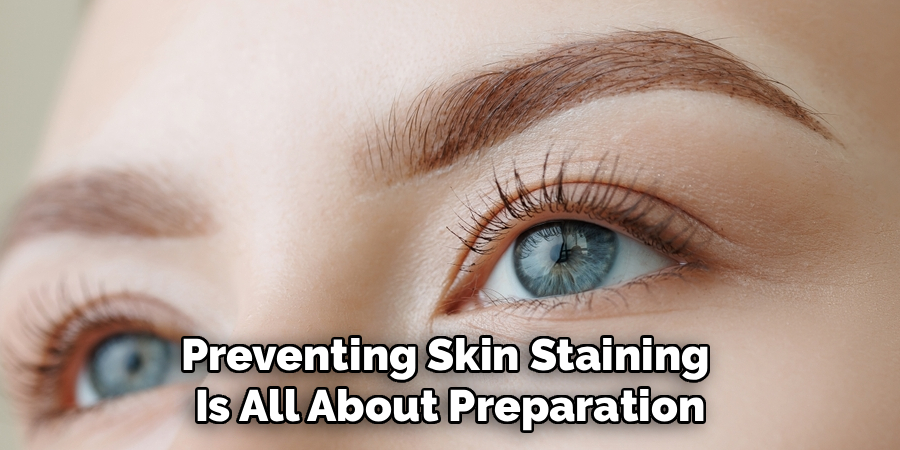
- Barrier cream: Apply a thick layer of Vaseline, shea butter, or a heavy oil around the outline of your brows before starting.
- Clean up fast: If you accidentally get the mixture on your skin, wipe it off immediately with a damp Q-tip.
- Exfoliation: If staining does occur, it will usually fade within a day or two. Gentle exfoliation can help speed up the removal of unwanted skin stains.
Conclusion
Taking control of your beauty routine by using natural ingredients is empowering and rewarding. You have learned how to dye your eyebrows without dye, a skill that saves you money and spares your skin from unnecessary chemicals. By following these simple steps, you can maintain defined, expressive brows using nothing more than what is in your pantry.
Remember, natural beauty is about experimentation and finding what works best for your unique features. Whether you choose coffee, cocoa, or henna, the result is a custom look that is authentically you. So, gather your ingredients, mix up a fresh batch of tint, and give your brows the natural boost they deserve. You might just find that nature provides the best beauty solutions of all.
About the Author
Jane Hubbard is a passionate beauty expert with a wealth of experience in makeup, hair, and overall beauty techniques. After years of working as a hairdresser specialist, she followed her entrepreneurial spirit and started her own consultancy business.
Jane has always been driven by her desire to help others feel confident in their own skin, and she does this by sharing her knowledge, experiences, and practical beauty tips. Through her consultancy, she empowers individuals to embrace their unique beauty, offering tailored guidance that boosts both self-esteem and personal style.
Professional Focus
Specializes in makeup, hairstyling, and beauty consulting.
Provides personalized beauty advice, tips, and techniques to help individuals feel confident in their appearance.
Dedicated to staying up-to-date with the latest industry trends and developments.
Passionate about creating a comfortable and empowering experience for every client.
Education History
University of Craft and Design – Bachelor of Fine Arts (BFA) in Woodworking and Furniture Design
Woodworking Apprenticeships – Extensive hands-on training with skilled craftsmen to refine carpentry and furniture making techniques
Online Courses & Masterclasses – Continued education in advanced woodworking techniques, design principles, and specialized tools
Expertise:
Makeup artistry, hairstyling, and beauty consulting.
Personalized beauty techniques to enhance confidence and self-expression.
Educating clients on how to maintain their beauty routines at home.