
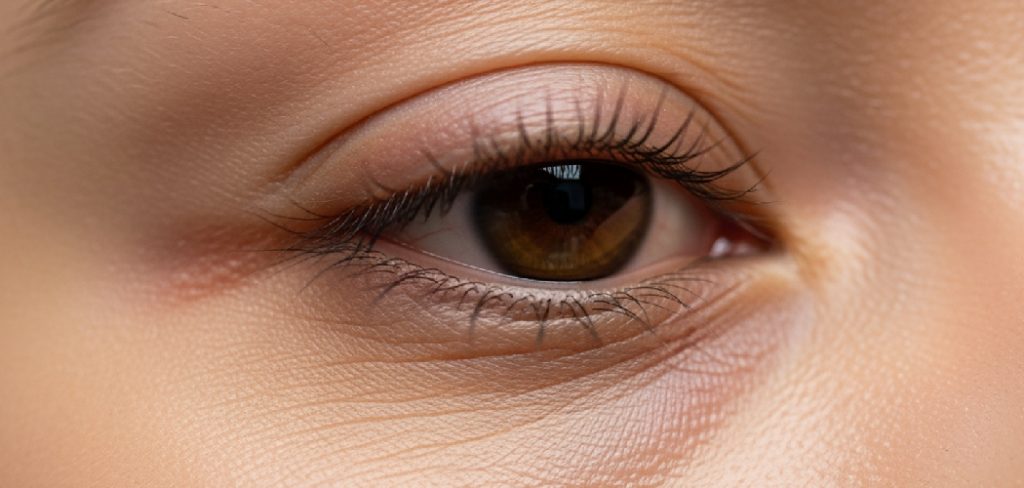
Applying a fresh coat of mascara can instantly wake up your face, making your eyes look brighter, wider, and more youthful. However, nothing ruins a beautiful makeup look faster than heavy, clumpy, spider-like lashes. When your cosmetic products glue your delicate hairs together, it creates an unpolished appearance that feels heavy and uncomfortable on your eyelids. Fortunately, achieving that perfectly fluttery, defined look is entirely possible for anyone.
Understanding the mechanics of your makeup tools and learning how to separate eyelashes makes a massive difference in your daily beauty routine. You do not need to be a professional makeup artist or spend hours at a salon to get beautiful results. We will explore the best preparation methods, the correct application techniques, and the ultimate rescue tools to achieve a flawless, fanned-out effect every single time you sit down at your vanity.
Why Eyelash Separation Matters
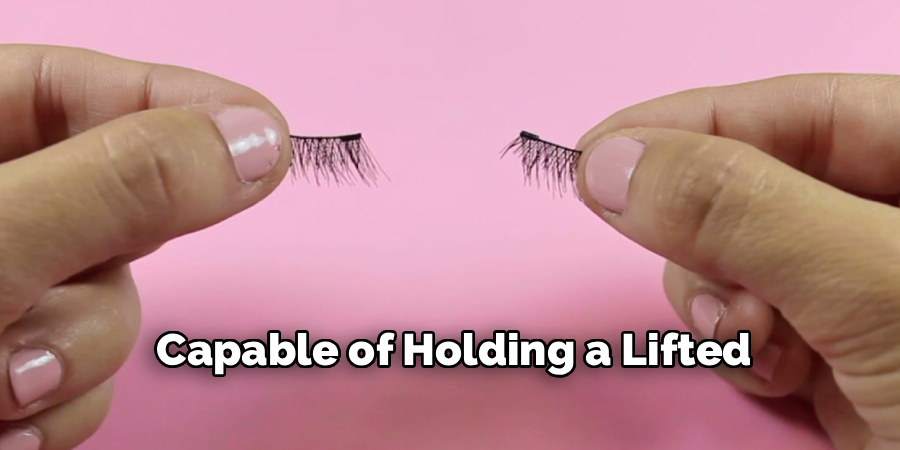
Taking the extra time to define your eye makeup provides incredible benefits for both your appearance and your physical comfort. Clumpy mascara adds unnecessary, heavy weight to your lash line. This excessive weight causes your natural curl to droop dramatically as the day progresses, completely defeating the purpose of wearing eye makeup in the first place. When the hairs stand alone, they remain light, wispy, and capable of holding a lifted curl from morning until night.
Furthermore, a beautifully fanned-out look creates the powerful optical illusion of much larger eyes. This meticulous technique mimics the luxurious appearance of expensive eyelash extensions or premium false strips without the heavy, irritating glue. By spreading the hairs evenly across your eyelid, you frame your eyes perfectly, drawing attention to their natural shape and color rather than distracting people with chaotic, tangled clumps.
Step-By-Step Guide To How To Separate Eyelashes
Step 1: Prep Your Lashes Correctly
Clean your lashes thoroughly before you begin your makeup routine. Leftover mascara residue from the previous day is the absolute biggest culprit for severe clumping. When you apply wet product over dry, crusty remnants, your natural hairs immediately stick together in thick clusters. Use a gentle, oil-free micellar water on a soft cotton pad to sweep away any stubborn flakes. Afterward, make sure you dry the area completely. Any lingering moisture or oily skincare products will prevent your fresh mascara from gripping the hair shaft properly. Starting with a perfectly clean, bare canvas ensures a flawless application.
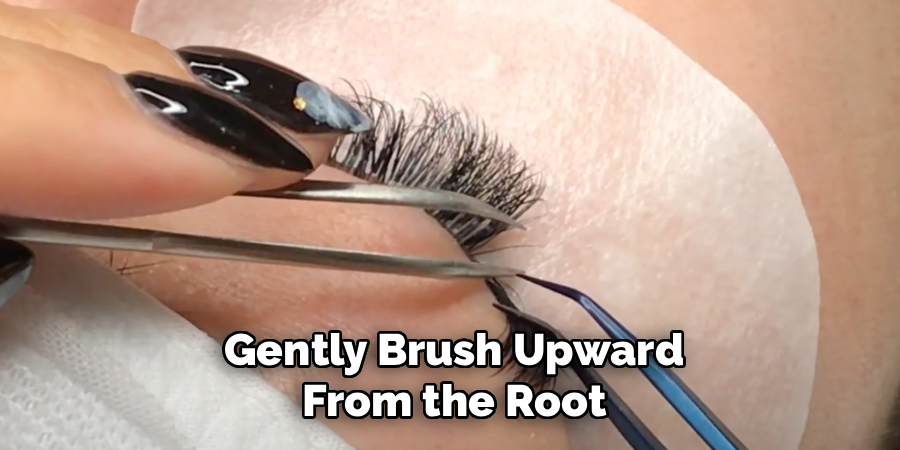
Step 2: Eyelashes With A Lash Comb
Before applying any liquid product, you need to physically align the individual hairs. Combing your bare lashes sets the ideal structural foundation for a beautiful, fanned-out effect. Grab a high-quality metal eyelash comb for this crucial preparatory phase. Carefully bring the fine metal teeth to the base of your lash line and gently brush upward from the root to the very tip. This simple motion detangles any crisscrossed hairs and removes microscopic lint or dust. By organizing the hairs while they are clean and flexible, you drastically reduce the chances of them grabbing onto each other later.
Step 3: Choose The Right Mascara Formula
Your choice of cosmetic product plays a massive role in achieving beautiful definition. You must avoid old, expired, or overly thick formulas if you want a clean look. Fresh, lengthening mascaras formulated with smooth, buildable ingredients separate much better than heavy volumizing products. Pay close attention to the brush design as well. Wands made of molded silicone with stiff, evenly spaced bristles act like a comb as you apply the liquid. Replace your tube every three months to prevent the formula from drying out, thickening, and creating those dreaded, unmanageable spider legs.
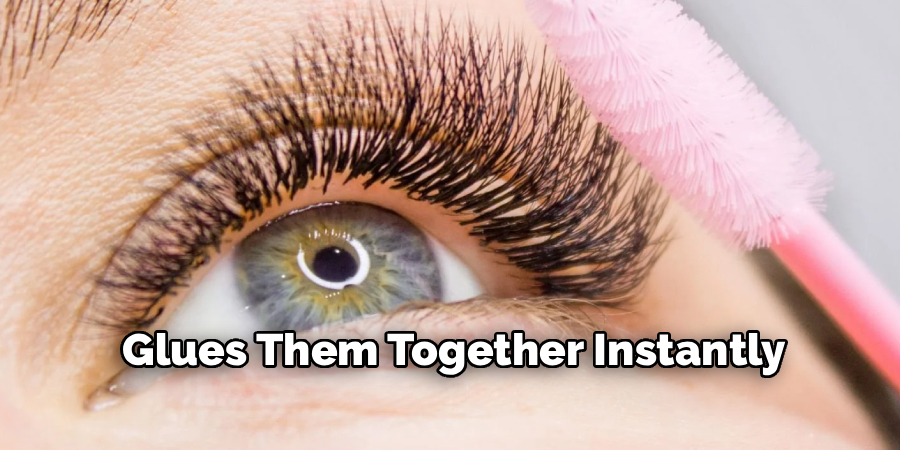
Step 4: Wipe Excess Product Off The Wand
Simply pulling the wand out of the makeup tube brings up entirely too much liquid. When you apply a heavily saturated brush directly to your eyes, the excess liquid floods the hair follicles and glues them together instantly. To fix this, gently wipe the tip and sides of the brush against the inner rim of the tube. If the brush still looks bulky, dab it lightly onto a clean tissue. Adopting a “less is more” mindset allows you to deposit just enough pigment to darken the hairs without overwhelming their delicate, natural structure.
Step 5: Apply Mascara Using The Wiggle Technique
The actual application motion dictates whether your hairs fan out or clump up. Place the lightly coated wand at the very base of your upper lash line. Instead of just swiping straight up, wiggle the brush firmly back and forth horizontally in a slight zigzag motion. After depositing that initial volume at the roots, sweep the wand slowly and smoothly through to the tips. This specific technique anchors the dark pigment at the base of your eyelid while keeping the fragile ends light, wispy, and perfectly detached from one another.
Step 6: Using A Clean Spoolie
Immediately after applying your very first coat, you must act quickly while the formula remains wet. Grab a completely clean, dry spoolie brush. Run this clean brush lightly through your damp lashes, starting from the middle and pulling upward. The dry, densely packed bristles will seamlessly absorb any accidental pools of excess liquid while gently guiding the individual hairs apart. This secondary brushing step mimics the action of a professional makeup artist, ensuring that every single hair stands alone with a smooth, even coating of dark pigment.
Step 7: Address Stubborn Clumps While Wet
Sometimes, despite your absolute best efforts, two adjacent hairs will stubbornly refuse to part ways. When this happens, do not pinch or pull on them with your fingers. Instead, pick up your metal lash comb or a dedicated precision makeup tool. Carefully use the very tip of the tool to gently coax the bonded hairs apart while the cosmetic formula is still damp and pliable. You must absolutely avoid using sharp household items like safety pins or toothpicks near your eyes, as one slip could cause a severe medical injury.
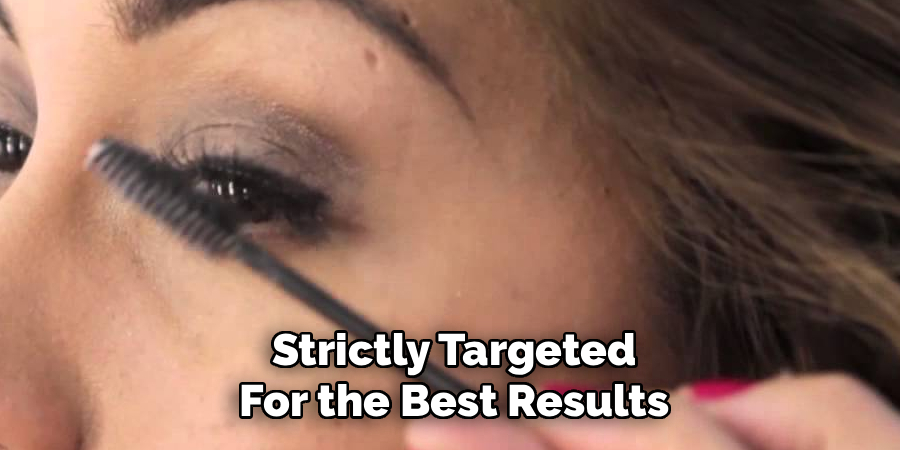
Step 8: Set Your Lashes For All-Day Wear
Once you finally achieve that perfect, fluttery, fanned-out appearance, you need to let the product set undisturbed. Keep your eyes wide open and avoid blinking heavily for about thirty to forty-five seconds so the liquid can dry completely. If you decide that you want a slightly more dramatic look with a second coat, apply the new layer exclusively to the outer corners. Adding more liquid to the center usually ruins the beautiful definition you just spent time creating, so keep additional layers minimal and strictly targeted for the best results.
Frequently Asked Questions
Should I Curl My Eyelashes Before Or After Applying Mascara?
You should always curl your eyelashes before applying any mascara to your eyes. Curling wet or heavily coated lashes can cause them to stick directly to the metal curler pad, leading to severe breakage or accidentally pulling out the hairs entirely. A good pre-curl provides a lifted, organized base that actually makes the subsequent brushing and application process much easier and safer.
What Is The Best Tool For Separating Clumpy Lashes?
A metal eyelash comb is widely considered the ultimate tool for this specific job. Unlike basic plastic combs that feature thick, clumsy teeth, metal combs have remarkably fine, closely spaced pins that glide effortlessly through wet makeup. They expertly remove tiny clumps and define each individual hair beautifully. A clean, dry spoolie brush also serves as an excellent secondary option for absorbing excess product.
Can I Fix Clumpy Eyelashes After The Mascara Has Completely Dried?
Trying to fix your makeup after the formula completely dries is usually a terrible idea. Combing aggressively through stiff, dry mascara causes heavy flaking and can easily snap your fragile natural hairs in half. If you notice a massive clump after everything sets, your absolute best bet is to gently remove the makeup with a cotton swab and start the process completely over.
Why Do My Eyelashes Always Stick Together In The Outer Corners?
The outer corner lashes tend to grow much closer together and often overlap naturally due to your eye shape. Additionally, people usually apply much more pressure at the end of their eye when sweeping the wand outward. To completely prevent this frustrating issue, focus carefully on pulling the wand straight up toward your eyebrows rather than dragging it aggressively toward your temples.
Does The Type Of Mascara Wand Really Matter For Lash Definition?
The wand shape plays a massive role in determining your final look. Silicone or molded plastic wands with short, stiff bristles excel at aggressively combing through hairs and preventing thick clumps. Traditional fluffy bristle brushes are specifically designed to pack on heavy volume, which inherently makes your natural hairs look much thicker but dramatically increases the risk of them sticking together.
Conclusion
Achieving perfectly fanned-out, fluttery eyes does not require expensive salon treatments or frustrating mornings staring into the mirror. By simply taking the time to prep your canvas, wiping off excess liquid product, and utilizing the correct cosmetic tools, you can easily master how to separate eyelashes at home. Remember that patience and a very light hand are your absolute best friends during this cosmetic process. Grab a fine metal comb, invest in a fresh tube of your favorite lengthening formula, and start practicing these simple, beginner-friendly techniques tomorrow morning. Your bright, beautifully defined eyes will completely transform your daily makeup routine.
You may read also- How to Stop Under Eye Makeup Creasing
About the Author
Jane Hubbard is a passionate beauty expert with a wealth of experience in makeup, hair, and overall beauty techniques. After years of working as a hairdresser specialist, she followed her entrepreneurial spirit and started her own consultancy business.
Jane has always been driven by her desire to help others feel confident in their own skin, and she does this by sharing her knowledge, experiences, and practical beauty tips. Through her consultancy, she empowers individuals to embrace their unique beauty, offering tailored guidance that boosts both self-esteem and personal style.
Professional Focus
Specializes in makeup, hairstyling, and beauty consulting.
Provides personalized beauty advice, tips, and techniques to help individuals feel confident in their appearance.
Dedicated to staying up-to-date with the latest industry trends and developments.
Passionate about creating a comfortable and empowering experience for every client.
Education History
University of Craft and Design – Bachelor of Fine Arts (BFA) in Woodworking and Furniture Design
Woodworking Apprenticeships – Extensive hands-on training with skilled craftsmen to refine carpentry and furniture making techniques
Online Courses & Masterclasses – Continued education in advanced woodworking techniques, design principles, and specialized tools
Expertise:
Makeup artistry, hairstyling, and beauty consulting.
Personalized beauty techniques to enhance confidence and self-expression.
Educating clients on how to maintain their beauty routines at home.