
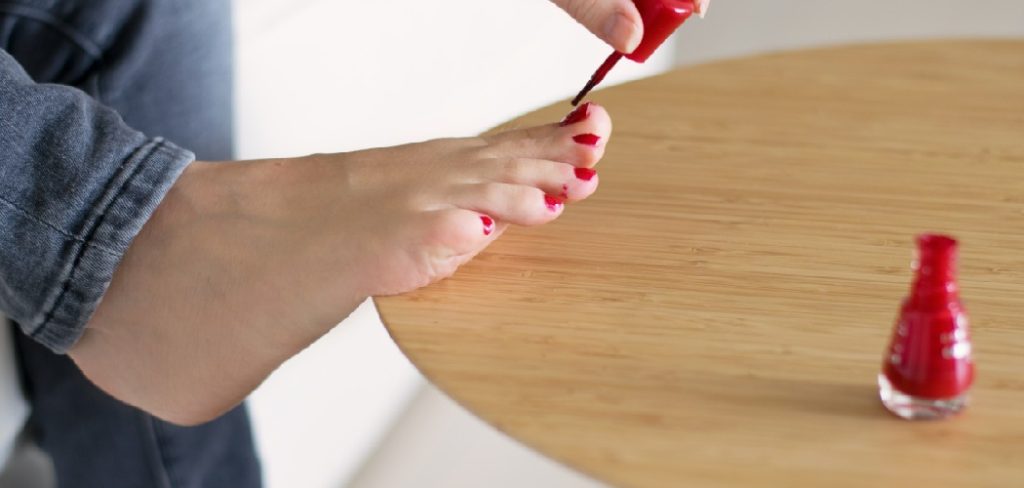
Spilling nail polish on wood has a way of making a small accident feel much larger than it is. One second, the bottle is open on the table; the next, a streak of red or pink is creeping across the surface of a nightstand, coffee table, or floorboard. The problem is not just the color. Nail polish is made to cling, dry fast, and resist wear, which is exactly why it can be so unpleasant to deal with once it leaves the bottle.
Still, this usually is not a disaster, even if it looks like one at first. In many cases, the damage can be contained and the stain reduced or removed without stripping the finish or resigning yourself to a repair bill. The trick is to slow down, identify what kind of wood surface you are dealing with, and use the least aggressive method that seems likely to work. In this guide on how to get nail polish out of wood, we’ll go over some helpful tips and techniques for just that.
Identify the Type of Wood Finish
Before touching the spill with any cleaner, figure out what is actually protecting the wood. That matters more than people think. A sealed polyurethane finish will often tolerate mild solvents far better than shellac, lacquer, wax, or an older hand-applied finish that may already be thin in spots. Antique furniture, in particular, can be less forgiving than newer pieces sold for everyday use.
If you are unsure, test first. Not “test somewhere near the stain.” Test somewhere hidden: the underside of a tabletop, the back edge of a leg, a lower corner no one sees. Dab a small amount of your chosen cleaner onto a cotton swab and touch the area lightly. Then wait. If the finish turns tacky, dull, cloudy, or starts to lift, stop there. That reaction suggests the product may be too harsh for the surface, even if it would work well on a more durable finish.
This part feels slow when you want the polish gone immediately. Even so, it is usually time well spent. A stain can often be treated; a stripped finish is a different problem.
Immediate Action for Fresh Spills
Fresh spills are easier. Not always easy, but easier.
If the polish is still wet, resist the urge to wipe it around with the nearest cloth or paper towel. That instinct is understandable, and it often makes things worse. Wet polish spreads quickly, and rubbing can push pigment into the grain or smear it over a larger area.
Instead, blot. Lay a clean, dry paper towel or lint-free cloth over the spill and let it absorb the liquid with as little pressure as possible. Lift straight up. Do it again with a fresh section or a new towel. The goal at this stage is containment, not scrubbing. If you can remove most of the liquid before it hardens, the rest of the cleanup becomes much more manageable.
7 Simple Step-By-Step Guidelines on How to Get Nail Polish Out of Wood
Step 1: Gather Your Cleaning Supplies
It helps to set everything out before you begin, especially if the spill is recent and drying by the minute. Running back and forth for supplies tends to waste time, and in a situation like this, a few extra minutes can matter.
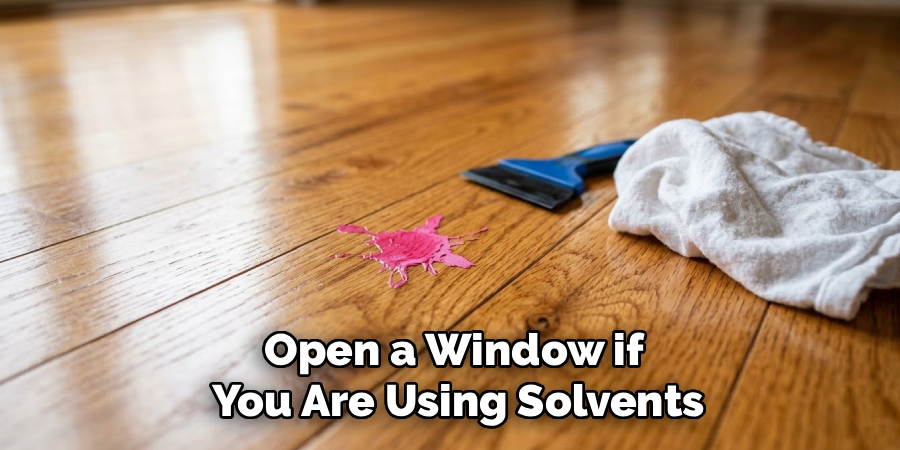
For most cases, you will want rubbing alcohol, mineral spirits, clean microfiber cloths, cotton swabs, a plastic scraper or old credit card, and very fine steel wool such as #0000 grade. A small bowl of warm water and a bit of mild dish soap can also be useful for the final wipe-down. If you have furniture wax or mineral oil on hand, keep that nearby, too.
Open a window if you are using solvents. Turn on a fan if the room feels closed in. That is basic safety, yes, but it also makes the job less miserable.
Step 2: Test Your Solvent in a Hidden Area
This step is repetitive only until you skip it once and regret it.
Choose the gentlest solvent you think may be effective and test it in an inconspicuous area. Usually, that means starting with rubbing alcohol rather than jumping straight to something harsher. Apply a very small amount with a cotton swab, touch the hidden spot lightly, and leave it alone for a minute or two before checking.
Look for changes in sheen, stickiness, color shift, or softening. If the finish seems unaffected, you can move forward more confidently. If not, back off and try a milder route. In some cases, especially on fragile or older finishes, even warm water with a drop of dish soap may be the safest first step, though it may not remove the stain completely.
A perfect result is not guaranteed. What you are trying to avoid is trading a polish stain for a much larger patch of finish damage.
Step 3: Gently Scrape Away Excess Dried Polish
If the polish has already dried into a raised blob or crust, remove that top layer before introducing liquid cleaners. Otherwise, you may just soften the surface and smear the color around.
Use a plastic putty knife, a plastic card, or another edge with some flex to it. Keep it nearly flat against the wood and work slowly under the edge of the dried polish. You are not chiseling. You are nudging. If the polish lifts off in flakes or a thin sheet, that is ideal.
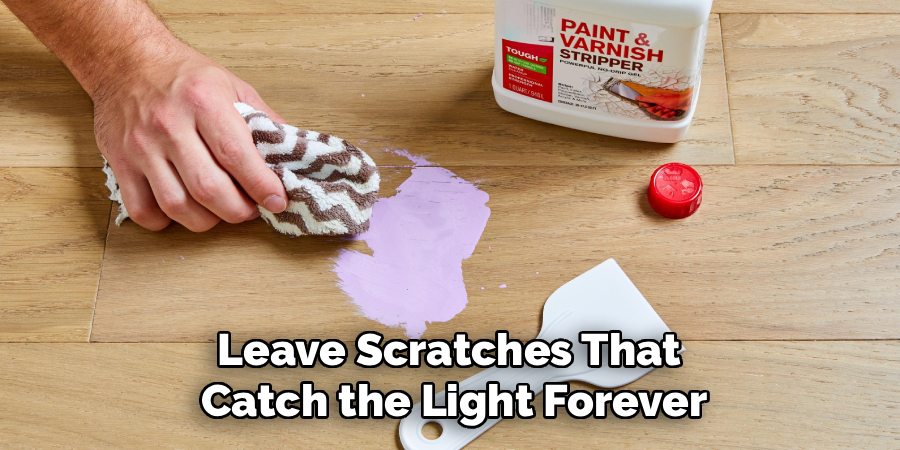
Avoid metal blades. They may seem precise, but once finished woo,d they can leave scratches that catch the light forever after. A tiny scratch on dark wood is often more visible than the original stain.
Once the thickest material is gone, you will usually be left with a tinted residue or a thin film. That is normal. The next steps address that part.
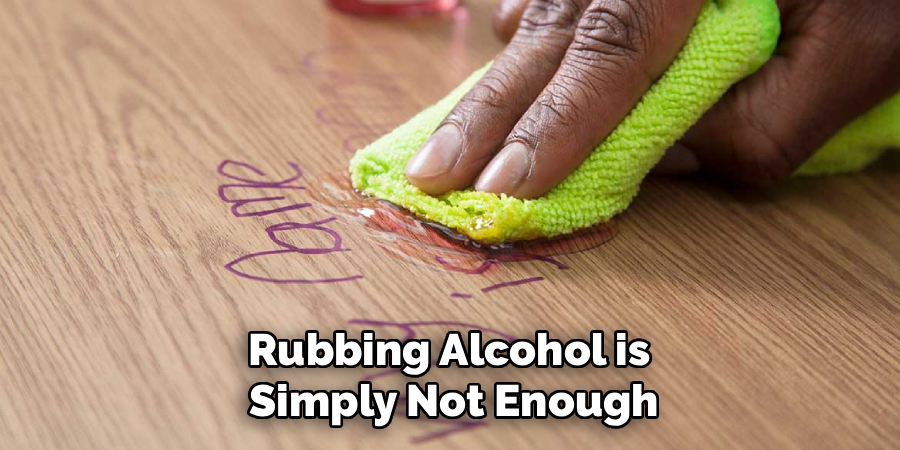
Step 4: Apply Rubbing Alcohol to the Stain
Rubbing alcohol is often a reasonable first solvent for modern sealed finishes. Not universally safe, to be clear, but in many cases it is less risky than acetone and strong enough to soften leftover polish.
Dampen a soft cloth or cotton pad with isopropyl alcohol. Do not soak it to the point of dripping. Press it gently onto the stained area for about 20 to 30 seconds so the residue has time to soften. Then wipe with the grain, not across it, and use a clean section of cloth as soon as you see color transfer.
You may need to repeat this several times. That is common. Slow progress is better than aggressive rubbing that leaves the finish hazy.
If the stain starts lifting and the wood looks unchanged, continue. If the surface begins to dull or feel tacky, stop and reassess.
Step 5: Use Mineral Spirits for Stubborn Spots
Sometimes rubbing alcohol is simply not enough, particularly if the polish has sat for a while or the pigment is dense. In that case, mineral spirits may help. On many polyurethane-coated surfaces, they can dissolve residue without immediately damaging the finish, though “safe” is still too strong a word if you have not tested first.
Apply a small amount to a clean cloth and dab the stained area gently. Work with the grain. Let the cloth do the work rather than pressing hard. As the residue loosens, rotate to a clean section so you are not redepositing color.
Once the stain fades or disappears, wipe the area with a lightly damp cloth to remove any remaining solvent. Then dry it thoroughly. Leaving residue behind is not catastrophic, but it can leave the surface looking smeared or uneven.
Step 6: Buff the Area with Fine Steel Wool
This is the step to approach with the most caution.
If a faint film of color remains lodged in the texture of the grain, very fine #0000 steel wool can sometimes remove it. The keyword there is sometimes. On durable finishes, used lightly and with lubrication, it may help. On softer, older, or already worn finishes, it could leave the surface duller than you want.
If you decide to try it, add a small amount of mineral oil or furniture wax to the steel wool first. Then rub very lightly, always in the direction of the grain. Check the spot every few seconds. Stop as soon as the residue lifts. More pressure is rarely the answer.
This step should feel almost too gentle. If it feels vigorous, it is probably too much.
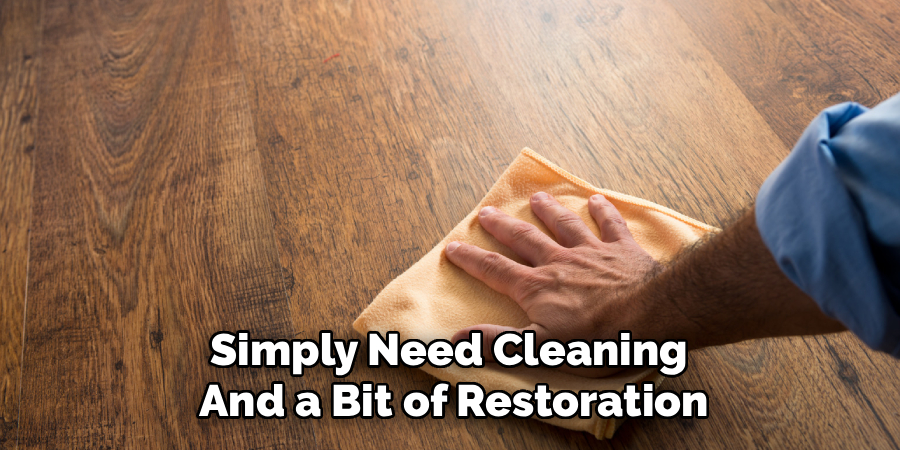
Step 7: Clean and Restore the Wood Finish
Once the polish is gone, the area may look slightly dry, smeared, or uneven compared with the surrounding wood. That does not necessarily mean the finish is damaged beyond repair. It may simply need cleaning and a bit of restoration.
Wipe the area with a clean, damp microfiber cloth to remove leftover solvent, polish flakes, or dust from steel wool. Dry it right away with a soft towel. After that, apply a suitable wood polish, paste wax, beeswax product, or furniture oil, depending on the finish and the care instructions for the piece.
Buff gently with a clean cloth until the sheen blends back in. You may not get a showroom-perfect result on the first pass, especially on older wood with visible wear, but the surface often looks much better once it is cleaned and reconditioned.
Following these steps on how to get nail polish out of wood, you can easily remove any nail polish spills or stains without damaging your furniture. It’s important to regularly clean and maintain your wooden furniture to keep it looking beautiful and in good condition.
Common Mistakes to Avoid
The biggest mistake is reaching straight for acetone or standard nail polish remover. It makes a kind of superficial sense: nail polish remover removes nail polish. On wood, though, that logic often falls apart. Acetone can soften or strip many finishes almost instantly, leaving behind a pale, cloudy patch that is harder to fix than the original spill.
Heavy scrubbing is another problem. So is using rough sponges, abrasive powders, or circular rubbing that ignores the grain. These methods may seem productive in the moment, but they can leave fine scratches or a dull patch that shows up whenever light hits the surface.
There is also a more subtle mistake: using too much liquid. Wood and standing moisture are not close friends. Even when the finish is sealed, flooding the area is unnecessary and may create its own set of issues.
Prevention Tips
The easiest cleanup, unsurprisingly, is the one you never have to do.
If you paint your nails at home, put down something substantial before you begin: an old towel folded over itself, a silicone mat, even a tray with a lip around the edge. Newspaper works in a pinch, though it is not ideal if the bottle tips and the liquid soaks through.
Close each bottle fully after use instead of leaving several open at once. That habit alone reduces spills more than people expect. If manicures are a regular part of your routine, it may be worth setting up a dedicated spot on a glass, tile, or metal surface rather than a wooden table you care about. Practical beats pretty here.
When to Seek Professional Help?
Some spills are better left to a professional furniture restorer. That may be the case if the wood is antique, unusually valuable, or finished with a coating you cannot identify. It is also worth calling for help if your cleanup attempt has already caused whitening, peeling, deep scratching, or a worn patch where the topcoat has clearly lifted.
At that point, the issue is no longer just stain removal. It becomes finish repair, color matching, and surface blending. Those are skills, and not trivial ones. A professional may be able to correct the damage without refinishing the entire piece, which can matter a great deal for older furniture.
Frequently Asked Questions
Q1: Can I Use Hairspray to Get Nail Polish Out of Wood?
Possibly, but I would treat it as a backup rather than a first choice. Some aerosol hairsprays contain enough alcohol to soften dried polish, which is why this tip keeps circulating. The problem is that hairspray also leaves residue, and formulas vary widely. Add fragrances, resins, and styling agents to the mix, and the result can get sticky fast.
If you want to try it, test it first in a hidden spot. Spray a small amount onto a cloth rather than directly flooding the wood, dab the stain briefly, and wipe clean afterward with mild soap and water. It may help with a minor residue stain, but it is not the most predictable method.
Q2: Does Vinegar Work on Spilled Nail Polish?
Usually not very well on its own, especially once the polish has hardened. Vinegar is useful for many household messes, but nail polish is not one of the easier ones. At best, a vinegar-based mixture may soften the edges slightly or help with leftover residue after most of the spill has already been removed.
If the finish is extremely delicate and you are trying to avoid stronger solvents, a mixture of white vinegar and lemon juice could be worth a cautious test. Just keep expectations realistic. It may be gentler, but it is also slower and often less effective.
Q3: Will Baking Soda Scratch My Wooden Furniture?
It can. Baking soda is mildly abrasive, which is exactly why some people recommend it. That same abrasiveness, however, can dull a glossy or soft finish if used carelessly.
If you use it at all, mix it with a little water to form a soft paste and apply it with a cloth rather than rubbing the dry powder directly on the wood. Even then, I would reserve it for cases where the polish has already been lifted and only a faint residue remains. It is not my first recommendation for finished wood.
Restoring Your Wooden Furniture
A nail polish spill on wood looks dramatic. Sometimes it is dramatic. More often, though, it is a cleanup problem that rewards patience rather than panic.
Start by identifying the finish. Blot, do not smear. Test before you commit to a solvent. Then work from the gentlest method upward, checking the surface as you go. That sequence may feel slow, but it usually gives you the best chance of removing the polish without turning a spill into finish damage.
And if the piece is old, valuable, or behaving unpredictably, it is perfectly reasonable to stop and ask for help. Not every stain needs a heroic DIY ending. Thanks for reading this guide on how to get nail polish out of wood.
About the Author
Jane Hubbard is a passionate beauty expert with a wealth of experience in makeup, hair, and overall beauty techniques. After years of working as a hairdresser specialist, she followed her entrepreneurial spirit and started her own consultancy business.
Jane has always been driven by her desire to help others feel confident in their own skin, and she does this by sharing her knowledge, experiences, and practical beauty tips. Through her consultancy, she empowers individuals to embrace their unique beauty, offering tailored guidance that boosts both self-esteem and personal style.
Professional Focus
Specializes in makeup, hairstyling, and beauty consulting.
Provides personalized beauty advice, tips, and techniques to help individuals feel confident in their appearance.
Dedicated to staying up-to-date with the latest industry trends and developments.
Passionate about creating a comfortable and empowering experience for every client.
Education History
University of Craft and Design – Bachelor of Fine Arts (BFA) in Woodworking and Furniture Design
Woodworking Apprenticeships – Extensive hands-on training with skilled craftsmen to refine carpentry and furniture making techniques
Online Courses & Masterclasses – Continued education in advanced woodworking techniques, design principles, and specialized tools
Expertise:
Makeup artistry, hairstyling, and beauty consulting.
Personalized beauty techniques to enhance confidence and self-expression.
Educating clients on how to maintain their beauty routines at home.