
Are you looking for a way to quickly and easily add some shine and sparkle to your natural nails? Look no further! Builder gel is an amazing product that can give your nails a beautiful finish in just moments.
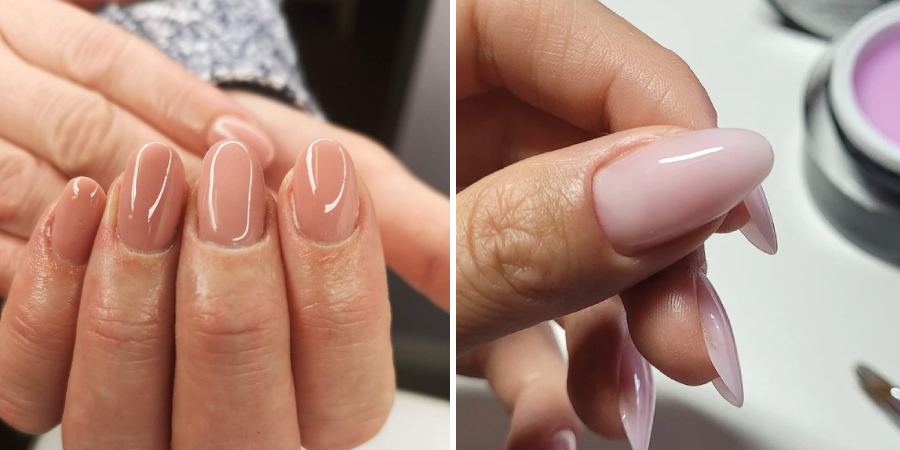
Easy to apply, versatile, and long-lasting – builder gel has become the hottest nail trend among women who want long-lasting manicures without the hassle of traditional acrylics or gels. With builder gel, you can get creative and give yourself an impressive, vibrant nail style that will last up to 4 weeks without damaging your nails.
In this blog post, we’ll discuss how this unique product works and show you step by step instructions on how to apply builder gel on natural nails so you can get salon quality results at home.
What Will You Need?
Before starting the process, ensure you have all the necessary tools and materials. You will need the following:
- Builder Gel
- Nail Prep Solution
- Lint-free wipes
- Applicator brush
Once you have all your supplies ready, you can get started.
10 Easy Steps on How to Apply Builder Gel on Natural Nails
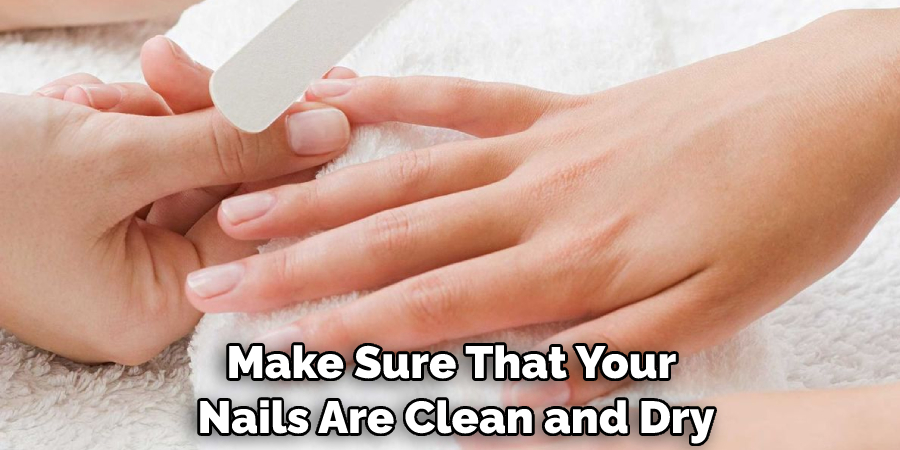
Step 1: Prep Your Nails
Before you start, make sure that your nails are clean and dry. Remove any excess dirt or oil with a lint free wipe dipped in nail prep solution, which will also help to dehydrate your nails. Try to avoid using any hand creams or oils prior to your application.
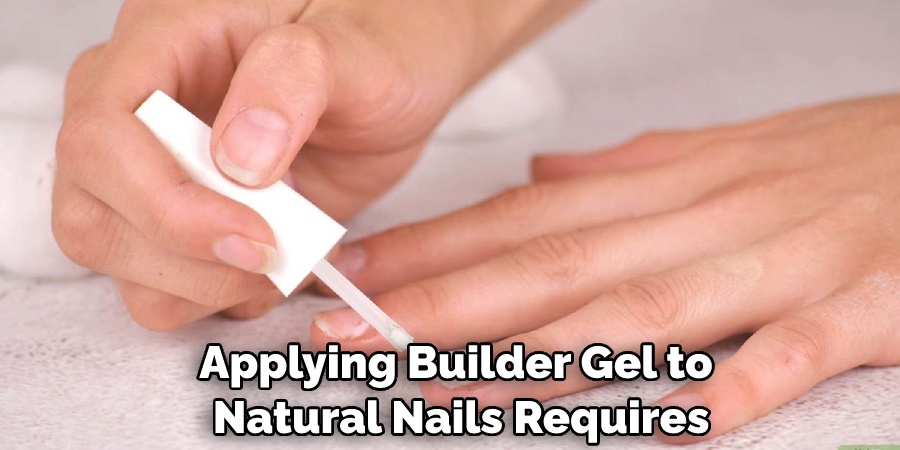
Step 2: Apply The Base Coat
Apply a thin layer of builder gel onto the nail plate and spread it out evenly with an applicator brush. Make sure that all areas are covered, and the product is free from any air bubbles. Allow the base coat to cure in a UV or LED lamp for 1 minute before moving on to the next step.
Step 3: Reapply The Base Coat
Once the first layer has cured, apply a second coat of builder gel on top of the first one. Again, make sure you cover all areas and avoid creating air bubbles by using gentle strokes when spreading out the product. Cure this second layer for 90 seconds under a UV or LED lamp.
Step 4: Apply The Topcoat
Apply a thin layer of builder gel topcoat over the base and cure it under a UV or LED lamp for 1 minute. This will provide an extra layer of protection and shine to your nails. Additionally, it will also make them more durable and long-lasting.
Step 5: Reapply The Topcoat
Once the first layer has cured, apply another coat of builder gel topcoat on top and cure for 90 seconds in a UV or LED lamp. This will give your nails an even more glossy finish. Don’t forget to spread the product out evenly and avoid air bubbles.
Step 6: Clean Up Excess Product
Using lint free wipes dipped in nail prep solution, gently wipe away any excess product from around the cuticle area. Make sure you do this before curing your nails for the last time. If you don’t, the excess product will create a sticky mess which can be difficult to remove.
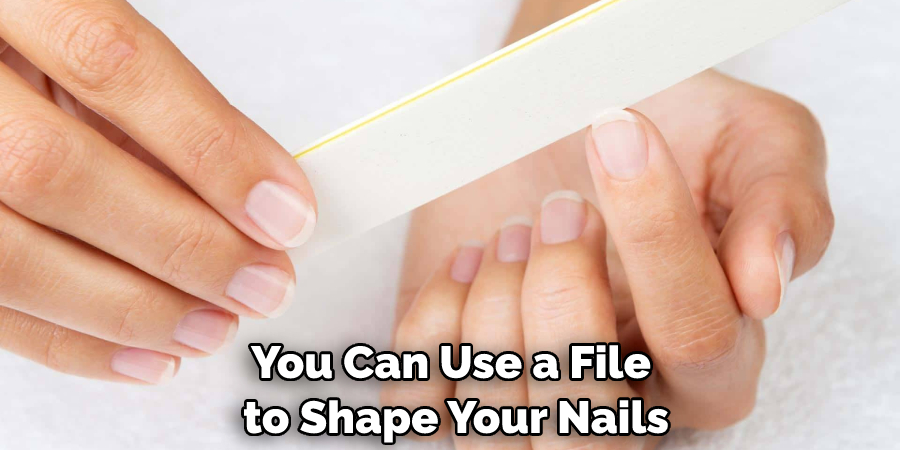
Step 7: Shape Your Nails
If desired, you can use a file to shape your nails into any style that you like. Avoid filing too aggressively, as this can weaken the gel and make it less durable. This step is optional but can help to give your nails a more polished look.
Step 8: Final Curing
Once your nails are shaped, and all excess product has been removed, place them under a UV or LED lamp one last time for 3 minutes so that they cure completely. This will ensure maximum durability and longevity of your manicure. Moreover, it will also make your nails look glossy and vibrant.
Step 9: Clean And Buff Your Nails
Using a soft buffer, lightly buff away any leftover residue from around the edges of your nails. This will create an even more flawless finish. Another option is to use a lint-free wipe dipped in nail prep solution and gently buff away any residue.
Step 10: Seal Your Manicure
To seal your manicure and give it that extra shine, apply a thin layer of builder gel topcoat one last time. Cure for 1 minute in a UV or LED lamp and then wipe off any residue with lint free wipes dipped in nail prep solution. Remember, always use gentle strokes when applying the product so that you don’t create any air bubbles.
And there you have it! Like a pro, you’ve just learned how to apply builder gel on natural nails. With these easy steps and the right supplies, you can create beautiful salon-quality manicures at home in no time.
5 Additional Tips and Tricks
- Make sure your nails are completely clean and free of any oils or debris before applying the gel. This helps ensure a strong bond between the nail and the product.
- Use short strokes for even application. Start at the base of your nail, then apply in an outward direction to cover the entire nail surface.
- When using builder gels, move quickly to prevent air bubbles from forming on your nails as you work with them.
- Make sure to cure the product in accordance with manufacturer instructions before removing it from the nail. Not doing so could result in damage to your nails or weak adhesion points that lead to chipping and peeling later down the line.
- If you’re having trouble removing excess product from the natural nail, you can use an orange wood stick to scrape away any buildup gently. This helps ensure a flawless finish.
Using builder gel on natural nails is one of the easiest ways to get salon-quality results at home. With these tips and tricks in hand, you’ll be able to achieve beautiful and long-lasting manicures in no time!
5 Things You Should Avoid
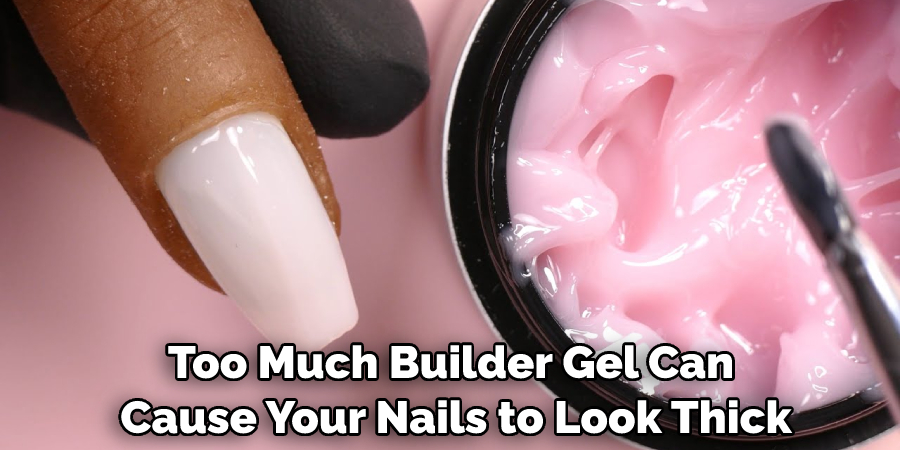
1. Don’t Use Too Much Builder Gel: Too much builder gel can cause your nails to look thick and bulky. Make sure to apply a thin layer of builder gel and let it cure before adding more.
2. Don’t File Too Aggressively: Be careful not to file away too much of the natural nail while sculpting with builder gel. Filing too aggressively can lead to thinning out the nail plate, which can weaken and even break your nails.
3. Don’t Leave It on for Too Long: Builder gels should be removed after two weeks max as leaving them on longer than that could cause damage to the natural nails due to over-hydration.
4. Don’t Forget About Proper Hydration: When using builder gels, make sure to keep your nails hydrated with cuticle oil and regular hand cream use.
5. Don’t Forget Proper Prep: Always make sure to properly prepare the nails with a nail file and buff before applying builder gel. This will ensure that the builder gel secures better and lasts longer on the nails.
By following these tips, you can confidently apply and wear builder gels on natural nails without any issues! With consistent care and maintenance of your nails, you’ll be able to enjoy beautiful, long-lasting results for weeks to come. Have fun trying out different designs and shapes with your newfound skill!
What’s the Difference Between Gel and Builder Gel?
Gel and builder gel are often confused with one another, but they are very different. Gel is a type of product that is usually used to create an even looking nail without any sculpting involved.
On the other hand, builder gels have to be applied in layers and cured using a UV or LED lamp. They are designed to help give shape and length to nails when sculpted correctly.
It’s important to note that builder gels need more time and attention than regular gels, as they require multiple steps for proper application. However, once you’ve mastered the art of applying it – you can get amazing results!
So now you know how can apply builder gel on natural nails. Give it a try, and you’ll quickly get the hang of it!
Conclusion
Whether you’re a beginner or an experienced nail technician, applying builder gel to natural nails requires understanding and knowledge. You must know the correct products, tools, and techniques that will ensure the best results. Each step is crucial for the final outcome, from cleansing and dehydrating the nail to prepping the natural nails with a primer before the builder gel application. Get the right media and information, practice your skills regularly, and become a professional in no time by continuing to hone those skills.
With continued learning comes greater expertise through repetitive processes and experiences that transform into intuition. Doesn’t it feel empowering to realize that you can be in charge of your own beauty destiny? Make sure to share what you have learned with your friends and family!
Hopefully, the article on how to apply builder gel on natural nails has been helpful for you in understanding the basics of this process. With these tips and some practice, you’ll be able to create beautiful nails for yourself or your customers in no time! Good luck!
About the Author
Jane Hubbard is a passionate beauty expert with a wealth of experience in makeup, hair, and overall beauty techniques. After years of working as a hairdresser specialist, she followed her entrepreneurial spirit and started her own consultancy business.
Jane has always been driven by her desire to help others feel confident in their own skin, and she does this by sharing her knowledge, experiences, and practical beauty tips. Through her consultancy, she empowers individuals to embrace their unique beauty, offering tailored guidance that boosts both self-esteem and personal style.
Professional Focus
Specializes in makeup, hairstyling, and beauty consulting.
Provides personalized beauty advice, tips, and techniques to help individuals feel confident in their appearance.
Dedicated to staying up-to-date with the latest industry trends and developments.
Passionate about creating a comfortable and empowering experience for every client.
Education History
University of Craft and Design – Bachelor of Fine Arts (BFA) in Woodworking and Furniture Design
Woodworking Apprenticeships – Extensive hands-on training with skilled craftsmen to refine carpentry and furniture making techniques
Online Courses & Masterclasses – Continued education in advanced woodworking techniques, design principles, and specialized tools
Expertise:
Makeup artistry, hairstyling, and beauty consulting.
Personalized beauty techniques to enhance confidence and self-expression.
Educating clients on how to maintain their beauty routines at home.