
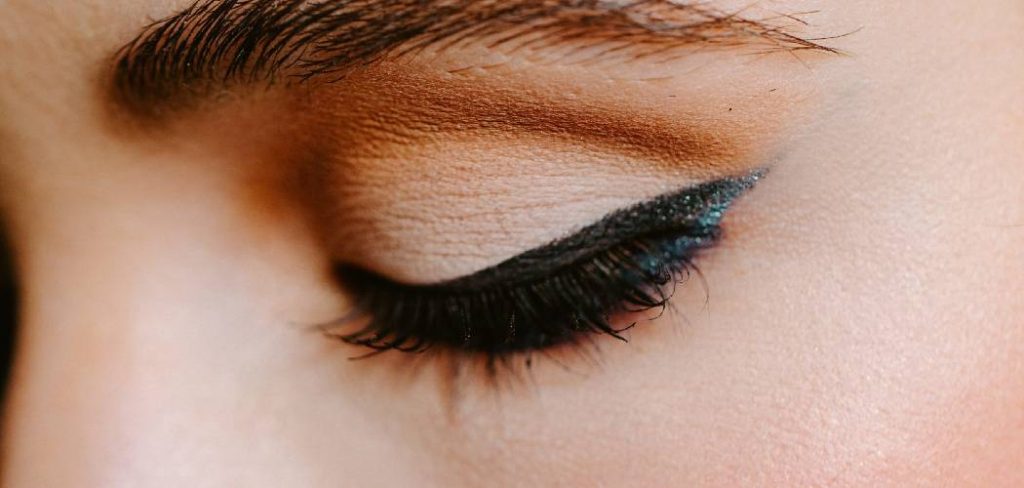
Are you tired of trying to achieve the perfect winged eyeliner look and ending up with a messy disaster every time? Fear not, because in this guide, we will teach you how to apply eyeliner for a natural look that will enhance your eyes without looking overdone.
Applying round eyes makeup eyeliner for a natural look can enhance your features without appearing overly done, making it perfect for everyday wear. The goal is to define your eyes subtly, giving them a soft and polished appearance. Whether you’re a makeup beginner or a seasoned pro, mastering this technique can complement any style effortlessly. The key lies in choosing the right tools, using gentle strokes, and focusing on blending to achieve a seamless finish.
In this guide on how to apply eyeliner natural look, we’ll walk you through the steps to create a beautiful, natural eyeliner look with ease.
What Are the Benefits of a Natural Eyeliner Look?
Before we dive into the application process, let’s first discuss why a natural eyeliner look is worth mastering.
- A natural eyeliner look is versatile and can be worn for any occasion, from work to special events.
- It defines your eyes without being too bold or dramatic, making it suitable for everyday wear.
- This technique enhances your eye shape and can make them appear bigger and brighter.
- Using gentle strokes instead of harsh lines can prevent damage to your delicate eye area.
What Will You Need?
To achieve a natural eyeliner look, you will need the following items:
- A black or brown pencil eyeliner (depending on your preference)
- An angled eyeliner brush
- A small blending brush
- Concealer (optional)
- Eyeshadow (optional)
Once you have all these items, you are ready to begin creating your natural eyeliner look.
10 Easy Steps on How to Apply Eyeliner Natural Look
Step 1: Prepare Your Eyelids
To prepare your eyelids, start by ensuring they are clean and dry. Use a gentle makeup remover or cleanser to eliminate any residual oil or makeup from previous wear. This will create a smooth and even surface for the eyeliner to adhere to, enhancing its longevity. If you have oily eyelids, applying a lightweight, oil-free primer can help control excess oil and prevent smudging throughout the day. A primer also smooths out any texture on your lids, making it easier to achieve a seamless application.
If desired, you can use a light layer of concealer or a neutral-toned eyeshadow to even out the skin tone on your eyelids and create a flawless base.

Step 2: Choose the Right Eyeliner
When selecting the right eyeliner, consider the look you want to achieve and the formula that best suits your needs. Pencil eyeliners are versatile and easy to use, making them ideal for beginners or those looking for a soft, smoky effect. Gel eyeliners offer precise lines with rich pigmentation and are great for creating bold or dramatic styles. For a sharp, defined look, liquid eyeliners with a fine-tip applicator are perfect for drawing crisp lines or mastering winged eyeliner.
Step 3: Create Small Dashes Along the Lash Line
To ensure a steady and even application, rest your elbow on a flat surface and lightly hold the eyeliner. Start at the inner corner of your upper eyelid, and carefully create small dashes along your lash line, moving outward. These dashes act as a guideline to help you connect the line smoothly later. Remember, it’s easier to add more liner than to erase mistakes, so apply gentle pressure and take your time for precise placement.
Step 4: Connect the Dashes Smoothly
To connect the dashes, use small, gentle strokes to join them into a continuous line. Start from the inner corner and follow the guideline you created, working outward. Keep your hand steady, and if needed, use your pinky finger as an anchor against your cheek for extra stability. For a natural look, aim to keep the line thin and close to the lash line. If you prefer a more dramatic effect, you can gradually build the line’s thickness. Take your time, and don’t be afraid to make minor adjustments to perfect the line.
Step 5: Smudge the Eyeliner
Using a smudging brush or the tip of a cotton swab, gently blend the eyeliner to create a softer, smoky effect. Start at the outer corner and work your way inward, using small, controlled motions to diffuse harsh lines. Smudging is particularly effective for pencil or gel eyeliner and can help achieve a more natural or sultry appearance. Be sure not to over-blend, as this can cause the eyeliner to lose its definition. If needed, reapply a bit more eyeliner and smudge again until the desired look is achieved.
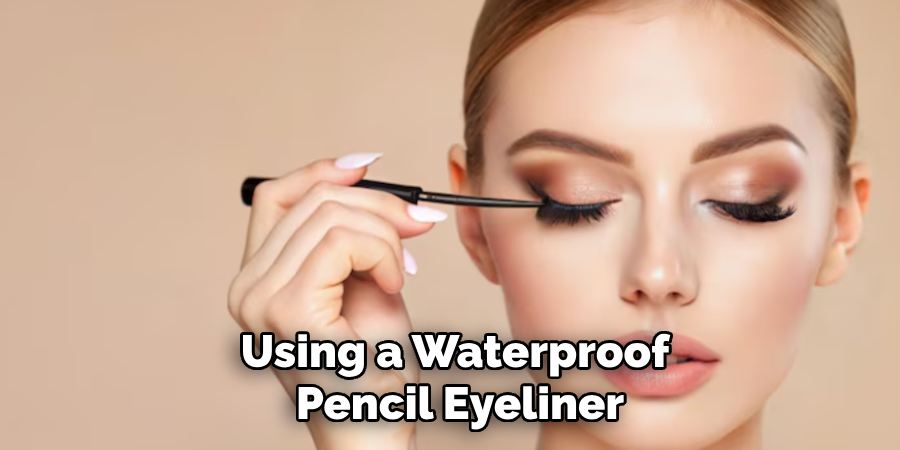
Step 6: Tightline Your Upper Waterline
Using a waterproof pencil eyeliner, gently lift your upper eyelid to expose the waterline. Carefully apply the eyeliner along the inner rim of your upper lash line, making sure to fill any gaps between the lashes for a fuller, more defined look. This technique enhances the intensity of your eye makeup while maintaining a subtle, natural effect. Avoid pressing too hard, and work slowly to ensure precision and comfort. Tightlining is particularly effective for creating the illusion of thicker lashes without visible eyeliner.
Step 7: Keep the Lower Lash Line Minimal
When enhancing your lower lash line, it’s best to keep the application minimal to maintain a balanced and natural look. Use a light hand and a soft pencil or eyeshadow in a shade that complements your overall makeup.
Gently smudge the product along the outer third of your lower lash line for subtle definition. Avoid applying heavy or dark lines across the entire lower lash line, as this can make your eyes look smaller and overly dramatic. Focus on blending well to create a soft, diffused effect that enhances your features without overpowering them.
Step 8: Add Eyeshadow
When adding eyeshadow, start by applying a neutral base shade across your entire eyelid to create a smooth canvas. Use a fluffy blending brush to sweep the color evenly, ensuring there are no harsh lines. Next, choose a slightly darker shade and apply it to the crease of your eyelid to add depth and dimension.
Use a smaller blending brush and work in circular motions to blend the edges seamlessly. If you want to create a more dramatic look, you can add an even darker shade to the outer corner of your eyes and blend it inward. For a finishing touch, apply a light, shimmery shade to the inner corners of your eyes and just below the brow bone to brighten and highlight.
Step 9: Clean Up Any Mistakes
Once you’ve completed your eye makeup, take a moment to check for any smudges or fallout. Use a clean cotton swab dipped in makeup remover to gently erase any mistakes or sharpen edges for a polished finish. To clean up fallout under your eyes, lightly sweep a fluffy brush with a touch of translucent powder to maintain a flawless base. This step ensures your look appears crisp and professional.
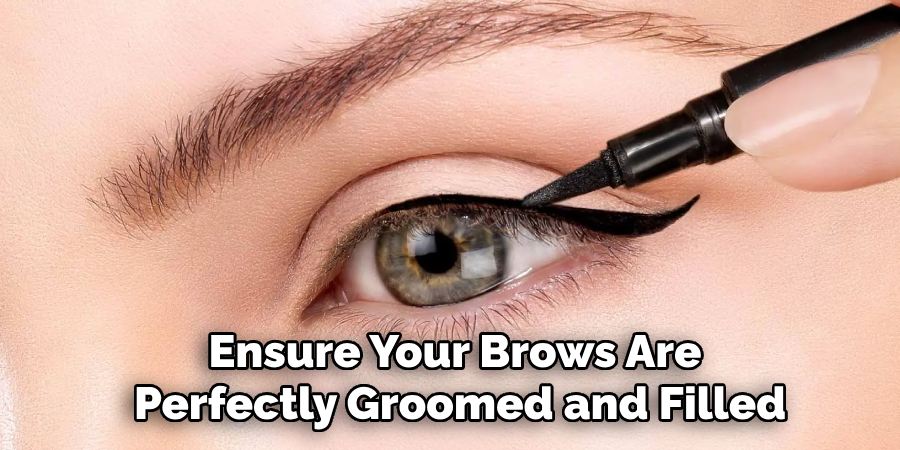
Step 10: Final Touches
To complete your eye makeup look, apply a few coats of mascara to your lashes for added length and volume. If desired, you can also add false lashes for extra drama and definition. Next, ensure your brows are perfectly groomed and filled in to frame your eyes beautifully. Finally, give your makeup one last check under good lighting to confirm everything is blended seamlessly. Seal your look with a setting spray to keep your makeup fresh and smudge-free throughout the day.
By following these steps, you can easily achieve a natural eyeliner look that enhances your features with minimal effort.
5 Things You Should Avoid
- Using a Heavy Hand
Avoid applying too much pressure when drawing your eyeliner. A heavy hand can result in harsh, thick lines that overpower the natural look you’re aiming for. Instead, use light, feathery strokes to build the line gradually.
- Skipping Primer or Base
Failing to prep your eyelids with a primer or base can cause your eyeliner to smudge or fade throughout the day. Always ensure your eyelids are clean and prepped for long-lasting results.
- Drawing a Single, Unblended Line
Leaving your eyeliner unblended can make it appear stark and unnatural. For a softer, more natural effect, use a smudging tool or a small brush to gently blend out the edges.
- Ignoring the Inner Corner
Forgetting to taper your eyeliner toward the inner corner of your eye can create an unbalanced look. Ensure the line starts thin at the inner corner and gradually thickens toward the outer corner for a natural gradient.
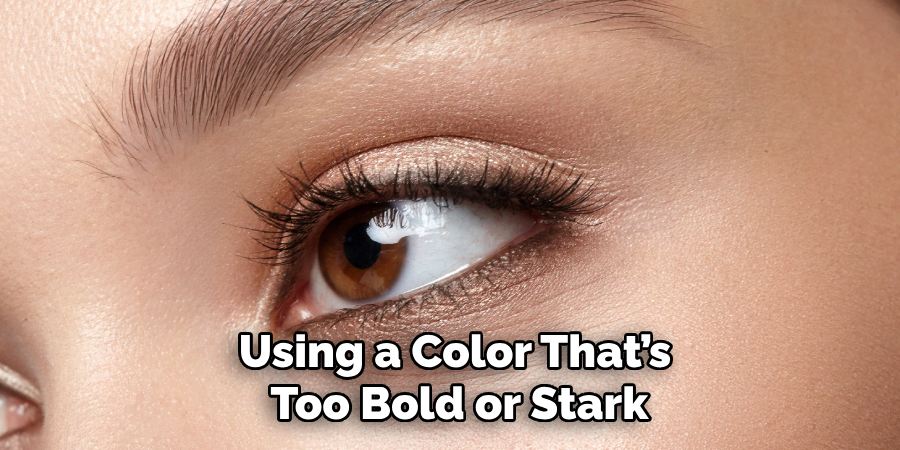
- Overlooking Your Eyeliner Color
Using a color that’s too bold or stark, such as jet black, can diminish the natural appearance. Opt for softer shades like brown or charcoal, which blend seamlessly and enhance your eyes more subtly.
Conclusion
How to apply eyeliner natural look is all about precision and subtlety.
By focusing on techniques like creating a soft gradient, selecting the right eyeliner shade, and ensuring smooth application, you can enhance your eyes without appearing overly dramatic. Remember that less is often more when it comes to natural makeup, so take your time to practice and adjust based on your features.
With these tips in mind, you’ll master the art of a flawless, natural eyeliner look in no time.
About the Author
Jane Hubbard is a passionate beauty expert with a wealth of experience in makeup, hair, and overall beauty techniques. After years of working as a hairdresser specialist, she followed her entrepreneurial spirit and started her own consultancy business.
Jane has always been driven by her desire to help others feel confident in their own skin, and she does this by sharing her knowledge, experiences, and practical beauty tips. Through her consultancy, she empowers individuals to embrace their unique beauty, offering tailored guidance that boosts both self-esteem and personal style.
Professional Focus
- Specializes in makeup, hairstyling, and beauty consulting.
- Provides personalized beauty advice, tips, and techniques to help individuals feel confident in their appearance.
- Dedicated to staying up-to-date with the latest industry trends and developments.
- Passionate about creating a comfortable and empowering experience for every client.
Education History
- University of Craft and Design – Bachelor of Fine Arts (BFA) in Woodworking and Furniture Design
- Woodworking Apprenticeships – Extensive hands-on training with skilled craftsmen to refine carpentry and furniture making techniques
- Online Courses & Masterclasses – Continued education in advanced woodworking techniques, design principles, and specialized tools
Expertise:
- Makeup artistry, hairstyling, and beauty consulting.
- Personalized beauty techniques to enhance confidence and self-expression.
- Educating clients on how to maintain their beauty routines at home.