
The Luxe Lash Lift is a revolutionary beauty treatment designed to enhance the natural lashes without the need for extensions or heavy mascara. By lifting and curling the lashes from the base, this procedure offers a more open-eyed and youthful look, making the eyes appear larger and more vibrant. Unlike other lash enhancement methods, such as eyelash extensions or falsies, a lash lift requires minimal maintenance and provides a more natural appearance.
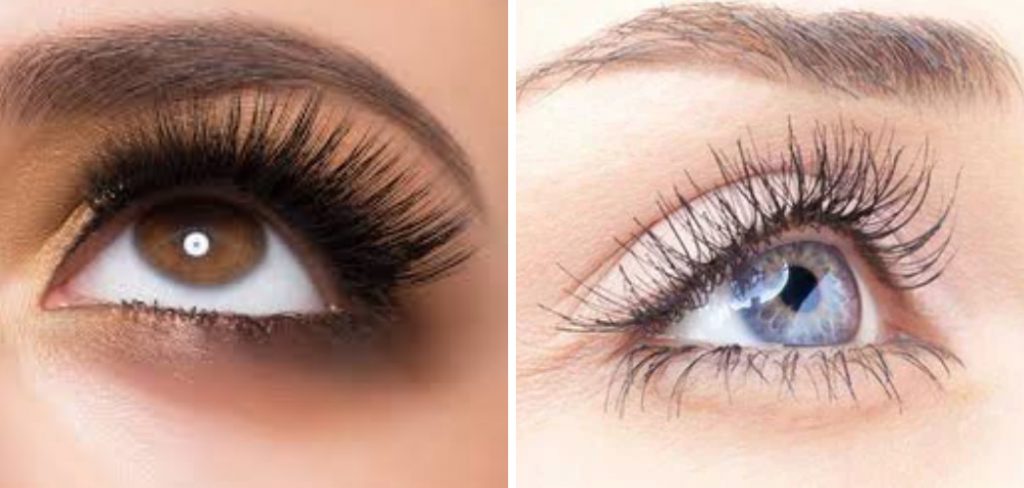
The benefits of a lash lift include longer-lasting results, less damage to natural lashes, and a quicker application process. This article aims to guide you through the detailed steps on how to achieve salon-quality results at home using the Luxe Lash Lift Kit. By following the instructions on how to apply Luxe Lash Lift, you can enjoy beautifully lifted lashes that last for weeks, enhancing your overall look effortlessly.
Understanding the Luxe Lash Lift Kit
The Luxe Lash Lift Kit is an all-inclusive set designed to provide you with all the essentials needed to perform a professional-grade lash lift at home. The kit typically includes a lifting solution, setting solution, nourishing solution, various sizes of lash rods, and a set of applicator tools. The lifting solution breaks down the bonds in the lashes, allowing them to be reshaped and lifted. The setting solution then locks the new shape in place, ensuring the lashes maintain their lift. The nourishing solution helps condition and strengthen the lashes, promoting their overall health and enhancing the lift’s longevity. Lash rods are available in different sizes to accommodate various lash lengths and desired lift intensities.
Suitable candidates for a lash lift include individuals with straight lashes seeking a natural curl, those with downward-facing lashes wanting an uplifted look, and people who prefer a low-maintenance eyelash enhancement. The Luxe Lash Lift is effective on different lash types and conditions, whether your lashes are short, long, thick, or thin. However, it is important to conduct a patch test to ensure you are not allergic to any kit components, ensuring a safe and effective lash-lifting experience.
Preparing for the Lash Lift
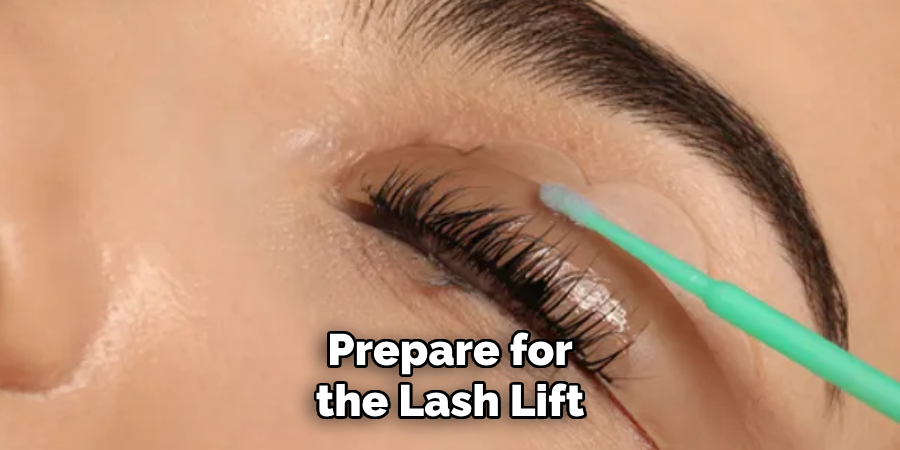
Before you begin the lash lift application, it’s crucial to properly prepare your lashes to ensure the best results and minimize any potential risks. Clean your lashes thoroughly to remove any makeup, dirt, or oils. This step is essential because any residue left on the lashes can interfere with the effectiveness of the solutions in the Luxe Lash Lift Kit. Use a gentle, oil-free cleanser to clean your eyelashes, paying close attention to the roots where most residues tend to accumulate. Make sure to rinse thoroughly and pat dry with a clean, lint-free towel.
The next critical step is to ensure that your lashes are completely dry and free from any residues. Wet or oily lashes can prevent the adhesive from securing the lash rods properly, leading to uneven lifts or lashes that won’t stay in place. After cleansing, allow your lashes to air dry naturally or use a clean cotton pad to gently dab them dry.
Performing a patch test is a vital precautionary measure to check for any allergic reactions to the components in the Luxe Lash Lift Kit. To perform a patch test, apply a small amount of the lifting solution to a discreet skin area, such as behind your ear or on your inner arm. Leave it on for the recommended processing time and then rinse off. Wait 24 hours and observe the area for any signs of redness, itching, or irritation. If you notice any adverse reactions, consult a professional and do not proceed with the lash lift. These preparatory steps ensure a safe and successful lash-lifting experience, allowing you to achieve the best possible results.
How to Apply Luxe Lash Lift: Step-by-Step Application Process
1.Applying the Lash Rods
Choosing the right size lash rod is paramount to achieving your desired lift. Examine your natural lash length and decide the extent of the curl you want. Smaller rods create a tighter curl, whereas larger rods offer a more subtle lift. Apply a thin, even layer of adhesive to the flat side of the lash rods. Position the rod as close to the lash line as possible, pressing gently but firmly to ensure it adheres well to the eyelid. Ensure the rods are secure and comfortable before proceeding, as improper placement can affect the lift’s outcome.
2.Lifting the Lashes
With the lash rods securely in place, apply a small amount of adhesive to the rods. Using a lash tool or applicator, carefully lift your lashes and press them onto the adhesive-covered rods. Work methodically from the inner to the outer corner of the lash line, ensuring each lash is evenly spread out and properly adhered. It’s essential to ensure that the lashes are lifted in a straight line and not crossed over one another, which could result in an uneven lift. Take your time during this step to guarantee that each lash is correctly positioned for a flawless finish.
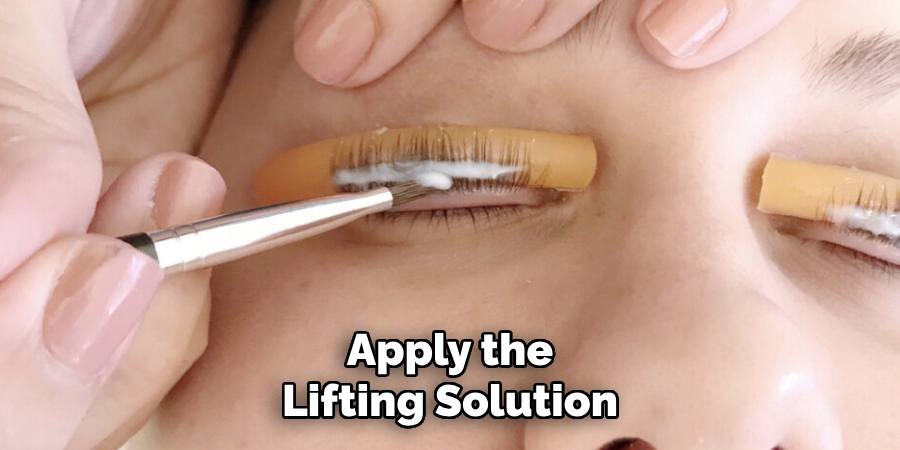
3.Applying the Lifting Solution
Once the lashes are adhered to the rods, it’s time to apply the lifting solution. Use a micro brush or small applicator to coat the lashes from base to tip, carefully avoiding contact with the skin. Apply the solution sparingly yet thoroughly, ensuring each lash is covered. Leave the lifting solution on for the recommended processing time, typically between 8 to 12 minutes, depending on the thickness and texture of your lashes. Setting a timer can help ensure accuracy and prevent over-processing, which could damage your lashes.
4.Applying the Setting Solution
Following the lifting solution, the next step is to apply the setting solution. First, use a clean microbrush to gently remove the lifting solution from your lashes. With a new micro brush or applicator, apply the setting solution to the lashes in the same manner as the lifting solution, covering them from base to tip. It is crucial to be thorough yet gentle to maintain the even lift achieved in the previous step. Allow the setting solution to set for the recommended duration, usually another 8 to 12 minutes, to ensure the lashes retain their new shape.
5.Nourishing the Lashes
The final step involves nourishing your newly lifted lashes to condition and strengthen them. Begin by removing any residual setting solution with a clean micro brush. Then, apply the nourishing solution evenly across the lashes using an applicator. This step not only adds shine and smoothness to your lashes but also helps to maintain their health and strength, promoting longevity. Ensure all product residues are thoroughly removed to avoid irritation or clumping, leaving your lashes looking beautifully lifted and natural. Completing this step concludes the lash lift process, revealing your stunning, salon-quality results.
Aftercare and Maintenance
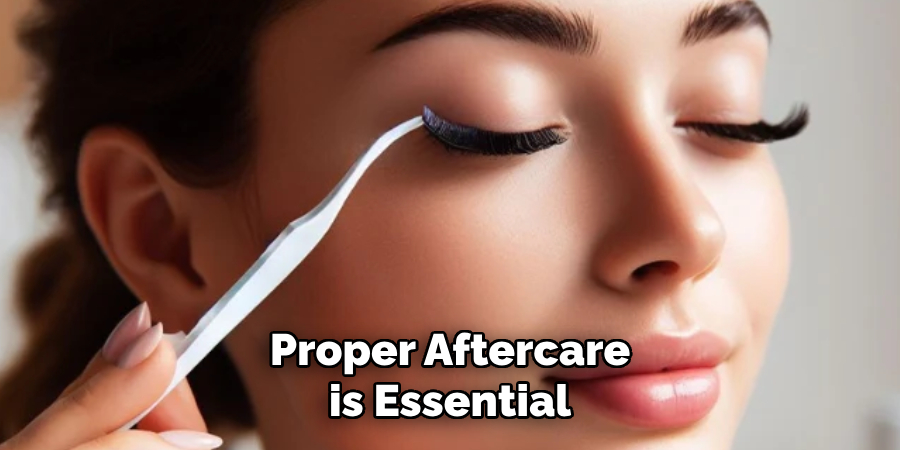
Proper aftercare is essential to preserving the beautiful results of your lash lift. During the first 24 hours after the treatment, avoiding water, steam, and makeup is crucial. Exposure to moisture can compromise the effectiveness of the lifting solutions, leading to less-than-ideal results. Hence, refrain from activities like swimming, using saunas, or engaging in intense workouts that cause sweating. Also, avoid applying mascara or any eye makeup that requires removal, as the friction from cleansing can affect the lash lift.
When you do cleanse your face, opt for a gentle, oil-free cleanser, and be careful not to rub your eyes. Instead, use a soft, patting motion around the eye area to remove impurities without disturbing your lashes. This gentle approach helps maintain the pristine condition of your lash lift for longer.
Consider incorporating lash serums and regular conditioning into your aftercare routine to ensure your lashes remain healthy and strong. Lash serums contain essential vitamins and peptides that promote lash growth and fortify each strand. Apply the serum as directed, usually at night, to nourish your lashes deeply. Additionally, use a conditioning solution specifically designed for lashes to add moisture and flexibility, preventing brittleness and breakage.
By following these aftercare and maintenance guidelines, you safeguard your investment in your lash lift and enjoy long-lasting, beautiful results. Consistent care and attention to your lashes will keep them looking voluminous, curled, and stunning with minimal effort.
Expected Results and Longevity
Immediate Results
After completing the lash lift procedure, you can expect to see immediate, eye-catching results. Your lashes will appear noticeably lifted, more voluminous, and beautifully curled without the need for extensions or mascara. This transformation enhances the natural beauty of your eyes, making them look more open and expressive. The results are particularly striking as the treatment provides a consistent curl from base to tip, giving your lashes a uniform and polished appearance.
Longevity of the Lash Lift
A lash lift typically lasts between 6 to 8 weeks, depending on individual lash growth cycles and aftercare practices. During this period, your lifted lashes will gradually return to their natural state as new lashes grow in and old ones shed.
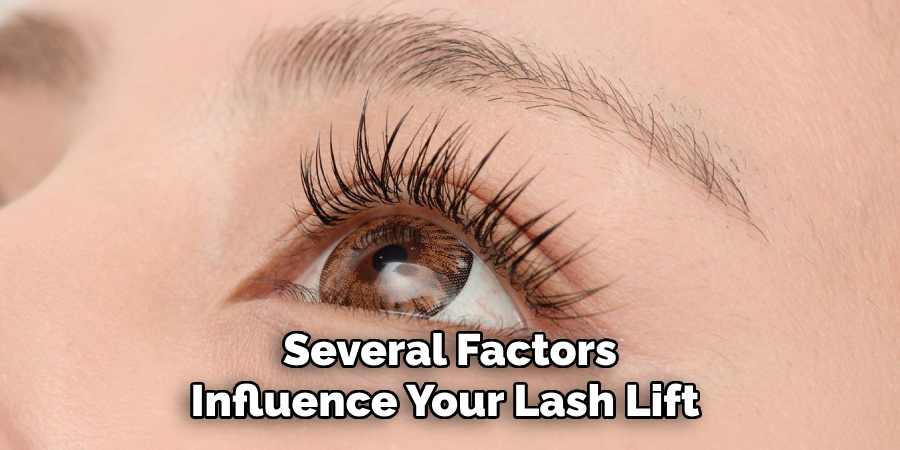
Factors Affecting Longevity
Several factors can influence the duration of your lash lift results. Firstly, your individual lash growth cycle plays a significant role; faster-growing lashes may cause the lift to diminish more quickly. Proper aftercare is also crucial for maintaining the lift; avoiding oil-based products, steam, and rigorous rubbing of the eyes will help prolong the effects. Lifestyle factors such as frequent swimming or exposure to humidity can also impact longevity. By adhering to recommended aftercare routines and adjusting your beauty habits, you can maximize the lifespan of your lash lift, enjoying your enhanced lashes for the full 6 to 8-week period.
Troubleshooting Common Issues
Addressing Uneven Lifts or Lashes Not Adhering Properly
Uneven lifts or lashes that fail to adhere can be frustrating. If you notice uneven lifts, ensure that the rods or shields are correctly placed and that the lashes are evenly spaced across the surface. Reapply the adhesive and gently press the lashes into place. Additionally, ensure that the lifting solution is applied uniformly. If lashes repeatedly fail to adhere, double-check that they are clean and free of oils before beginning the procedure.
What to Do if the Lifting Solution Causes Irritation
If the lifting solution causes irritation or discomfort, rinse your eyes immediately with cool water and discontinue use. Mild irritation might resolve with rinsing, but persistent symptoms necessitate consulting a medical professional. Always perform a patch test before the procedure to prevent adverse reactions.
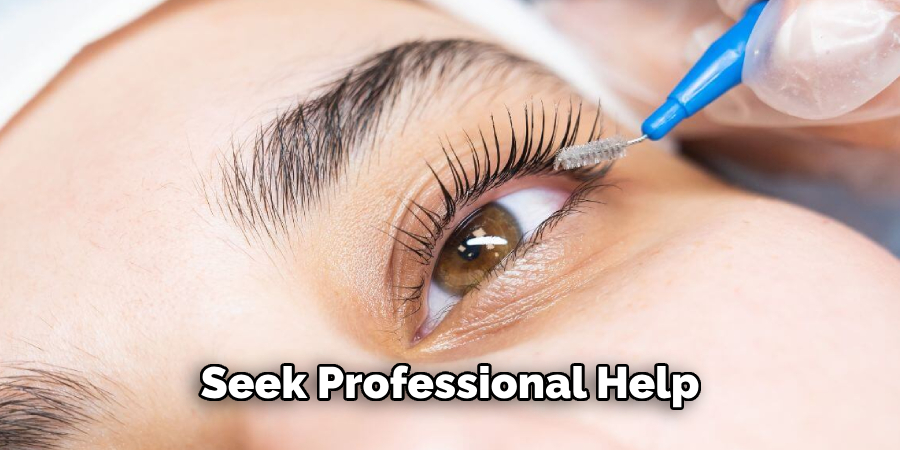
When to Seek Professional Help for Corrections
If you experience severe irritation, uneven results that you cannot correct, or damaged eyelashes, it is best to seek professional help. A qualified technician can assess the issue and provide the appropriate corrective treatments to restore your lashes to their desired appearance.
Conclusion
In summary, understanding how to apply Luxe Lash Lift involves several essential steps: thorough preparation, careful application of the lifting and setting solutions, and nurturing with a conditioning solution. Following the detailed aftercare and maintenance instructions is crucial for preserving the stunning results of your lash lift, ensuring the longevity and health of your lashes.
By adhering to these guidelines, you will enjoy beautifully lifted, voluminous lashes that enhance the natural allure of your eyes. Remember to use recommended products, avoid activities that can compromise the lift, and regularly condition your lashes for optimal results.
Embracing the convenience and effectiveness of a DIY lash lift saves time and money while delivering salon-quality outcomes in the comfort of your home. With patience and attention to detail, achieving professional results is entirely achievable. Enjoy your newfound confidence with the perfect lash lift!
About the Author
Jane Hubbard is a passionate beauty expert with a wealth of experience in makeup, hair, and overall beauty techniques. After years of working as a hairdresser specialist, she followed her entrepreneurial spirit and started her own consultancy business.
Jane has always been driven by her desire to help others feel confident in their own skin, and she does this by sharing her knowledge, experiences, and practical beauty tips. Through her consultancy, she empowers individuals to embrace their unique beauty, offering tailored guidance that boosts both self-esteem and personal style.
Professional Focus
Specializes in makeup, hairstyling, and beauty consulting.
Provides personalized beauty advice, tips, and techniques to help individuals feel confident in their appearance.
Dedicated to staying up-to-date with the latest industry trends and developments.
Passionate about creating a comfortable and empowering experience for every client.
Education History
University of Craft and Design – Bachelor of Fine Arts (BFA) in Woodworking and Furniture Design
Woodworking Apprenticeships – Extensive hands-on training with skilled craftsmen to refine carpentry and furniture making techniques
Online Courses & Masterclasses – Continued education in advanced woodworking techniques, design principles, and specialized tools
Expertise:
Makeup artistry, hairstyling, and beauty consulting.
Personalized beauty techniques to enhance confidence and self-expression.
Educating clients on how to maintain their beauty routines at home.