
Choosing the right contour and highlight colors for your skin tone is key to achieving that flawless look. But with such a wide variety of shades, it can take time to know where to start. So, if you’re overwhelmed by all the choices available in the makeup aisle or online, don’t despair!
In this blog post, I will walk you through step-by-step how to choose contour and highlight color that pair perfectly with your unique skin tone. Plus, I’ll provide tips on blending techniques so that your final complexion looks flawlessly beautiful.
So, let’s get started – read on for my top tips on finding the optimum contouring and highlighting color palettes for every unique skin type!
What Will You Need?
Before diving into the specifics of choosing contour and highlight colors, it’s important to have all the necessary tools. Here are some must-haves that you will need to achieve a perfectly contoured and highlighted look:
- Contour powder or stick: this is typically a shade or two darker than your natural skin tone and is used to create shadows and add definition to the face.
- Highlighter: This light-reflecting product helps bring out your best features and gives your skin a glow.
- Brush or blend sponge: these tools are essential for applying contour and highlight products and blending them seamlessly into your skin.
Now that you have all the necessary tools let’s dive into choosing the right colors for your skin tone.
8 Easy Steps on How to Choose Contour and Highlight Color
Step 1. Identify Your Skin Tone:
The first step in choosing the right contour and highlight color is identifying your skin tone. Look at the veins on your wrist. If they look blue or purple, you have a cool skin tone. If they appear green, you have a warm skin tone, and if you can’t tell, you likely have a neutral skin tone.
Step 2. Determine Your Skin Undertone:
After identifying your overall skin tone, you must determine your skin’s undertone, categorized as warm, cool, or neutral. People with warm undertones have a golden, peachy, or yellowish complexion, while those with cool undertones have a rosy, pink, or bluish complexion. Neutral undertones are a balance of both cool and warm undertones. Knowing your skin’s undertone will greatly assist you in picking the correct contour and highlight color.
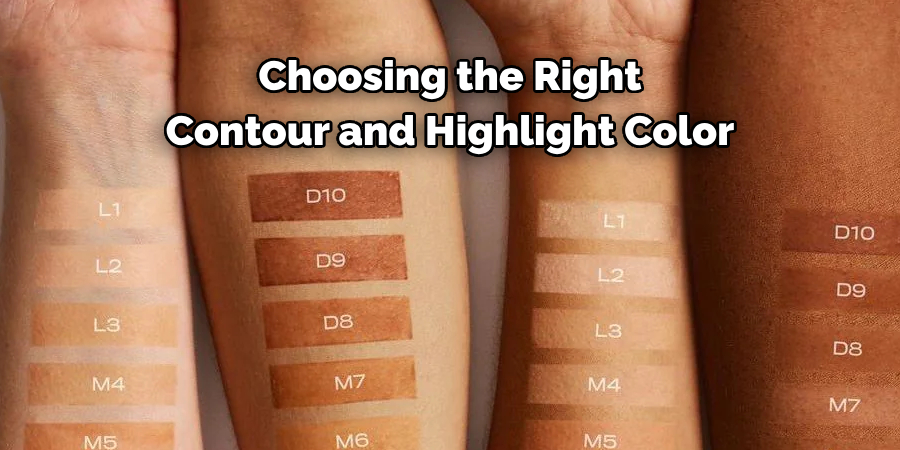
Step 3. Select Your Contour Color:
Now that you’ve identified your skin tone and undertone, it’s time to select a contour color. If you have a warm skin tone, opt for a contour color with a hint of golden or yellow undertone for a natural look. Choose a contour shade with a grayish, ashy undertone for cool-toned skin. If you have a neutral skin tone, a contour color with a balance of warm and cool undertones is ideal. Remember, your contour color should be one to two shades darker than your natural skin tone to create an illusion of depth and definition.
Step 4. Choose Your Highlight Color:
Once you’ve selected your contour color, the next step is to choose a highlight color. The purpose of a highlighter is to emphasize the high points of your face – like the top of your cheekbones, the bridge of your nose, and the cupid’s bow of your lips. Generally, your highlight color should be one to two shades lighter than your skin tone. If you have a cool skin tone, go for highlighters with a pink or silver undertone. For those with warm skin tones, a gold or peachy highlighter will complement your complexion well. Neutral skin tones can experiment with a range of highlighter shades to see which best accentuates their features.
Step 5. Testing the Shades:
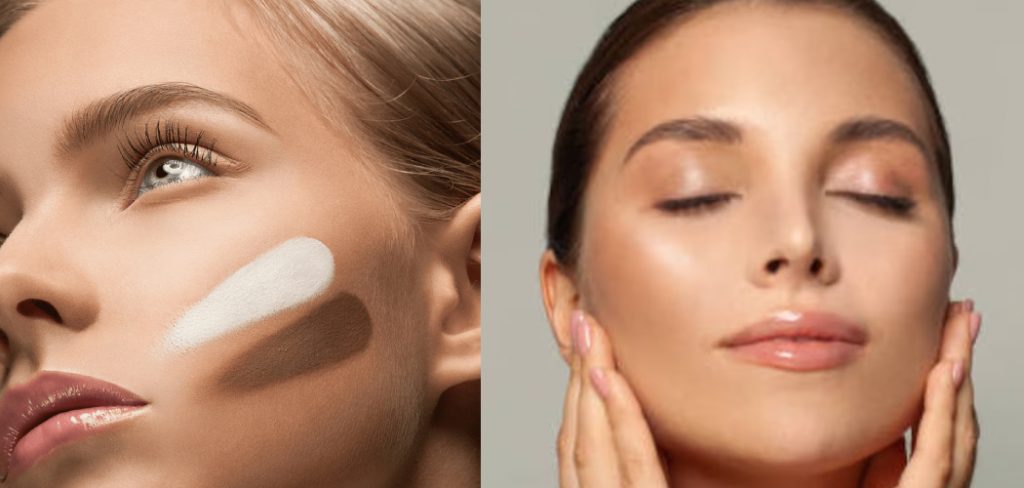
At this point, you should have your potential contour and highlight shades chosen. However, before making a final decision, testing these shades in natural light is crucial. Natural light provides the most trustworthy representation of color and how it will look in most situations. Apply a small amount of the selected contour shade below your cheekbones and a dab of the highlighter on top of your cheekbones. If the colors blend seamlessly and enhance your features without appearing too stark or unnatural, you’ve likely found your perfect match.
Step 6. Blending is Key:
Once you’ve chosen your contour and highlight colors, the next significant step is to perfect your blending technique. Blending is the key to a natural, seamless contour and highlight look. For contouring, apply the product just below your cheekbones, along your jawline, and on the edges of your forehead. For highlighter, focus on the high points of your face, like your cheekbones, down the bridge of your nose, and the cupid’s bow of your lips. Then, use a brush or sponge to blend the contour and highlight until there are no harsh lines. This might take a bit of practice, but with time, you’ll achieve a beautifully sculpted and radiant look.
Step 7. Adjust According to Your Face Shape:
Understanding your face shape can guide you where to contour and highlight for the most flattering results. For instance, if you have a round face, contouring along the sides of your forehead and below your cheekbones can help to create a more angular look. On the other hand, if you have an oval face, contour under your cheekbones starting from your ears and ending in the middle of your cheeks, and highlight the middle of your forehead and chin to create balance. Hence, adjust your contouring and highlighting technique per your specific face shape for a look that complements your unique features.
Step 8. Practice and Experiment:
After understanding your face structure and how to apply contour and highlight, the most important step is to practice. Practice is key when it comes to perfecting your contouring and highlighting skills. Feel free to experiment with different techniques to see what works best for your face shape and features. Remember, makeup is a form of self-expression, and there’s no one-size-fits-all approach. With time and consistent practice, you’ll be able to create a beautifully contoured and highlighted look that enhances your natural beauty and boosts your confidence.
By following these simple steps and understanding how to choose the right contour and highlight colors for your skin tone and undertone, you’ll achieve a flawless, sculpted look that will elevate your makeup game.
5 Additional Tips and Tricks
- Consider the Occasion: Lighter shades are perfect for everyday looks, whereas bolder tones are ideal for nighttime or special occasions.
- Test Your Skin Tone: Different skin tones will suit different shades. Test out various colors on your jawline to see which one blends seamlessly with your complexion.
- Choose the Right Formula: Contour and highlight products can come in powder, cream, or liquid form. Choosing a formula that works best for your skin type and desired finish is important.
- Use Shades to Enhance Features: Contouring and highlighting isn’t just for sculpting cheekbones. You can use shades to enhance your nose, jawline, and lips!
- Keep it Natural: When choosing contour and highlight colors, always opt for shades that are only a few shades darker or lighter than your natural skin tone. This will create a more natural and subtle effect.
With these additional tips and tricks, you can confidently choose the perfect contour and highlight colors for any occasion.
5 Things You Should Avoid
- Avoid Going Too Dark or Too Light: If the contour is too dark or the highlight is too light, it can make your makeup look unnatural. Always aim for a balance.
- Skipping Blending: Not blending your contour and highlight properly can leave harsh lines and create an artificial look. Take the time to blend for a seamless finish.
- Using the Wrong Tools: Different products require different tools. Using the wrong brush or sponge can affect product application and blending.
- Ignoring Your Skin Undertone: Matching the color to your skin tone isn’t enough; you must also consider your skin undertone. Using a product with the wrong undertone can produce a less flattering effect.
- Don’t Overdo it: Contouring and highlighting should enhance your natural features, not overpower them. Use a light hand and gradually build the product for a more natural look.
By avoiding these common mistakes, you can achieve a flawless and effortless contour and highlight every time.

Conclusion
In conclusion, choosing the right contour and highlighter color is important in properly applying makeup. You don’t want to end up with a look that doesn’t suit your skin tone and age.
Choosing the right shades can help you enhance your features without exaggerating them. To ensure you get the perfect look, always test out a few shades before purchasing cosmetics. Take a few minutes to browse through all available colors and find one that best suits your complexion. Lastly, keep exploring and playing with different tones and hues – it’s a great way to create something unique for yourself!
Hopefully, the article on how to choose contour and highlight color has been helpful and informative. With the right products, tools, and techniques, you can achieve a flawless and natural-looking every day. Happy contouring and highlighting!
About the Author
Jane Hubbard is a passionate beauty expert with a wealth of experience in makeup, hair, and overall beauty techniques. After years of working as a hairdresser specialist, she followed her entrepreneurial spirit and started her own consultancy business.
Jane has always been driven by her desire to help others feel confident in their own skin, and she does this by sharing her knowledge, experiences, and practical beauty tips. Through her consultancy, she empowers individuals to embrace their unique beauty, offering tailored guidance that boosts both self-esteem and personal style.
Professional Focus
Specializes in makeup, hairstyling, and beauty consulting.
Provides personalized beauty advice, tips, and techniques to help individuals feel confident in their appearance.
Dedicated to staying up-to-date with the latest industry trends and developments.
Passionate about creating a comfortable and empowering experience for every client.
Education History
University of Craft and Design – Bachelor of Fine Arts (BFA) in Woodworking and Furniture Design
Woodworking Apprenticeships – Extensive hands-on training with skilled craftsmen to refine carpentry and furniture making techniques
Online Courses & Masterclasses – Continued education in advanced woodworking techniques, design principles, and specialized tools
Expertise:
Makeup artistry, hairstyling, and beauty consulting.
Personalized beauty techniques to enhance confidence and self-expression.
Educating clients on how to maintain their beauty routines at home.