
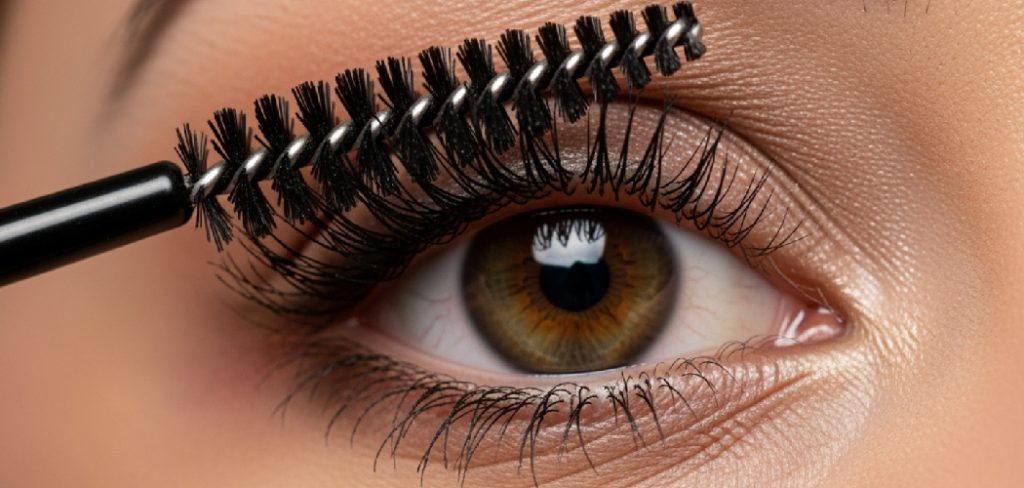
Mascara wands do a lot of quiet work. They separate lashes, catch tiny corner hairs, and can make the difference between clean definition and a smudgy mess. The problem is that they also collect dried mascara, skin oils, lint, and, over time, residue you probably do not want anywhere near your eyes.
Cleaning a mascara wand is not glamorous, and that may be why people skip it. Still, if you want a smoother application or plan to reuse an old wand as a brow spoolie, it is worth the few extra minutes. A clean brush tends to work better, and just as importantly, it is less likely to drag old product back across a sensitive area. In this guide on how to clean a mascara wand, we will cover the best methods and tips for keeping your mascara wand in top shape.
Materials You’ll Need
Set everything out before you start. It makes the process less annoying, and it helps avoid the usual sink-side scramble once your hands are wet.
- Paper towels or a clean microfiber cloth
- Warm water
- Gentle antibacterial soap or baby shampoo
- Makeup remover or micellar water
- A small bowl or cup
- Rubbing alcohol (isopropyl alcohol)
- Cotton pads or cotton swabs
7 Simple Step-By-Step Guidelines on How to Clean a Mascara Wand
Step 1: Wipe Off the Excess Product
Start dry. That part matters more than people think.
Before you introduce water, remove as much built-up mascara as you can with a paper towel or cloth. Fold the towel over once or twice, pinch the wand near the base, and pull upward toward the tip with light pressure. You should see streaks of black or brown residue come away almost immediately.
Turn the wand slightly and repeat. A few passes usually do the job. You are not trying to scrub it raw; you are just getting rid of the obvious buildup so the washing steps are less messy and more effective. If you yank too hard, especially with older brushes, you could bend the wire or rough up the bristles.
Step 2: Soak the Wand in Warm Water
Once the surface residue is off, let warm water do some of the heavy lifting.
Fill a small bowl or cup with warm water. Not boiling. Just comfortably hot to the touch. Mascara is designed to cling to lashes, so dried product can hold on stubbornly, particularly if the formula is waterproof or long-wear. A short soak helps soften the waxes and pigments caught deep between the bristles.
Leave the wand submerged for about 10 to 15 minutes. You may notice the water clouding up a bit as old product loosens. That is a good sign. If the wand came from a tube of especially resistant mascara, a few extra minutes may help, though you do not need to leave it there forever.
Step 3: Apply Gentle Soap or Baby Shampoo
After soaking, move on to soap.
Place a small drop of baby shampoo or gentle soap in the palm of your hand, then swirl the wet wand through it until it starts to lather. Baby shampoo is often a safe choice because it is made to clean without being too harsh, which is useful for something you may later use around the eyes.
Now use your fingers to work the soap into the bristles. Pinch lightly. Roll the wand as you go. Try to get into the base of the brush where the product tends to collect and stay there. This part can feel tedious, admittedly, but it is often where the real cleaning happens.

Step 4: Rinse Under Running Water
Next, rinse thoroughly.
Hold the wand under lukewarm running water and turn it slowly so the stream reaches every side. If mascara is still clinging near the center, use your fingertips to separate the bristles gently and help loosen it. No need to be rough.
Keep rinsing until the water runs clear. That may take a minute or two, depending on how dirty the wand was to begin with. Soap left behind can make the brush feel filmy, and if you are using it near your eyes later, that residue is not something you want hanging around.
Step 5: Treat with Makeup Remover
Sometimes soap and water get close, but not all the way there.
If the wand still looks stained or feels waxy, use a small amount of micellar water or makeup remover. Waterproof mascara, in particular, can leave behind a stubborn coating that regular washing only partly lifts. Pour the remover into a cup and soak the wand for five minutes, or saturate a cotton pad and wrap it around the bristles for a short rest.
After that, wipe or rinse again. In many cases, this second pass is what removes the final bits of pigment that were stuck near the core of the brush.
Step 6: Sanitize with Rubbing Alcohol
Cleaning removes visible residue. Sanitizing addresses what you cannot see.
Pour a little 70% isopropyl alcohol into a clean cup and dip the washed wand into it for about 30 seconds. Swish it around so the liquid reaches all sides of the brush. You do not need a long soak. In fact, prolonged exposure may not do the materials any favors, especially if the wand is older or cheaply made.
Lift it out, then shake off the excess over the sink. Alcohol evaporates quickly, which is one reason it is commonly used for tools like this.
Step 7: Air Dry Completely
Now leave it alone.
Set the wand flat on a clean paper towel or microfiber cloth and let it air dry fully. A few hours is often enough, but overnight is safer if the bristles are dense or the room is humid. What you want to avoid is putting a damp wand into a drawer, bag, or makeup container where moisture can linger.
That last bit is easy to overlook. It also matters. A wand that is technically clean but stored wet may not stay that way for long.
Following these steps on how to clean a mascara wand will not only keep your lashes healthy and free from potential infections, but also extend the life of your mascara.
Styling Tips
Once the wand is clean and dry, you can reuse it in a few practical ways. The most obvious is as a brow spoolie. A light mist of hairspray on the brush can help tame unruly brow hairs, though use a very small amount and keep it away from the eyes. It can also help separate lashes after mascara application if you are dealing with clumps.
Some people use clean mascara wands to exfoliate the lips gently after applying balm. That can work, provided the brush is thoroughly cleaned and still in good shape. If the bristles feel sharp, bent, or scratchy, skip it. Not every old wand deserves a second career.
Common Mistakes to Avoid
The biggest mistake is using water that is too hot. Very hot water may warp plastic parts or soften synthetic bristles more than you intended. Another common problem is overhandling the brush with a towel. If you tug at the bristles aggressively, you might loosen them or distort the shape.
Then there is the drying issue. People rush this step all the time. A damp tool tucked into a makeup bag can pick up odor, residue, or, in some cases, microbial growth. It is also best to avoid household cleaners that were never meant for cosmetic tools. Even trace residue could irritate the skin around the eyes.
Do You Need to Hire a Professional Makeup Artist?
For cleaning a mascara wand, no. For a wedding, major photo shoot, or another high-stakes event, maybe.
Most people can manage their daily tasks just fine with a little care and consistency. Learning to clean and reuse basic items is practical, inexpensive, and usually enough for everyday makeup. A professional artist comes into the picture for different reasons: long-wear application, photography, event timing, skin prep, and the kind of precision that matters when every detail will be closely seen.
So this is less an either-or question than a matter of context. For ordinary use, doing it yourself is completely reasonable. For once-in-a-lifetime events, paying for skill and sanitation standards may be worthwhile.
Frequently Asked Questions
Q1: How Often Should I Clean My Mascara Wand?
If you are reusing the wand as a brow brush or lash comb, cleaning it about once every two weeks is a sensible baseline. If you use it daily or if it picks up product often, you may want to wash it more frequently. Residue builds slowly, then all at once.
Q2: Can I Clean the Wand While Still Using the Mascara Tube?
Usually, that is not a great idea. If you wash the wand and then place it back into the original mascara tube while any moisture or soap remains, you could affect the formula or introduce contamination. In most cases, it makes more sense to clean the wand only after the tube is finished and you plan to repurpose the brush.
Q3: Why Is My Mascara Wand Still Clumpy After Washing?
The most likely explanation is leftover waterproof product. Those formulas tend to resist plain soap and water, which is, from a wear standpoint, exactly what they are designed to do. Try micellar water or an oil-based remover and give it a little more time to break down the residue. If the clumps still remain, the brush itself may simply be too worn out to clean fully.
Enhance Your Beauty Routine with Clean Tools
A clean mascara wand will not transform your life, obviously. It can, however, make your routine a little easier and a little more hygienic, which is not nothing. Small maintenance habits like this tend to pay off quietly: fewer clumps, better brow grooming, less chance of dragging old residue back onto the eye area.
If you have a few minutes this weekend, clean the brushes you keep meaning to deal with. Start with the mascara wand. It is a small job, but one that makes sense. Thanks for reading this guide on how to clean a mascara wand.
About the Author
Jane Hubbard is a passionate beauty expert with a wealth of experience in makeup, hair, and overall beauty techniques. After years of working as a hairdresser specialist, she followed her entrepreneurial spirit and started her own consultancy business.
Jane has always been driven by her desire to help others feel confident in their own skin, and she does this by sharing her knowledge, experiences, and practical beauty tips. Through her consultancy, she empowers individuals to embrace their unique beauty, offering tailored guidance that boosts both self-esteem and personal style.
Professional Focus
Specializes in makeup, hairstyling, and beauty consulting.
Provides personalized beauty advice, tips, and techniques to help individuals feel confident in their appearance.
Dedicated to staying up-to-date with the latest industry trends and developments.
Passionate about creating a comfortable and empowering experience for every client.
Education History
University of Craft and Design – Bachelor of Fine Arts (BFA) in Woodworking and Furniture Design
Woodworking Apprenticeships – Extensive hands-on training with skilled craftsmen to refine carpentry and furniture making techniques
Online Courses & Masterclasses – Continued education in advanced woodworking techniques, design principles, and specialized tools
Expertise:
Makeup artistry, hairstyling, and beauty consulting.
Personalized beauty techniques to enhance confidence and self-expression.
Educating clients on how to maintain their beauty routines at home.