
Are you tired of the hassle of cleaning your acrylic nail brushes after use? Look no further! Here are some simple steps on how to clean acrylic nail brushes after use, ensuring that they last longer and maintain their shape for all your future manicures.
Proper cleaning after each use is essential when it comes to maintaining the longevity and effectiveness of your acrylic nail brushes. Residual acrylic can harden, damaging the bristles and compromising the precision of your work. In this guide, we’ll walk you through a step-by-step process to thoroughly clean your brushes, ensuring they remain pristine for future nail art projects.
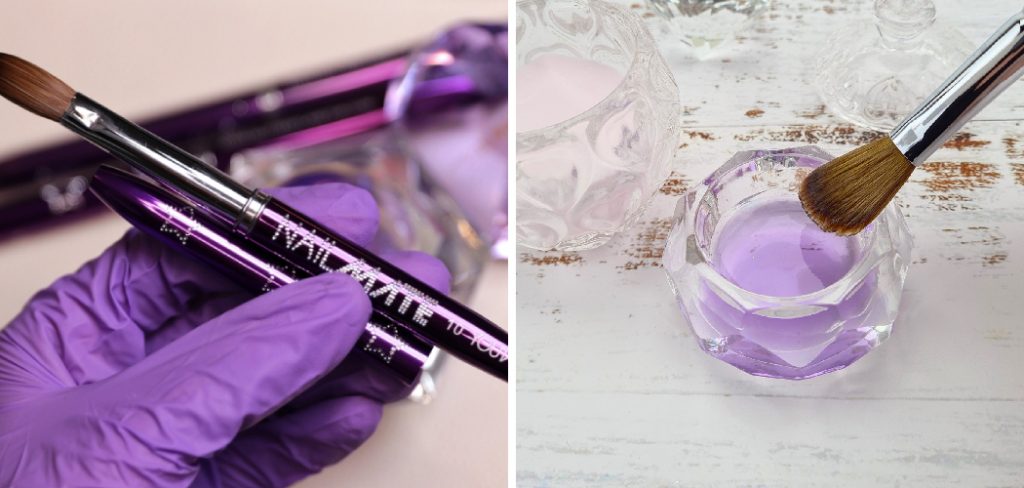
Whether you’re a professional nail technician or a home enthusiast, following these cleaning techniques will help you protect your investment and produce flawless results every time.
What Will You Need?
Before we dive into the cleaning process, let’s gather all the necessary tools and materials to clean your acrylic nail brushes effectively:
- A small bowl or container
- Warm water
- Acetone or brush cleaner solution
- Paper towels or lint-free cloth
- A fine-tooth comb (optional)
Once you have all these items ready, let’s dive into the cleaning process!
10 Easy Steps on How to Clean Acrylic Nail Brushes After Use
Step 1: Remove Excess Acrylic
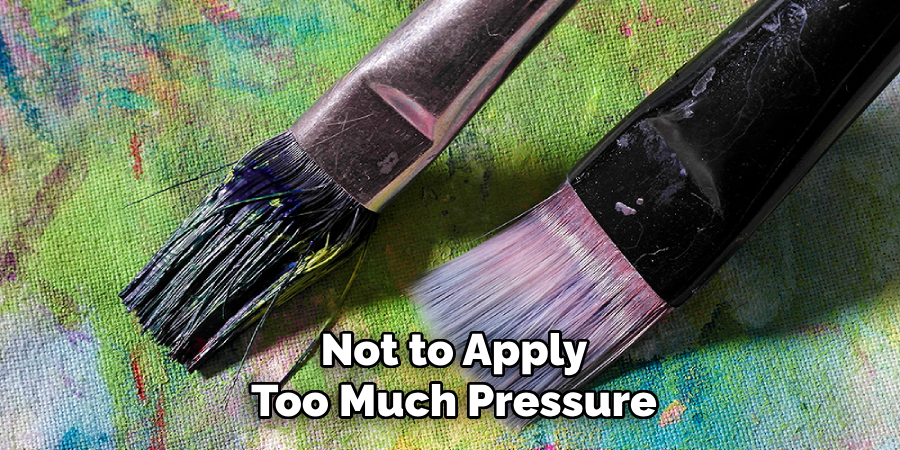
Begin by gently wiping your brush on a paper towel or lint-free cloth to remove any excess acrylic. It’s important to do this immediately after your nail session before the acrylic can harden. Be careful not to apply too much pressure, which could damage the bristles.
Step 2: Rinse the Brush
Fill your small bowl or container with warm water. Swirl the brush in the water to loosen any remaining acrylic. You may gently press the brush against the edge of the bowl to help dislodge any stubborn residue. Ensure that the brush hair is fully submerged to facilitate thorough cleaning.
Step 3: Dip in Acetone or Brush Cleaner
After rinsing in warm water, the next step is to clean the brush with acetone or a dedicated brush cleaner solution. Pour a small amount of your chosen solvent into a clean bowl. Gently dip the brush into the solution, ensuring that the bristles are fully submerged. Swirl the brush around in the solution for a few seconds to dissolve any remaining acrylic particles.
Step 4: Gently Wipe the Brush
Remove the brush from the acetone or brush cleaner and gently wipe it on a clean paper towel or lint-free cloth. This step helps to remove the dissolved acrylic residues from the bristles. Be sure to use a gentle motion to avoid damaging the bristles or altering their shape.
Step 5: Repeat If Necessary
If you notice that there is still some acrylic residue on the brush, repeat steps 3 and 4. It is essential to remove all acrylic particles to prevent the bristles from becoming stiff or clumped. Persistence in this step will result in a cleaner brush and better performance during your next nail art session.
Step 6: Rinse and Dry
Once the acrylic residue has been thoroughly removed from the brush, it’s time to give it a final rinse. Fill a new bowl or container with clean, warm water. Swirl the brush in the water to cleanse it of any remaining acetone or brush cleaner solution. This step is crucial as it ensures that no chemical residues are left on the brush, which could potentially damage the bristles over time or interfere with future nail applications.
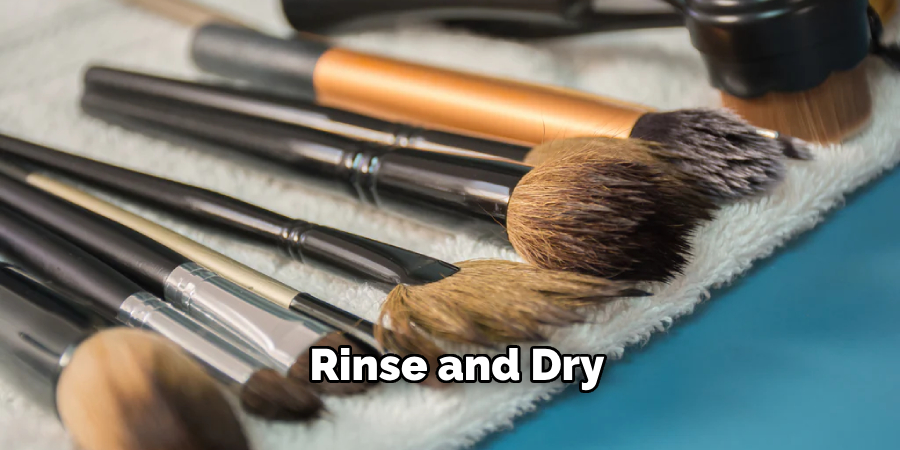
After rinsing, gently shake off excess water and then lay the brush flat on a clean paper towel or lint-free cloth. Avoid standing the brush upright while drying, as this can deform the bristles and weaken the glue holding them in place. It’s best to let the brush dry naturally in a well-ventilated area. If you’re in a hurry, you may use a fine-tooth comb to reshape the bristles and speed up the drying process gently. Ensure the brush is arid before storing it to prevent mold growth and maintain its optimal condition.
Step 7: Reshape the Bristles
As your brush begins to dry, take a moment to reshape the bristles if they’ve become splayed or misshapen during cleaning. Use your fingers or a fine-tooth comb if necessary to gently coax the bristles back into their original form. This step is essential for maintaining the precision and effectiveness of the brush, ensuring your next manicure or nail art project goes smoothly. Proper bristle care will prolong the life of your brush and guarantee professional-quality results every time you use it.
Step 8: Check for Residual Acrylic
Once your brush is arid, it’s good practice to inspect it to ensure no acrylic residue remains. Run your fingers through the bristles to feel for any stiffness or clumping that could indicate hidden residue. If you discover any hardened acrylic, re-clean the brush using the previous steps to guarantee it is entirely contaminant-free. This additional check can save you trouble in the long run, ensuring your brush remains in peak condition.
Step 9: Store Properly
Proper storage of your acrylic nail brush is the final step in the cleaning process. Choose a storage solution that will protect the brush and maintain the bristles’ shape. Store the brush flat or in a protective case. Avoid placing the brush in an area where it might get crushed or bent, as this could ruin the bristles’ integrity. Investing a little time in proper storage will protect your tool and extend its usability.
Step 10: Regular Maintenance
Maintaining the cleanliness of your acrylic nail brushes does not end with a single cleaning session. Incorporate a regular maintenance routine into your nail care regimen. Clean your brushes after each use and periodically check them for signs of wear and tear. If the bristles show signs of damage beyond cleaning and reshaping, it may be time to invest in a new brush. Regular maintenance ensures the longevity and performance of your brushes, allowing you to produce beautiful nail art consistently.
By following these steps diligently, you can ensure that your acrylic nail brushes remain in excellent condition, leading to flawless manicures and nail art every time. Proper care and maintenance protect your investment and enhance your overall nail art experience.

5 Additional Tips and Tricks
- Use a Brush Cleaner: Investing in a high-quality brush cleaner specifically designed for acrylic nails can make a significant difference. These cleaners typically contain ingredients that dissolve acrylic residue without damaging the bristles.
- Avoid Over-Soaking: Prolonged soaking can degrade the bristle quality and loosen the adhesive holding them in place. Limit soaking time to only a few minutes to ensure the effective removal of product buildup without harming the brush.
- Use a Lint-Free Cloth: Dry your brush using a lint-free cloth to avoid leaving fibers that could interfere with your next application. Gently press the fabric against the bristles to absorb excess moisture.
- Store Properly: Ensure your brushes are stored correctly after fully drying. Place the bristles up in a brush holder to prevent any deformation and protect them from dust and other contaminants.
- Check for Damage: Regularly inspect your brushes for any signs of damage, such as bent or frayed bristles. If you notice any, it may be time to replace the brush to ensure optimal performance.
By following these additional tips and tricks, you can prolong the life of your acrylic nail brushes and maintain their quality for future use.
5 Things You Should Avoid
- Using Acetone: Acetone is extremely harsh and can cause the bristles to dry out, become brittle, and eventually break. Always opt for a brush cleaner that is specifically designed for acrylic nails.
- Excessive Force: Scrubbing or applying too much pressure while cleaning can deform the bristles and reduce the longevity of your brush. Instead, gently work the cleaner through the bristles to remove product buildup.
- Soaking Overnight: Leaving your brushes soaking overnight can lead to bristle damage and loosen the adhesive that holds the bristles in place. Limit soaking time to just a few minutes.
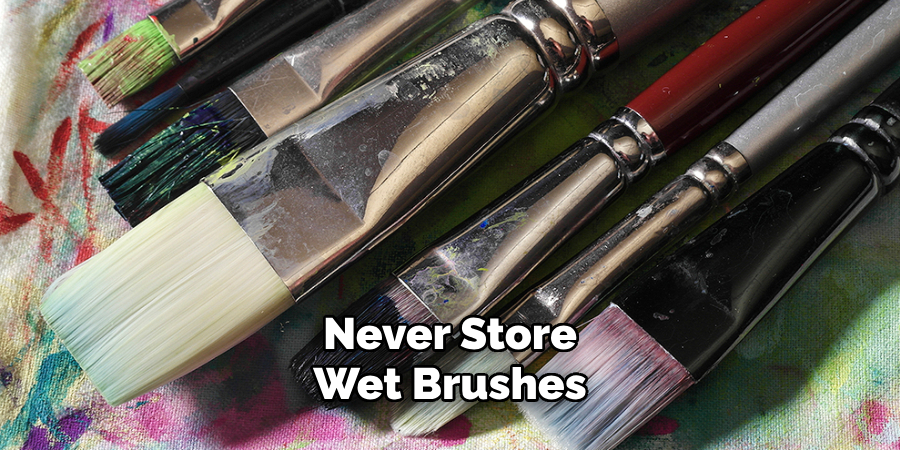
- Storing Wet Brushes: Never store your brushes while they are still wet, as this can cause mold growth and bristle damage. Always ensure they are dehydrated before putting them away.
- Using Paper Towels: Drying your brushes with paper towels can leave behind fibers that interfere with future applications. Always use a lint-free cloth to absorb excess moisture from the bristles.
Avoiding these common mistakes can help you maintain the quality and extend the life of your acrylic nail brushes.
Conclusion
How to clean acrylic nail brushes after use is crucial for maintaining their effectiveness and longevity.
Following a consistent cleaning routine that includes a specialized brush cleaner, you can effectively remove acrylic residue without damaging the bristles. Remember to avoid over-soaking, apply gentle cleaning techniques, and ensure thorough drying with a lint-free cloth before storage.
By avoiding common pitfalls like using acetone, exerting excessive force, and storing brushes while wet, you can prevent damage and ensure your brushes remain in optimal condition. Maintaining these practices will help you achieve precise and flawless nail applications every time.
About the Author
Jane Hubbard is a passionate beauty expert with a wealth of experience in makeup, hair, and overall beauty techniques. After years of working as a hairdresser specialist, she followed her entrepreneurial spirit and started her own consultancy business.
Jane has always been driven by her desire to help others feel confident in their own skin, and she does this by sharing her knowledge, experiences, and practical beauty tips. Through her consultancy, she empowers individuals to embrace their unique beauty, offering tailored guidance that boosts both self-esteem and personal style.
Professional Focus
Specializes in makeup, hairstyling, and beauty consulting.
Provides personalized beauty advice, tips, and techniques to help individuals feel confident in their appearance.
Dedicated to staying up-to-date with the latest industry trends and developments.
Passionate about creating a comfortable and empowering experience for every client.
Education History
University of Craft and Design – Bachelor of Fine Arts (BFA) in Woodworking and Furniture Design
Woodworking Apprenticeships – Extensive hands-on training with skilled craftsmen to refine carpentry and furniture making techniques
Online Courses & Masterclasses – Continued education in advanced woodworking techniques, design principles, and specialized tools
Expertise:
Makeup artistry, hairstyling, and beauty consulting.
Personalized beauty techniques to enhance confidence and self-expression.
Educating clients on how to maintain their beauty routines at home.