
Are you looking for a way to enhance your best features without going overboard? Contouring can be an excellent way to do so, but it’s important to consider the unique needs of fair skin. From selecting the right products and tools for contour application to blending colors flawlessly, mastering contour techniques tailored for fair skin can take some practice. Fortunately, we have easy-to-follow step by step instructions on how to contour fair skin that will help you achieve beautiful results every time!
Fair skin can be more prone to sunburns and sensitivity, so it’s important to use products that won’t irritate your skin. Opt for matte shades instead of shimmery ones when selecting a contouring product.
Read on as we share tips and tricks from makeup artists on perfecting your facial structure in no time, like a pro!
What Will You Need?
Before contouring, gather all the necessary tools and products on your vanity table. Here’s what you’ll need to achieve a perfectly chiseled look for fair skin:
- Contour powder or cream: Choose a matte shade one or two shades darker than your natural skin tone.
- Highlighter: Opt for a shimmery highlighter to add dimension and glow to your face.
- Blush: A light shade of blush will bring a natural flush to your cheeks and balance the contour.
- Contour brush: Use a small, angled brush for precise application.
- Blending sponge or brush: This will help blend the contour seamlessly into your skin.
Once you have all the necessary tools, it’s time to start contouring your fair skin!
10 Easy Steps on How to Contour Fair Skin
Step 1: Prep Your Skin
Before you start applying any makeup, make sure to prep your skin. Start by cleansing and moisturizing your face to create a smooth and hydrated base for makeup application. Follow up with a primer specifically formulated for sensitive and fair skin to help your makeup last longer.

Step 2: Choose the Right Contour Shade
Choosing the right contour shade is crucial for fair skin. As a general rule of thumb, opt for shades one or two tones darker than your natural skin tone. Avoid going too dark; it can look unnatural and harsh on fair skin.
Step 3: Apply Your Foundation
Apply your regular foundation after prepping your skin and choosing the right contour shade. Make sure it matches your skin tone perfectly. This will act as a canvas for your contouring makeup. Blend it evenly using a sponge or brush to create a flawless base. Remember, it’s best to avoid heavy coverage when it comes to fair skin. Stick to lightweight, hydrating products that enhance your natural complexion rather than masking it.
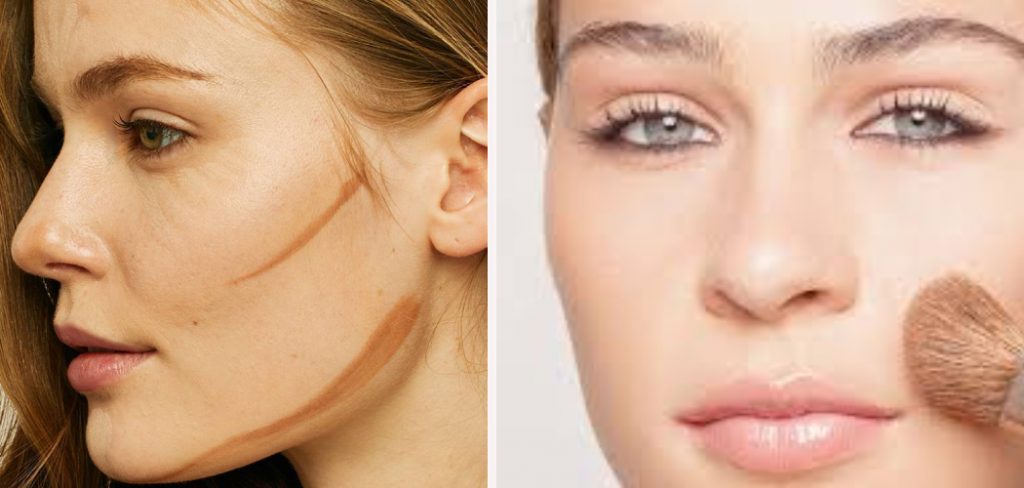
Step 4: Start Contouring
Begin by sucking in your cheeks to find the hollows. This is where you will apply the contouring product. Use your contour brush to lightly draw a line from the middle of your ear toward the corner of your mouth. Remember to stop about an inch from the corner of your mouth. This line is known as the contour line and should mimic your cheekbone’s natural shadow. For people with fair skin, applying the contouring product lightly is important. You can always build up the color if needed, but removing excess product can be more difficult.
Step 5: Blend, Blend, Blend
Blending is crucial in achieving a natural-looking contour, especially for fair skin. You don’t want any harsh lines or obvious color differences. Use your blending sponge or brush to blend the contour line upward towards your cheekbones softly. Do this with gentle, circular motions, ensuring the product is seamlessly incorporated into your skin. If the color appears too dark or noticeable, use a lightweight concealer or some of your foundation to tone it down. The key to a successful contour for fair skin is subtlety.
Step 6: Apply Highlighter
The next step is to apply highlighter. Highlighting is essential in contouring as it brings forward and emphasizes certain areas of the face. Choose a shimmery highlighter with a champagne or pearl tone for fair skin. Avoid anything too gold or bronze, as it might look unnatural. Apply the highlighter on the high points of your face: the top of your cheekbones, the bridge of your nose, the cupid’s bow, and the brow bone. This will give your face a radiant glow and enhance the contouring effect.
Step 7: Apply Blush
After you’ve contoured and highlighted, it’s time to apply blush. This will add some color to your face, creating a natural, healthy flush perfect for fair skin tones. Choose a light shade of blush that complements your skin tone – peach, light pink, or a neutral shade works best. Use a fluffy brush and apply the blush on the apples of your cheeks in circular motions.

Step 8: Set Your Makeup
To ensure your contouring stays in place all day, setting your makeup is essential. For fair skin, use a translucent setting powder. This doesn’t add any extra color or weight to your makeup but will help to set the contour, highlighter, and blush. Lightly dust the powder over your face with a large, fluffy brush. Pay extra attention to your T-Zone, under-eye area, and other places where your makeup tends to wear off quickly. This will help your contoured look last longer and stay flawlessly in place.
Step 9: Add Finishing Touches
Once your makeup is set, add the finishing touches to your look. This could include filling in your eyebrows to frame your face, applying eyeshadow that complements your skin tone, or adding a mascara swipe to open your eyes. For lips, go with a color that complements your blush. A nude or light pink shade works well for fair skin. Remember, the focus is on your beautifully contoured features, so keep the rest of your makeup subtle and balanced.
Step 10: Check Your Makeup in Different Lighting
The final step is to check your makeup in different lighting to ensure it looks good in all scenarios. Start by checking your makeup in your vanity mirror, move to an area with natural light, and finally, check it in indoor lighting. This will help you spot areas that might need more blending or harsh lines that you may not have noticed earlier. Also, it will ensure that your contouring looks natural and flattering on your fair skin in all lights. Remember, the key to successful contouring is subtlety and blending. With these steps, you can achieve a beautifully contoured look that enhances your fair skin and defines your features.
By following these easy steps on contouring fair skin, you can create a natural and flawless look that complements your complexion. Remember to prep your skin, choose the right shades, blend carefully, and add finishing touches for a perfect contoured look.
5 Additional Tips and Tricks
- Choose the Right Shade: For fair skin, selecting a contour color that’s only one or two shades darker than your skin tone is crucial. Anything darker can look too harsh or artificial.
- Use a Light Hand: When contouring fair skin, less is more. Start with a small quantity of product and build up as necessary to avoid a heavy or overdone look.
- Blend Well: Blend your contour thoroughly to create a natural gradient between your highlight and contour shades. This can prevent any harsh lines or stark contrasts.
- Embrace Cool Tones: Fair skin often has cool undertones. Opt for contouring products with a cool or neutral undertone to mimic natural shadows and avoid a muddy or orange appearance.
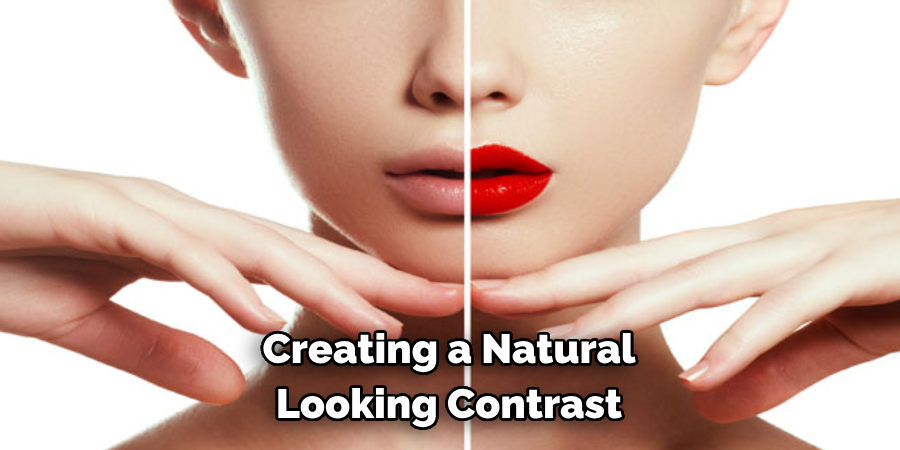
- Don’t Neglect Highlighter: A well-placed highlight can enhance your contour by creating a natural-looking contrast. Choose a highlighter in a shade that complements your fair skin, typically with a pearl or champagne tone.
With these additional tips and tricks, you can master contouring fair skin. Remember to choose the right shade, use a light hand, blend well, embrace cool tones, and don’t neglect highlighter.
5 Things You Should Avoid
- Avoid Too Dark Shades: As mentioned earlier, choosing a contour color that’s only one or two shades darker than your skin tone is crucial. Anything darker can leave you looking unnatural and overdone.
- Avoid Over-Application: Applying more products for a dramatic effect can be tempting, but this often results in an unnatural and heavy look. Remember, less is more when it comes to contouring fair skin.
- Avoid Poor Blending: Failing to blend your contour properly can lead to harsh lines and stark contrasts, which are not flattering. Make sure to blend well to achieve a natural gradient.
- Avoid Warm Tones: It’s important to avoid contouring products with warm undertones as they can give fair skin a muddy or orange appearance. Stick to cool or neutral undertones to mimic natural shadows.
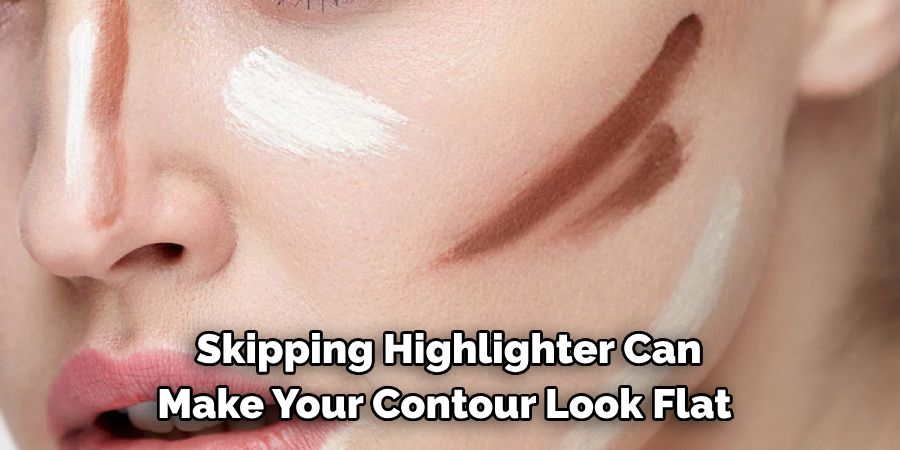
- Avoid Skipping Highlighter: Skipping highlighter can make your contour look flat and dull. A well-placed highlight can enhance your contour by creating a natural-looking contrast. Pay attention to this important step in your contouring routine.
Avoiding these mistakes will help you achieve a natural and flawless contour for your fair skin. Remember to avoid too dark shades, over-application, poor blending, warm tones, and skipping highlighter.
Conclusion
To create an effective contour on fair skin, the key is to use light and medium colors in strategic positions with blending. Remember always to use quality makeup products for the best results. Put your new knowledge into practice and give yourself extra time to blend until you have the perfect contour.
Don’t forget that every face embraces its beauty uniquely, so let your creativity show! Be confident and keep experimenting to find what works best for you. When you are finally finished, sparkle not only because of your natural glow – but also how well contouring has complemented it.
Hopefully, the article on how to contour fair skin has provided you with valuable tips and tricks to enhance your features. Go ahead and make heads turn with your stunning look!
About the Author
Jane Hubbard is a passionate beauty expert with a wealth of experience in makeup, hair, and overall beauty techniques. After years of working as a hairdresser specialist, she followed her entrepreneurial spirit and started her own consultancy business.
Jane has always been driven by her desire to help others feel confident in their own skin, and she does this by sharing her knowledge, experiences, and practical beauty tips. Through her consultancy, she empowers individuals to embrace their unique beauty, offering tailored guidance that boosts both self-esteem and personal style.
Professional Focus
Specializes in makeup, hairstyling, and beauty consulting.
Provides personalized beauty advice, tips, and techniques to help individuals feel confident in their appearance.
Dedicated to staying up-to-date with the latest industry trends and developments.
Passionate about creating a comfortable and empowering experience for every client.
Education History
University of Craft and Design – Bachelor of Fine Arts (BFA) in Woodworking and Furniture Design
Woodworking Apprenticeships – Extensive hands-on training with skilled craftsmen to refine carpentry and furniture making techniques
Online Courses & Masterclasses – Continued education in advanced woodworking techniques, design principles, and specialized tools
Expertise:
Makeup artistry, hairstyling, and beauty consulting.
Personalized beauty techniques to enhance confidence and self-expression.
Educating clients on how to maintain their beauty routines at home.