
Are you looking for a new hairstyle that will give you a fresh and playful look? Cutting your curly hair into bangs might just be the answer!

Cutting curly hair bangs can feel intimidating, but with the right approach, it’s a manageable and rewarding task. Hair crunchy diy requires special care and attention to maintain its shape, volume, and bounce, making proper technique essential when trimming bangs. Whether you’re looking to freshen up your style or try something completely new, learning how to cut bangs for curly hair can help you achieve a flattering and unique look while maintaining the integrity of your curls.
This guide how to cut curly hair bangs will walk you through the essential steps and tips to ensure a beautiful and even result.
What Are the Benefits of Cutting Bangs for Curly Hair?
Cutting bangs for curly hair can provide a variety of benefits, both practical and aesthetic. Here are some of the top reasons to consider adding bangs to your curly hair:
- Adds Dimension: Bangs can add depth and dimension to your overall hairstyle, especially if you have long or heavy curls. The contrast between your bangs and the rest of your curls can create a visually interesting look.
- Frames the Face: Bangs can help frame your face and draw attention to your features, such as your eyes or cheekbones.
- Hides Forehead Imperfections: If you have a larger forehead or any blemishes on your forehead, bangs can help cover them up and give you a more polished look.
- Versatile Styling: Depending on the length of your bangs, they can be styled in various ways to change up your look. You can wear them straight across or swept to the side for a softer look.
- Works with Different Curly Hair Types: Whether you have loose waves or tight coils, bangs can work with any type of curly hair. Just make sure to consult with a stylist who has experience cutting curly hair to ensure the best results.
What Will You Need?
To rock curly bangs, you will need a few key items to maintain and style them properly:
- A good quality shampoo and conditioner specifically designed for curly hair. This will help keep your curls hydrated and defined.
- A diffuser attachment for your hair dryer. This helps to evenly distribute heat and reduce frizz when drying your bangs.
- A styling product, such as mousse or curl cream, to enhance and define your curls.
- Bobby pins or clips to hold back any unwanted pieces of hair while styling.
- A wide-tooth comb or pick for detangling wet hair.
- Satin or silk pillowcases to prevent frizz and breakage while sleeping.
10 Easy Steps on How to Cut Curly Hair Bangs
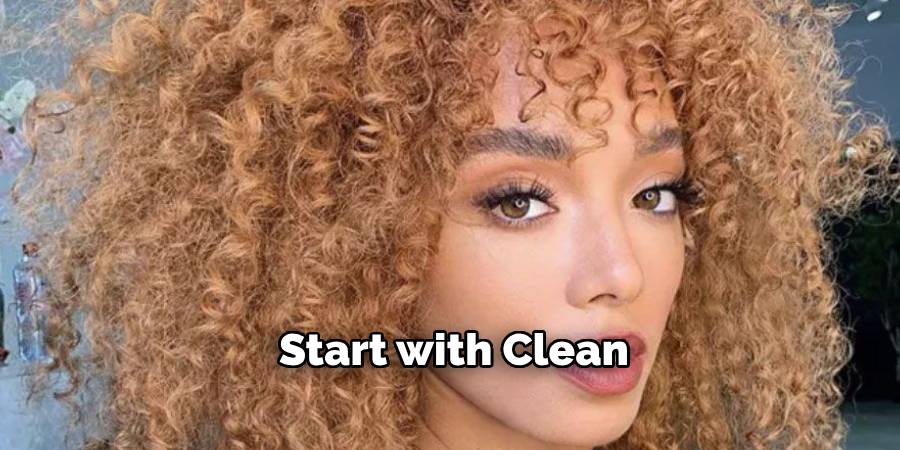
Step 1. Start with Clean, Dry Hair
When preparing to cut curly hair bangs, it’s essential to start with clean, dry hair to ensure the most accurate results. Washing your hair beforehand allows your natural curl pattern to form clearly, making it easier to see how your curls lie when they are dry. Avoid cutting wet hair, as curls shrink significantly when dry, and this can result in bangs that end up shorter than intended. Gently wash and condition your hair with curl-friendly products, and allow it to air dry completely or use a diffuser attachment with your hair dryer. Once your hair is dry and your curls are defined, carefully separate the section you plan to cut to ensure an even and precise outcome.
Step 2. Section Your Hair
To ensure accurate and manageable trimming, divide your hair into small, even sections. Use clips or hair ties to secure the rest of your hair away from the section you are working on. This will help prevent accidentally cutting unintended areas and allow you to focus on one section at a time. Sectioning your hair also ensures that you can target specific curls and work methodically for the most consistent results. Start at the front or back, depending on your preference, and work your way through each section slowly and carefully.
Step 3. Determine the Length
Deciding the length of your hair is an essential step that requires careful thought and precision. Start by visualizing the desired look you want to achieve and consider your hair’s natural curl pattern or texture. Use your fingers or a comb to gently stretch out a small section of hair to estimate its length when straight versus curly. Keep in mind that curly hair shrinks once dry, so account for this when determining the final length. It’s always better to cut off a small amount at first—remember, you can always trim more if needed, but you can’t undo a cut that’s too short. Take note of how each section aligns with your chosen style as you proceed.
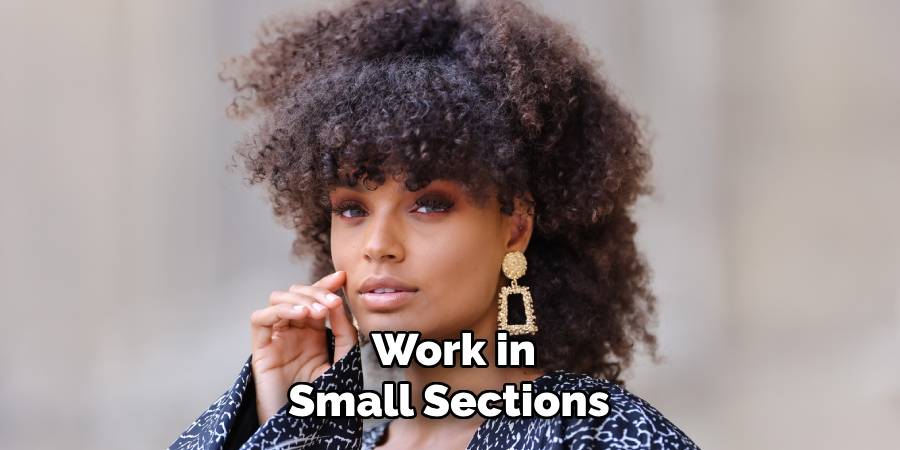
Step 4. Work in Small Sections
Working in small sections is essential for achieving precision and balance in your haircut. Divide your hair into manageable sections using clips or hair ties to keep the rest of the hair out of the way while you work. By focusing on one small section at a time, you ensure that your cuts are even and your style is symmetrical. This method also allows you to make careful adjustments as needed, reducing the likelihood of cutting too much at once. Patience and attention to detail are key—take your time with each section and check your progress frequently to maintain consistency throughout the process.
Step 5. Cut Curl by Curl
When trimming curly hair, it’s important to work with the natural curl pattern. Begin by isolating a single curl and holding it at its natural fall. Gently stretch it downward to gauge its length, but avoid over-stretching, as this can lead to uneven results when the hair bounces back. Use sharp, high-quality scissors to make a clean cut, and start with small snips to maintain control. Trim each curl individually, ensuring it aligns with the shape and length you desire for the overall style.
Step 6. Start Long and Trim Gradually
When trimming curly hair, it’s always better to start longer than you think you’ll need. Curls tend to shrink significantly as they dry, so cutting off too much initially can result in shorter-than-intended lengths. Start by trimming small sections gradually, checking how the curls settle as you go. This method allows you to make adjustments and fine-tune the overall shape of your style without risking a drastic change.
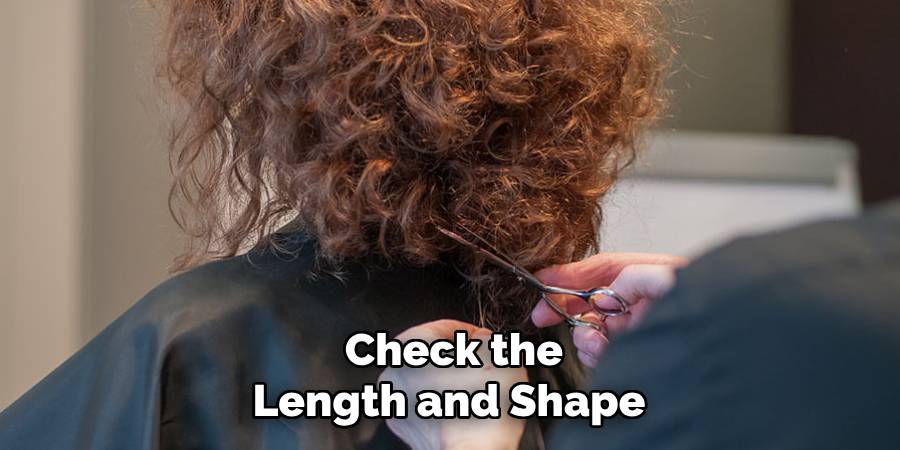
Step 7. Check the Length and Shape
Once you’ve finished trimming, take a step back and assess the overall length and shape of the hair. Use a mirror to check all angles, ensuring that the curls are even and balanced. Look for any uneven sections or areas that need minor adjustments. It’s important to consider how the hair will look when styled naturally, as curly hair can appear different when wet versus dry. If necessary, make small, precise trims to refine the shape and maintain a cohesive look. Remember, achieving the perfect shape for curly hair takes patience and attention to detail.
Step 8. Blend the Edges
Blending the edges is a crucial step to ensure the haircut looks seamless and natural. Use thinning shears or point-cutting techniques to soften any harsh lines and create a smooth transition between layers. Work methodically around the head, focusing on areas where the curls naturally fall. Pay close attention to the perimeter of the haircut, as well as the ends of each section, to avoid a boxy or uneven appearance. Continually check your progress by gently shaking out the curls and observing how they settle.
Step 9. Style Your Bangs
Begin by sectioning off your bangs from the rest of your hair to ensure a focused and precise styling process. Use a styling tool, like a round brush or a diffuser, depending on the desired outcome. For a sleek look, blow-dry your bangs using a round brush, directing the airflow downward and gently curving the ends inward. If you prefer a more natural, tousled effect, use your fingers and a diffuser to define the texture while maintaining a soft flow. Be sure to use a heat protectant to shield your hair from heat damage, and finish with a lightweight styling product like a serum or spray to set your bangs in place without weighing them down.
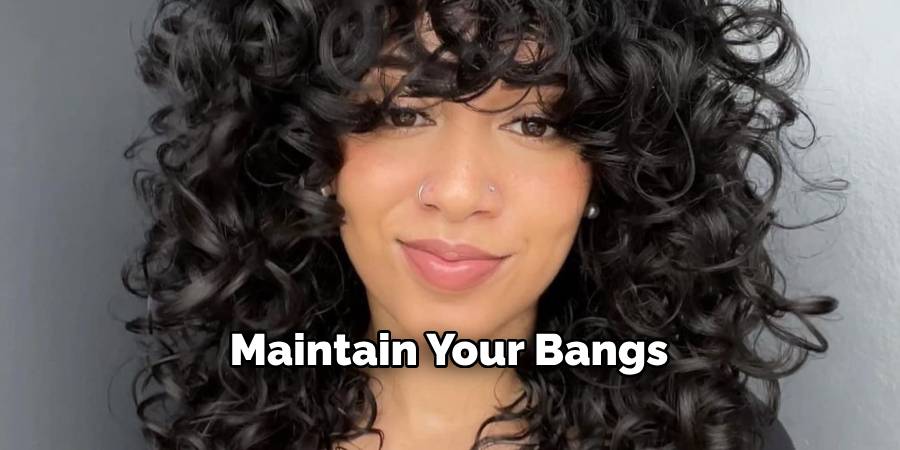
Step 10. Maintain Your Bangs
To keep your bangs looking fresh and stylish, proper maintenance is key. Regular trims are essential to prevent your bangs from becoming too long or losing their shape; aim for a trim every 2-3 weeks, depending on your growth rate. Incorporate a lightweight shampoo and conditioner into your routine to avoid excess buildup while keeping your hair soft and manageable. If your bangs tend to get oily quickly, consider using a dry shampoo to absorb excess oil between washes. Additionally, brushing your bangs daily will help distribute natural oils and keep them looking polished.
By following these tips and incorporating them into your hair care routine, you can successfully maintain your bangs without constantly having to visit the salon.
Conclusion
How to cut curly hair bangs requires patience, precision, and the right techniques to achieve a flattering and manageable look.
Always start with dry curls in their natural state to ensure an accurate cut that complements their shape and pattern. Use sharp, professional scissors and take small sections, cutting gradually to prevent overcutting. Remember to keep the curls’ spring factor in mind, as they will bounce up when dry. If you’re uncertain, it’s always better to seek help from a professional stylist to ensure the best results.
With the right approach, you can create beautiful, well-shaped bangs that enhance your natural curls.
About the Author
Jane Hubbard is a passionate beauty expert with a wealth of experience in makeup, hair, and overall beauty techniques. After years of working as a hairdresser specialist, she followed her entrepreneurial spirit and started her own consultancy business.
Jane has always been driven by her desire to help others feel confident in their own skin, and she does this by sharing her knowledge, experiences, and practical beauty tips. Through her consultancy, she empowers individuals to embrace their unique beauty, offering tailored guidance that boosts both self-esteem and personal style.
Professional Focus
- Specializes in makeup, hairstyling, and beauty consulting.
- Provides personalized beauty advice, tips, and techniques to help individuals feel confident in their appearance.
- Dedicated to staying up-to-date with the latest industry trends and developments.
- Passionate about creating a comfortable and empowering experience for every client.
Education History
- University of Craft and Design – Bachelor of Fine Arts (BFA) in Woodworking and Furniture Design
- Woodworking Apprenticeships – Extensive hands-on training with skilled craftsmen to refine carpentry and furniture making techniques
- Online Courses & Masterclasses – Continued education in advanced woodworking techniques, design principles, and specialized tools
Expertise:
- Makeup artistry, hairstyling, and beauty consulting.
- Personalized beauty techniques to enhance confidence and self-expression.
- Educating clients on how to maintain their beauty routines at home.