
Do you want to switch up your look without committing to a sleek or straight hairdo? Braids provide the perfect solution with their many fun styles and versatile looks. Whether you want your hair all wavy, doll-like curls, silky tendrils, or anything else in between–braid perms can help! In this blog post, we’ll discuss the basics of braid perms which will give you all of the information that you need to get amazing results every time. So read on for more details and our tips and tricks for achieving beautiful waves from braided perm hairstyles!
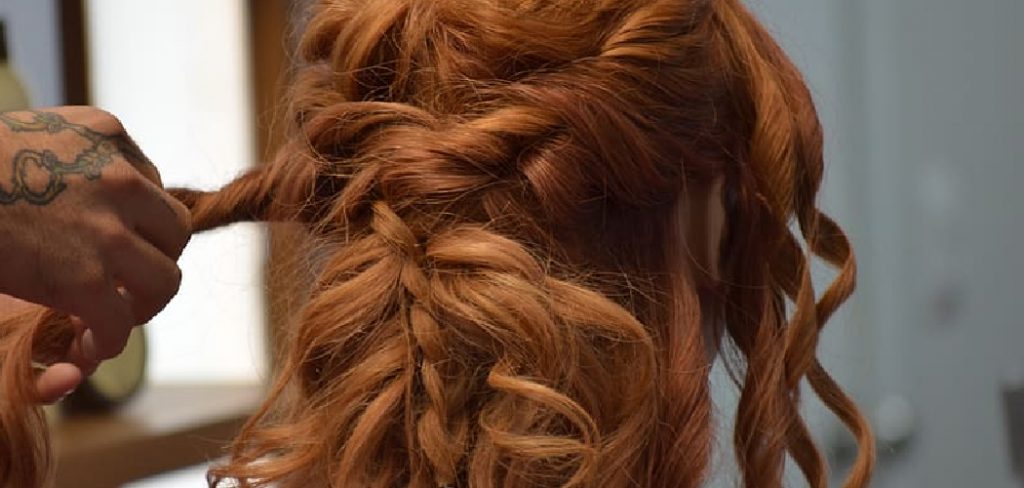
If you’re looking for a way to update your hairstyle without committing to a full-on perm, then consider getting a braid perm! This temporary treatment is ideal for adding texture and definition to all types of hair, whether it’s wavy or straight. By braiding the hair before perming, you can control the amount of wave that will be created in each strand – meaning even more styling options! Getting this look at home isn’t as difficult as it looks; by following our simple step-by-step guide on how to do a braid perm, you can enjoy beautiful waves until it’s time for your next visit to the salon.
Benefits of a Braid Perm
1. Provides Updated Hairstyle
One of the benefits of a braid perm is that it allows you to achieve an updated and modern hairstyle. Instead of traditional perms, which tend to provide the same look every time, a braid perm can give you a unique and customized look that will last for months.
2. Natural-Looking Results
A braid perm also provides natural-looking results as opposed to a traditional perm, which can give your hair an unnatural look and feel. With a braid perm, your hair will retain its natural texture and shape without appearing overly processed or damaged.
3. Quick Process
Another benefit of a braid perm is that it is quicker than a traditional perm. Traditional perms require long-term preparation before they are applied, but with a braid perm, you can achieve similar results in a much shorter amount of time.
4. Easy Maintenance
A braid perm is also easier to care for than traditional perms because it does not require as much maintenance over time. Instead of having to touch up your perm every few weeks, you can simply shampoo and condition your hair as usual without worrying about having to reapply the perm. This makes it a more cost-effective and time-saving hairstyle option.
In conclusion, a braid perm is an excellent way to achieve a modern and updated look while also retaining natural texture and shape. The process is quicker than traditional perms, and it requires less maintenance over time, making it an ideal choice for those looking for an easy and cost-effective hairstyle option. With the right preparation and knowledge, anyone can learn how to do a braid perm. So if you’re ready to try something new, give a braid perm a try! You won’t regret it.
How to Do a Braid Perm in 5 Easy Steps
Step 1: Gather All The Tools You Will Need
The very first step is to make sure you have all the items you need to successfully complete your braid perm. This includes a wide-toothed comb, hair clips, perm rods or foam rollers, setting lotion, neutralizing shampoo and conditioner, gloves, a timer, and scissors.
Step 2: Sectioning The Hair
Take small sections of hair and clip the rest away. Then, braid the sections of hair gently and secure them with a small elastic.
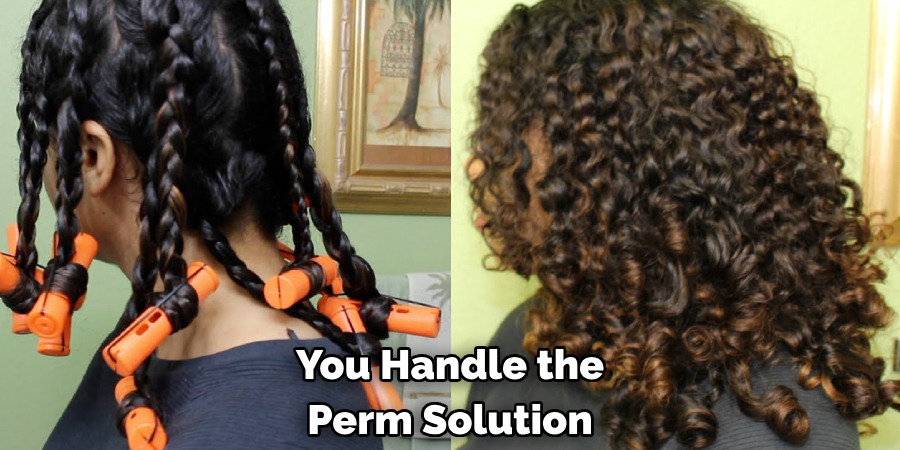
Step 3: Applying The Perm
Put on gloves before you handle the perm solution. Then, apply the solution to each section of braided hair from root to tip. Be sure to follow all the directions for specific timing instructions that come with your perm kit.
Step 4: Neutralizing The Perm
Once the perm solution has been on the hair for the required amount of time, it’s time to neutralize. This is done by rinsing each section with warm water and applying a neutralizing shampoo.
Step 5: Setting The Hair
Lastly, roll the hair into perm rods or foam rollers. Then, spritz with setting lotion and leave in for 30 minutes. When you’re done, take out the rollers and style as usual.
These are the simple steps for how to do a braid perm. Following them correctly will ensure that you get long-lasting results and beautiful curls!
Some Extra Tips to Do a Braid Perm
1. Do Not Leave the Perm in for too Long
The amount of time a perm can stay in your hair is determined by the strength of the chemicals used. Do not leave the perm in for more than what is recommended as this could lead to damage and breakage.
2. Use Quality Products
Always use quality products when doing a braid perm. This will help ensure that your hair looks its best and is well taken care of.
3. Wait Until Your Hair Is Dry Before Applying the Perm
You should always wait until your hair is completely dry before applying the perm. This will help to ensure that the chemicals are applied evenly and your perm lasts longer. Also, make sure to comb your hair before applying the perm to remove any tangles.
4. Use a Heat Protectant Product
Using a heat protectant product when doing a braid perm is important in order to prevent heat damage and help maintain the longevity of your perm. Also, make sure to use a good quality moisturizing product to keep your hair healthy and hydrated.

5. Follow Up with Deep Conditioning Treatments
After you do a braid perm, it is important to follow up with deep conditioning treatments in order to nourish the hair and help maintain its strength. This will also help ensure that your perm looks its best for a longer period of time.
These are just some of the extra tips you should keep in mind when doing a braid perm. Following these steps will help ensure that your hair is looking and feeling its best. With these tips, you can achieve beautiful, healthy, and long-lasting curls! Good luck!
Frequently Asked Questions
What Precautions Should I Take Before Doing a Braid Perm?
Before you start the braid perm, wash your hair with shampoo and conditioner to remove any dirt and oil. You should also use a special heat-protectant spray to prevent damage from the hot air that will be used during the process. Additionally, make sure that your hair is completely dry before starting so that the perm solution will be applied evenly.
How Long Does a Braid Perm Last?
The lifespan of your braid perm depends on how often you shampoo your hair and the type of products you use. Generally, a braid perm can last anywhere from 6 to 8 months if taken care of properly. To extend the life of your perm, avoid using too many styling products and abstain from washing your hair too often.
What Hair Types Are Best Suited for Braid Perms?
Braid perms are best suited for those with thick, wavy hair. This type of perm will add texture and shape to the hair while adding body and volume. If you have fine or thin hair, a braid perm may not be the best choice as it may leave your hair looking frizzy.
Can I Color My Hair After a Braid Perm?
Yes, you can color your hair after a braid perm. However, it is important to wait at least two weeks before doing so. This will give the perm time to settle and allow the chemicals from both processes to interact without damaging your hair. Additionally, it is best to choose a color that will not compete with the texture of the perm.
Do I Need a Professional for a Braid Perm?
The process of doing a braid perm can be quite complex and intricate so it is recommended that you seek out an experienced hairstylist who specializes in perms. They will be able to advise you on which type of perm is best suited for your hair and walk you through the entire process. Additionally, they will be able to provide help and advice should anything go wrong during the process.

Conclusion
Now you know how to do a braid perm! With so many perm styles to choose from, the braid perm is sure to turn heads wherever you go. It’s an easy way to add a touch of elegance to any look. Plus it keeps your hair looking fresh and long-lasting. So, what are you waiting for? Get your hair braided and enjoy your new look!
Whether you’re looking for perfect beach waves or something more formal, you can achieve them with a braid perm done by a professional hairstylist. Remember, even if the style seems complicated at first, take it step by step and you’ll be amazed at the results you can create. Be sure to keep up with regular maintenance appointments as well in order to keep your new ‘do look great for the long haul.
About the Author
Jane Hubbard is a passionate beauty expert with a wealth of experience in makeup, hair, and overall beauty techniques. After years of working as a hairdresser specialist, she followed her entrepreneurial spirit and started her own consultancy business.
Jane has always been driven by her desire to help others feel confident in their own skin, and she does this by sharing her knowledge, experiences, and practical beauty tips. Through her consultancy, she empowers individuals to embrace their unique beauty, offering tailored guidance that boosts both self-esteem and personal style.
Professional Focus
Specializes in makeup, hairstyling, and beauty consulting.
Provides personalized beauty advice, tips, and techniques to help individuals feel confident in their appearance.
Dedicated to staying up-to-date with the latest industry trends and developments.
Passionate about creating a comfortable and empowering experience for every client.
Education History
University of Craft and Design – Bachelor of Fine Arts (BFA) in Woodworking and Furniture Design
Woodworking Apprenticeships – Extensive hands-on training with skilled craftsmen to refine carpentry and furniture making techniques
Online Courses & Masterclasses – Continued education in advanced woodworking techniques, design principles, and specialized tools
Expertise:
Makeup artistry, hairstyling, and beauty consulting.
Personalized beauty techniques to enhance confidence and self-expression.
Educating clients on how to maintain their beauty routines at home.