
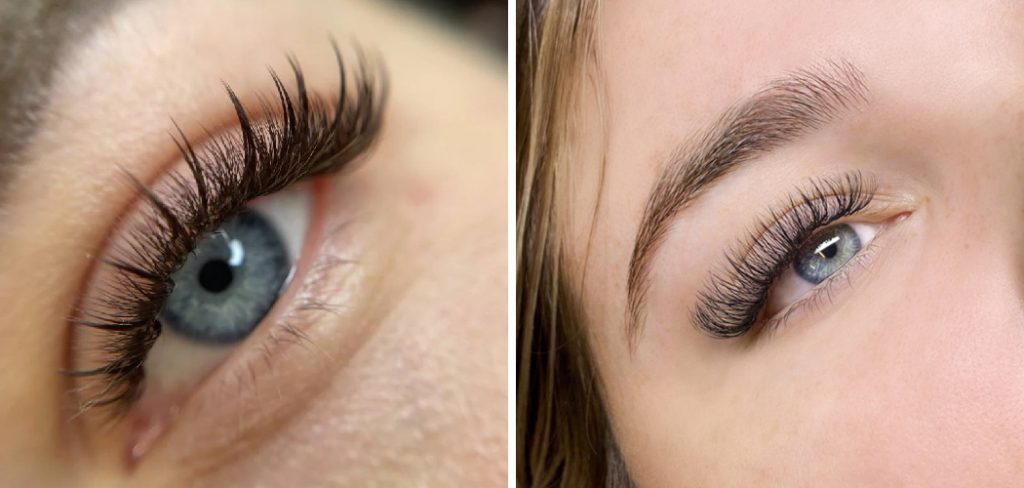
Are you tired of the same old dramatic lash look? Want to try something new and more natural-looking? If so, a wispy lash set may be just what you need. This style adds length and volume to your lashes while still maintaining a soft and fluttery appearance.
How to do a wispy lash set is an art form that combines precision, technique, and creativity. This style of eyelash extensions mimics the naturally varied lengths and layers of wispy, fluttery eyelashes for a soft, realistic look. Unlike traditional lash extensions which aim for uniformity, a wispy set involves mixing different lengths and curls to achieve a feathered, multidimensional effect.
Whether you are a seasoned lash artist or a beginner, mastering the wispy lash set can elevate your skills and provide your clients with a stunning, natural finish.
What Will You Need?
Before we dive into the steps of how to do a wispy lash set, let’s first go through the necessary tools and products you will need:
- Eyelash extensions (varying lengths and curls)
- Lash adhesive/glue
- Tweezers (straight and curved)
- Lash primer or cleanser
- Lint-free applicators or cotton swabs
- Under eye pads or tape to protect the lower lashes
All your supplies must be ready before starting the lash application process. This ensures a smooth and uninterrupted workflow. Make sure to use high-quality products and tools for the best results.
10 Easy Steps on How to Do a Wispy Lash Set:
Step 1: Prep Your Client’s Lashes
Proper preparation is crucial for ensuring the longevity and overall appearance of the lash set. Start by thoroughly cleaning your client’s natural lashes using a lash primer or cleanser. This step will eliminate any oils, makeup residue, or dirt that can interfere with the adhesive’s bond. Use a lint-free applicator or cotton swab soaked in the cleansing solution to gently clean each lash, paying extra attention to the roots where buildup is most common.
Next, place under eye pads or tape beneath your client’s eyes to protect the lower lashes and skin. These pads not only shield the delicate under-eye area from stray adhesive but also make the upper lashes more accessible, streamlining the application process. Ensure that the pads are positioned comfortably and securely, adjusting them as needed to avoid any discomfort for your client.
Step 2: Choose the Right Extensions
Selecting the appropriate lash extensions is key to achieving the desired wispy effect. Begin by preparing a mix of extensions in multiple lengths and curls — typically ranging from 6mm to 15mm — to replicate the naturally varied pattern of wispy lashes. Shorter lengths will provide a base for the look, while longer lengths will create the fluttery, standout wisps.
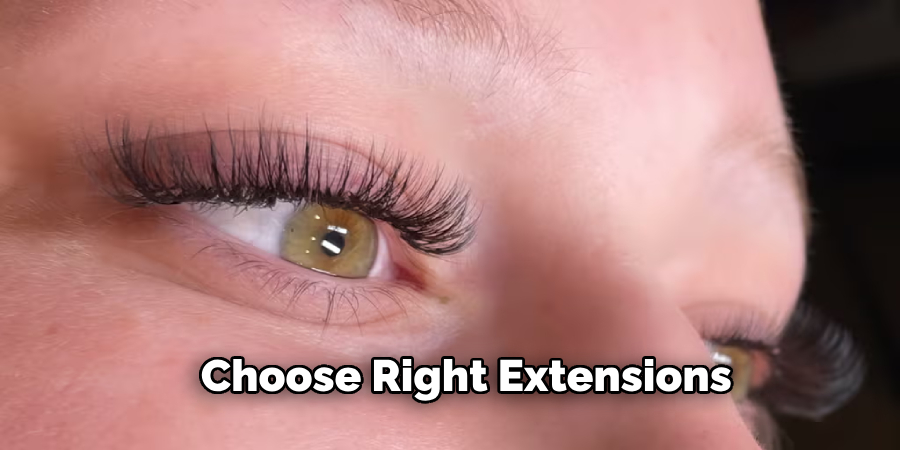
Using a lash mapping guide can be helpful to determine where each length and curl should be placed. Generally, shorter lashes are applied to the inner corners and gradually increase in length towards the middle, with the longest lashes placed towards the outer corners for a cat-eye effect. When correctly mapped, this alternating pattern results in a multidimensional and feathered appearance.
Step 3: Apply the Lash Extensions
Begin the application by carefully isolating a single natural lash with your straight tweezers. Using your curved tweezers, gently pick up a lash extension from the base and dip it into the lash adhesive. Ensure that only a small amount of adhesive is used to avoid clumping. Apply the extension to the isolated natural lash about 1-2mm away from the eyelid, aligning it to ensure proper bond and placement.
Continue this process, alternating between different lengths and curls as pre-determined by your lash mapping guide. Be meticulous in placement to create the desired wispy effect, ensuring no two adjacent lashes are the same length. This diversity in lengths and curls will contribute to the delicate, fluttery appearance characteristic of a wispy lash set. Remember to frequently check for any clumping or misalignment and correct as needed for a flawless finish.
Step 4: Monitor Adhesive Usage
Keeping a close eye on adhesive usage is paramount to achieving a seamless and natural look. Apply only a minimal amount of adhesive to each extension to prevent clumping and ensure a strong, flexible bond. Too much adhesive can weigh down the natural lashes, while too little might compromise the longevity of the extensions. Regularly replenish your adhesive drop to maintain its viscosity and effectiveness throughout the application process.
Step 5: Allow Time for Each Extension to Set
Patience is key when building a wispy lash set. Allow each applied lash extension sufficient time to set and bond with the natural lash before moving on to the next one. Rushing this process can lead to displacement and poor adhesion. Use the waiting time to assess the overall look and make necessary adjustments to ensure the extensions are evenly distributed and maintain the desired wispiness.
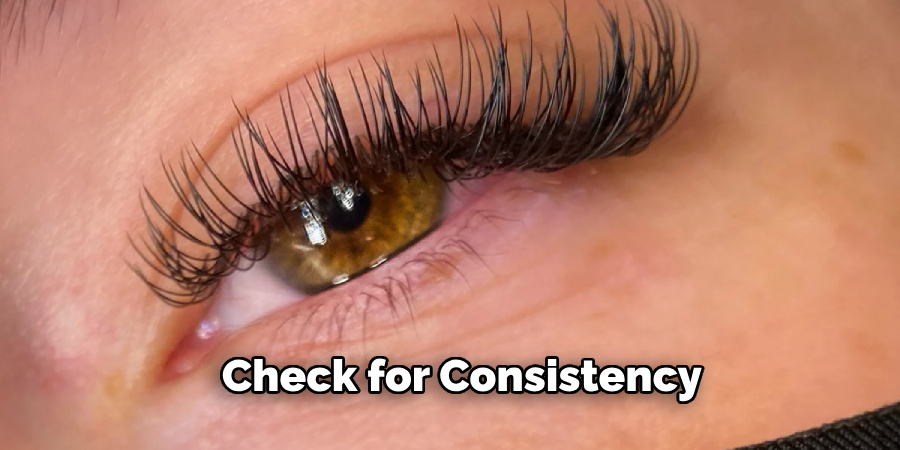
Step 6: Check for Consistency and Symmetry
Once the lash extensions are set, take a moment to review your work for consistency and symmetry. Pay close attention to the evenness of lash placement, ensuring that both eyes mirror each other in terms of length and curl distribution. Adjust any uneven or misaligned extensions to achieve a balanced, cohesive look. This step is crucial for ensuring the natural and polished finish that a wispy lash set is known for.
Step 7: Separate and Align Lashes
Using a fine-tip lash comb or spoolie, gently brush through the lashes to separate any that may have stuck together during the application process. This step helps to align the extensions and natural lashes, enhancing the wispy effect and ensuring a more natural appearance. Comb through the lashes from the base to the tip, being careful not to dislodge any extensions.
Step 8: Final Adjustments
After combing through the lashes, make any final adjustments needed to perfect the look. This may include repositioning a few extensions, adding extra lashes to sparse areas, or removing any extensions that appear out of place. Focus on enhancing the overall balance and distribution, keeping the wispy style in mind.
Step 9: Remove Under under-eye pads or Tape
Once you are satisfied with the lash set, gently remove the under-eye pads or tape from your client’s lower lashes and skin. Be careful to avoid pulling on the skin or lashes. This step should be done cautiously to ensure comfort and ease for your client.
Step 10: Aftercare Advice
Finally, provide your client with aftercare instructions to maintain their wispy lash set. Advise them to avoid water, steam, and oil-based products for the first 24-48 hours to allow the adhesive to fully cure. I recommend regular, gentle brushing with a lash spoolie and instructing them on how to cleanse their lashes without disturbing the extensions. Proper aftercare will help extend the life of the lash set and keep it looking fresh and beautiful.
These steps will guide you in achieving a stunning wispy lash set, offering a natural, fluttery enhancement to your client’s eyes.
5 Additional Tips and Tricks
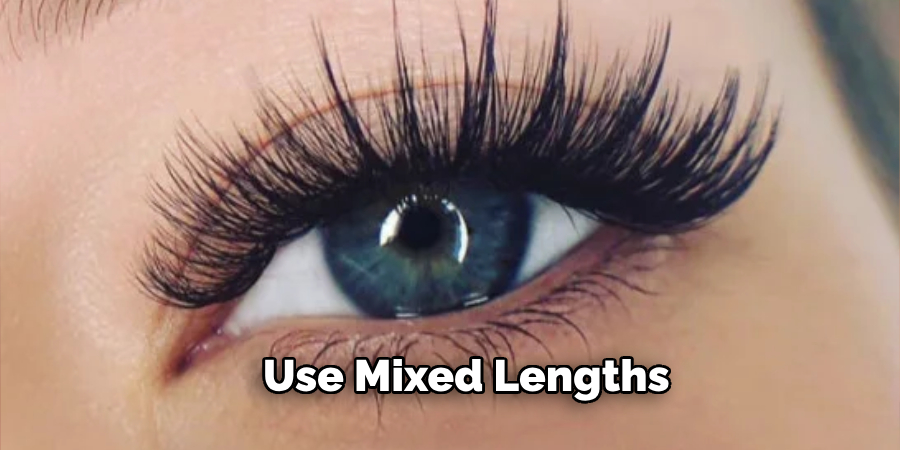
- Use Mixed Lengths: To achieve a natural, wispy effect, combine short, medium, and long lash extensions. This variation creates a textured look that mimics natural lashes.
- Stagger Lash Placement: Instead of placing lashes in a uniform pattern, stagger them slightly. This irregular placement adds to the wispy appearance and gives a more voluminous look.
- Focus on the Outer Corners: Apply slightly longer lashes towards the outer corners of the eyes. This technique not only enhances the wispy effect but also creates a subtle cat-eye shape, which is very flattering.
- Consider the Curvature: Use lashes with a mix of different curls. Combining C and D curls can add depth and dimension, making the lashes look more natural and wispy.
- Light Adhesive Application: Use minimal adhesive for a lighter, more flexible lash that doesn’t weigh down the natural lashes. This also helps to maintain the wispy, fluttery look of the extensions.
With these additional tips and tricks, you can take your lash game to the next level and achieve a beautiful, wispy look.
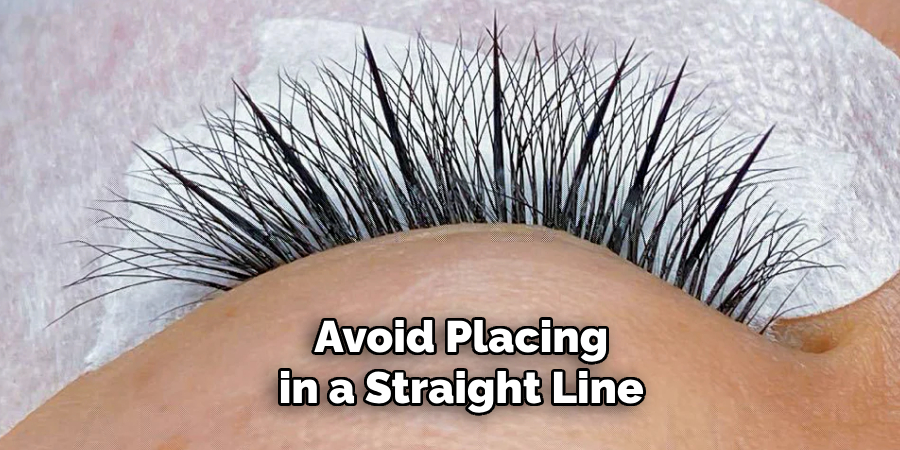
5 Things You Should Avoid
- Using Uniform Lengths: Avoid using lash extensions of the same length throughout. This creates a blocky, unnatural appearance instead of the desired wispy texture.
- Overloading Adhesive: Refrain from applying too much adhesive. Excess glue can clump the lashes together and weigh them down, compromising the light and feathery look.
- Neglecting Natural Lash Health: Be mindful not to apply extensions that are too heavy or long for the client’s natural lashes. This can lead to damage and weaken the natural lashes over time.
- Ignoring Lash Curvature Variety: Do not use only one curl type when applying lash extensions. Using a mix of curls like C and D ensures a more natural and textured appearance.
- Placement in a Straight Line: Avoid placing lash extensions in a perfectly straight line. A staggered placement adds to the wispy effect, giving the lashes a more voluminous and natural look.
You can achieve a beautiful and natural-looking wispy lash extension application by avoiding these common mistakes.
Conclusion
How to do a wispy lash set involves a combination of strategic techniques and careful attention to detail.
By using mixed lengths, staggering lash placement, focusing on the outer corners, varying the curvature, and applying adhesive lightly, you can achieve a natural and fluttery look that enhances the eyes beautifully. It’s equally important to avoid common pitfalls such as using uniform lengths, overloading adhesive, neglecting the health of natural lashes, ignoring variety in lash curvature, and placing extensions in a straight line.
By incorporating these dos and don’ts, you can ensure a stunning and durable wispy lash set that will delight your clients with their enhanced appearance.
About the Author
Jane Hubbard is a passionate beauty expert with a wealth of experience in makeup, hair, and overall beauty techniques. After years of working as a hairdresser specialist, she followed her entrepreneurial spirit and started her own consultancy business.
Jane has always been driven by her desire to help others feel confident in their own skin, and she does this by sharing her knowledge, experiences, and practical beauty tips. Through her consultancy, she empowers individuals to embrace their unique beauty, offering tailored guidance that boosts both self-esteem and personal style.
Professional Focus
Specializes in makeup, hairstyling, and beauty consulting.
Provides personalized beauty advice, tips, and techniques to help individuals feel confident in their appearance.
Dedicated to staying up-to-date with the latest industry trends and developments.
Passionate about creating a comfortable and empowering experience for every client.
Education History
University of Craft and Design – Bachelor of Fine Arts (BFA) in Woodworking and Furniture Design
Woodworking Apprenticeships – Extensive hands-on training with skilled craftsmen to refine carpentry and furniture making techniques
Online Courses & Masterclasses – Continued education in advanced woodworking techniques, design principles, and specialized tools
Expertise:
Makeup artistry, hairstyling, and beauty consulting.
Personalized beauty techniques to enhance confidence and self-expression.
Educating clients on how to maintain their beauty routines at home.