
Are you looking for a way to get salon-worthy acrylic nails without leaving your home? Look no further! Follow these easy steps to achieve professional-looking acrylic nails in the comfort of your own home.
Acrylic nails are a stylish and durable option for achieving a salon-quality manicure from the comfort of your own home. Learning how to do acrylic nails yourself can save you time and money while allowing you to customize your nails to suit your style. While the process may seem intimidating at first, it becomes much easier with the right tools, techniques, and a bit of practice.
This guide on how to do acrylic nails at home will walk you through the essentials of applying acrylic nails step-by-step, ensuring professional-looking results every time.
What Are the Benefits of Doing Acrylic Nails at Home?
Before we dive into the step-by-step process of doing acrylic nails at home, let’s first discuss why it may be a beneficial option for you. Here are some of the benefits:
- Cost Savings: One of the primary reasons people opt for DIY acrylic nails is to save money. Professional nail services can add up over time, so investing in your supplies and doing it yourself can save you a significant amount in the long run.
- Convenience: Visiting a salon for nail services can be time-consuming. By learning how to do acrylic nails at home, you have the convenience of being able to do them whenever and wherever you want.
- Personalization: Doing your acrylic nails also allows for more personalization. You can choose from a wide range of colors, designs, and techniques to create a unique look that reflects your style.
- Creativity: Not only can you personalize your nails, but doing them yourself also allows for creativity and experimentation. You can try out different techniques and styles without having to pay for each service at a salon.
What Will You Need?
To get started with doing your acrylic nails, you’ll need the following essential tools and materials:
- Acrylic Nail Kit: Most kits include acrylic liquid (monomer), acrylic powder (polymer), and a dappen dish for mixing the two.
- Nail Files and Buffers: These are necessary to shape your nails, smooth out edges, and create a clean surface for application.
- Nail Tips or Forms: Nail tips are used to extend your natural nails, while forms help shape and sculpt acrylic overlays.
- Acrylic Nail Brush: A high-quality brush is essential for applying and shaping the acrylic mixture precisely.
- Cuticle Pusher and Nippers: These tools help prepare your nails by pushing back and trimming the cuticles.
- Nail Primer and Dehydrator: These products ensure the acrylic adheres properly to your nails and prevent lifting.
- UV/LED Lamp (Optional): Some acrylic systems may require curing under a lamp, though this isn’t always necessary.
- Top Coat and Finish: To seal your work and add a glossy or matte finish.
Having these supplies on hand will enable you to create beautiful, long-lasting acrylic nails at home.
9 Easy Steps on How to Do Acrylic Nails at Home
1. Prepare Your Nails
Start by thoroughly cleaning your hands and nails to remove any dirt or oils that could affect the application process. Use a gentle nail polish remover to remove any existing polish from your nails. Next, use a nail clipper to trim your nails to the desired length and shape. Follow up with a nail file to smooth out the edges and ensure your nails have a uniform base. Gently push back your cuticles with a cuticle pusher to create a clean surface and avoid acrylic application on the cuticle area, which can lead to lifting.
2. Clean and Prime
To ensure the acrylic adheres effectively and lasts longer, it is crucial to thoroughly clean and prime your nails. Start by washing your hands with soap and water to remove any dirt or oils that could interfere with the application process. Dry your hands thoroughly, paying special attention to your nails to ensure there is no lingering moisture. Next, use a lint-free wipe soaked in nail cleanser or isopropyl alcohol to gently wipe each nail. This step removes any remaining oils and debris from the nail surface, creating a clean foundation for the acrylic.
3. Choose and Attach Nail Tips
Selecting the right nail tips is a crucial step in achieving a natural and polished appearance. Choose tips that closely match the width of your natural nails and align well with your nail bed to ensure a seamless fit. If a tip is slightly larger, carefully file down the edges to match the size of your nail.
Once you have your tips prepared, apply a small amount of nail glue to the underside of each tip. Press the tip onto your natural nail at a slight angle, starting from the free edge and working toward the cuticle, ensuring that no air bubbles are trapped underneath. Hold the tip in place for 10-15 seconds to allow the glue to bond securely.
4. Prepare the Acrylic Mixture
To prepare the acrylic mixture, you will need a dappen dish, acrylic liquid (also known as monomer), and acrylic powder. Start by pouring a small amount of acrylic liquid into the dappen dish—just enough for your application to avoid waste. Dip your acrylic brush into the liquid, gently tapping off any excess to prevent dripping. Then, touch the tip of the brush to the acrylic powder, allowing it to form a bead. The consistency of the bead should be smooth and workable, not too wet or too dry.
Practice creating a balanced mixture to ensure easy application and achieve a professional-looking finish.
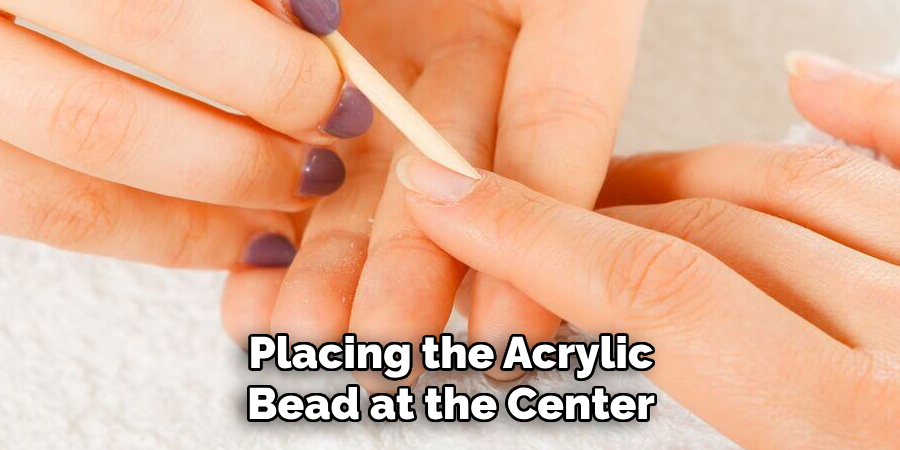
5. Apply Acrylic to Your Nails
Start by placing the acrylic bead at the center of your natural nail or nail tip. Using the body of your brush, gently press and shape the bead, working it towards the cuticle without touching the skin. Smooth the bead outward toward the free edge of the nail to create a smooth, even layer. Continue this process by adding additional beads if needed, ensuring a smooth and consistent application. Take your time to shape the acrylic to your desired nail structure while keeping the surface even. This step is crucial for achieving a clean, polished look. Repeat this process for each nail.
6. Shape and File
Once the acrylic has set, use a nail file to shape the nails to your desired style. Common shapes include square, oval, almond, or coffin, but you can customize the shape based on your preference. Gently file the edges to refine the shape, ensuring symmetry and smoothness. Then, use a finer-grit buffer to smooth the acrylic surface, removing any bumps or uneven areas. This step is essential for creating a professional finish and preparing the nails for polishing. Take your time to achieve a clean, consistent shape and smooth surface on every nail.
7. Buff the Surface
Buffing the surface of your acrylic nails is a key step to ensure a flawless, salon-quality result. Use a soft, high-grit buffer and gently move it across each nail in a back-and-forth motion. This process helps to smooth out any imperfections further, providing an even base for the application of polish or nail art. Pay close attention to the edges and the cuticle area to create a seamless, natural transition. Remember not to over-buff, as this could weaken the acrylic and compromise its durability. Proper buffing ensures that your nails are ready for the perfect finish.
8. Apply Nail Polish or Gel Polish
Begin by selecting your desired nail polish or gel polish color. If using regular nail polish, apply a thin base coat to ensure better adhesion and to protect the acrylic surface. Allow the base coat to dry completely before moving on. Next, apply the polish in thin, even strokes, starting from the base of the nail and moving toward the tip. Avoid overloading the brush to prevent streaks or uneven application.
For gel polish, follow the same steps but cure each layer under a UV or LED lamp as directed by the product instructions. Typically, two layers of color provide the best coverage. Finish with a top coat to seal in the color, enhance shine, and prolong the wear.
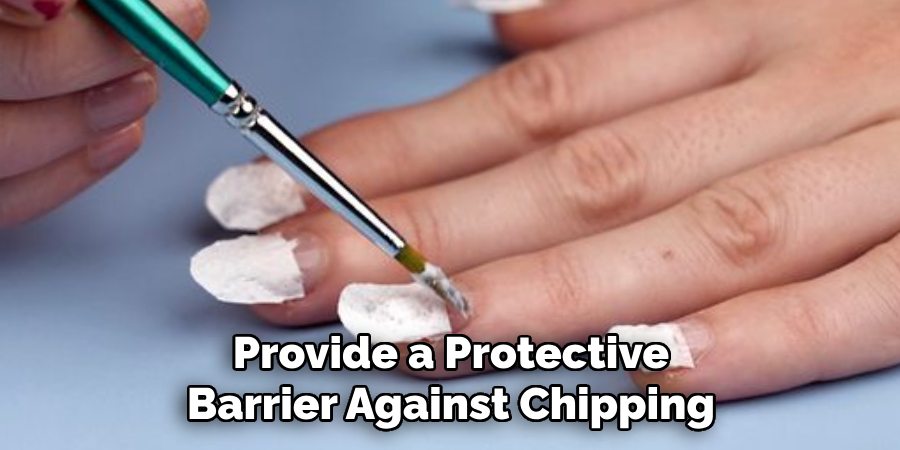
9. Seal with a Topcoat
A topcoat is an essential step in any manicure routine, as it serves multiple purposes that contribute to the longevity and overall appearance of your nails.
Not only does it provide a protective barrier against chipping, peeling, and everyday wear and tear, but it also enhances the color’s vibrancy, giving a professional-looking glossy finish. Ensure that the topcoat is applied evenly and thoroughly, covering the edges and tips, which are most prone to damage. For gel manicures, cure the topcoat under a UV or LED lamp to lock everything in place for a flawless, long-lasting result.
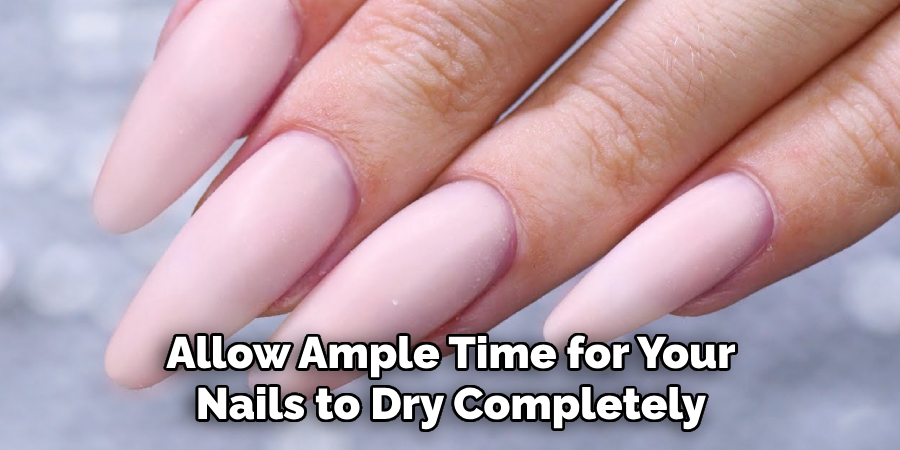
10. Allow Proper Drying Time
After applying the topcoat, it is essential to allow ample time for your nails to dry completely. Whether using regular or gel polish, avoid any activities that could smudge or damage your manicure during this period. For traditional polish, drying can take between 10 and 20 minutes, while gel polish requires curing under a UV or LED lamp, as specified. Patience is key to achieving a flawless, long-lasting finish.
By following these tips, you can achieve beautiful and long-lasting nails with your at-home manicure.
Conclusion
How to do acrylic nails at home can be a rewarding and cost-effective experience with the right tools and techniques.
By carefully preparing your nails, applying the acrylic mixture with precision, and shaping them to your desired look, you can achieve salon-quality results. Always ensure your workspace is clean and well-ventilated, and take your time during each step to avoid mistakes. Proper aftercare, including moisturizing your cuticles and avoiding harsh chemicals, can help extend the life of your acrylic nails.
With practice and patience, mastering the process can elevate your manicure game and give you professional-looking nails from the comfort of your home.
About the Author
Jane Hubbard is a passionate beauty expert with a wealth of experience in makeup, hair, and overall beauty techniques. After years of working as a hairdresser specialist, she followed her entrepreneurial spirit and started her own consultancy business.
Jane has always been driven by her desire to help others feel confident in their own skin, and she does this by sharing her knowledge, experiences, and practical beauty tips. Through her consultancy, she empowers individuals to embrace their unique beauty, offering tailored guidance that boosts both self-esteem and personal style.
Professional Focus
- Specializes in makeup, hairstyling, and beauty consulting.
- Provides personalized beauty advice, tips, and techniques to help individuals feel confident in their appearance.
- Dedicated to staying up-to-date with the latest industry trends and developments.
- Passionate about creating a comfortable and empowering experience for every client.
Education History
- University of Craft and Design – Bachelor of Fine Arts (BFA) in Woodworking and Furniture Design
- Woodworking Apprenticeships – Extensive hands-on training with skilled craftsmen to refine carpentry and furniture making techniques
- Online Courses & Masterclasses – Continued education in advanced woodworking techniques, design principles, and specialized tools
Expertise:
- Makeup artistry, hairstyling, and beauty consulting.
- Personalized beauty techniques to enhance confidence and self-expression.
- Educating clients on how to maintain their beauty routines at home.