
Are you getting ready for prom and wondering how to do your makeup? Look no further than prom makeup for brown eyes!
Prom night is a special occasion that calls for a flawless and dazzling look, making makeup an essential part of your preparation. The right makeup not only enhances your natural features but also complements your outfit, hairstyle, and overall vibe for the night. Whether you prefer a bold, dramatic look or something soft and subtle, creating the perfect prom makeup requires planning and technique.
This guide on how to do makeup for prom will walk you through step-by-step tips and tricks to achieve a stunning look that will leave you feeling confident and radiant all night long. Let’s dive into the world of prom makeup!
What Will You Need?
To create a stunning prom look, you will need some essential makeup products such as foundation, concealer, eyeshadow, eyeliner, mascara, blush, and lipstick. These can be purchased from your local drugstore or beauty retailer. It’s important to choose products that match your skin tone and type to ensure a flawless finish.
You will also need some basic tools like makeup brushes or sponges for application. Remember to clean your brushes regularly to avoid any bacterial buildup and maintain their efficacy.
10 Easy Steps on How to Do Makeup for Prom
Step 1. Start with a Clean and Hydrated Face
Before applying any makeup, it’s essential to prepare your skin properly. Begin by washing your face with a gentle cleanser to remove dirt, oil, and impurities. Follow up with a toner if desired to balance your skin’s pH. Next, apply a lightweight moisturizer suitable for your skin type to ensure your face is well-hydrated. This step creates a smooth, nourished base for your makeup and helps it last longer throughout the evening. Don’t forget to include sunscreen if your prom takes place during the daytime or if you’re taking photos outside!
Step 2. Apply a Primer

Once your face is clean and moisturized, the next step is to apply a primer. Primer helps create a smooth base for your makeup, ensuring that it lasts throughout the night. Choose a primer that suits your skin type—mattifying for oily skin, hydrating for dry skin, or pore-filling for skin with larger pores. Use a small amount and gently spread it evenly across your face, focusing on areas where makeup tends to fade or crease, such as your T-zone, cheeks, or around the nose. Allow the primer to set for a minute before moving on to the next step.
Step 3. Apply Foundation
Choosing the right foundation is essential for achieving a flawless finish. Select a foundation that matches your skin tone and type, whether it’s liquid, cream, or powder. Use a makeup brush, sponge, or clean fingertips to apply the product evenly across your face. Start from the center of your face and blend outward for a natural look, making sure to blend well along the jawline and hairline to avoid harsh lines. Build coverage gradually if needed, focusing on areas with discoloration or blemishes. Take your time to ensure a seamless, even application before proceeding to the next step in your makeup routine.
Step 4. Conceal Imperfections
To effectively conceal imperfections like dark circles, blemishes, or redness, select a creamy concealer that matches your skin tone or is a shade lighter for brightening under the eyes. Using a small makeup brush, sponge, or your fingertips, dab a small amount of concealer onto the areas you wish to cover. Gently blend the edges into your foundation, ensuring a smooth and natural transition. For under-eye areas, focus on the inner corners and blend outward for a lifted look. Set the concealer with a light dusting of translucent powder to prevent creasing and ensure long-lasting coverage.
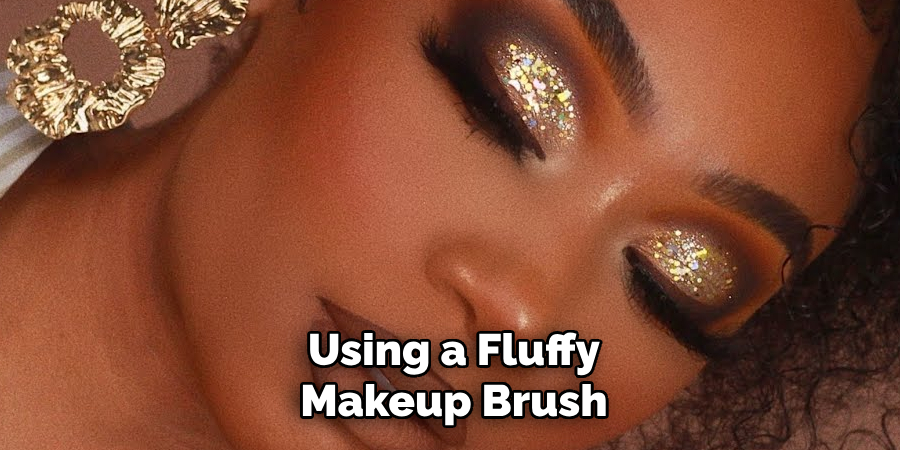
Step 5. Set with Powder
Using a fluffy makeup brush, lightly dust a translucent or pressed powder over your face to set your makeup. Focus on areas prone to oiliness, such as the T-zone, while ensuring an even application throughout. This step helps lock your foundation and concealer in place, reduces shine, and creates a smooth, matte finish. Be careful not to over-apply, as this can leave your skin looking cakey or overly dry. For a natural look, opt for a light and buildable formula that complements your skin tone.
Step 6. Define Your Brows
Use a brow pencil, powder, or pomade to shape and fill in your brows. Start by brushing your brows with a spoolie to determine their natural shape, then use gentle, hair-like strokes to fill in any sparse areas. Focus on defining the arch and tail for a more polished look. Be sure to choose a shade that matches your natural brow color for a seamless finish. Finally, set your brows in place with a clear or tinted brow gel to keep them looking neat and structured throughout the day. Well-defined brows frame your face and enhance your overall holiday party makeup look.
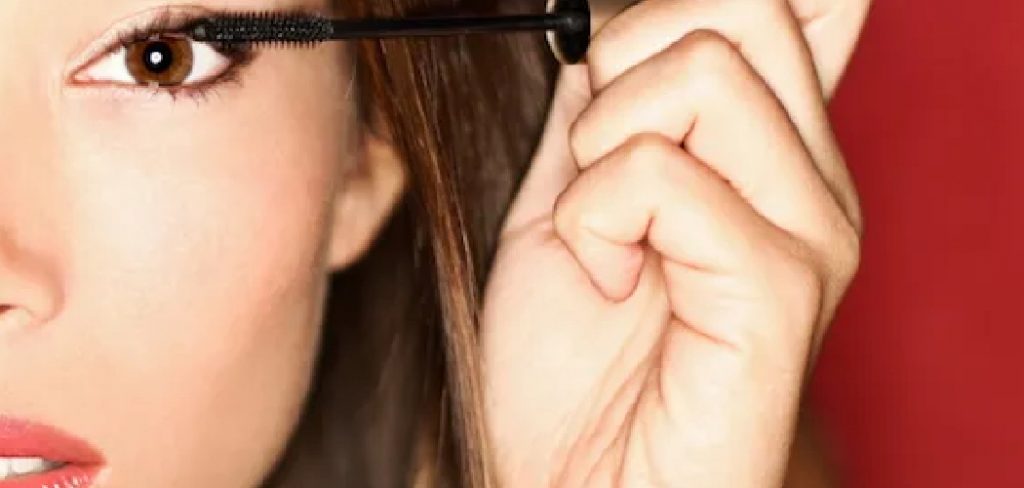
Step 7. Create a Stunning Eye Look
Start by applying an eyeshadow primer to ensure your eye makeup stays vibrant and crease-free throughout the day. Next, choose an eyeshadow palette that complements your look, starting with a neutral base shade to create a smooth canvas. Blend a slightly darker shade into your crease to add depth, and use a shimmer or metallic shade on your eyelids to make them pop. For added drama, apply eyeliner along your lash line—opt for a winged style for a bold look or tightline for subtle definition. Finish with a few coats of mascara or apply false lashes for extra volume and length. A stunning eye look can transform your makeup and draw attention to your beautiful eyes.
Step 8. Add Some Color with Blush
Blush is the perfect way to bring life and warmth to your face, giving you a natural, healthy glow. Choose a shade that complements your skin tone—rosy pinks, warm peaches, or soft mauves are popular options. Using a blush brush, lightly sweep the product onto the apples of your cheeks and blend it upward toward your temples for a lifting effect. For a subtly flushed look, build the color gradually to avoid over-applying. If you’re aiming for a more radiant finish, consider using a cream blush or one with a hint of shimmer. Blush not only adds dimension to your makeup but also ties your look together, making your complexion appear fresh and lively.
Step 9. Highlight and Contour
Highlighting and contouring are key techniques to define your facial features and add dimension to your makeup look. Start by selecting a contour shade that is one to two shades darker than your natural skin tone and a highlighter that is one to two shades lighter. Apply the contour to areas you want to create shadows, such as the hollows of your cheeks, sides of your nose, jawline, and along the edges of your forehead. Blend thoroughly to avoid harsh lines and achieve a natural finish.
Next, apply the highlighter to the high points of your face, including the tops of your cheekbones, the bridge of your nose, the center of your forehead, and your cupid’s bow. The contrast between the light and shadow created by these techniques adds depth and structure, making your features stand out beautifully.
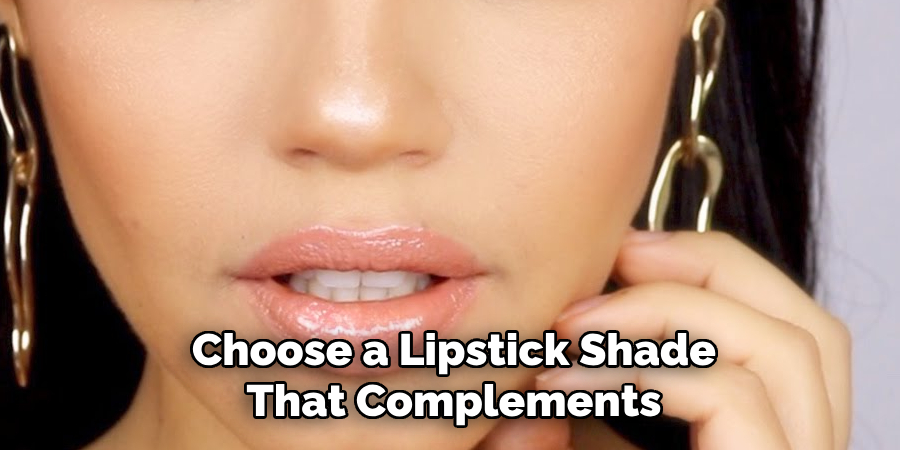
Step 10. Complete with Lipstick
To finish your look, choose a lipstick shade that complements your overall makeup and outfit. For a bold statement, opt for a vibrant red or deep plum, while neutral tones like nude or soft pink are perfect for a subtle, everyday look. Start by lining your lips with a lip liner to define their shape and prevent the lipstick from bleeding. Then, apply the lipstick evenly, either straight from the tube or using a lip brush for more precision. Blot with a tissue to set the color and reapply if needed for added intensity. This final touch ties your makeup together, leaving a polished and flawless finish.
With these steps, you’ll achieve a stunning prom makeup look that enhances your natural beauty and ensures you feel confident all night long!
5 Things You Should Avoid
- Skipping Skincare Before Makeup
Neglecting your skincare routine can result in uneven makeup application and a lackluster finish. Always cleanse, hydrate, and prep your skin to create a smooth canvas.
- Using the Wrong Foundation Shade
A mismatched foundation can ruin your entire look. Make sure to test and choose a color that perfectly matches your skin tone for a seamless finish.
- Overdoing Your Eye Makeup
While bold eyes can make a statement, going too heavy on eyeshadow or eyeliner can overwhelm your look. Balance is key to maintaining a polished appearance.
- Applying Too Much Highlighter
Overusing highlighter can lead to an unnatural shine in photos. Stick to subtle, well-blended highlights to emphasize your features gracefully.
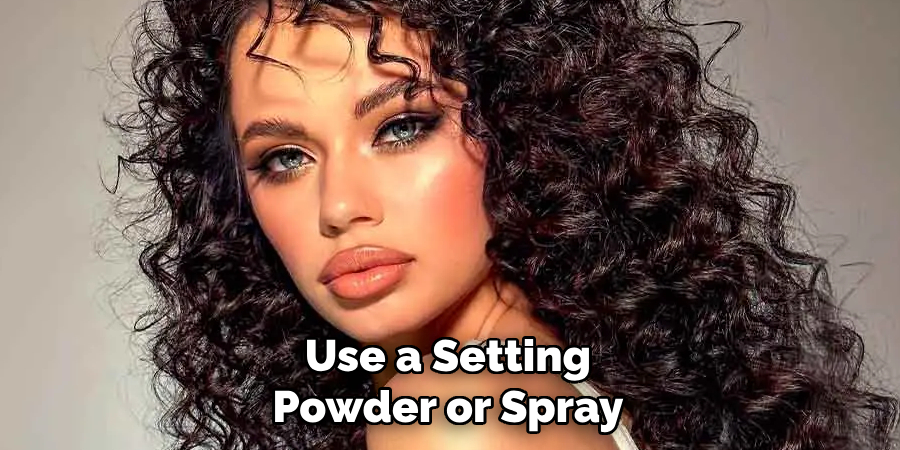
- Skipping Makeup Setting Products
Forgetting to use a setting powder or spray can cause your makeup to smudge or wear off mid-event. Set your makeup to ensure it lasts throughout the prom night.
Conclusion
Creating the perfect prom makeup look doesn’t have to be overwhelming.
By focusing on proper preparation, selecting products that complement your features, and avoiding common mistakes, you can achieve a stunning and lasting look for your special night. Remember, the key is to enhance your natural beauty while feeling confident and comfortable. With these tips, you’ll be photo-ready and glowing throughout the evening!
Hopefully, the article on how to do makeup for prom has provided you with helpful insights and inspiration for your prom makeup routine.
About the Author
Jane Hubbard is a passionate beauty expert with a wealth of experience in makeup, hair, and overall beauty techniques. After years of working as a hairdresser specialist, she followed her entrepreneurial spirit and started her own consultancy business.
Jane has always been driven by her desire to help others feel confident in their own skin, and she does this by sharing her knowledge, experiences, and practical beauty tips. Through her consultancy, she empowers individuals to embrace their unique beauty, offering tailored guidance that boosts both self-esteem and personal style.
Professional Focus
- Specializes in makeup, hairstyling, and beauty consulting.
- Provides personalized beauty advice, tips, and techniques to help individuals feel confident in their appearance.
- Dedicated to staying up-to-date with the latest industry trends and developments.
- Passionate about creating a comfortable and empowering experience for every client.
Education History
- University of Craft and Design – Bachelor of Fine Arts (BFA) in Woodworking and Furniture Design
- Woodworking Apprenticeships – Extensive hands-on training with skilled craftsmen to refine carpentry and furniture making techniques
- Online Courses & Masterclasses – Continued education in advanced woodworking techniques, design principles, and specialized tools
Expertise:
- Makeup artistry, hairstyling, and beauty consulting.
- Personalized beauty techniques to enhance confidence and self-expression.
- Educating clients on how to maintain their beauty routines at home.