
Are you wondering how to make your hair topper look natural? You are not alone! Hair toppers are a popular choice for those experiencing hair loss or thinning hair, but it can be challenging to style and blend them seamlessly with your natural hair.
Achieving a natural look with a hair topper can significantly boost your confidence and enhance your overall appearance. Whether dealing with thinning hair or simply adding volume and length, a well-blended hair topper can seamlessly integrate with your natural hair. Proper selection, application, and maintenance are the key to making your hair topper look natural.
In this guide, we’ll explore tips and techniques how to make a hair topper look natural, helping you achieve a perfect blend every time.
What Will You Need?
Before we dive into the steps, let’s go over some essential tools you’ll need to make your hair topper look natural:
- A well-matched hair topper
- Bobby pins or clips for securing the topper
- A comb and brush for styling
- Hair products like hairspray, serum, or dry shampoo
Once you have these basic tools, it’s time to learn how to make your hair topper look natural.
10 Easy Steps on How to Make a Hair Topper Look Natural
Step 1: Choose the Right Hair Topper
The first step to achieving a natural look with your hair topper is selecting the right one. Consider color, length, and texture when choosing a hair topper that closely matches your natural hair. Bring a picture of your hair before experiencing thinning or loss to help you find the most natural-looking match.
Step 2: Cut and Style the Topper
Once you have selected the perfect hair topper, the next crucial step is to cut and style it to blend seamlessly with your natural hair. It’s highly recommended to seek the expertise of a professional hairstylist with experience working with hair toppers. A professional can trim the topper to match the length and shape of your haircut, ensuring it looks cohesive and natural.
When styling, focus on the layers and texture. Adding layers to the topper can help it blend more naturally with your own hair, creating a more unified look. If the hair topper is made of human hair, you can style it using heat tools like curling irons or straighteners, just as you would with your natural hair. For synthetic hair toppers, make sure to check the manufacturer’s guidelines on the use of heat tools.
Additionally, pay attention to the parting. If your natural hair has a distinct part, try to mimic this in the hair topper. Use a fine-tooth comb to create a natural-looking part and use styling products, such as hairspray or mousse, to set it in place. If the topper has a lace or silk base, securing it close to your natural part can make the hairline look more realistic.
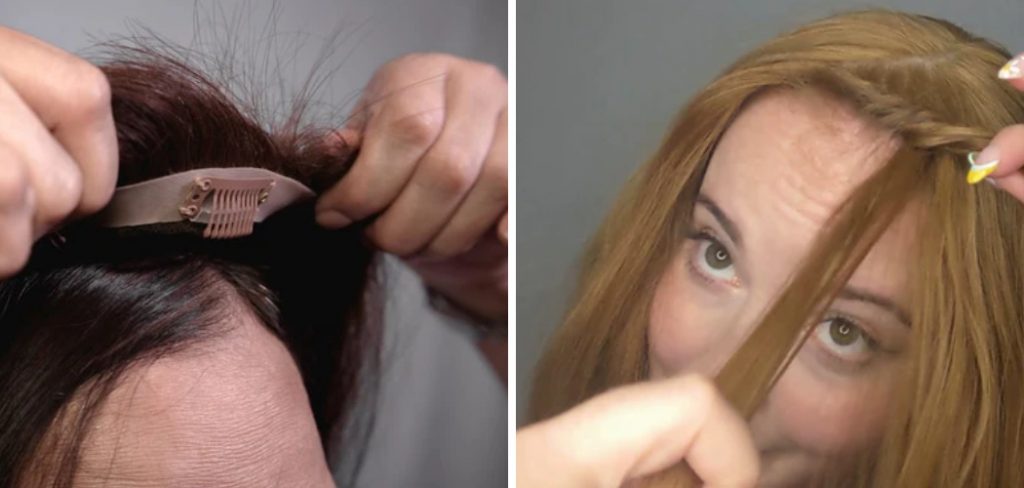
Step 3: Secure the Topper Properly
Securing your hair topper correctly ensures it stays in place and looks natural throughout the day. Begin by aligning the topper with your natural part and positioning it as desired. Use the built-in clips, combs, or bobby pins to fasten the hair topper securely to your natural hair. Be sure not to pull the topper too tightly, which can create tension and discomfort.
To achieve a seamless blend, consider backcombing or teasing your natural hair at the roots where the topper will be attached. This adds volume and helps the clips grip better, reducing the risk of the topper slipping. Once secured, gently smooth your natural hair over the edges of the topper to conceal any visible lines or clip attachments.
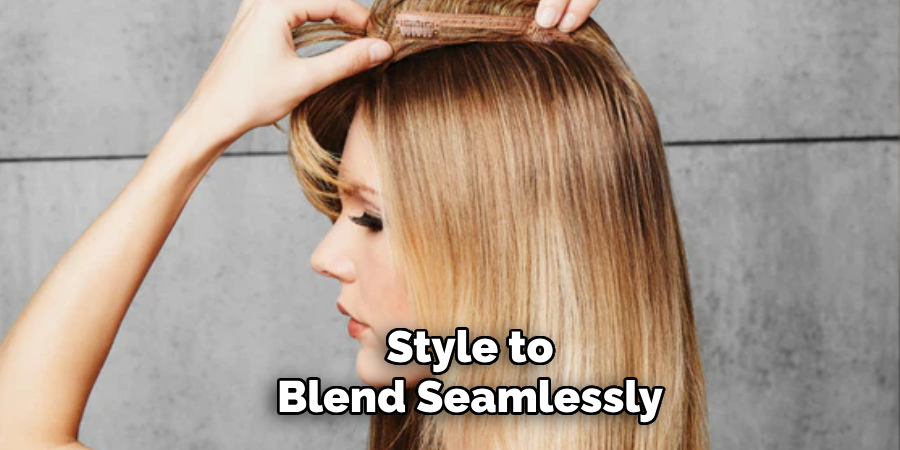
Step 4: Blend Your Natural Hair with the Topper
Blending your natural hair with the hair topper is key to achieving a seamless and natural look. To integrate the two, start by brushing your natural hair and the topper. Use a fine-tooth comb to gently tease the roots of your natural hair where it meets the topper. This helps to create a unified volume and conceal the topper’s base.
If your natural hair and the topper have different textures, use a styling tool such as a curling iron or straightener to match the textures. For example, if your natural hair is wavy, add some waves to the topper to ensure consistency in appearance. Applying a little bit of hair serum can also help reduce frizziness and maintain a sleek look.
Step 5: Use Concealers to Hide the Edges
To make the edges of your hair topper blend more naturally with your scalp and natural hair, consider using makeup concealers. Choose a concealer that matches your skin tone and lightly dab it along the hairline of the topper using a small brush or sponge. This can help to cover any visible lace or silk base and create the illusion that the hair is growing directly from your scalp.
You can also use a root touch-up powder or spray along the part line for an extra realism touch. This fills in any gaps and ensures the topper’s part matches your natural roots. Be sure to blend the products well to avoid any noticeable transitions between your skin, natural hair, and the topper.
Step 6: Style with Hair Products
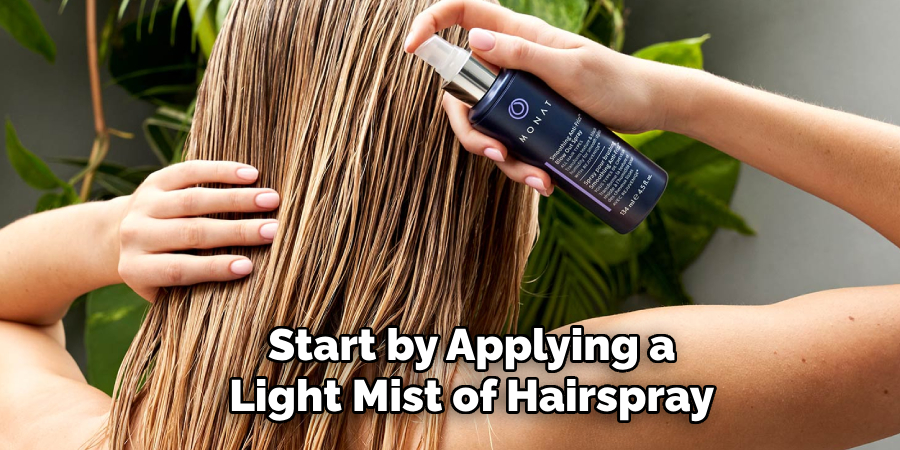
Using hair products can significantly enhance the natural appearance of your hair topper. Start by applying a light mist of hairspray to set the blend of your natural hair and the topper. Hair serums or leave-in conditioners can add shine and reduce frizziness, making the topper hair look healthy and vibrant. Opt for lightweight products to avoid weighing down the hair and creating an unnatural look. Dry shampoo can also be helpful, especially if the topper looks too glossy compared to your natural hair; it adds texture and reduces excess shine. Use these products sparingly and evenly to maintain a natural, cohesive look.
Step 7: Match Your Hair Color
Ensuring that your hair topper matches your natural hair color is crucial for creating a seamless look. If the topper’s color does not perfectly match, consider taking it to a professional colorist who specializes in working with hairpieces and extensions. They can custom-dye the topper to match your natural or dyed hair color. Another option is to use temporary hair color sprays or root touch-up powders to blend the edges of the topper with your roots. This can be particularly useful if highlights or lowlights need to be replicated in the topper. Regular hair color and topper maintenance will help keep the blend natural and fresh.
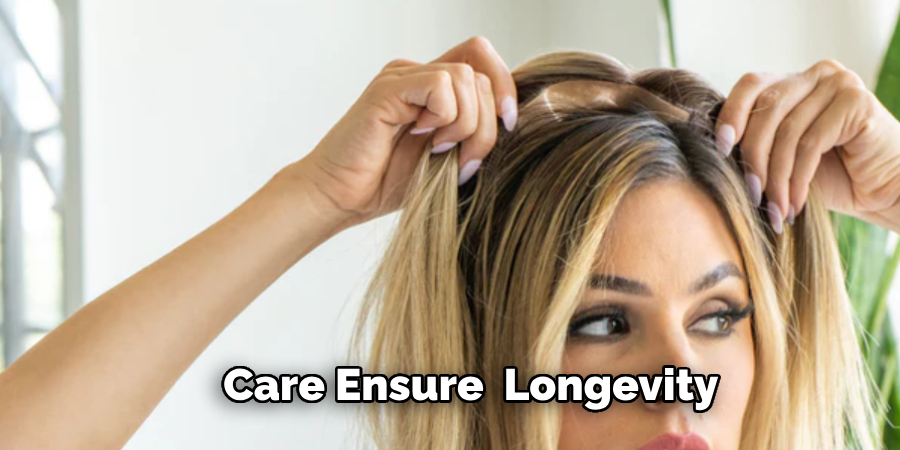
Step 8: Maintenance and Care
Proper maintenance and care of your hair topper will ensure its longevity and keep it looking natural. Regularly washing the hair topper is crucial to remove any build-up of products and oils. Use a gentle shampoo and conditioner specifically designed for wigs or extensions. Avoid vigorous scrubbing, as this can damage the hair fibers; gently swish the topper in lukewarm water. Rinse thoroughly and let it air dry on a wig stand to maintain its shape.
Periodically inspect the attachments such as clips and combs to remain secure. Replace any worn-out parts to maintain a comfortable and secure fit. Store the hair topper properly when not in use to prevent tangles and damage. Use a wig stand or original packaging to keep its shape intact.
Step 9: Regularly Trim the Topper
Regularly trimming your hair topper is essential to maintain its natural appearance and prevent split ends. Just like natural hair, hair toppers benefit from periodic trims to remove any damaged or frayed ends. It’s recommended to have the trim done by a professional stylist with experience working with hair extensions and toppers. They can shape and layer the topper to ensure it blends seamlessly with your natural hair. If you prefer to trim it yourself, use sharp, hair-cutting scissors and make small, gradual cuts. Always trim less than you think you need; you can always cut more, but you can’t put hair back once it’s cut off. Regular maintenance trims will keep your topper looking fresh and healthy.
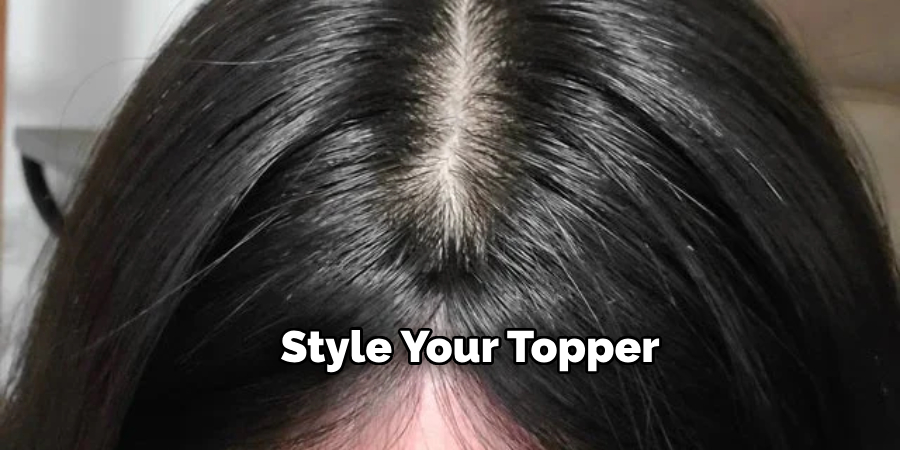
Step 10: Style Your Topper
Styling your hair topper is the final step to achieving a polished and cohesive look. Treat the topper as you would your natural hair, using heat styling tools like curling irons, straighteners, or hot rollers to create your desired hairstyle. Always apply a heat protectant spray before using any hot tools to protect the hair from damage. Experiment with styles such as updos, ponytails, or braids to see what works best with your natural hair and the topper.
When styling, be mindful of the topper’s attachment points and avoid putting excessive stress on them. If you’re curling or straightening the topper, work in small sections and use a low to medium heat setting to prevent damage. For added volume and body, consider using volumizing mousse or root lift spray.
By following these steps and incorporating some of your own tips and tricks, you can successfully blend your hair topper with your natural hair for a flawless and realistic look.
Conclusion
How to make a hair topper look natural involves attention to detail and a bit of practice. Begin by prepping your natural hair and ensuring the topper is applied securely.
You can also check it out to Know When Babyliss Pro is Fully Charged
Customize the texture, color, and edges of your topper to match your natural hair closely. Use styling tools and hair products strategically to enhance the blend. Regular maintenance, such as washing, trimming, and proper storage, will keep your topper looking fresh and healthy.
By following these comprehensive steps, you can confidently wear your hair topper with the assurance that it appears natural and seamlessly integrated with your hair.
About the Author
Jane Hubbard is a passionate beauty expert with a wealth of experience in makeup, hair, and overall beauty techniques. After years of working as a hairdresser specialist, she followed her entrepreneurial spirit and started her own consultancy business.
Jane has always been driven by her desire to help others feel confident in their own skin, and she does this by sharing her knowledge, experiences, and practical beauty tips. Through her consultancy, she empowers individuals to embrace their unique beauty, offering tailored guidance that boosts both self-esteem and personal style.
Professional Focus
Specializes in makeup, hairstyling, and beauty consulting.
Provides personalized beauty advice, tips, and techniques to help individuals feel confident in their appearance.
Dedicated to staying up-to-date with the latest industry trends and developments.
Passionate about creating a comfortable and empowering experience for every client.
Education History
University of Craft and Design – Bachelor of Fine Arts (BFA) in Woodworking and Furniture Design
Woodworking Apprenticeships – Extensive hands-on training with skilled craftsmen to refine carpentry and furniture making techniques
Online Courses & Masterclasses – Continued education in advanced woodworking techniques, design principles, and specialized tools
Expertise:
Makeup artistry, hairstyling, and beauty consulting.
Personalized beauty techniques to enhance confidence and self-expression.
Educating clients on how to maintain their beauty routines at home.