
Taking care of your feet is crucial, especially when dealing with cracked heels. Neglecting foot care can lead to pain, discomfort, and, in severe cases, infections. Utilizing natural ingredients in your foot care routine can provide significant benefits, as they offer essential nutrients and hydration without the harsh chemicals found in many commercial products.
Learning how to make foot cream for cracked heels at home enables you to customize the ingredients to suit your specific needs, ensuring the best nourishment for your skin. The process involves mixing beneficial ingredients like shea butter, coconut oil, and beeswax, optionally adding essential oils, and then setting the mixture. This homemade remedy not only tackles the problem of cracked heels but also promotes overall foot health, making it a valuable addition to your skincare regimen.
Understanding Cracked Heels
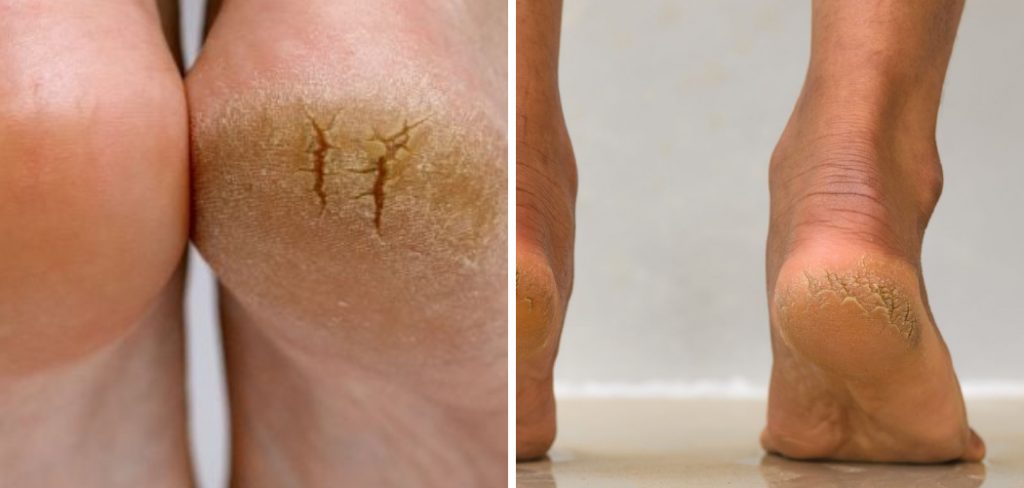
Cracked heels, also known as heel fissures, are a common foot problem that can cause significant discomfort and pain. They occur when the skin on the heels becomes dry, thick, and calloused, developing cracks or splits. This condition is often exacerbated by factors such as prolonged standing, wearing open-back shoes, and environmental conditions that strip moisture from the skin. Additionally, medical conditions like diabetes and thyroid problems can contribute to the formation of cracked heels.
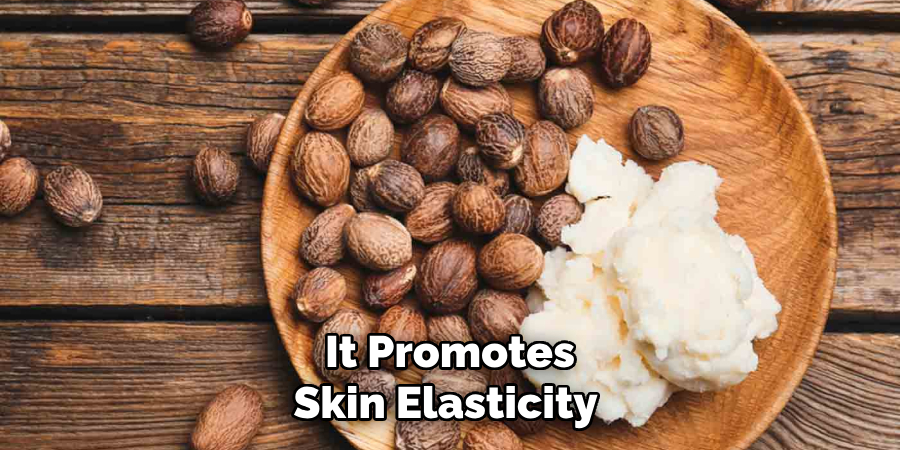
Moisturizing and nourishing the skin is essential in treating and preventing cracked heels. Proper hydration keeps the skin supple and resilient, reducing the likelihood of cracks. Regularly applying moisturizers helps lock in moisture and replenish the skin’s natural oils, which are vital for maintaining skin health. Ingredients such as shea butter and coconut oil, thanks to their rich emollient properties, are particularly effective in providing deep hydration and nourishment.
Foot creams play a crucial role in promoting healing and preventing further cracking. They often contain a blend of moisturizing agents, humectants, and occlusive ingredients that work together to soften the skin, draw moisture into the skin cells, and create a protective barrier to retain that moisture. Incorporating a dedicated foot cream into your daily routine can enhance the skin’s elasticity, repair existing damage, and safeguard your heels against future issues.
Ingredients Needed
To make your own foot cream for cracked heels, you will need a few natural ingredients known for their hydrating and healing properties:
- Shea Butter: Rich in vitamins A and E, shea butter moisturizes deeply, promoting skin elasticity and healing.
- Coconut Oil: Known for its antibacterial and antifungal properties, it also hydrates and soothes dry, cracked skin.
- Beeswax: Acts as a protective barrier, locking in moisture and protecting the skin from environmental factors.
- Essential Oils (Optional): Oils such as lavender or tea tree can offer additional benefits, such as soothing irritation and providing a pleasant aroma.
How to Make Foot Cream for Cracked Heels: Recipe for DIY Foot Cream
Creating a homemade foot cream for cracked heels is a simple process that requires just a few natural ingredients and basic kitchen equipment. Follow these step-by-step instructions to make your own nourishing and hydrating foot cream:
Gather Your Ingredients and Equipment:

- 1/2 cup shea butter
- 1/4 cup coconut oil
- 1/4 cup beeswax
- 15-20 drops of essential oil (optional)
- Double boiler or a heat-safe bowl and a saucepan
- Stirring utensil (e.g., wooden spoon or silicone spatula)
- Clean, sterilized container for storage
- Melting Shea Butter, Coconut Oil, and Beeswax:
- Begin by setting up a double boiler. If you don’t have a double boiler, use a heat-safe bowl that fits snugly over a saucepan filled with a few inches of simmering water.
- Add the shea butter, coconut oil, and beeswax to the top of the double boiler or heat-safe bowl.
- Heat the ingredients gently over medium-low heat, stirring occasionally. Do not let the water in the saucepan come to a full boil to avoid overheating the oils.
- Stirring Until Well Combined and Smooth:
- Continue to heat the mixture until all the ingredients have completely melted and are well combined.
- Stir constantly to ensure a smooth consistency, ensuring no lumps of unmelted beeswax or shea butter.
- Allowing the Mixture to Cool Slightly:
- Remove the bowl from the heat source once the ingredients are fully melted and mixed.
- Allow the mixture to cool for a few minutes but not enough for it to start solidifying. This step ensures that any added essential oils do not evaporate due to excessive heat.
- Adding Essential Oils (If Desired):
- If you choose to add essential oils, now is the time. Essential oils such as lavender, which has soothing properties, or tea tree oil, which has antiseptic qualities, can be beneficial.
- Add 15-20 drops of your chosen essential oil(s) and stir thoroughly to incorporate them into the mixture.
- Pouring the Mixture Into a Clean, Sterilized Container:
- Carefully pour the warm mixture into a clean, sterilized container. Use a funnel if necessary to avoid spills.
- Ensure the container is suitable for storing creams and can be sealed tightly to preserve the product’s freshness.
- Allowing the Foot Cream to Set and Solidify at Room Temperature:
- Let the mixture cool and solidify completely at room temperature. This might take a few hours.
- Once fully set, your DIY foot cream is ready for use. Seal the container with its lid and label it with the creation date.
- By following these straightforward steps, you’ll have a nourishing and effective foot cream ready to tackle your cracked heels, leaving your feet soft, hydrated, and healthy.
Application and Usage Tips
How to Apply Foot Cream for Cracked Heels
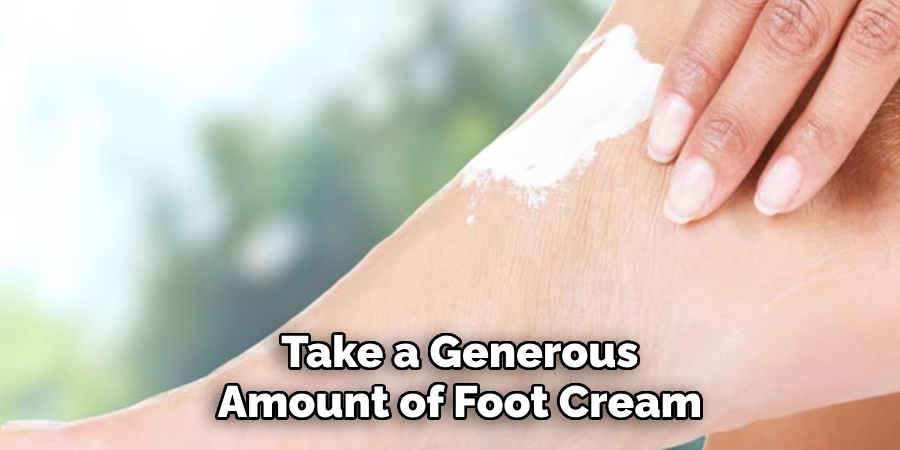
For optimal results, thoroughly wash your feet with warm water and a mild soap. Pat them dry with a clean towel, leaving no moisture between the toes. Take a generous amount of foot cream and gently massage it into your heels, focusing on the cracked areas. Use circular motions to aid the cream’s absorption into the skin. This moisturizes and promotes blood circulation, helping the skin heal faster.
Frequency of Application for Best Results
To maintain smooth and healthy heels, apply the foot cream at least twice daily—once in the morning and once before bedtime. Evening application is particularly effective as the foot cream can work overnight, a time when your feet are at rest and not subjected to pressure from walking. For severely cracked heels, additional applications throughout the day may be beneficial.
Tips for Maximizing the Effectiveness of the Foot Cream
- Exfoliate Regularly: Use a pumice stone or foot file to gently remove dead, calloused skin before applying the foot cream. This allows the cream to penetrate deeper and more effectively.
- Use Cotton Socks: After applying the foot cream at night, wear a pair of clean cotton socks to lock in moisture and enhance absorption.
- Stay Hydrated: Drink plenty of water throughout the day to keep your skin hydrated from the inside out.
- Avoid Walking Barefoot: Minimise walking barefoot on hard surfaces to prevent further heel damage.
By following these application tips and maintaining a consistent foot care routine, you can achieve soft, smooth, and healthy heels free from painful cracks.
Benefits of Homemade Foot Cream
Advantages of Using Homemade Foot Cream Over Commercial Products
Homemade foot creams offer numerous benefits that set them apart from commercial products. First and foremost, they allow you to control the ingredients, ensuring that only natural, skin-friendly components are included. This reduces the risk of adverse reactions often caused by synthetic additives, preservatives, and fragrances found in many store-bought creams. Additionally, homemade foot creams are often richer and more nourishing, as they are free from fillers that dilute the effectiveness of active ingredients.
Cost-Effectiveness and Customization of Ingredients
Creating your own foot cream can be remarkably cost-effective, especially considering the high price of many premium commercial alternatives. You can make multiple batches of foot cream at a fraction of the cost by purchasing a few key natural ingredients in bulk. Moreover, homemade recipes can be easily customized for specific skin needs or preferences. For example, you can choose specific essential oils for their therapeutic benefits or adjust the ratio of butter and oils to create a perfect cream for your skin type.
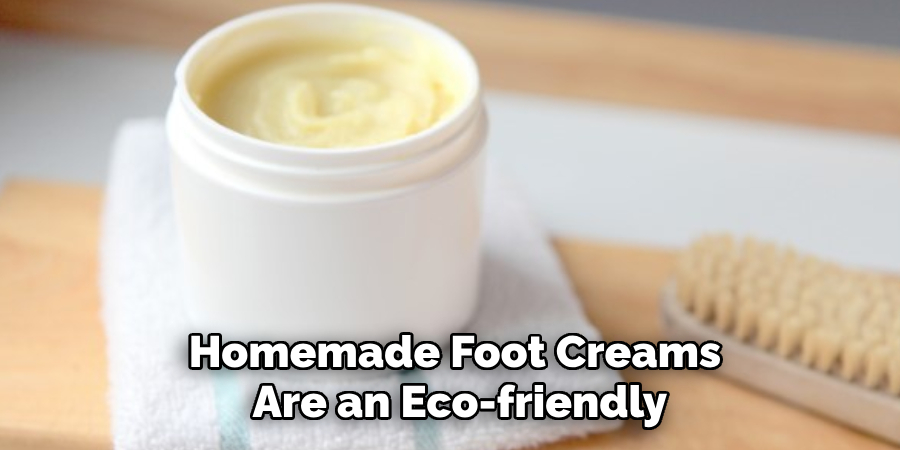
Sustainability and Reduced Exposure to Chemicals
Homemade foot creams are an eco-friendly choice that supports sustainability. You reduce your environmental footprint by choosing natural, often organic ingredients and avoiding plastic packaging. Moreover, creating your own foot cream at home means less exposure to harmful chemicals that are frequently present in mass-produced products. This is not only beneficial for your skin but also contributes to a healthier environment by minimizing pollution and waste.
In conclusion, opting for homemade foot cream is a smart, health-conscious, and environmentally responsible choice that effectively treats cracked heels.
Precautions and Considerations
While homemade foot creams can be highly effective and beneficial, it is crucial to be aware of potential allergies or ingredient sensitivities. Always check the individual properties of the ingredients used, particularly essential oils, which can sometimes cause allergic reactions. Conduct a patch test before applying the cream to your entire foot to prevent adverse effects. Apply a small amount of the cream to a discreet area of the skin, such as the inner wrist or elbow, and wait 24 hours to observe any reactions.
Additionally, if you have severely cracked heels, it is advisable to consult a healthcare professional before using any homemade treatments. Persistent or worsening symptoms may indicate underlying health issues that require medical attention. Your healthcare provider can offer guidance and recommend appropriate interventions to ensure your cracked heels’ safe and effective treatment. Taking these precautions will help you enjoy the benefits of your homemade foot cream safely.
Storage and Shelf Life
Proper Storage of Homemade Foot Cream to Maintain Freshness
To ensure your homemade foot cream remains fresh and effective, it is essential to store it correctly. Keep the foot cream in an airtight container to prevent contamination and reduce exposure to air, which can degrade the ingredients over time. Store the container in a cool, dark place, such as a cupboard or refrigerator, to protect it from heat and light, both of which can cause the natural oils and butter to spoil more quickly. Avoid storing the foot cream in the bathroom where temperature and humidity levels can fluctuate significantly.
Typical Shelf Life of Natural Foot Creams
Homemade foot creams, crafted with natural ingredients and free from synthetic preservatives, typically have a shelf life of around 3 to 6 months. This period can vary based on the specific ingredients used and how they were handled during the preparation. Signs that your foot cream is no longer good include texture, odor, or color changes.
Tips for Extending Shelf Life Through Storage Practices
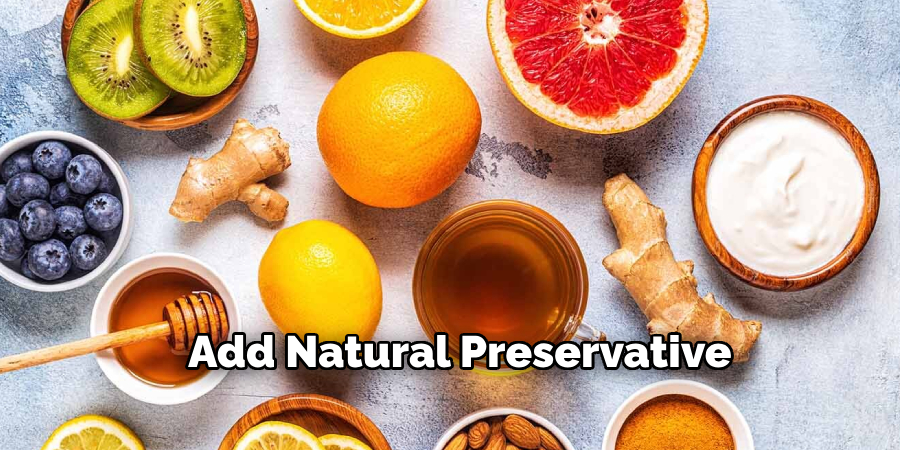
To extend the shelf life of your homemade foot cream, consider adding a natural preservative, such as vitamin E oil or grapefruit seed extract, which can help prevent mold and bacteria growth. Always use clean utensils when scooping out the cream to avoid introducing contaminants. Label the container with the creation date to track its age and use it within the recommended timeframe for optimal freshness and effectiveness.
Conclusion
In summary, homemade foot cream offers numerous advantages for those dealing with cracked heels. By knowing how to make foot cream for cracked heels, you gain control over the ingredients, ensuring that only natural, skin-friendly components nourish your skin. This approach can be more cost-effective, customizable, and eco-friendly than commercial products. Also, homemade foot cream can reduce exposure to harmful chemicals and support sustainable practices.
I encourage you to try the DIY recipe and experience the soothing benefits firsthand. Incorporating this natural remedy into your foot care routine can lead to significantly softer, smoother, and healthier heels. Remember, regular foot care is vital for overall well-being and comfort, especially for individuals who spend much time on their feet. Embrace this mindful practice and let your feet enjoy the rejuvenating effects of homemade foot cream.
About the Author
Jane Hubbard is a passionate beauty expert with a wealth of experience in makeup, hair, and overall beauty techniques. After years of working as a hairdresser specialist, she followed her entrepreneurial spirit and started her own consultancy business.
Jane has always been driven by her desire to help others feel confident in their own skin, and she does this by sharing her knowledge, experiences, and practical beauty tips. Through her consultancy, she empowers individuals to embrace their unique beauty, offering tailored guidance that boosts both self-esteem and personal style.
Professional Focus
Specializes in makeup, hairstyling, and beauty consulting.
Provides personalized beauty advice, tips, and techniques to help individuals feel confident in their appearance.
Dedicated to staying up-to-date with the latest industry trends and developments.
Passionate about creating a comfortable and empowering experience for every client.
Education History
University of Craft and Design – Bachelor of Fine Arts (BFA) in Woodworking and Furniture Design
Woodworking Apprenticeships – Extensive hands-on training with skilled craftsmen to refine carpentry and furniture making techniques
Online Courses & Masterclasses – Continued education in advanced woodworking techniques, design principles, and specialized tools
Expertise:
Makeup artistry, hairstyling, and beauty consulting.
Personalized beauty techniques to enhance confidence and self-expression.
Educating clients on how to maintain their beauty routines at home.