
Are you looking for a fun and creative way to add personality to your hair? Look no further than making your hair ribbons!
Hair ribbons are a charming and versatile accessory that can add a touch of whimsy and style to any hairstyle. Whether you want to create a cute and playful look or add an elegant and sophisticated touch, making your own hair ribbons allows for endless possibilities.
In this guide on how to make hair ribbons, we will explore various techniques and materials to help you craft beautiful hair ribbons that are perfect for any occasion.
Get ready to unleash your creativity and embark on a delightful journey of making personalized hair ribbons. Let’s dive in and discover the joy of creating these lovely accessories!
What Are the Benefits of Making Your Hair Ribbons?
Making hair ribbons has many benefits. First and foremost, it allows you to express your style and add a unique touch to your hair. You can choose from various materials, colors, patterns, and designs to create hair ribbons that reflect your taste and personality.
Additionally, making your hair ribbons is a budget-friendly option compared to purchasing pre-made ones. With some basic materials and tools, you can create beautiful hair ribbons at a fraction of the cost. Plus, it’s an enjoyable activity that allows you to unleash your creativity and relax while crafting something beautiful.
What Will You Need?
Before we dive into the process of making hair ribbons, let’s look at the materials and tools you will need to get started. Some essential items include:
- Ribbon: This is the primary material for your hair ribbon. You can choose from a variety of widths, colors, and patterns to suit your design.
- Scissors: A sharp pair of scissors is crucial for cutting the ribbon neatly and precisely.
- Glue gun/glue stick: A glue gun or glue stick is handy if you want to add embellishments or secure your ribbon in place.
- Embellishments (optional): To add flair, you can decorate your hair ribbon with various embellishments such as buttons, beads, flowers, or sequins.
- Measuring tape: This will help you measure the length of the ribbon and ensure consistency in size if you are making multiple ribbons.
- Pins: Pins can be helpful for holding the ribbon in place while you work on it.
Once you have all your materials and tools ready, you can start making your own hair ribbons.
10 Easy Steps on How to Make Hair Ribbons
Step 1. Choose Your Desired Ribbon:
Selecting the right ribbon is the first step in creating a beautiful hair accessory. Consider the following factors when choosing your ribbon:
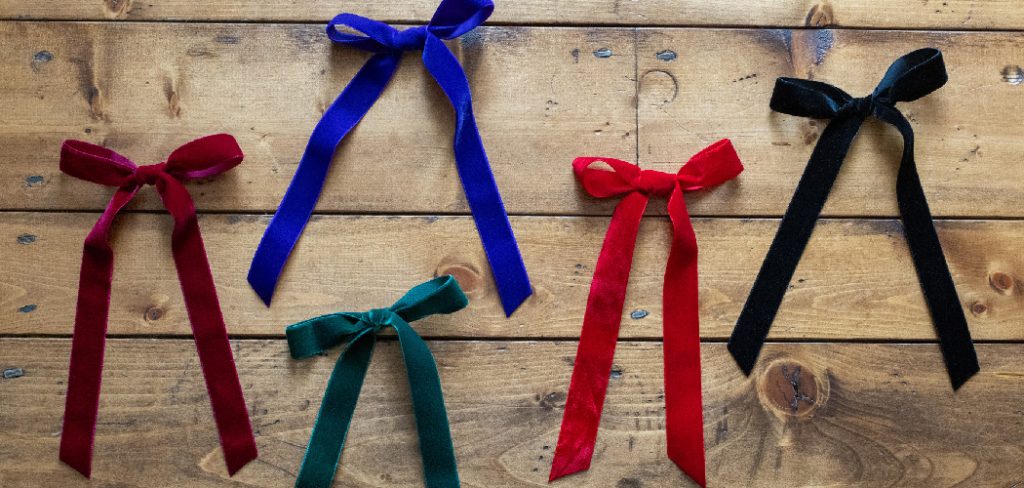
- Material: Ribbons are made from various materials, such as satin, grosgrain, velvet, or organza. Each material has a unique texture and appearance, so choose one that complements your desired style.
- Width: Ribbons are available in different widths, ranging from narrow to wide. The width you choose depends on the look you want to achieve and the hairstyle you plan to adorn with the ribbon.
- Color and Pattern: Think about the color scheme and design that best matches your outfits or the occasion you are preparing for. Solid colors are classic and versatile, while patterns and prints can add a playful or festive touch.
- Texture: Consider the ribbon’s texture, as it can add depth and interest to your hair accessory. Textured ribbons can include ribbed, ruffled, or embellished with sequins or beads.
Take your time exploring and experimenting with different ribbon options until you find the one that perfectly captures your vision. Remember, the right ribbon will enhance your hairstyle and add a touch of flair to your overall look.
Step 2. Measure and Cut the Ribbon:
Using your measuring tape, determine the desired length of your hair ribbon. The size will depend on how you plan to use it — for example, a shorter ribbon works well for tying around a ponytail, while a longer ribbon might be better for wrapping around a braid. Once you’ve decided on the length, cut the ribbon neatly with your sharp scissors. Be sure to cut the ends at an angle or in a V-shape for a decorative finish.
Step 3. Seal the Edges of the Ribbon:
To prevent fraying and ensure your hair ribbon lasts longer, it’s essential to seal the edges after cutting. There are a few simple methods you can use to do this:
- Heat Sealing: Use a lighter, candle, or heat tool to melt the edges of the ribbon gently. Carefully run the flame or heat source along the cut edge without burning the ribbon. Be cautious while using this method to avoid accidents.
- Fray Check: Apply a liquid fray preventer, like Fray Check, along the edges of the ribbon. Allow it to dry completely before moving on.
- Clear Nail Polish: Another quick option is to apply a thin layer of clear nail polish to the edges. This will help bond the fibers together and keep the ribbon from unraveling.
Choose the best method for your ribbon material, and take your time to ensure a clean and polished finish. Sealing the edges enhances the durability of your hair ribbons and adds a professional touch to your handmade accessories.
Step 4. Decide on Embellishments (Optional):
If you want to add extra flair to your hair ribbon, now is the time to decide on embellishments. Embellishments can elevate the look of your ribbon and make it stand out. Consider using options like beads, sequins, rhinestones, small fabric flowers, or buttons.
Arrange the embellishments on the ribbon to visualize the design before securing them. This step allows you to experiment and find a layout that enhances your ribbon’s aesthetic. Once you’re happy with the arrangement, use a glue gun or fabric glue to carefully attach each embellishment, ensuring they are securely in place. Allow them to dry completely before proceeding to the next step.
Step 5. Create Folds (Optional):
Add folds to your ribbon before securing it in place for a more intricate and textured look. Take the cut ribbon and make accordion-like folds along its length, then secure them with pins or glue. This technique adds depth and visual interest to the hair ribbon.
Step 6: Secure the Ribbon:
Now that you have all the elements, it’s time to secure the ribbon. Depending on your preference and expertise, you can do this using a glue gun or fabric glue. If you are new to crafting, we recommend starting with fabric glue, as it is easier to control and less messy.
- Apply a thin line of glue onto one end of the ribbon.
- Place the other end of the ribbon on top, forming a loop.
- Press down lightly until the glue sets and holds the two ends together.
Step 7: Allow Time for Drying:
Allow the glue to dry completely before moving on to the next step. This ensures that the ribbon remains secure and holds its shape over time. Depending on the type of glue you’ve used, drying times may vary, so refer to the instructions on your glue product to determine how long you need to wait. Patience is key at this stage to avoid undoing your hard work.
Step 8. Attach the Ribbon to a Hair Clip or Elastic (Optional):
Consider attaching your hair ribbon to a hair clip or elastic band to make it functional and wearable. Here’s how to do it:
- For a Hair Clip: Position the looped ribbon on the top side of the clip. Apply a glue line along the clip’s surface and gently press the ribbon onto it. Hold it in place for a few seconds to ensure it adheres properly.
- For an Elastic Band: Place the ribbon around the elastic band and secure it tightly with a small amount of glue. Alternatively, you can tie the ribbon directly onto the band for a looser but adjustable design.
Step 9. Add Final Touches (Optional):
Once the ribbon is attached to a hair accessory, take a moment to add any finishing touches. For example, you can tie an additional piece of ribbon around the secured area for a polished look or trim any uneven edges. This is also an opportunity to double-check the sturdiness of your glue and ensure all embellishments are properly fixed.
Step 10. Style and Enjoy Your Creation!
Your handcrafted hair ribbon is now ready to be worn! Experiment with different hairstyles to showcase your beautiful accessory.
Whether used as a bow on a ponytail, an accent in a braid, or a decorative piece on a bun, your custom-made hair ribbon can elevate your look for any occasion. Don’t hesitate to make more ribbons in various styles and colors to match your wardrobe.
Following these simple steps, you can easily create your unique and stylish hair ribbon. Get creative with different materials, colors, and textures to produce various ribbons that reflect your style.
Conclusion
How to make hair ribbons is not only a fun and creative activity but also a cost-effective way to enhance your accessory collection.
With just a few supplies and imagination, you can craft hair ribbons that perfectly complement your outfits or suit any occasion, from casual outings to formal events. Additionally, this DIY project makes for a delightful gift idea; personalized hair ribbons can show thoughtfulness and attention to detail when given to friends or loved ones.
Remember, the beauty of handmade accessories lies in their uniqueness and personality. Don’t be afraid to experiment with unconventional colors, patterns, or embellishments to create a style that is truly your own.
Whether you are seeking a simple accent for your hairstyle or a bold, eye-catching statement piece, a custom-crafted hair ribbon is a fantastic way to express your creativity and individuality.
About the Author
Jane Hubbard is a passionate beauty expert with a wealth of experience in makeup, hair, and overall beauty techniques. After years of working as a hairdresser specialist, she followed her entrepreneurial spirit and started her own consultancy business.
Jane has always been driven by her desire to help others feel confident in their own skin, and she does this by sharing her knowledge, experiences, and practical beauty tips. Through her consultancy, she empowers individuals to embrace their unique beauty, offering tailored guidance that boosts both self-esteem and personal style.
Professional Focus
Specializes in makeup, hairstyling, and beauty consulting.
Provides personalized beauty advice, tips, and techniques to help individuals feel confident in their appearance.
Dedicated to staying up-to-date with the latest industry trends and developments.
Passionate about creating a comfortable and empowering experience for every client.
Education History
University of Craft and Design – Bachelor of Fine Arts (BFA) in Woodworking and Furniture Design
Woodworking Apprenticeships – Extensive hands-on training with skilled craftsmen to refine carpentry and furniture making techniques
Online Courses & Masterclasses – Continued education in advanced woodworking techniques, design principles, and specialized tools
Expertise:
Makeup artistry, hairstyling, and beauty consulting.
Personalized beauty techniques to enhance confidence and self-expression.
Educating clients on how to maintain their beauty routines at home.