
Are you tired of feeling frustrated with store-bought eyelash glue that’s not quite sticky enough or isn’t compatible with sensitive skin? If so, making homemade eyelash glue might be the perfect solution for you.
From finding simple ingredients to gathering easy-to-follow instructions, this blog post on how to make homemade eyelash glue will guide you through the entire process and provide everything needed to create your very own collagen-based lash adhesive.
Not only is it a more cost-effective option compared to shop-bought products, but it’ll also ensure safe application each and every time. Keep reading if creating DIY lash glue has caught your eye!
Necessary Materials
To make homemade eyelash glue, you’ll need these materials:
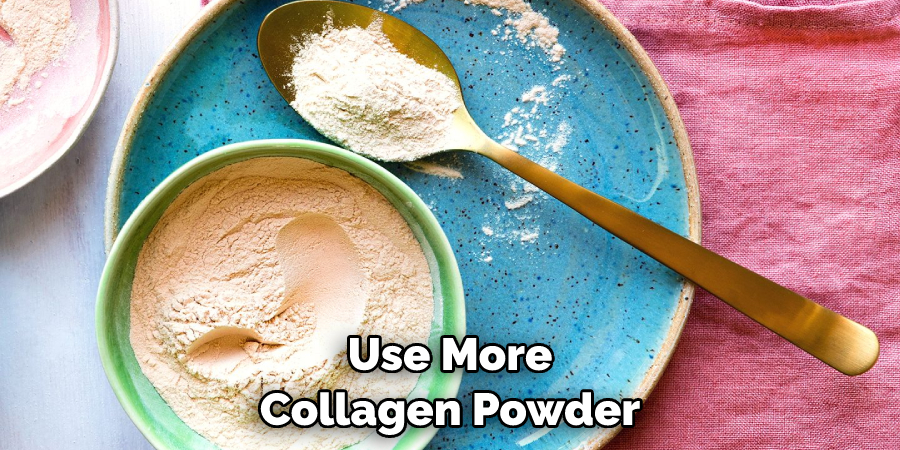
White Collagen Powder
The collagen powder acts as the base for this DIY lash adhesive. It’s an odorless, tasteless white powder that can typically be found in health food stores or online.
Aloe Vera Gel
The aloe vera will help to bind the ingredients together and helps your glue stay sticky.
Glycerin
Glycerin is used to help keep the glue from drying out quickly.
Water
You’ll need water to help dissolve the collagen powder and glycerin in order to form your lash glue.
11 Simple Steps on How to Make Homemade Eyelash Glue
Step 1: Use Collagen Powder
Using about 2 teaspoons of collagen powder, place it in a small bowl and set aside. If you’d like a thicker formula, use more collagen powder. It’s important to note that the thinner consistency will be easier to apply but not as effective in holding your lash extensions. This is all dependent on personal preference. If using a thicker formula, the adhesive will be stronger but more difficult to apply.
Step 2: Dissolve the Unflavored Gelatin in Water
In a bowl, combine 4 tablespoons of unflavored gelatin with 4 tablespoons of warm water. Stir until all the powder has been dissolved and a thick mixture is formed. It should be fully dissolved within a few minutes. If it’s still not fully dissolved, you can add a few extra drops of water. This will help to form a smooth adhesive. It’s important to note that this is optional but recommended.
Step 3: Add the Aloe Vera Gel
Add two tablespoons of aloe vera gel to the mixture and stir until combined completely. If it’s too thick, add a few more drops of water. It should have the consistency of traditional lash glue.
Otherwise, it will be hard to apply. You can also experiment with different Aloe Vera Gel textures or add more water to thin out the consistency. It’s also important to make sure the Aloe Vera Gel is from a natural source and not synthetic.
Step 4: Add Glycerin to the Mixture
To make your homemade eyelash glue more pliable, add one teaspoon of glycerin before stirring. This will help prevent it from becoming too thick. This is also beneficial in ensuring that your DIY glue is easy to use and won’t cause any irritation. If the glue is too thin, add more collagen powder. This should make it just right. But be sure to not over-mix it as this can create bubbles.
Step 5: Cover and Refrigerate the Mixture
Cover the mixture with a lid or plastic wrap and place it in the refrigerator overnight. This will help ensure that your homemade lash glue is ready to use right away.
It’s important to keep the glue in a cool and dry place. This will help it last longer. But be sure to not store it in the freezer. It can become too hard to work with. With that being said, make sure to only store your homemade glue for a maximum of two weeks.
Step 6: Prepare Your Eye Area
Before applying your homemade eyelash glue, make sure to remove any makeup around your eyes and apply an oil-free moisturizer. This will create a clean surface for you to work on. If you don’t want to use a moisturizer, you can also use a lip balm that contains petroleum jelly.
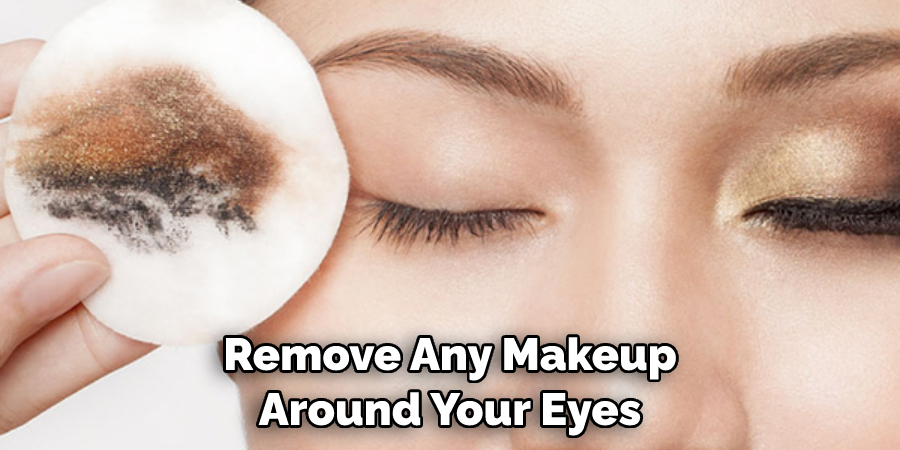
This will help keep your eyes from becoming irritated while applying the glue. It’s also important to make sure you don’t get any glue in your eyes. Before applying the glue, make sure to use a tweezer and carefully apply your false eyelashes.
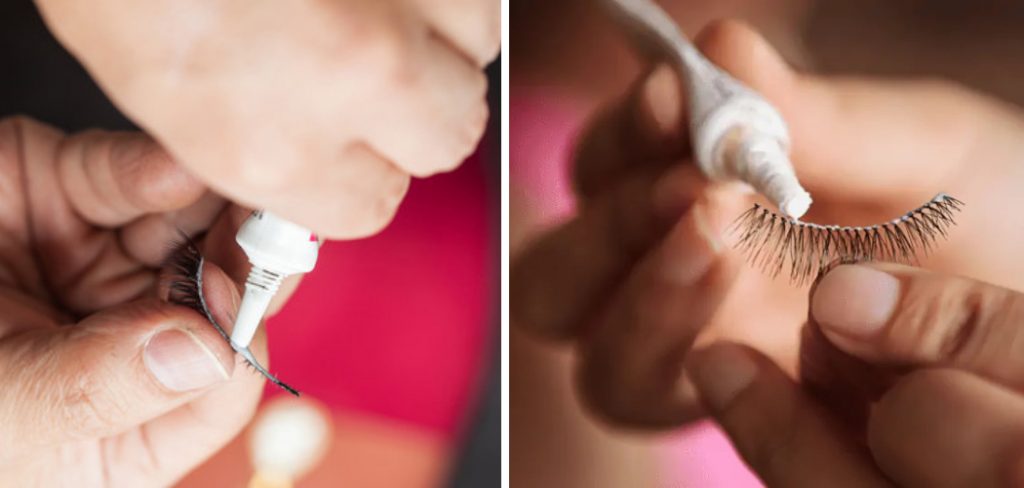
Step 7: Apply Your Homemade Eyelash Glue
Using a small brush or toothpick, dab some of the homemade eyelash glue onto the lashes as close to their base as possible (but not into the eyes). For extra hold, apply a second layer.
It should be thick enough to stick but not too thick so it doesn’t weigh down the lashes. If you want to create a faster drying time, use a blow dryer on the low setting. It’s important to make sure you don’t place the blow dryer too close as this could damage your false eyelashes.
Step 8: Apply False Eyelashes
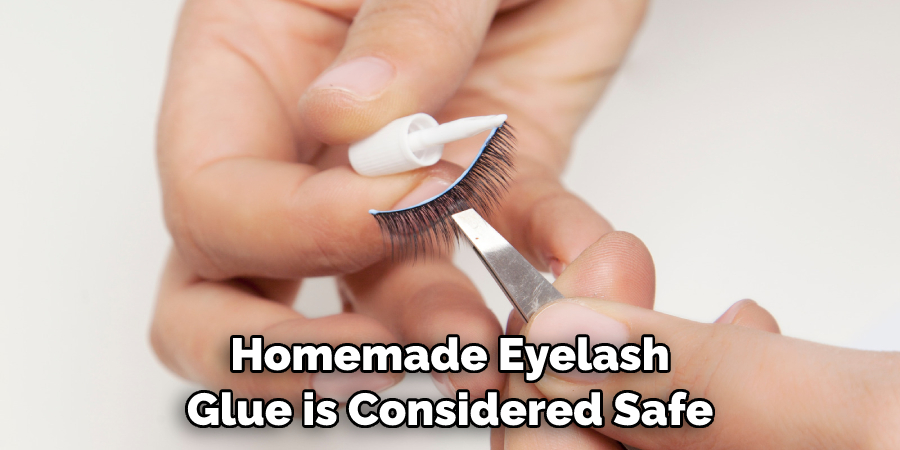
Wait until the glue has become slightly tacky before applying your false lashes. If needed, use tweezers to carefully place them onto the lash line and press gently to ensure they stay in place. It’s important to not tug or pull the lashes too hard. Otherwise, they can be damaged and it can also cause irritation. If you make a mistake, use some tweezers to remove any excess glue.
Step 9: Let It Set
Allow the eyelash glue to dry completely before blinking or touching your face with your fingers. This should take about 5-10 minutes. If you want the false lashes to stay on for a longer period of time, apply a second layer of glue once it’s been set. It should last up to a week if stored properly. However, make sure to remove the false lashes and clean off any remaining glue before going to bed. Otherwise, it can cause irritation and may even lead to an infection.
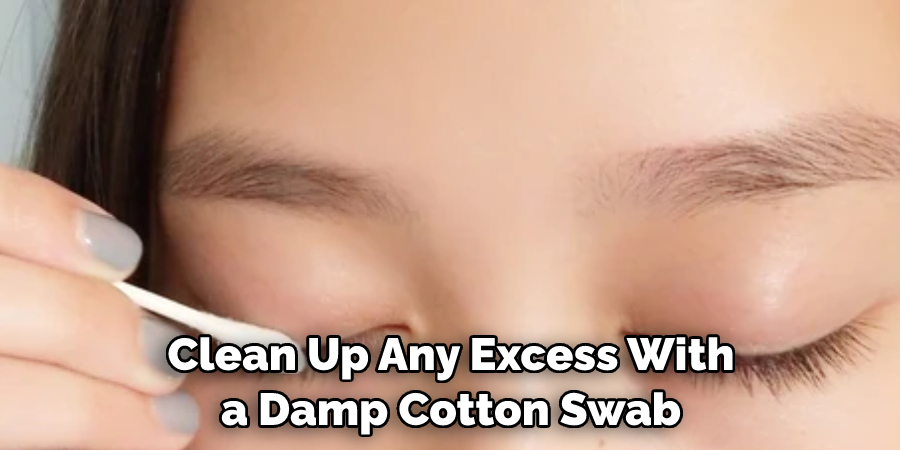
Step 10: Clean Up Any Excess Glue
Once you’ve applied both layers of glue, clean up any excess with a damp cotton swab and remove any dried lashes that weren’t properly adhered. It’s also important to clean the area around your eyes and lashes with a mild cleanser. This will help remove any build-up of dirt, oil, and bacteria. If necessary, you can also use makeup remover or a gentle facial cleanser to help remove the glue.
Step 11: Enjoy!
Your homemade eyelash glue is now ready to be used and enjoyed! Be sure to store any leftover glue in a cool, dark place and use it within two weeks for the best results. Always apply a thin layer to ensure safe application and maximum hold. If the glue becomes too dry, you can always add more water or aloe vera gel to it.
Always apply the glue away from your eyes, as it can cause irritation. With a few simple steps, you now know how to make homemade eyelash glue.
Making your very own homemade eyelash glue is not only fun but also cost-effective and safe for sensitive skin. Follow these steps and you’ll have beautiful lashes that last all day long. Now go ahead and show off those amazing lashes!
How Much Will It Cost?
Making your own homemade eyelash glue is very cost-effective compared to store-bought options. It should cost you no more than a few dollars for the ingredients. Aloe vera gel and vitamin E oil are both available at most health stores and pharmacies, while other items such as cornstarch or flour can be found in any kitchen pantry. This makes it an inexpensive option that you can use over and over again.
Frequently Asked Questions
Q: How Long Will My Homemade Eyelash Glue Last?
A: It’s best to use your homemade lash glue within two weeks. Be sure to store it in a cool, dark place for the best results.
Q: Can I Reuse My Homemade Eyelash Glue?
A: No, for optimal results and hygiene, it is not recommended to reuse your homemade eyelash glue. Make a new batch each time you apply false lashes.
Q: Is Homemade Eyelash Glue Safe to Use?
A: Yes, homemade eyelash glue is considered safe to use — however, if you have sensitive skin or eyes, it’s best that you consult a doctor before using it. Additionally, be sure to avoid getting it in your eyes and always clean up any excess glue after application.
Q: Does Homemade Eyelash Glue Work as Well as Store Bought Adhesives?
A: Yes, when done correctly, homemade eyelash glue can work just as well as store-bought adhesives. It’s a great way to save money and create an adhesive that’s tailored specifically for your own needs.
Conclusion
Whether you’re a makeup veteran or just starting out, making your own homemade eyelash glue is an easy and affordable way to ensure quality while being creative. Not only is this method completely safe, but it also gives you the opportunity to customize ingredients depending on what works best for your sensitive eyes.
With the right materials and information on how to make homemade eyelash glue, you can create a product that will give you beautiful results every time! Ultimately, creating homemade eyelash glue may seem intimidating at first but once you get familiar with the process and materials, you’ll be well on your way towards having long-lasting lash looks made with your very own custom blend of glue. Try it out today and come up with an excellent beauty look all from home!
About the Author
Jane Hubbard is a passionate beauty expert with a wealth of experience in makeup, hair, and overall beauty techniques. After years of working as a hairdresser specialist, she followed her entrepreneurial spirit and started her own consultancy business.
Jane has always been driven by her desire to help others feel confident in their own skin, and she does this by sharing her knowledge, experiences, and practical beauty tips. Through her consultancy, she empowers individuals to embrace their unique beauty, offering tailored guidance that boosts both self-esteem and personal style.
Professional Focus
Specializes in makeup, hairstyling, and beauty consulting.
Provides personalized beauty advice, tips, and techniques to help individuals feel confident in their appearance.
Dedicated to staying up-to-date with the latest industry trends and developments.
Passionate about creating a comfortable and empowering experience for every client.
Education History
University of Craft and Design – Bachelor of Fine Arts (BFA) in Woodworking and Furniture Design
Woodworking Apprenticeships – Extensive hands-on training with skilled craftsmen to refine carpentry and furniture making techniques
Online Courses & Masterclasses – Continued education in advanced woodworking techniques, design principles, and specialized tools
Expertise:
Makeup artistry, hairstyling, and beauty consulting.
Personalized beauty techniques to enhance confidence and self-expression.
Educating clients on how to maintain their beauty routines at home.