
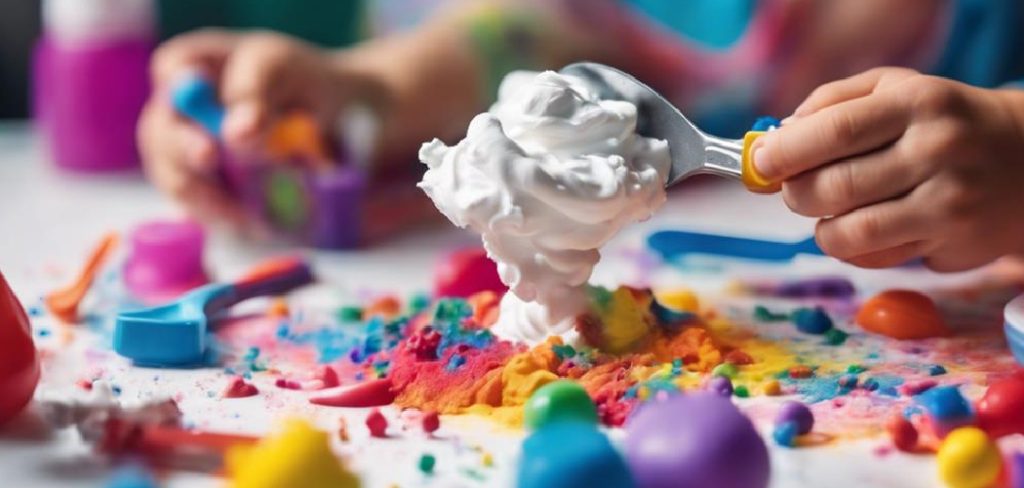
Crafting at home often provides a deeply satisfying tactile experience. Finding the perfect weekend activity might suggest looking no further than your own bathroom cabinet. Fluffy slime remains a perpetually favored sensory material for both children and adults seeking a creative outlet.
Understanding the underlying chemistry makes this seemingly messy endeavor surprisingly clinical. This guide explains the exact science, the precise ingredients, and the physical techniques required to craft a flawless batch. If you want to know how to make slime from shaving cream, you must recognize that achieving a cloud-like texture relies entirely on specific ratios.
Following the correct chemical sequence ensures your mixture behaves properly. We will explore the chemical reactions of polymers, the importance of aeration, and the physical kneading required to bind the dough. A perfect, non-sticky result is highly achievable.
Understanding the Science Behind Fluffy Slime
Slime creation is not merely child’s play. It represents a fascinating demonstration of basic non-Newtonian physics. The ingredients interact on a molecular level to change states of matter.
You must grasp how these components communicate. This knowledge prevents the common pitfall of a rubbery or crumbling final product.
The Role of Polymers in Glue
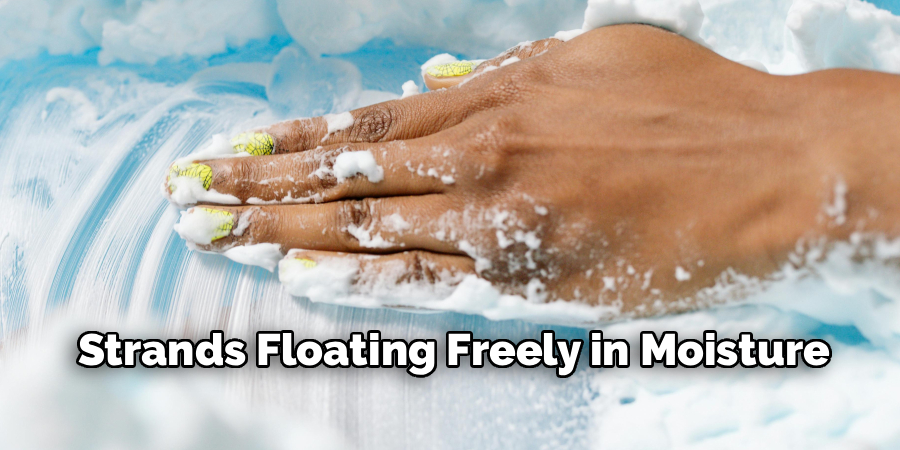
Standard school glue serves as the foundational architecture of your craft. It contains a liquid polymer known as polyvinyl acetate (PVA). These long-chain molecules behave like flexible, microscopic spaghetti strands floating freely in moisture.
Before any other chemical is introduced, these strands slide past one another with minimal friction. This specific fluid dynamic is what gives the glue its familiar, runny consistency.
How Activators Bind the Mixture
Introducing a chemical activator fundamentally alters that fluid structure. Compounds like sodium borate or saline solution act as a linking agent between the free-floating PVA strands. They physically tie the separate polymer chains together into a sprawling net.
This rapid cross-linking chemical reaction traps water and air within the newly formed web. The resulting mass becomes a solid that still stretches and flows under tension. It is a brilliant display of practical chemistry happening right inside a mixing bowl.
Gathering Your Essential Ingredients and Tools
Preparation dictates the success of any chemical experiment. You should gather all necessary supplies before unscrewing a single bottle cap. Running back and forth to cabinets often leads to dried glue or missed measurements.
Having everything within arm’s reach also prevents cross-contamination in your workspace. Keep your materials organized and accessible.
The Core Base Ingredients
You will need specific iterations of everyday household items. White school glue forms the unyielding base, while plain baking soda provides the necessary structure. You must also acquire a buffered saline solution that explicitly lists boric acid or sodium borate in its ingredients.
If the contact lens solution lacks those specific borate compounds, the chemical reaction simply will not occur. Your mixture would remain a soupy, useless puddle.
Essential Mixing Equipment
Safety and cleanliness require dedicated crafting tools. You might want to purchase a cheap plastic mixing bowl and a silicone spatula specifically for this hobby. Using your daily kitchenware for chemical crafts is generally not advised.
A simple set of plastic measuring cups ensures your ratios remain perfectly accurate. Precision separates a messy failure from a satisfying, fluffy success.
Choosing the Right Type of Shaving Cream
The aeration agent defines this specific variation of sensory dough. You are essentially trapping thousands of microscopic air bubbles inside the polymer net. Choosing the wrong aerator ruins the physical structure entirely.
Not all shaving products behave identically. You must select a formula that holds its shape.
Foam Versus Gel Formulas
Standard aerosol shaving foam provides the exact density required. It dispenses as a thick, pre-aerated cloud that folds beautifully into the liquid glue. This foam acts as a temporary scaffolding for the polymers.
Conversely, shaving gel will destroy the texture. Gels contain heavy lubricants that prevent the borate ions from linking with the glue, leaving you with a sticky, dense mess.
Scented and Sensitive Skin Options
Crafters with easily irritated hands should opt for sensitive or unscented foams. Heavy artificial fragrances sometimes cause mild contact dermatitis when kneaded extensively.
If skin sensitivity is not a concern, selecting a lightly scented foam adds a wonderful olfactory dimension to the activity. The scent binds to the polymers, creating a multi-sensory experience that lingers pleasantly.
Step-by-Step Guide: How to Make Slime from Shaving Cream
This sequence serves as your primary instructional roadmap. Proceeding methodically through these exact steps ensures the chemical reaction occurs at the proper pace. Rushing the process almost always results in structural failure.
Execute each phase with deliberate care. Mixing chemicals requires patience.
Step 1: Measuring and Pouring the Glue
Begin by measuring exactly one-half cup of white PVA school glue. Pour this foundational liquid directly into the center of your dedicated mixing bowl.
Use your silicone spatula to scrape the measuring cup clean. You want to ensure the mathematical ratio of glue to activator remains entirely accurate.
Step 2: Adding Color and Mix-Ins
Now is the moment to establish the visual aesthetic of your creation. Add two to three drops of liquid food coloring or watercolor paint to the white glue.
Stir the pigment vigorously until the liquid achieves a uniform, vibrant hue. Adding color later in the process often results in stained hands and uneven, streaky dough.
Step 3: Folding in the Shaving Cream
Dispense approximately three cups of aerosol shaving foam directly on top of the colored glue. This measurement does not need to be mathematically exact, but a generous mound is preferred.
Gently fold the foam into the liquid using a deliberate, scooping motion. You must avoid stirring aggressively, as rapid agitation will deflate the delicate air bubbles before they can be trapped.
Step 4: Introducing the Baking Soda
Sprinkle exactly one half-teaspoon of dry baking soda evenly across the surface of the fluffy mixture. This alkaline powder acts as a firming agent for the polymers.
Fold it in carefully until the powder completely dissolves. The baking soda primes the chemical environment, preparing the glue strands for the incoming linking agent.
Step 5: Adding the Activator Gradually
Measure one tablespoon of your borate-infused saline solution. Drip it over the mixture in tiny fractions while continuously moving the spatula.
You will immediately notice the foam begin to seize and pull away from the edges of the bowl. Keep stirring until the mass clumps together around your mixing tool.
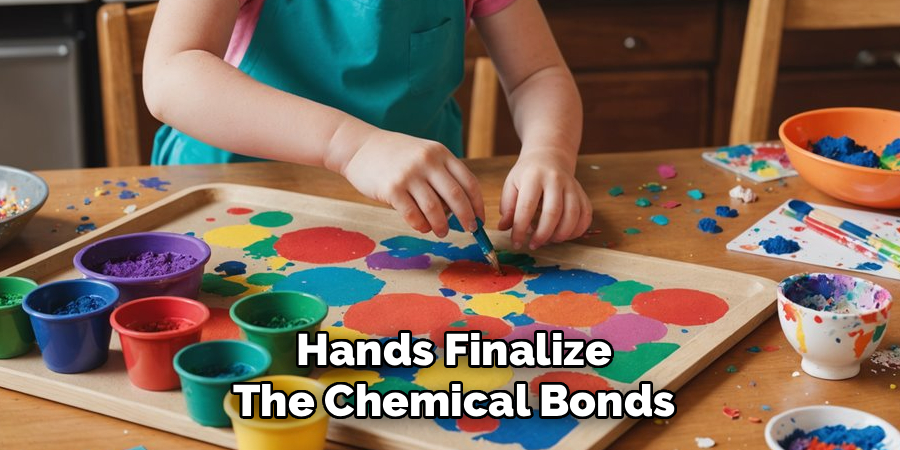
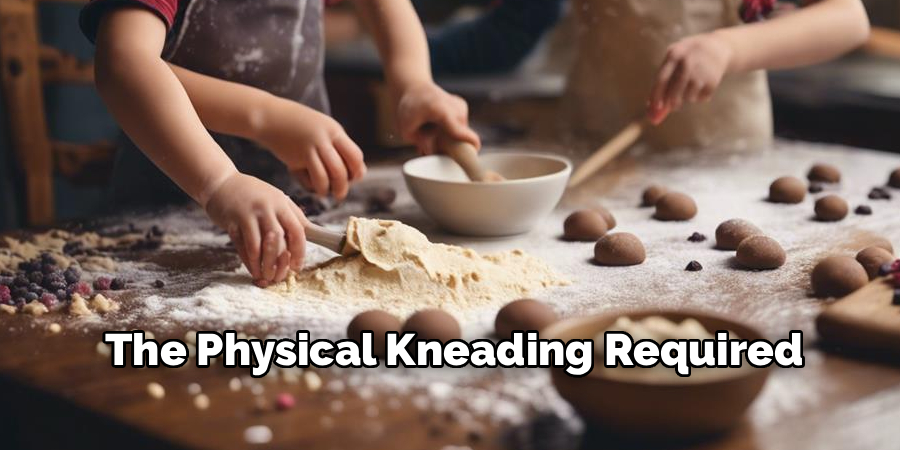
Step 6: Kneading to the Perfect Texture
Once the mixture forms a cohesive, albeit sticky, ball, abandon the spatula. Coat your hands with a few drops of saline solution to prevent sticking.
Pick up the mass and begin kneading it aggressively with your fingers. The heat and kinetic energy from your hands finalize the chemical bonds, transforming the sticky web into a smooth, fluffy cloud.
Troubleshooting Common Slime Issues
Even seasoned crafters occasionally misjudge a measurement. Environmental humidity and temperature can also subtly alter how the polymers behave. Recognizing these physical shifts allows you to rescue a failing batch.
You rarely need to throw a mistake in the trash. Small adjustments usually correct the structural imbalance.
Fixing Overly Sticky Slime
A mixture that aggressively clings to your fingers requires more chemical linking. The polymer chains have not fully bound to one another.
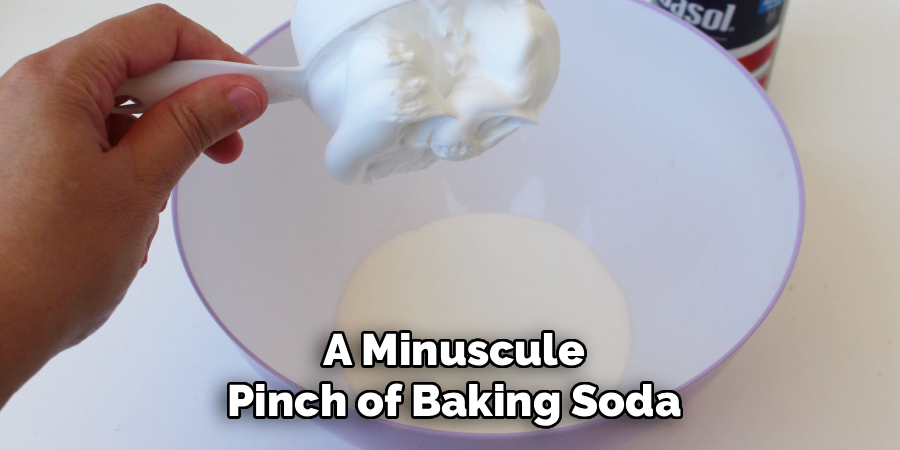
Add a few singular drops of contact solution and a minuscule pinch of baking soda. Knead the dough rapidly, and the excess moisture will quickly lock into the tightening chemical web.
Softening Stiff or Rubbery Slime
Sometimes the dough snaps like a rigid rubber band instead of stretching. This indicates an overabundance of borate ions, which have linked the polymers too tightly.
You could massage a small spoonful of warm water or basic hand lotion into the solid mass. The added moisture lubricates the rigid chains, restoring the desired elastic flexibility.
Customizing Your Fluffy Creation
Mastering the foundational recipe naturally invites experimentation. The fluffy base acts as a blank canvas for countless tactile variations.
Modifying the physical properties keeps the activity fresh. You can tailor the sensory feedback to your exact preferences.
Adding Glitter and Texture
Incorporating fine cosmetic glitter introduces a mesmerizing visual shift to the matte foam. You might also fold in miniature foam beads to create a satisfying, crunchy texture.
Ensure you only add these structural inclusions after the dough is fully activated and kneaded. Adding them too early disrupts the cross-linking process and weakens the base.
Creating Multi-Colored Swirls
A marbled aesthetic elevates the visual appeal significantly. You must create two completely separate, fully activated batches in contrasting colors.
Stretch the two distinct masses into long ropes. Twist them together rapidly for a temporary, striking swirl that eventually merges into a single, custom shade.
Safe Storage and Shelf Life
Your fluffy creation possesses a limited structural lifespan. The trapped microscopic air bubbles will inevitably escape over time. Proper storage slows this deflation significantly.
Protecting the dough from environmental exposure extends its playability.
Best Containers for Preservation
Oxygen acts as the primary enemy of PVA polymers. You must store the dough inside a rigid, airtight plastic container or a heavy-duty zipper bag.
Press all excess air out of the bag before sealing it. This barrier prevents the water content from evaporating and turning the dough into a hardened rock.
Knowing When to Discard
Even with perfect preservation, the structure will eventually fail. The foam usually deflates after three to five days, leaving behind a denser, traditional putty.
If the material develops an unpleasant odor, separates into liquid pools, or harbors visible mold, you must discard it immediately. Chemical crafts should be treated as temporary, consumable entertainment.
Conclusion
Crafting a flawless, aerated sensory dough requires a blend of chemical understanding and physical patience. By accurately measuring your polymers, selecting the appropriate foam, and introducing the activator gradually, you ensure a perfect reaction. You now know exactly how to make slime from shaving cream safely and effectively.
The process offers a brilliant, hands-on demonstration of non-Newtonian physics. Gather your household supplies, prepare a clean workspace, and enjoy an afternoon of tactile, scientific exploration.
About the Author
Jane Hubbard is a passionate beauty expert with a wealth of experience in makeup, hair, and overall beauty techniques. After years of working as a hairdresser specialist, she followed her entrepreneurial spirit and started her own consultancy business.
Jane has always been driven by her desire to help others feel confident in their own skin, and she does this by sharing her knowledge, experiences, and practical beauty tips. Through her consultancy, she empowers individuals to embrace their unique beauty, offering tailored guidance that boosts both self-esteem and personal style.
Professional Focus
Specializes in makeup, hairstyling, and beauty consulting.
Provides personalized beauty advice, tips, and techniques to help individuals feel confident in their appearance.
Dedicated to staying up-to-date with the latest industry trends and developments.
Passionate about creating a comfortable and empowering experience for every client.
Education History
University of Craft and Design – Bachelor of Fine Arts (BFA) in Woodworking and Furniture Design
Woodworking Apprenticeships – Extensive hands-on training with skilled craftsmen to refine carpentry and furniture making techniques
Online Courses & Masterclasses – Continued education in advanced woodworking techniques, design principles, and specialized tools
Expertise:
Makeup artistry, hairstyling, and beauty consulting.
Personalized beauty techniques to enhance confidence and self-expression.
Educating clients on how to maintain their beauty routines at home.